Vanilla Samourai Dojo Guide
How to Setup and Use Samourai Dojo

This tutorial is based on the official Ashigaru documentation, which I have taken over and expanded. I have rewritten all sections to improve clarity, added further detailed explanations, as well as illustrations for beginners, to make installation and use easier to understand.
Dojo is an open-source program designed to act as a backend server for certain privacy-oriented Bitcoin wallets, based on a Bitcoin core node. Historically, it was developed to work with Samourai Wallet, a mobile wallet that offered advanced privacy features like Whirlpool (CoinJoin), Ricochet, Stonewall, PayNym… Samourai Wallet has now been shut down following the arrest of its developers, but its community successor, Ashigaru Wallet, has taken over and continues to rely on Dojo to offer a complete experience for users wishing to keep control of their data when using Bitcoin.

In practical terms, Dojo acts as a gateway between your wallet and the Bitcoin network. Without Dojo, a lightweight mobile wallet would have to query third-party servers to obtain the status of your UTXOs and your history, or to broadcast your transactions. This implies dependency and leakage of sensitive data to a third-party server (addresses used, amounts, payment frequency, etc.). With Dojo, you host this server yourself, directly connected to your own Bitcoin node. In this way, all your portfolio requests pass through an infrastructure that you control, without intermediaries, reinforcing your confidentiality and sovereignty.
Using third‑party servers leaks wallet metadata (addresses, balances, timing). Running Dojo with your own node keeps requests under your control.
Requirements for setting up a Dojo
Setting up a Dojo server doesn’t require an ultra-powerful machine. Anyone with an entry-level computer, a stable Internet connection and the ability to leave it on continuously (24/7) can set up a working Dojo.
Plan for continuous power and stable connectivity (UPS recommended). Unexpected shutdowns can corrupt indexes and prolong sync.
Choose your machine type
You can use :
- a laptop ;
- a desktop computer ;
- a mini-PC (e.g. Intel NUC, Lenovo Thincentre Tiny…).
Each option has its advantages and disadvantages:
- Price: a refurbished mini-PC or desktop will often be cheaper than a new laptop.
- Footprint: a Mini-PC takes up less space.
- Power supply: a laptop has the advantage of a battery, which means it won’t shut down in the event of a power cut, unlike a mini-PC.
- Upgradeability: barbones generally allow you to add memory or easily replace a hard disk.
For more information on choosing your equipment, I recommend you take this course
Recommended equipment
There’s no need to buy a new machine. A refurbished computer with the specifications below will give much better performance than single-board electronics (like the Raspberry Pi).
Minimum specifications:
- X86-64 architecture (64-bit processor).
- 2 GHz dual-core processor or faster.
- 8 GB RAM minimum.
- 2 TB or more NVMe SSD (to store Blockchain of Bitcoin and the necessary indexes).
**Recommended operating system: **
- A Debian-based distribution, like Ubuntu 24.04 LTS.
Recommended equipment:
- HP EliteDesk / EliteBook
- Dell OptiPlex
- Lenovo ThinkCentre / ThinkPad
- Intel NUC
- etc.
It’s perfectly possible to run a Dojo server on other hardware configurations. However, to get the best performance and limit problems, we advise you to follow the above recommendations.
In this tutorial, I’ll be using an old ThinkCentre Tiny with an Intel Pentium Dual-Core G4400T processor, 8 GB RAM and a 2 TB SSD.
1 - Installing Ubuntu
If you wish to install Dojo on a device that is already configured, you can skip this step and proceed directly to step 2.
Having prepared the chosen hardware, it’s time to install an operating system. You can use virtually any Debian distribution, but I recommend you opt for an LTS version of Ubuntu, as it’s perfectly suited to our purposes. Here are the steps to follow:
1.1. create a bootable USB key
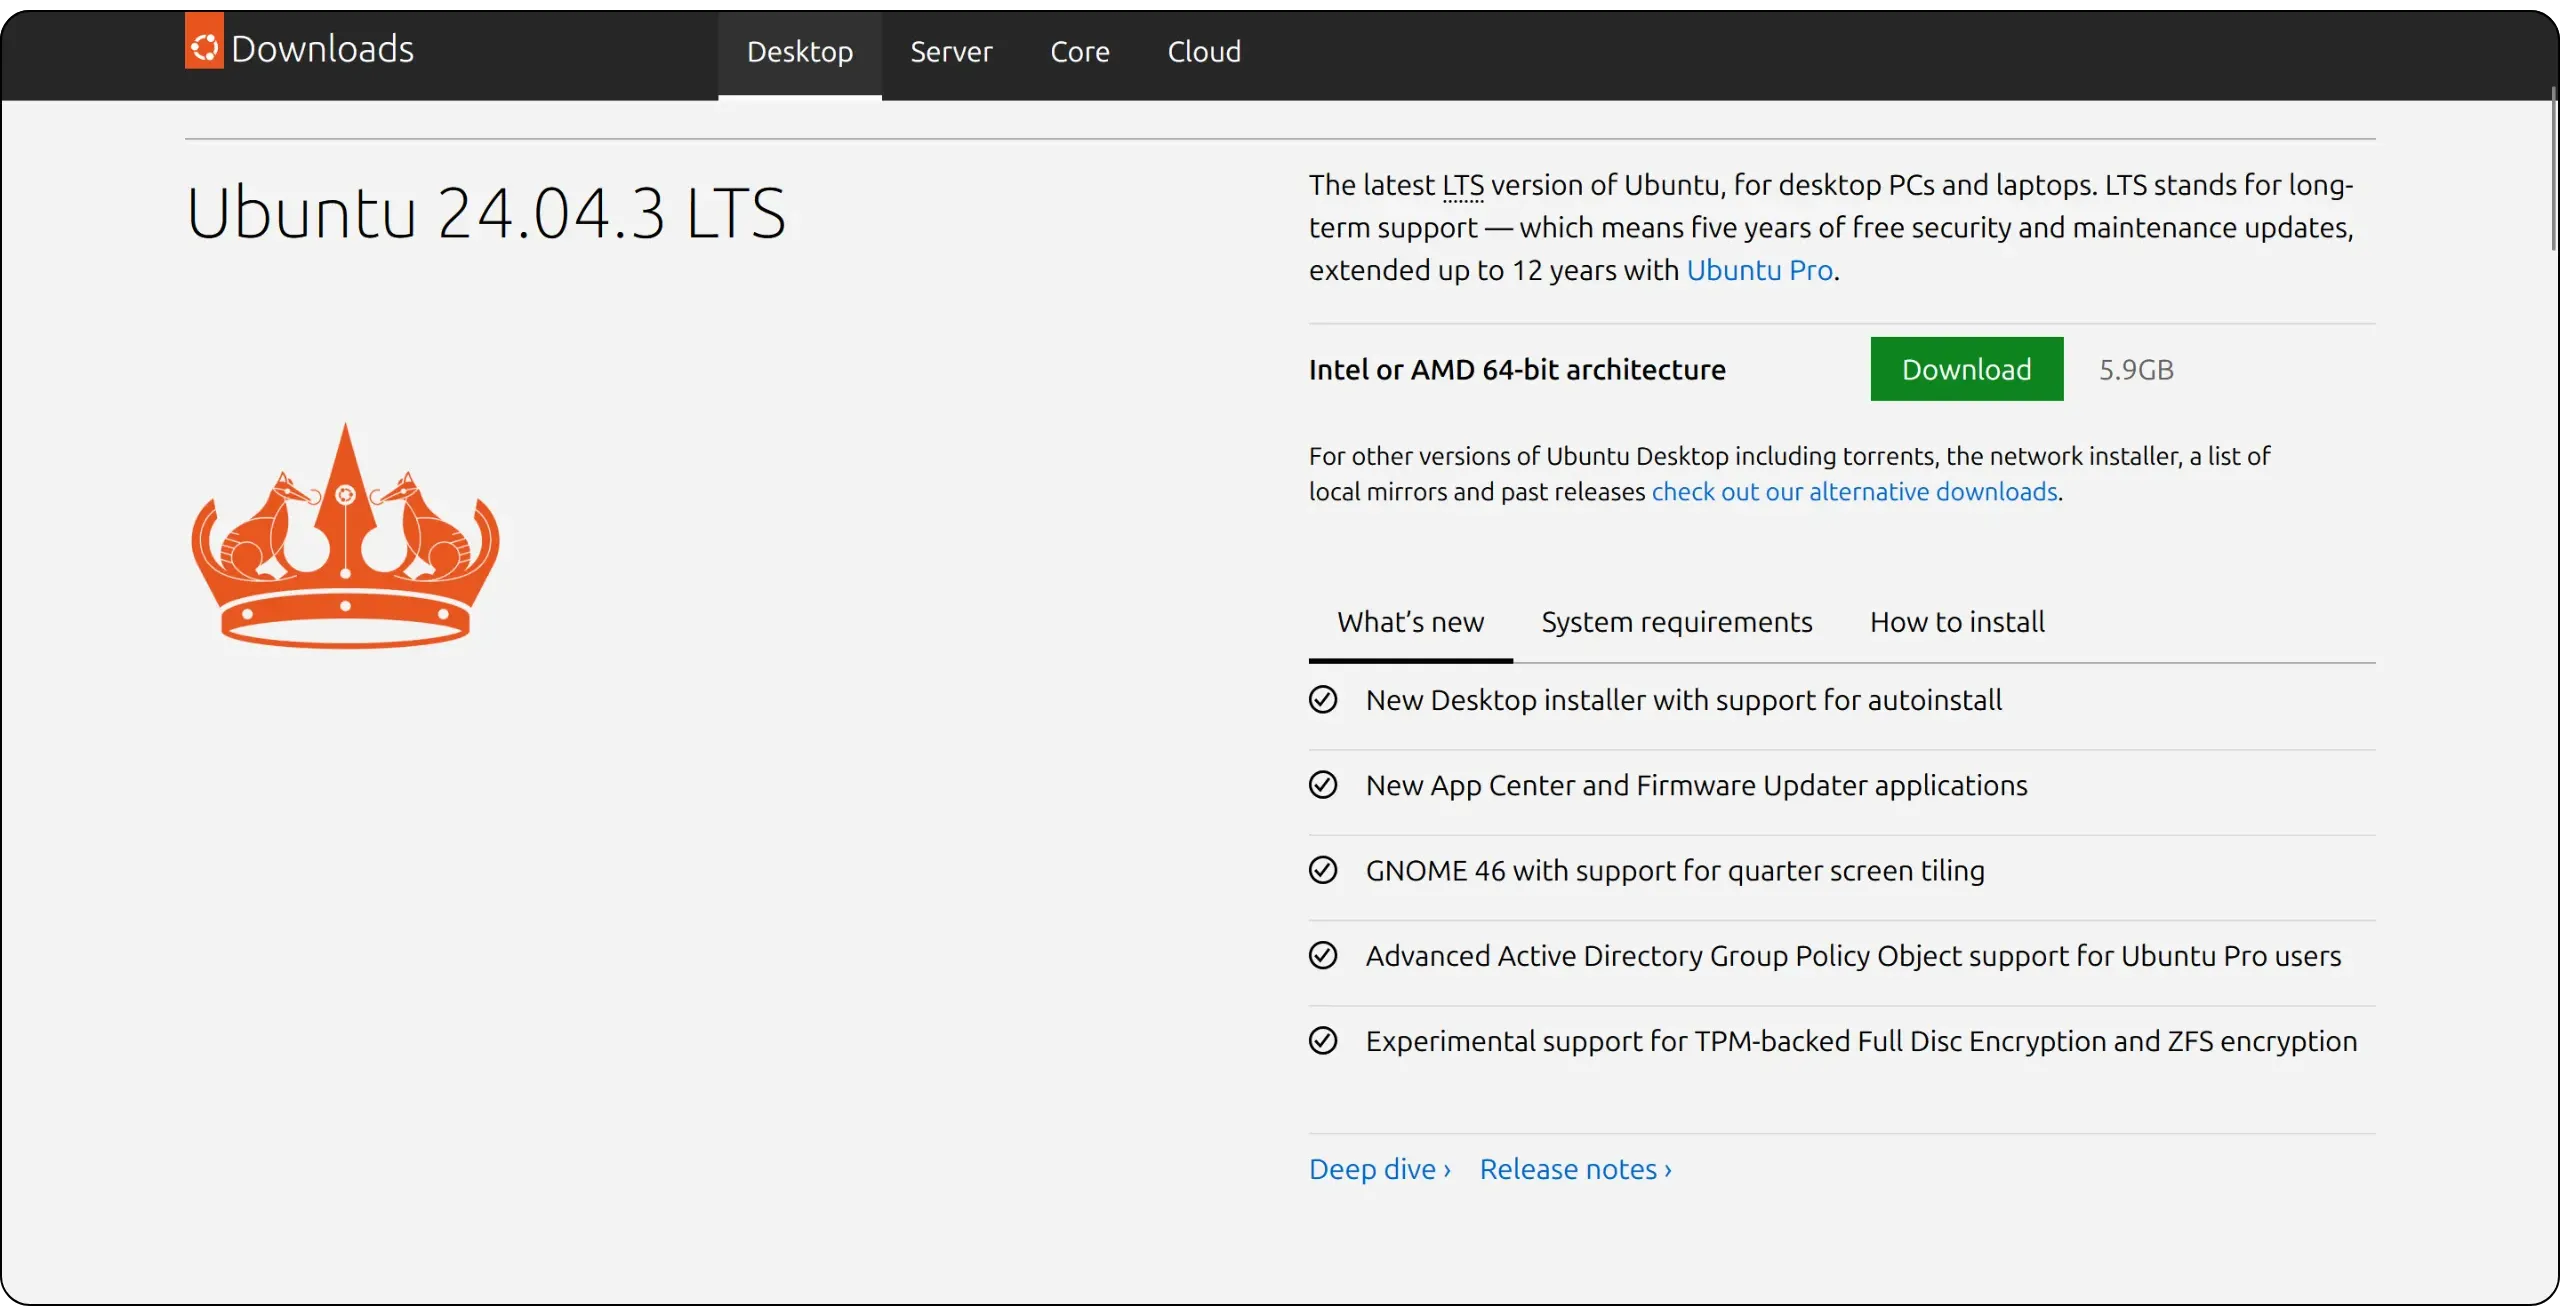
From an already working computer (your usual machine), download the Ubuntu LTS ISO image from the official site (24.04 at the time of writing, but take the most recent if another is available).
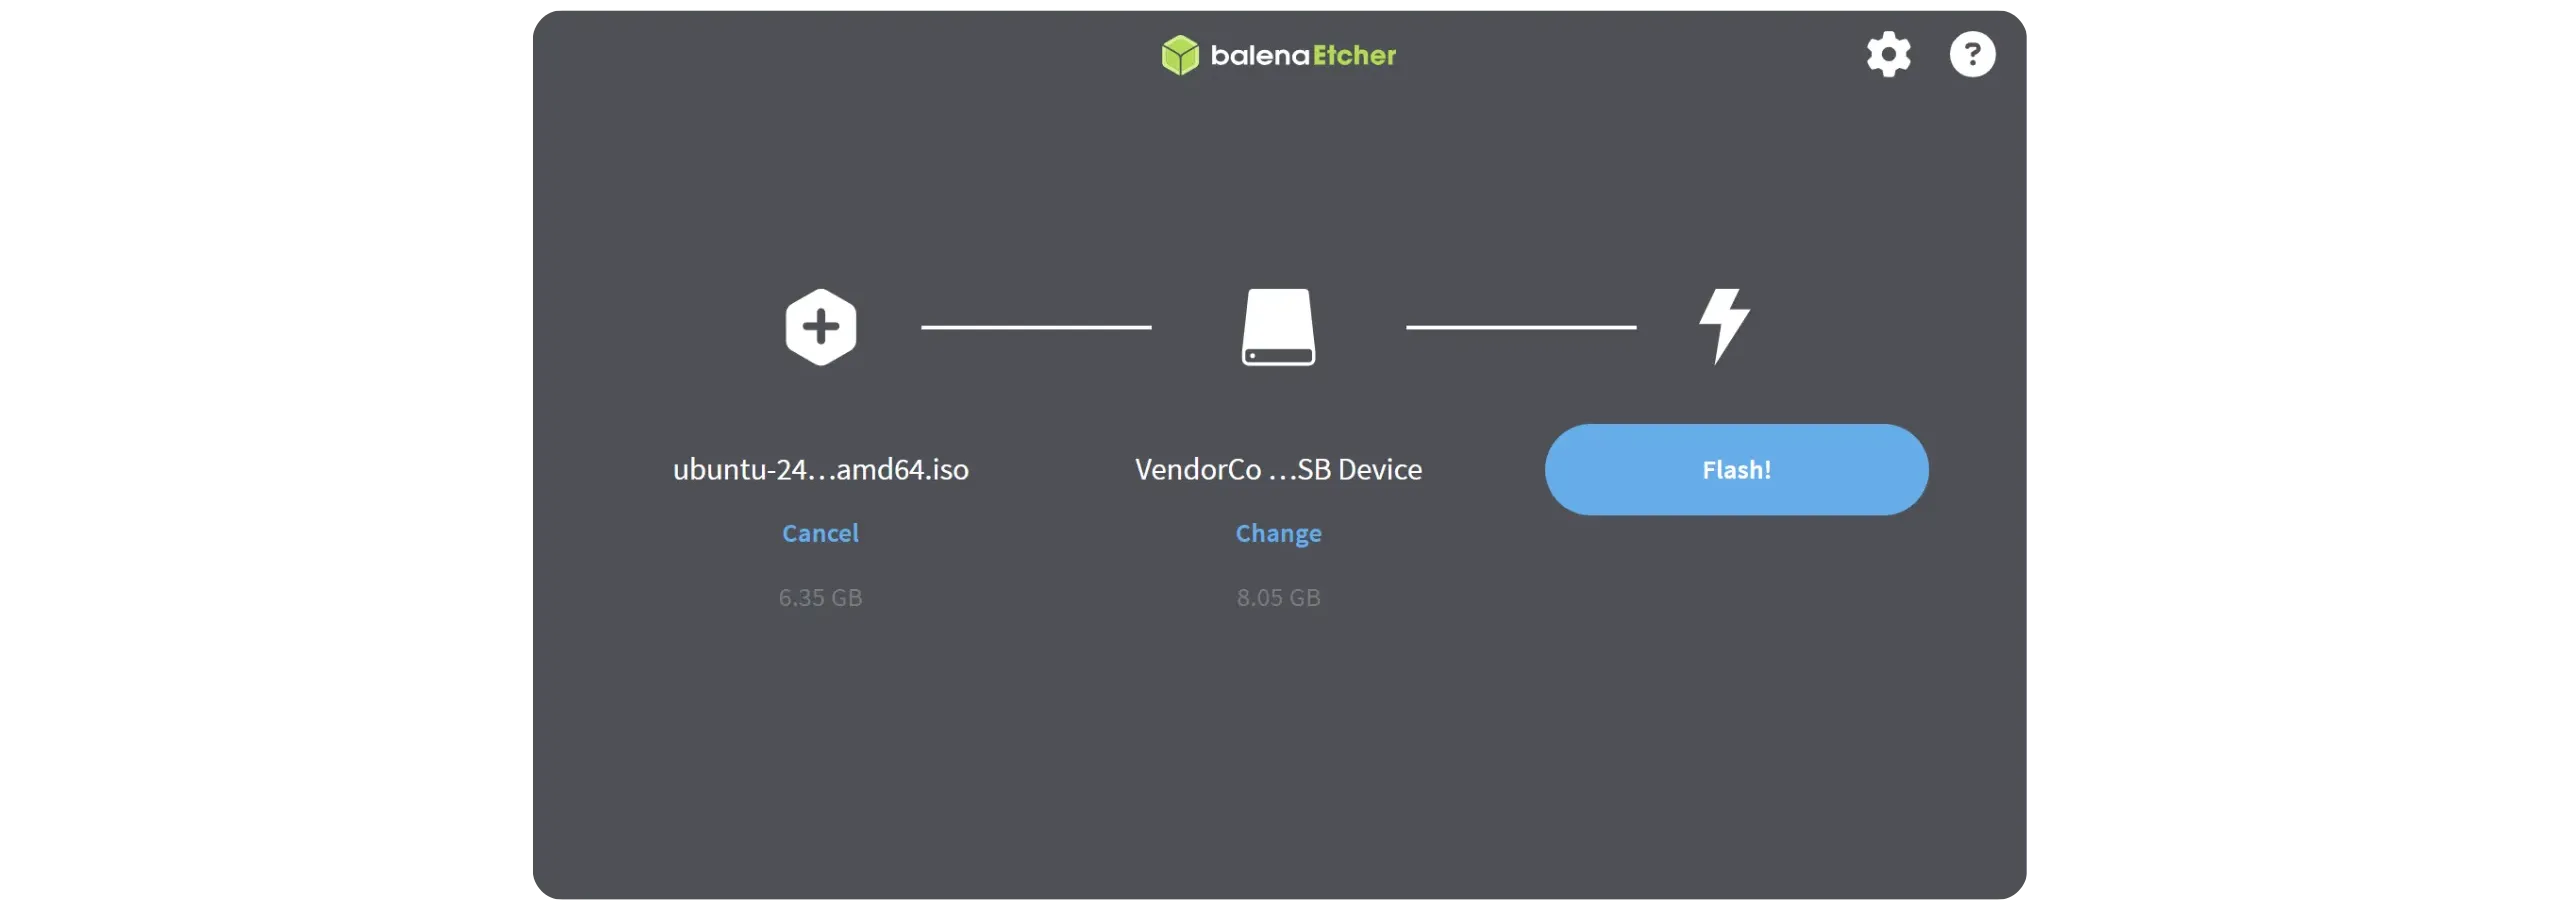
Insert a USB key of at least 8 GB into this computer, then create a bootable key using software such as Balena Etcher. Select the Ubuntu ISO image you’ve just downloaded, choose the USB key as the target device, then start the creation process (be patient, it may take several minutes).
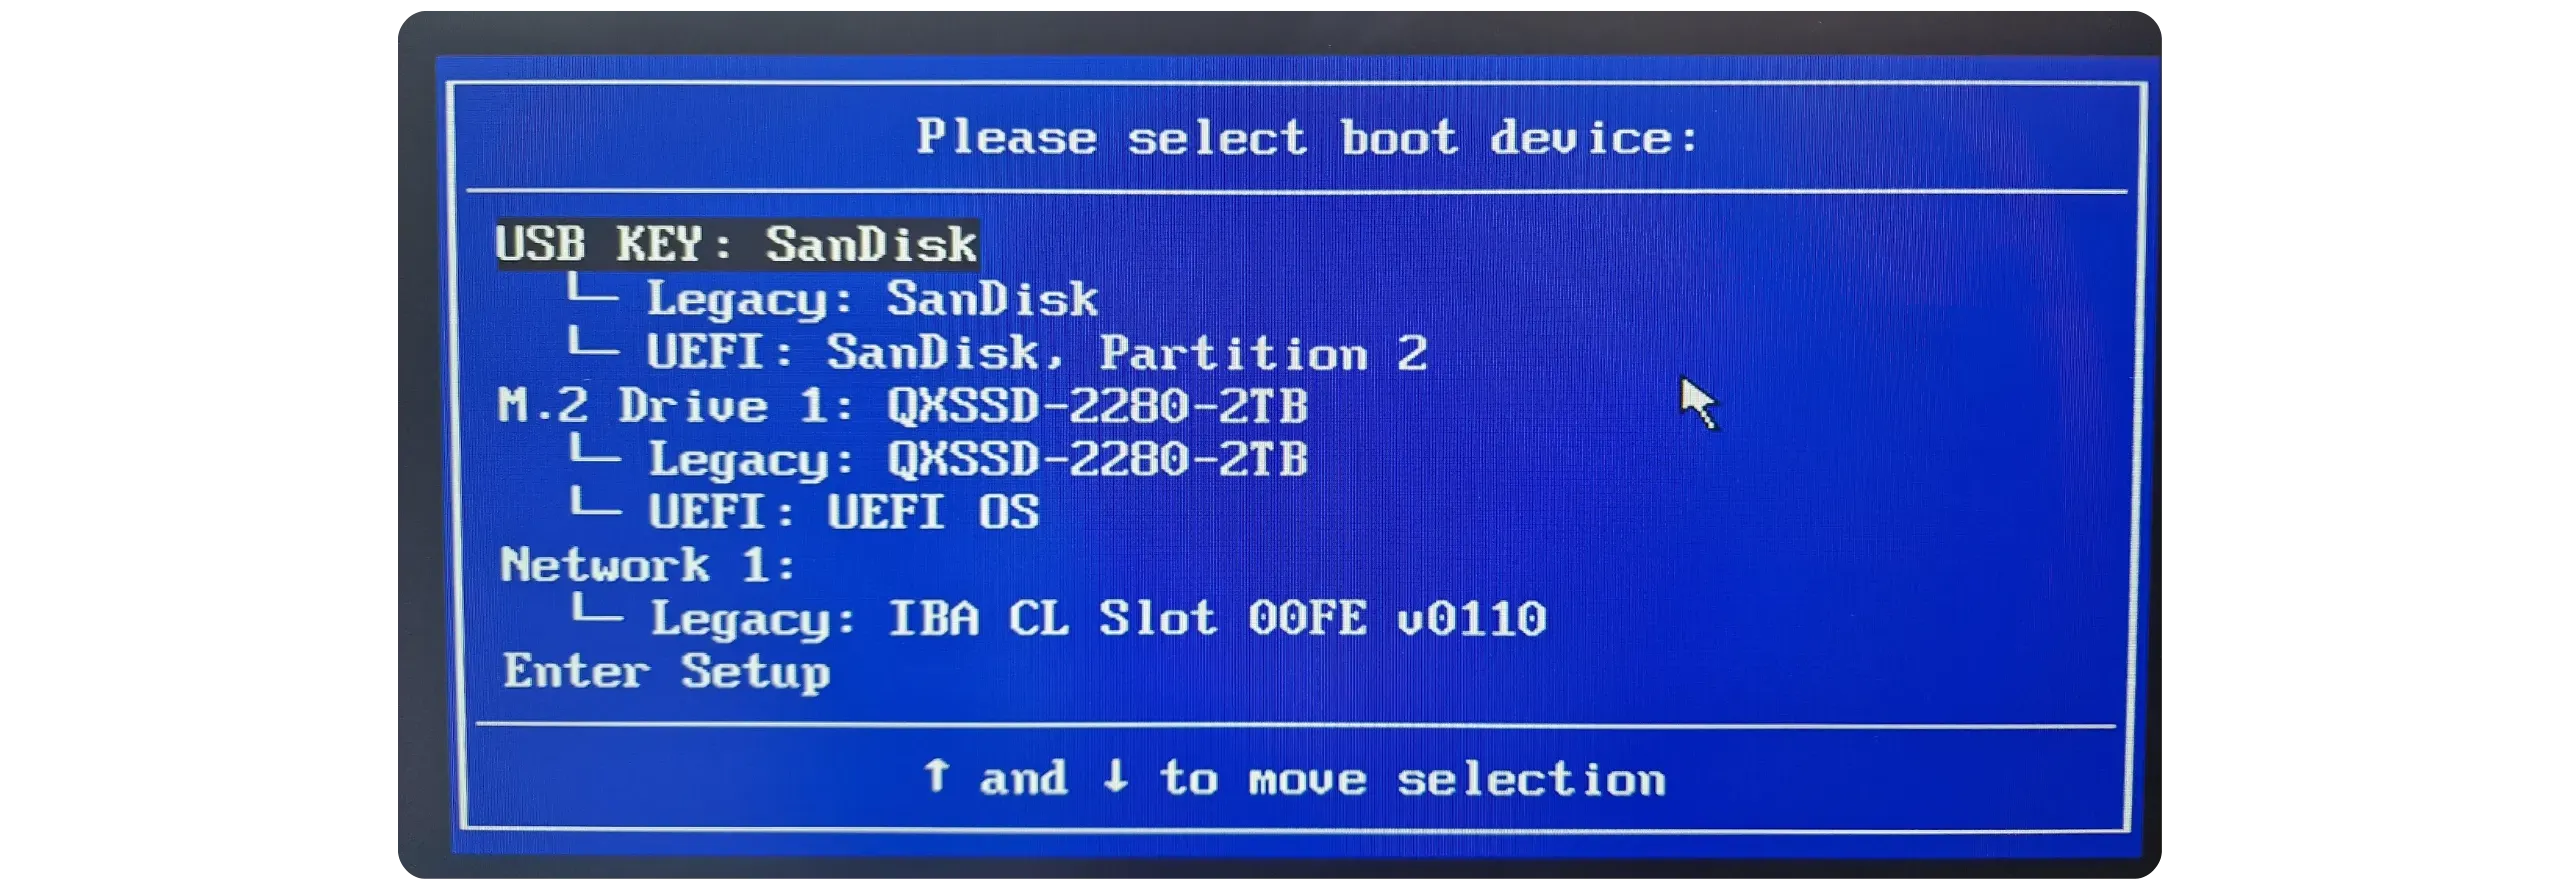
Insert the bootable USB key into the switched-off computer (the one on which you want to run Dojo). Start the machine and immediately press F12 or F10 on your keyboard (depending on the model) to access the boot menu. Then choose your USB key as the priority device in the computer boot order.
1.2. install the operating system
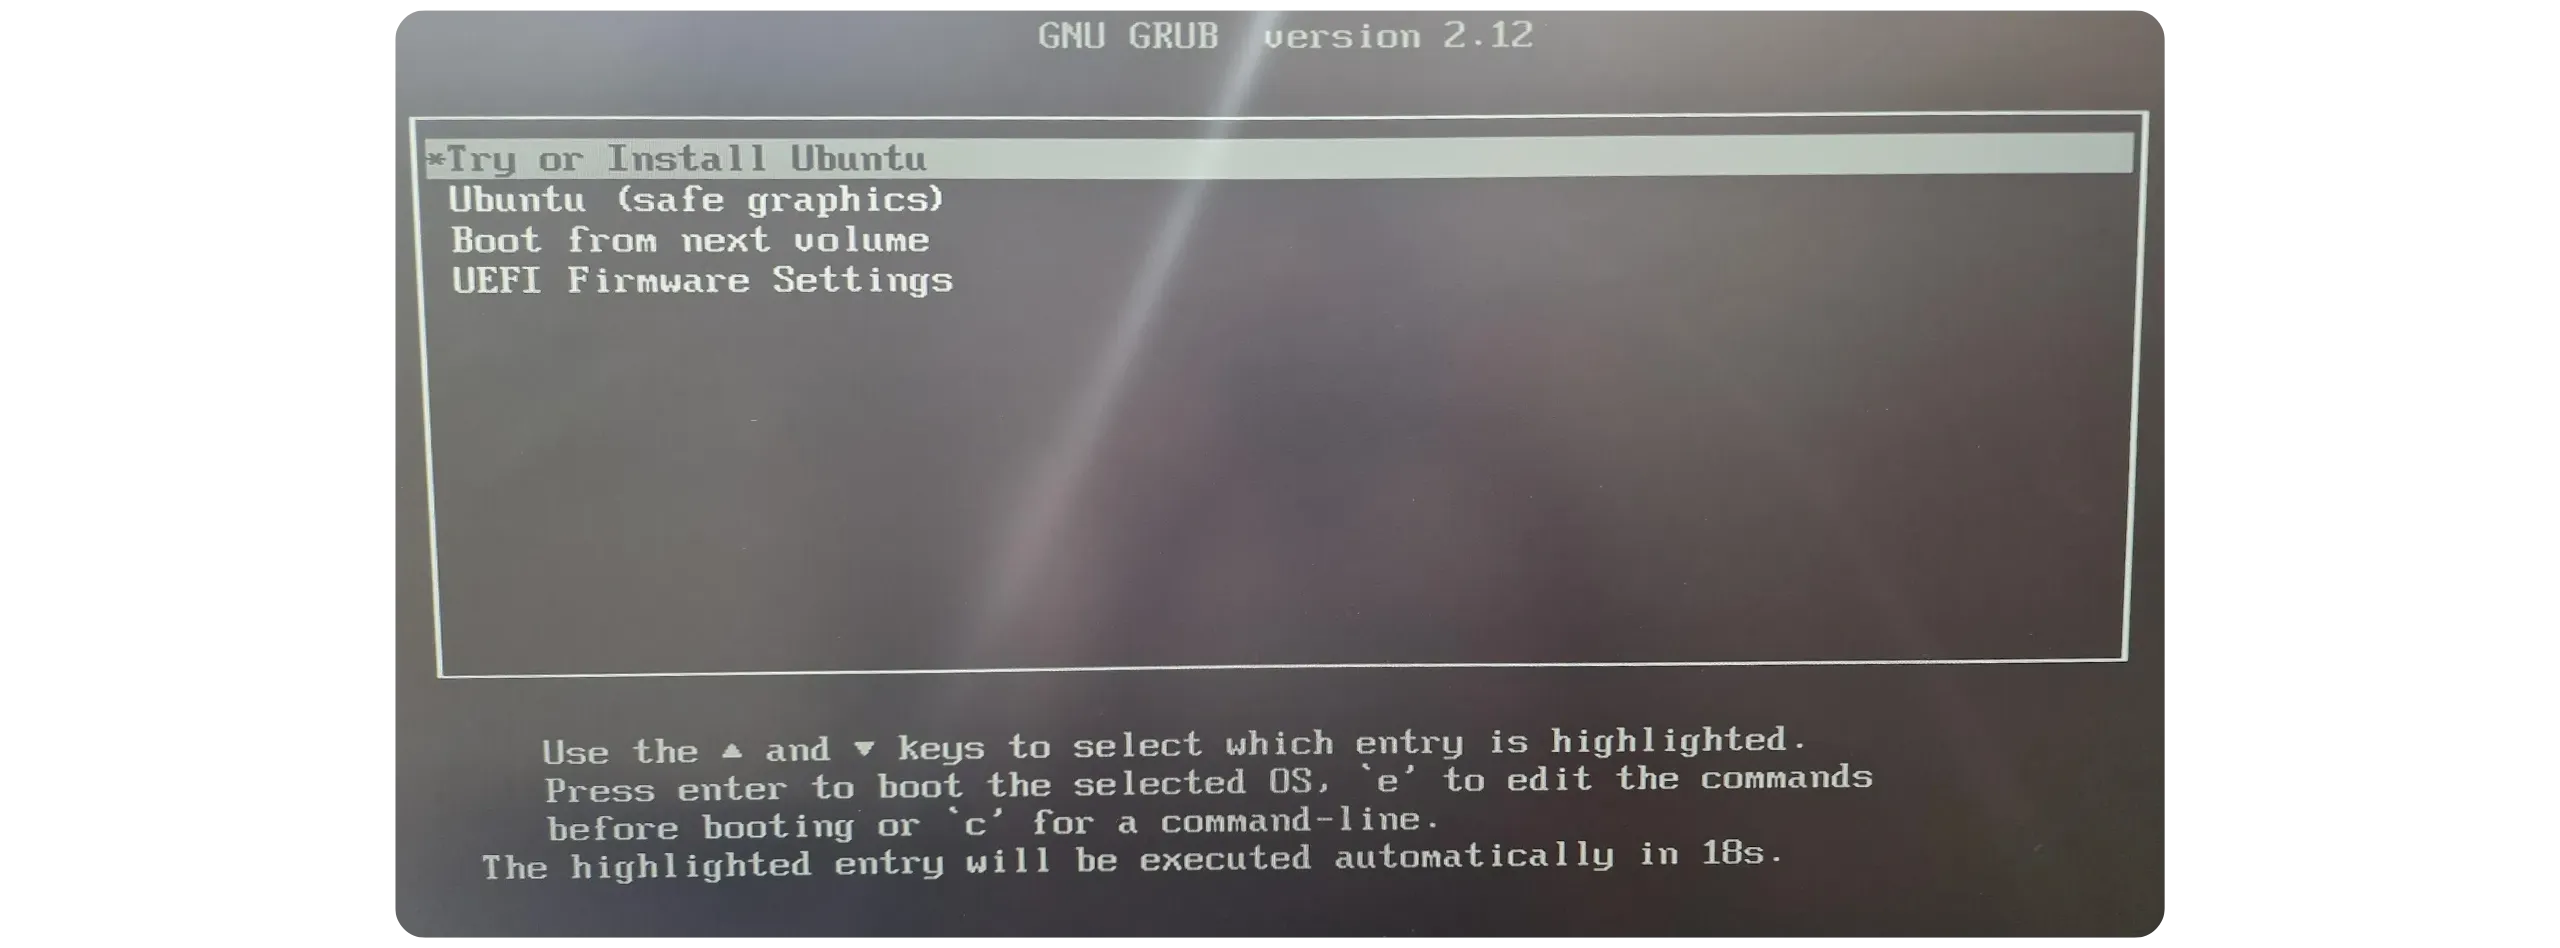
The Ubuntu home screen appears. Select “Try or Install Ubuntu*”.
Then follow the classic Ubuntu installation process:
- Select language.
- Select keyboard type.
- If you’re connected via RJ45 cable, there’s no need to configure Wi-Fi.
- Click on “Install Ubuntu” and check the option to install third-party software (Wi-Fi drivers, multimedia codecs, etc.).
- When the wizard asks for the type of installation, select “Erase disk and install Ubuntu”.
- Create a simple user name (e.g. “loic”).
- Assign a name to the machine (e.g. “dojo-node”).
- Set a strong password and keep it safe.
- Enable the “Request my password to log in” option to reinforce security.
- Indicate your time zone, then click on “Install”.
- Wait for the installation to complete. Once complete, the system will restart automatically.
- Remove the USB installation key when restarting the computer.
“Erase disk” wipes all data on the target drive. Confirm the correct NVMe SSD and back up any important files before proceeding.
For more details on the Ubuntu installation process, please see our dedicated tutorial
1.3. system update
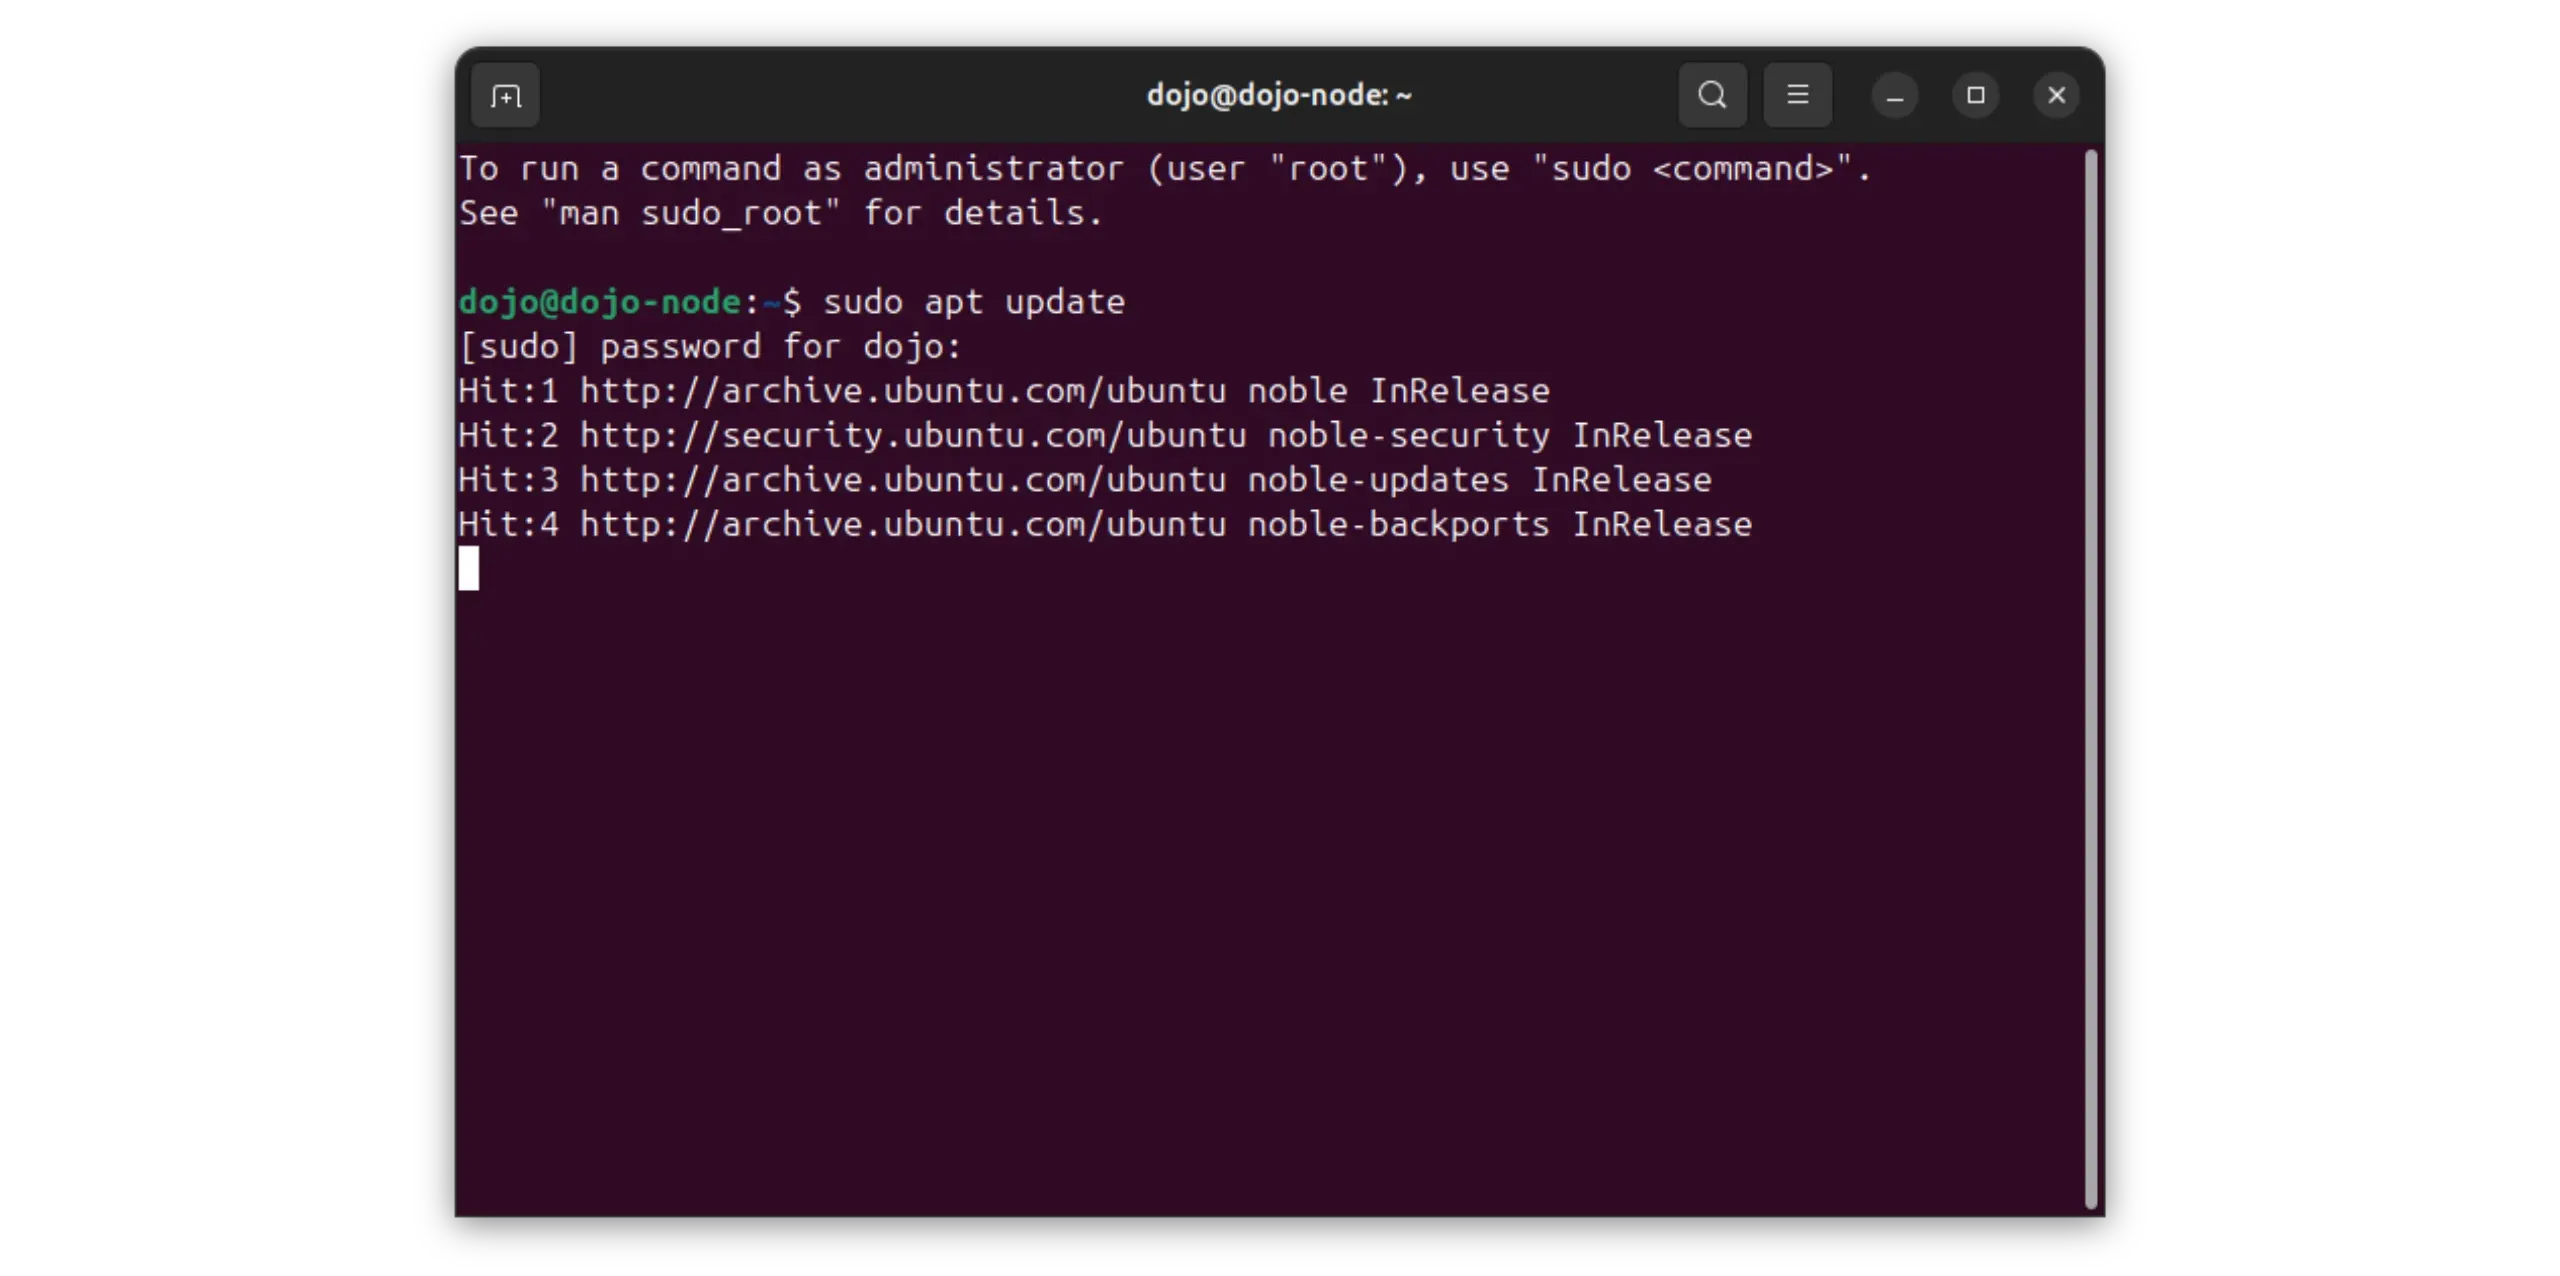
After the first boot, open a terminal using the key combination Ctrl + Alt + T and run the following commands to update the system:
1
2
sudo apt update
sudo apt upgrade -y
2. Outbuilding installation
For Dojo to work properly, certain software bricks must be present on your system. These are used to manage software repositories, communication, archive decompression and the execution of Dojo inside Docker containers. All these operations are performed in the terminal.
2.1. Preparation
The following command returns you to your personal folder. This is a good practice before running a series of installations.
1
cd ~/
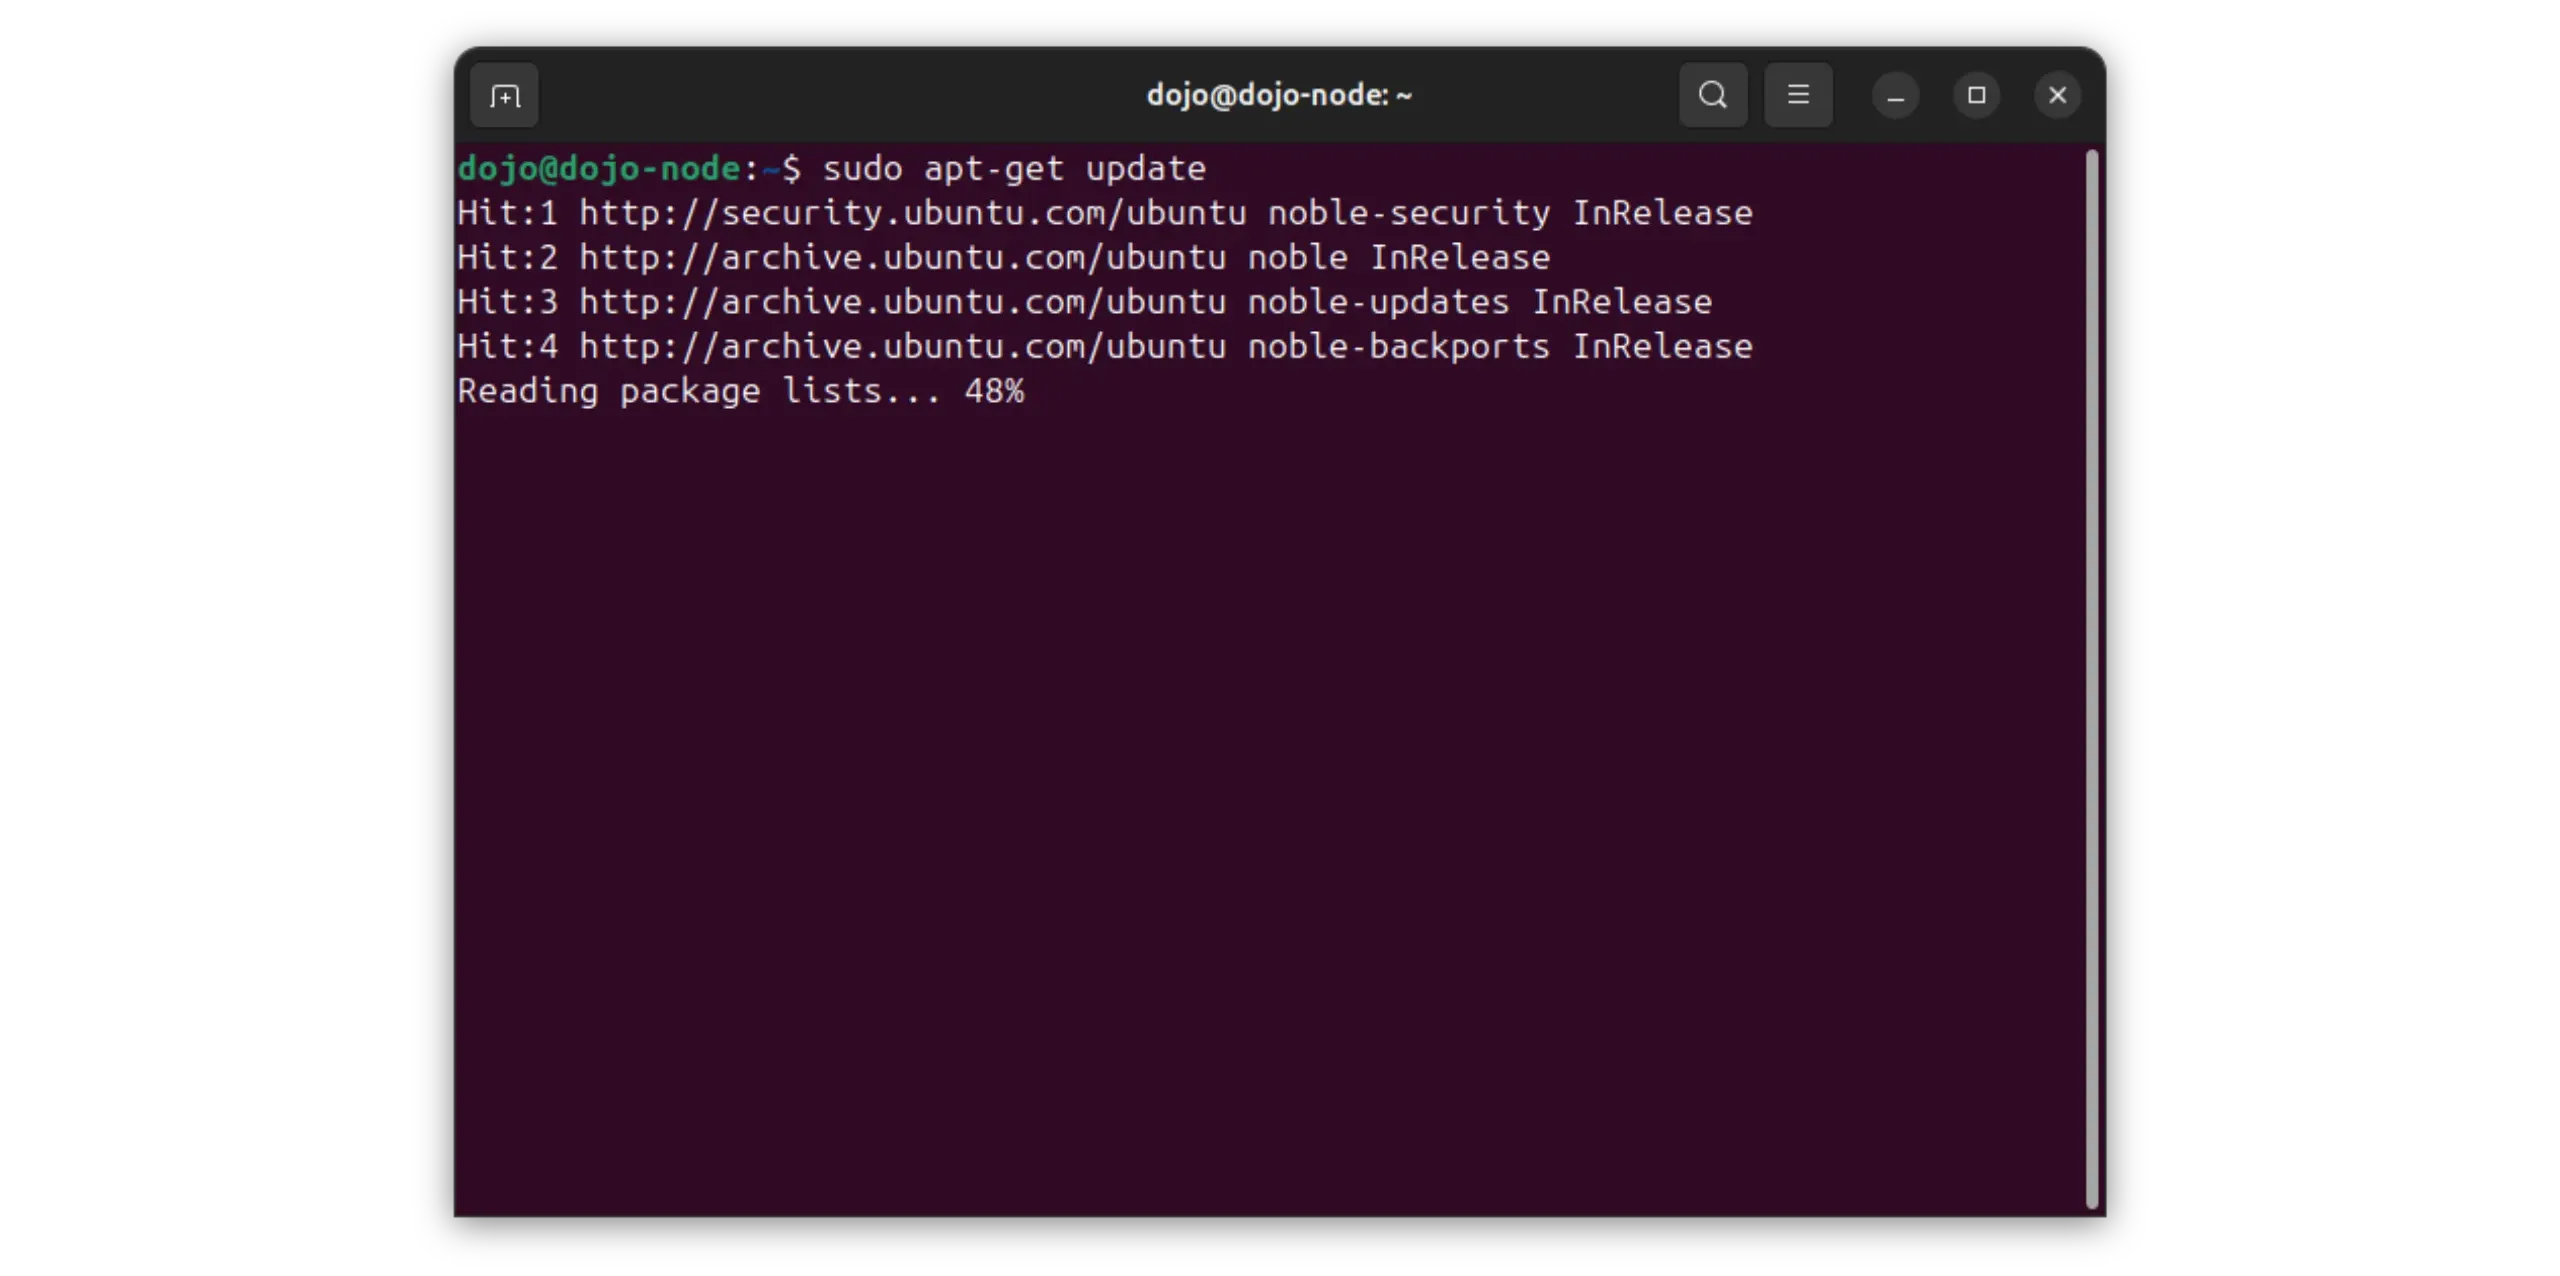
Before installing any software, make sure that the database of software available on your machine is up to date. This avoids installing obsolete versions.
1
sudo apt-get update
2.2. install utilities
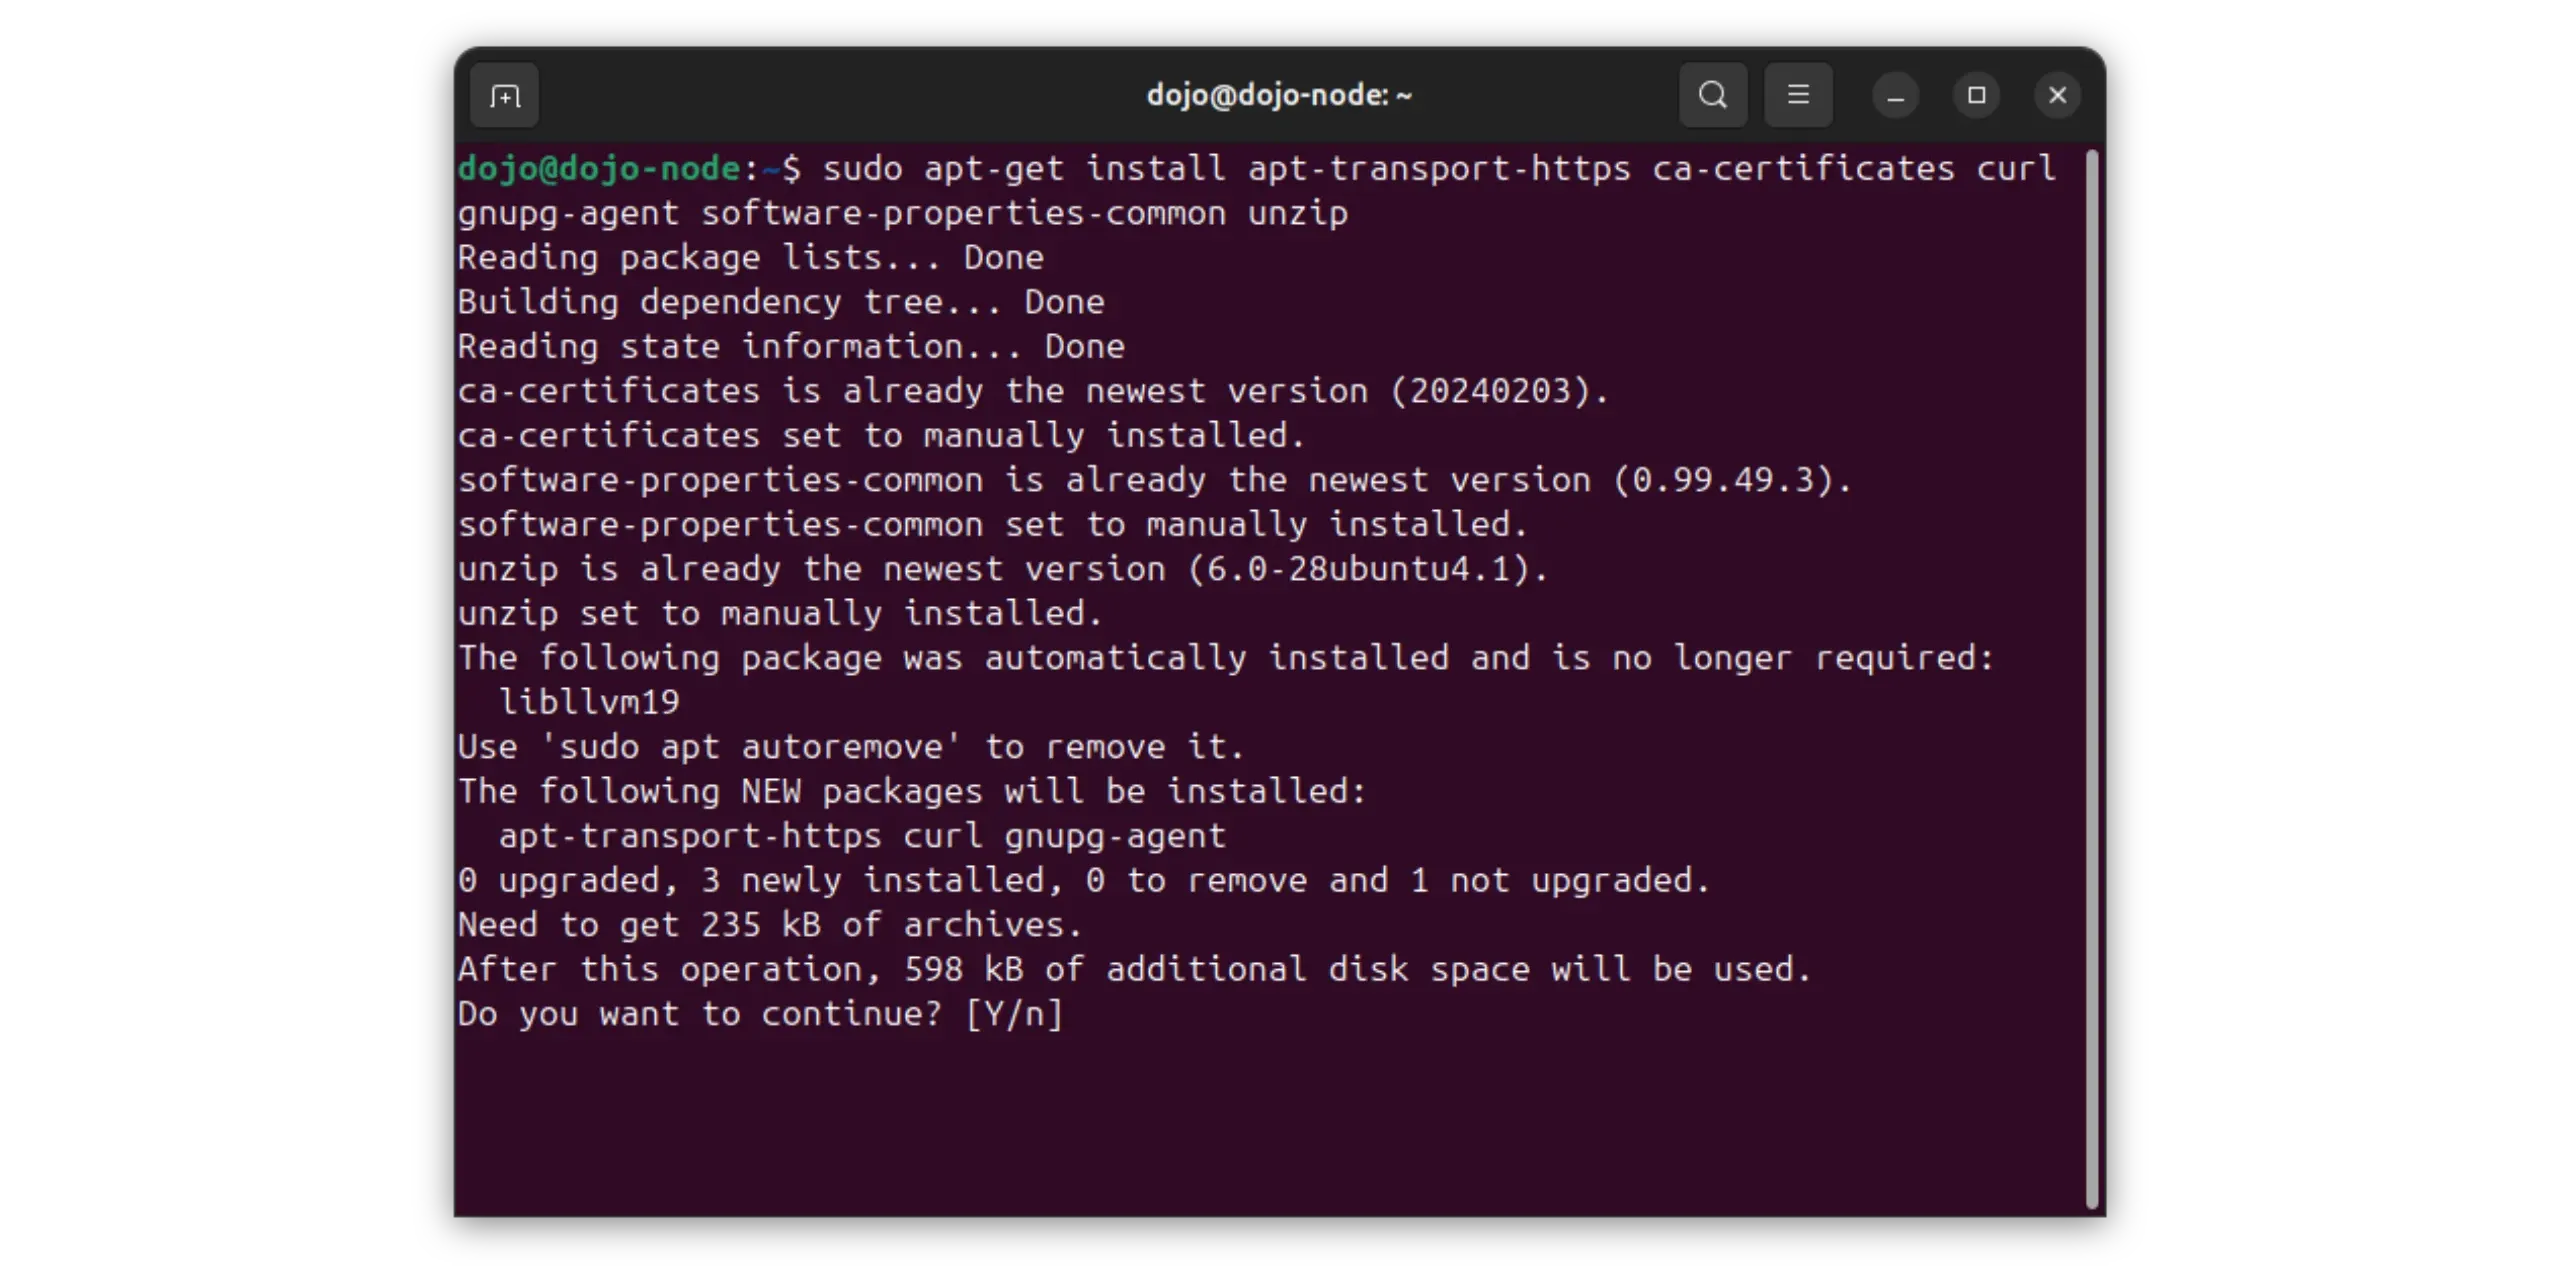
Several tools need to be added to the system:
apt-transport-https: allows you to download packets securely via HTTPSca-certificates: manages the certificates required for encrypted connectionscurl: to retrieve files from the Internetgnupg-agent: for GPG key management- software-properties-common`: provides utilities for manipulating APT repositories
unzip: unzips files in ZIP format
1
sudo apt-get install apt-transport-https ca-certificates curl gnupg-agent software-properties-common unzip
During installation, the system may ask you for confirmation. Press the “y” key, then press “Enter”.
2.3. install Torsocks
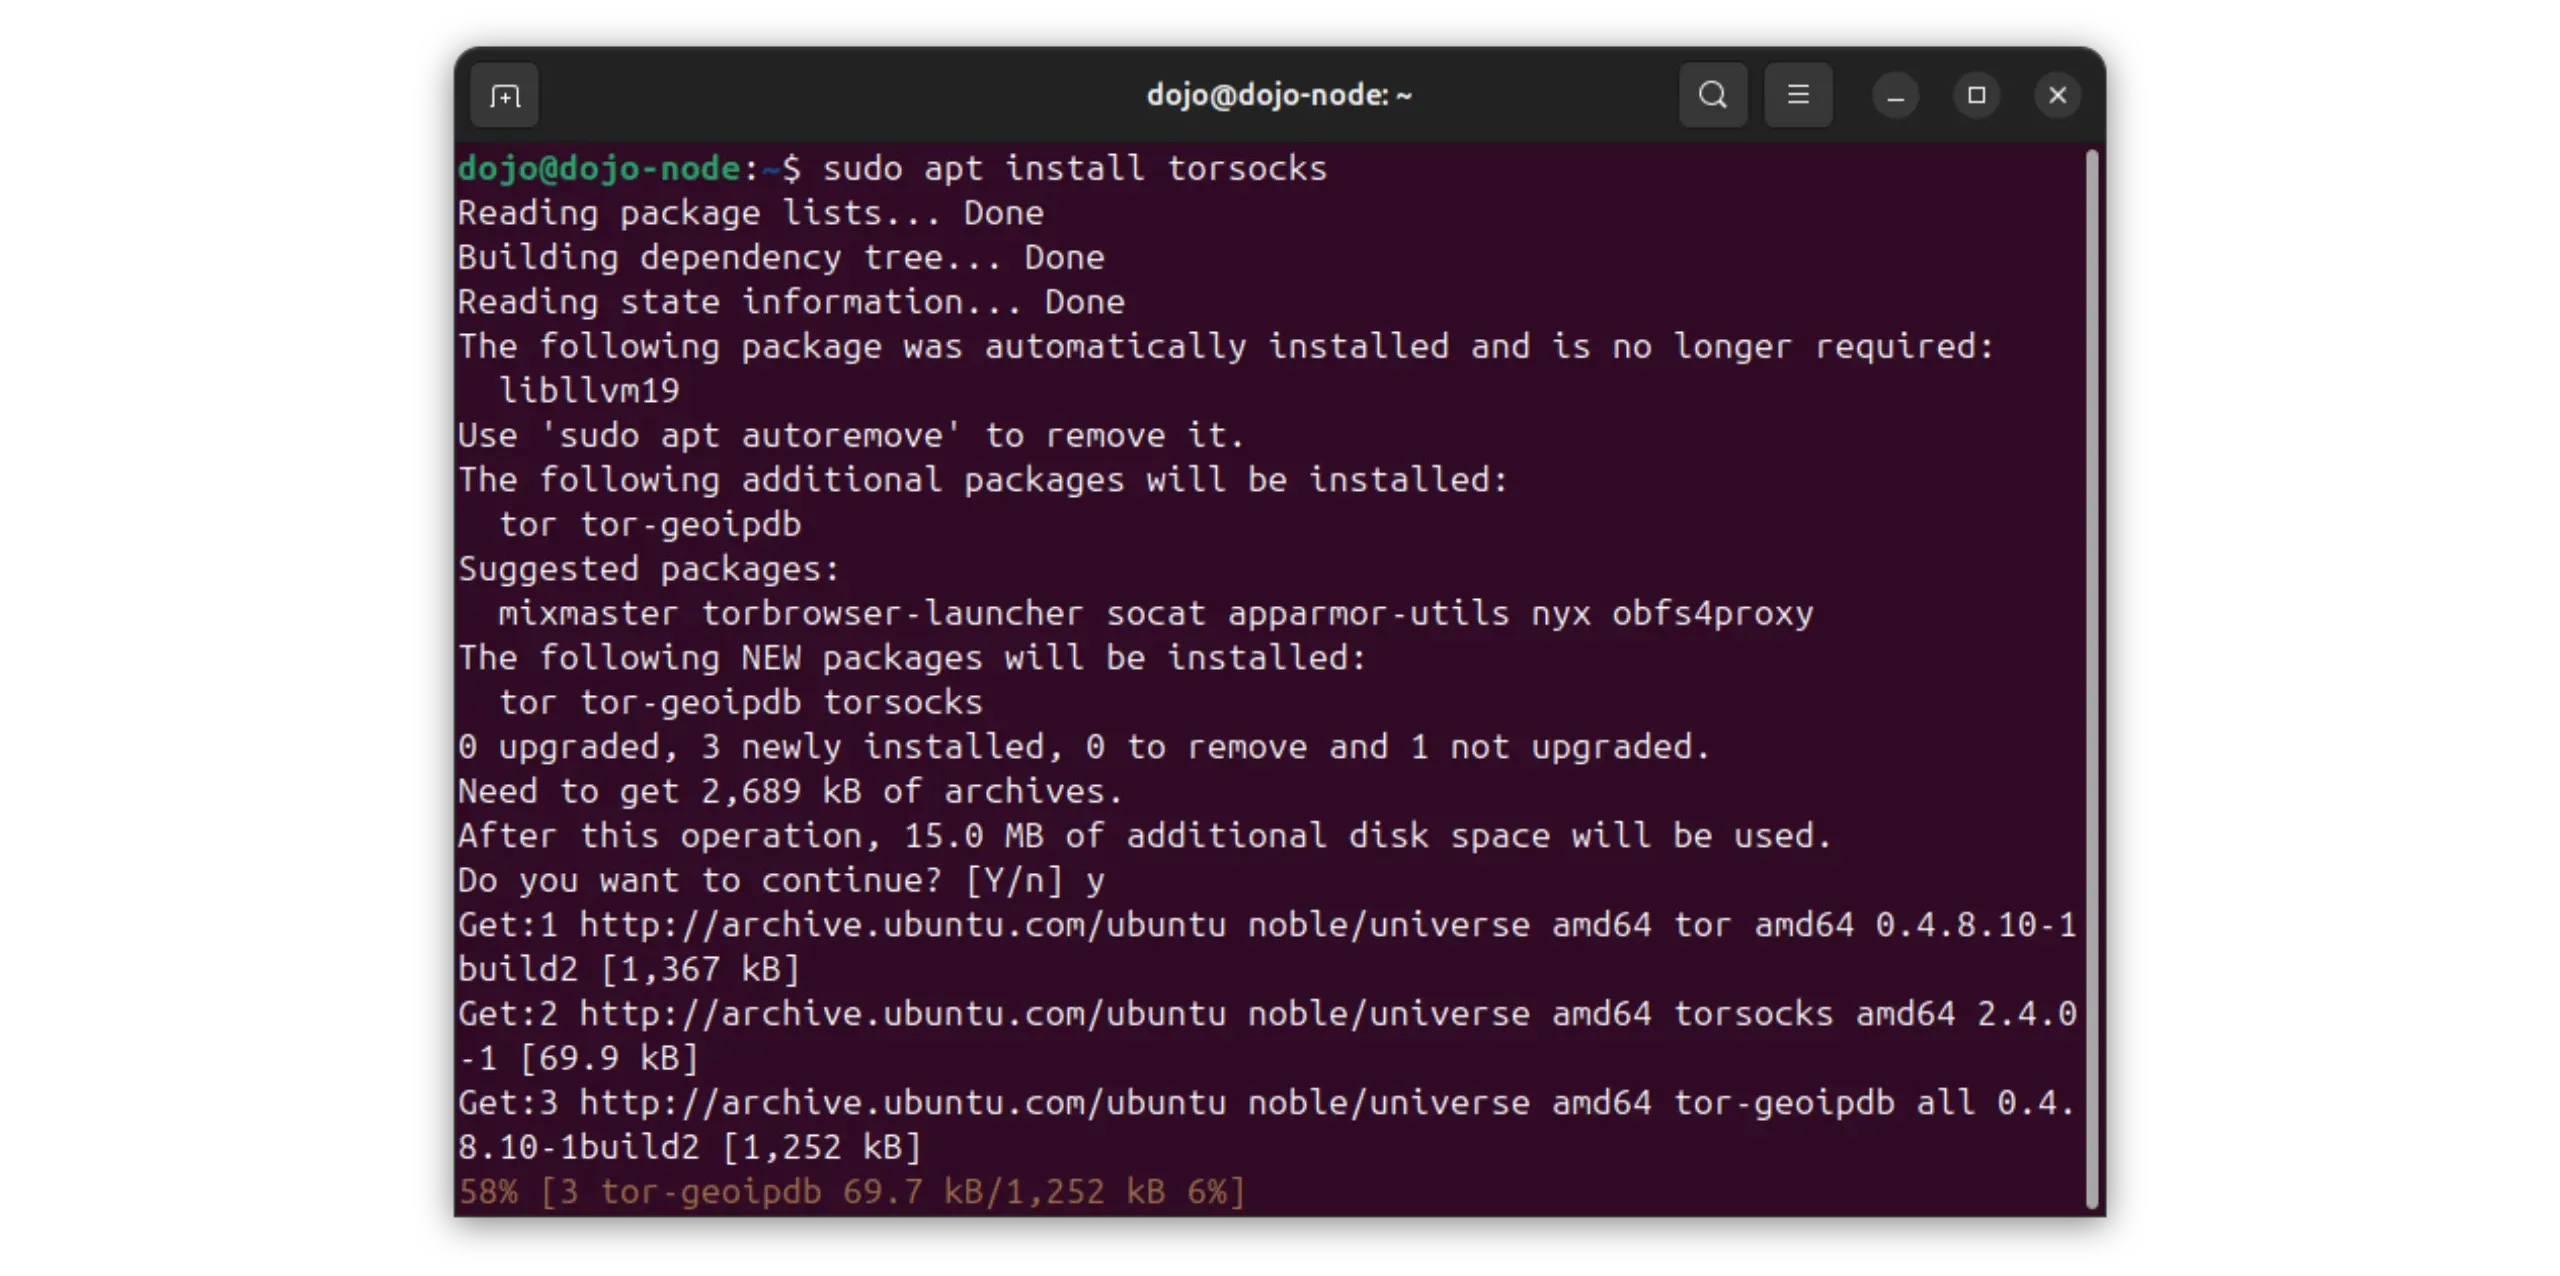
Torsocks enables certain commands to be executed via the Tor network, improving the confidentiality of communications.
1
sudo apt install torsocks
Use Tor (torsocks) when fetching keys or releases to reduce metadata leakage to third‑party servers.
2.4. install Docker and Docker Compose
Dojo runs inside Docker containers. This means that each service is isolated in an independent environment, simplifying maintenance and security. To do this, you need to install Docker and the Docker Compose tool, which enables you to manage several containers at the same time.
Add Docker signing key
Docker provides its own digital signature key. Adding it verifies the authenticity of downloaded packages.
1
2
3
4
5
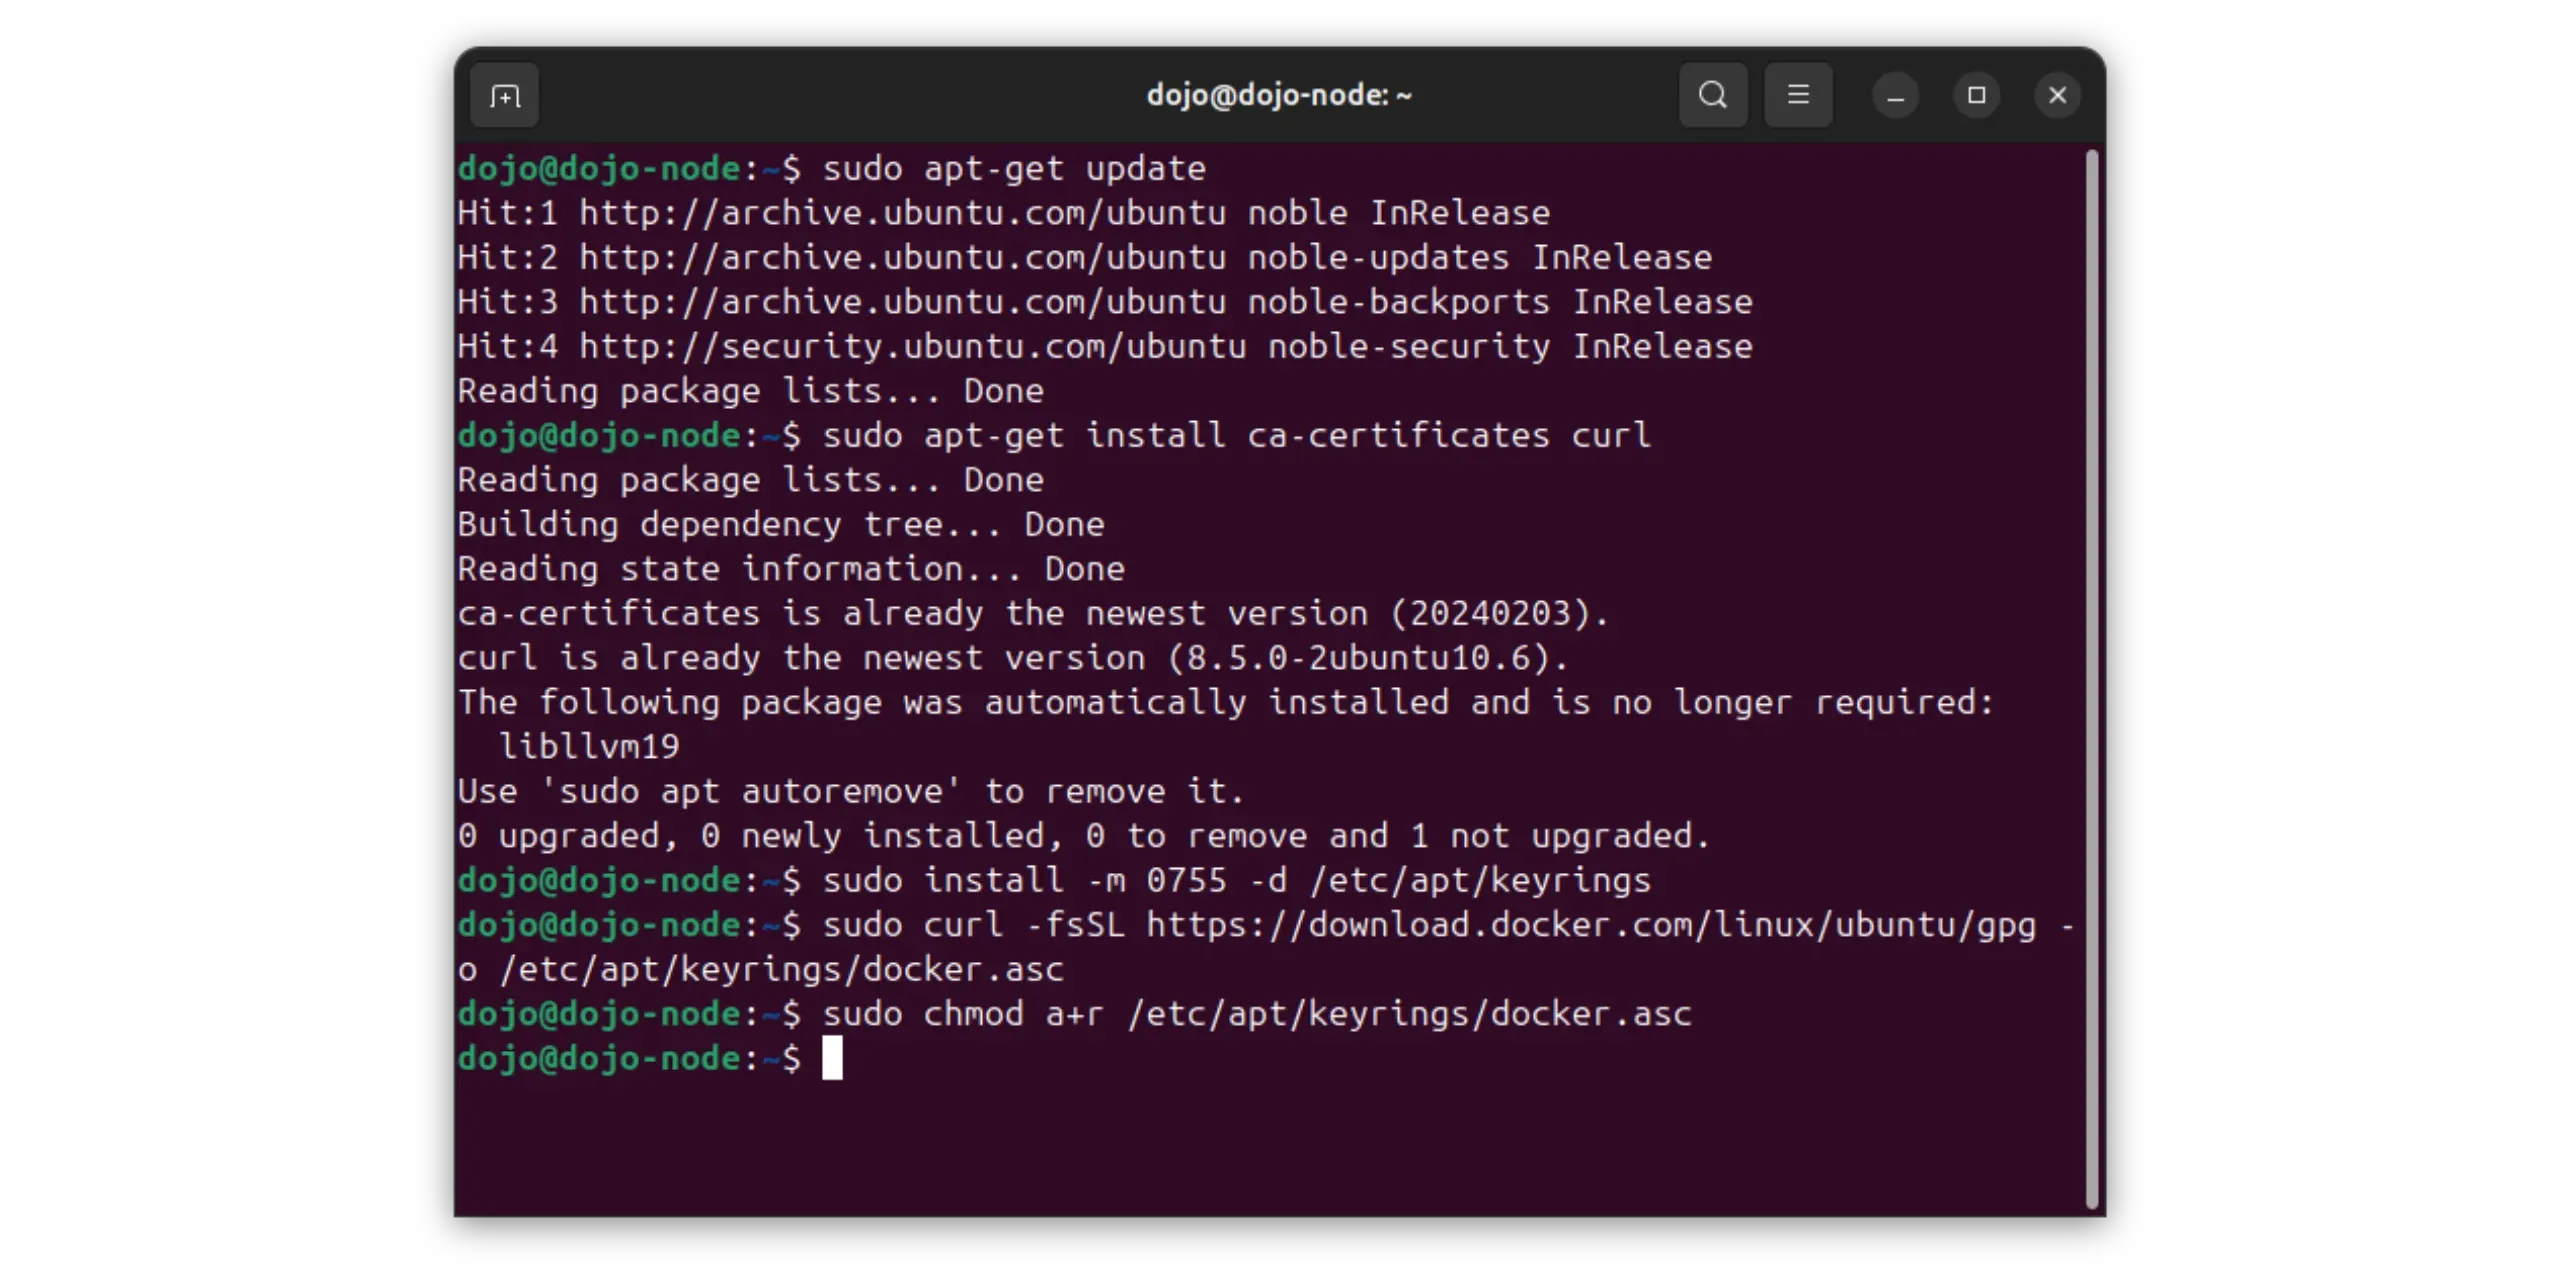
sudo apt-get update
sudo apt-get install ca-certificates curl
sudo install -m 0755 -d /etc/apt/keyrings
sudo curl -fsSL https://download.docker.com/linux/ubuntu/gpg -o /etc/apt/keyrings/docker.asc
sudo chmod a+r /etc/apt/keyrings/docker.asc
Add vendor keys and repositories only from official sources; verify keys and URLs to avoid supply‑chain attacks.
Official Docker repository added
Next, you need to tell the system where to find the official Docker packages. This command adds a new repository to your package manager configuration.
1
2
3
4
5
6
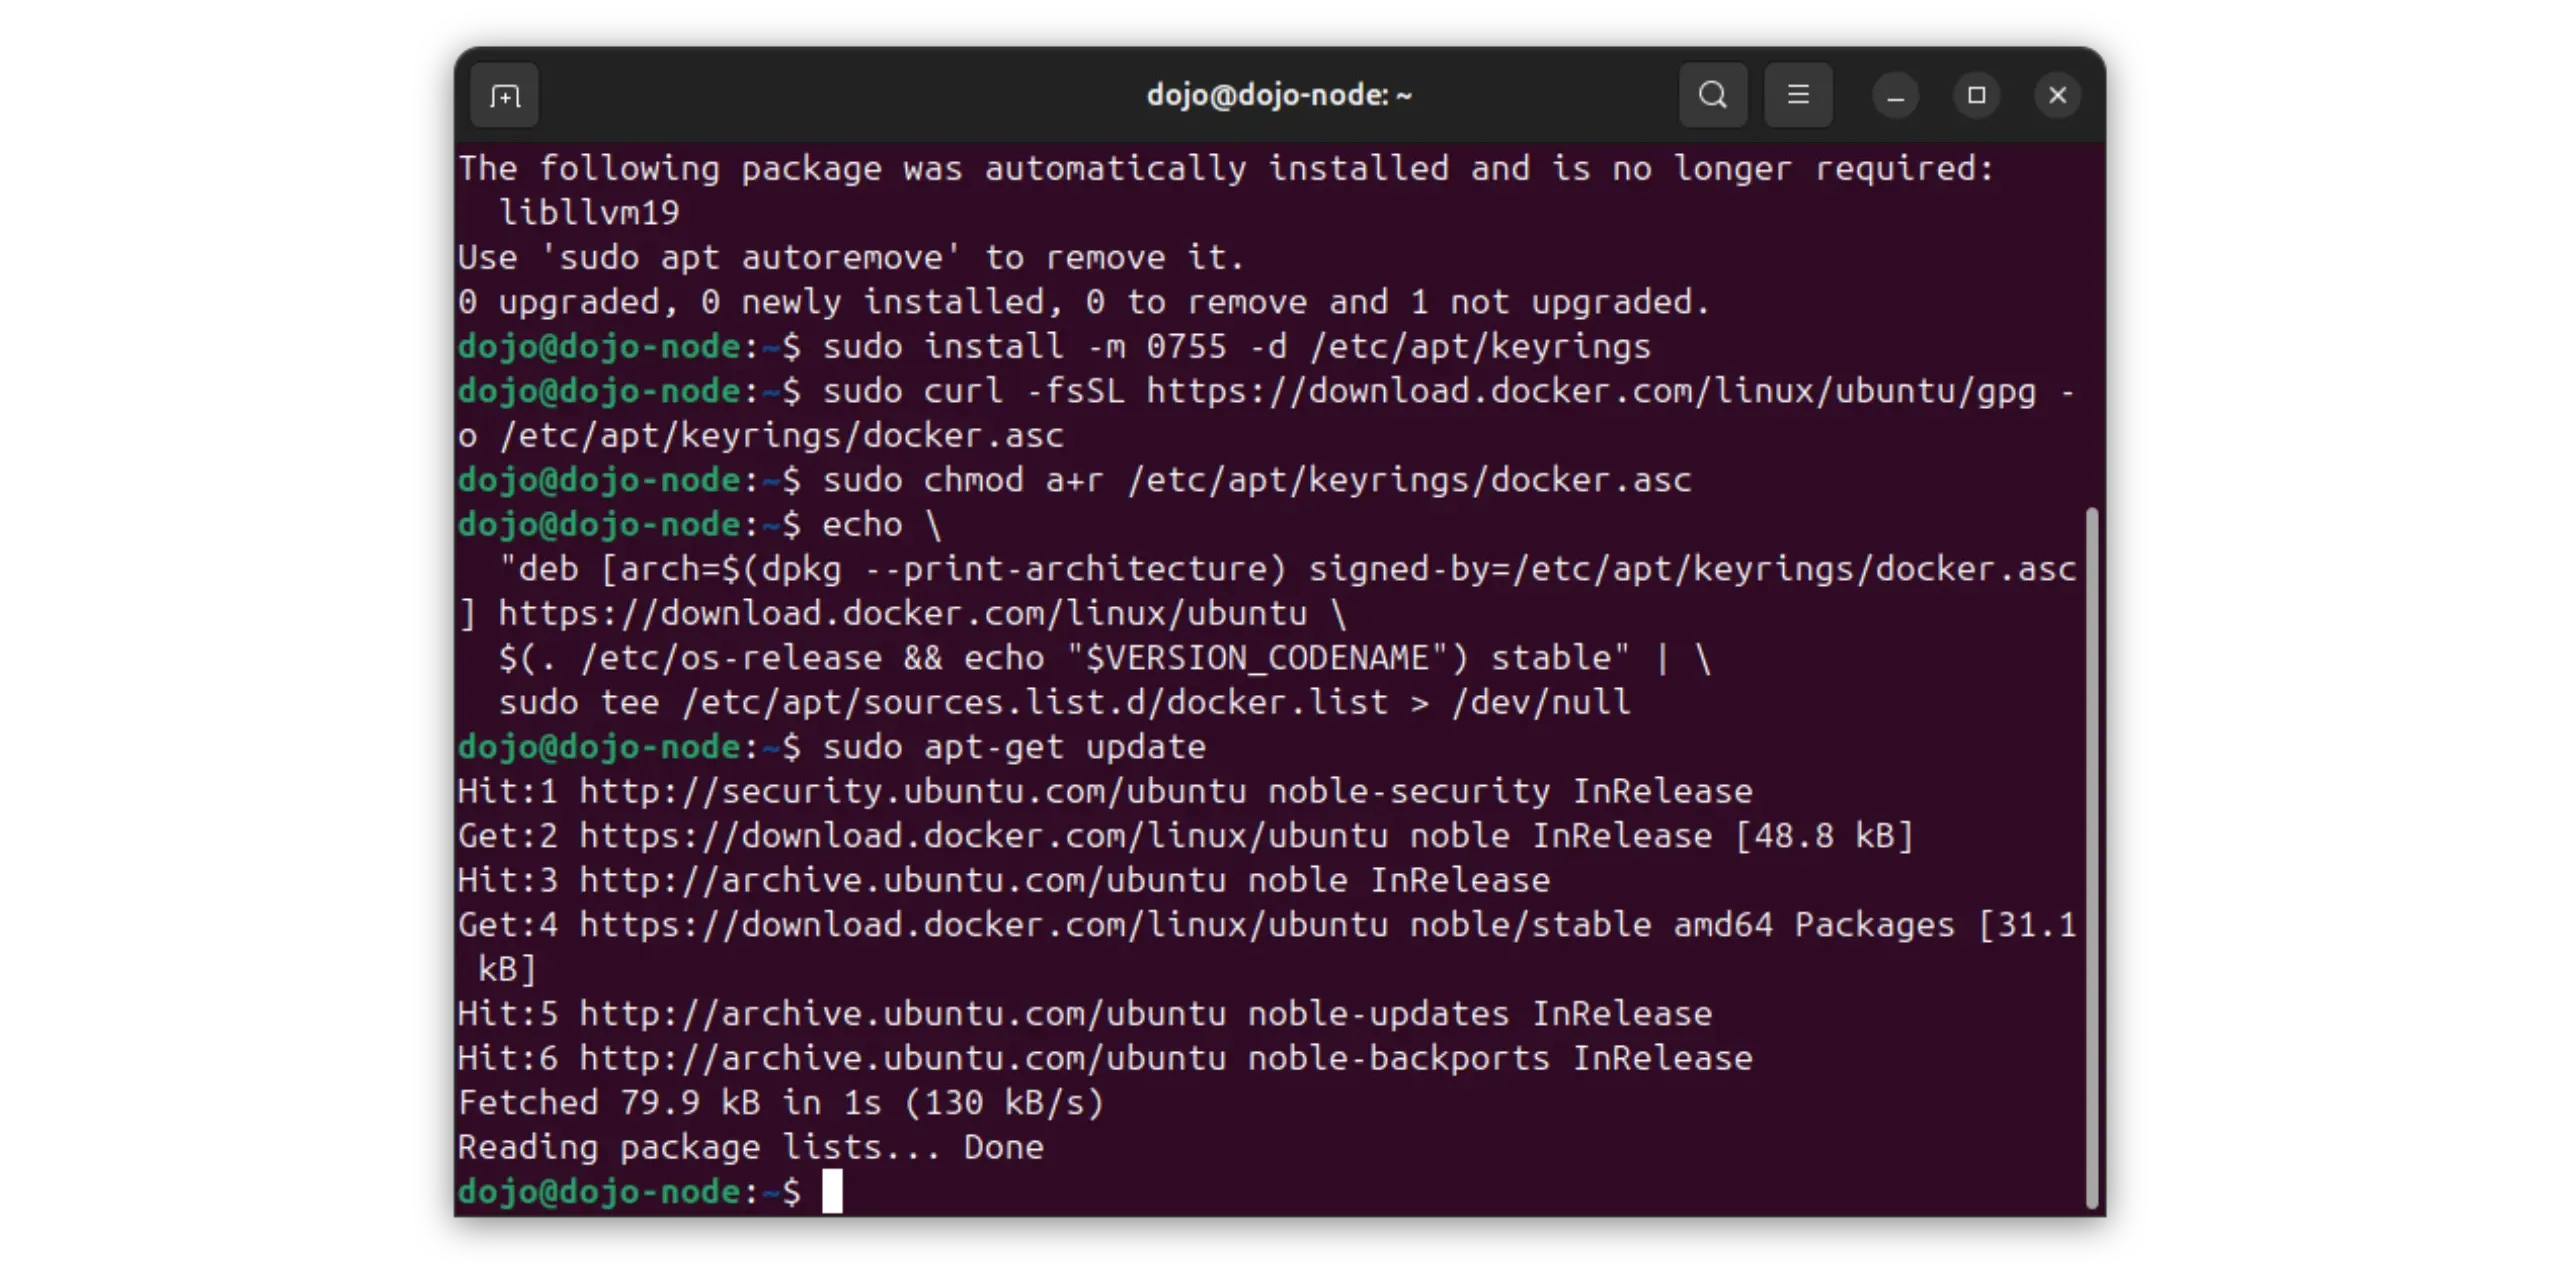
echo \
"deb [arch=$(dpkg --print-architecture) signed-by=/etc/apt/keyrings/docker.asc] https://download.docker.com/linux/ubuntu \
$(. /etc/os-release && echo "*$VERSION_CODENAME*") stable" | \
sudo tee /etc/apt/sources.list.d/docker.list > /dev/null
sudo apt-get update
Installing Docker and Docker Compose
The main Docker components can now be installed.
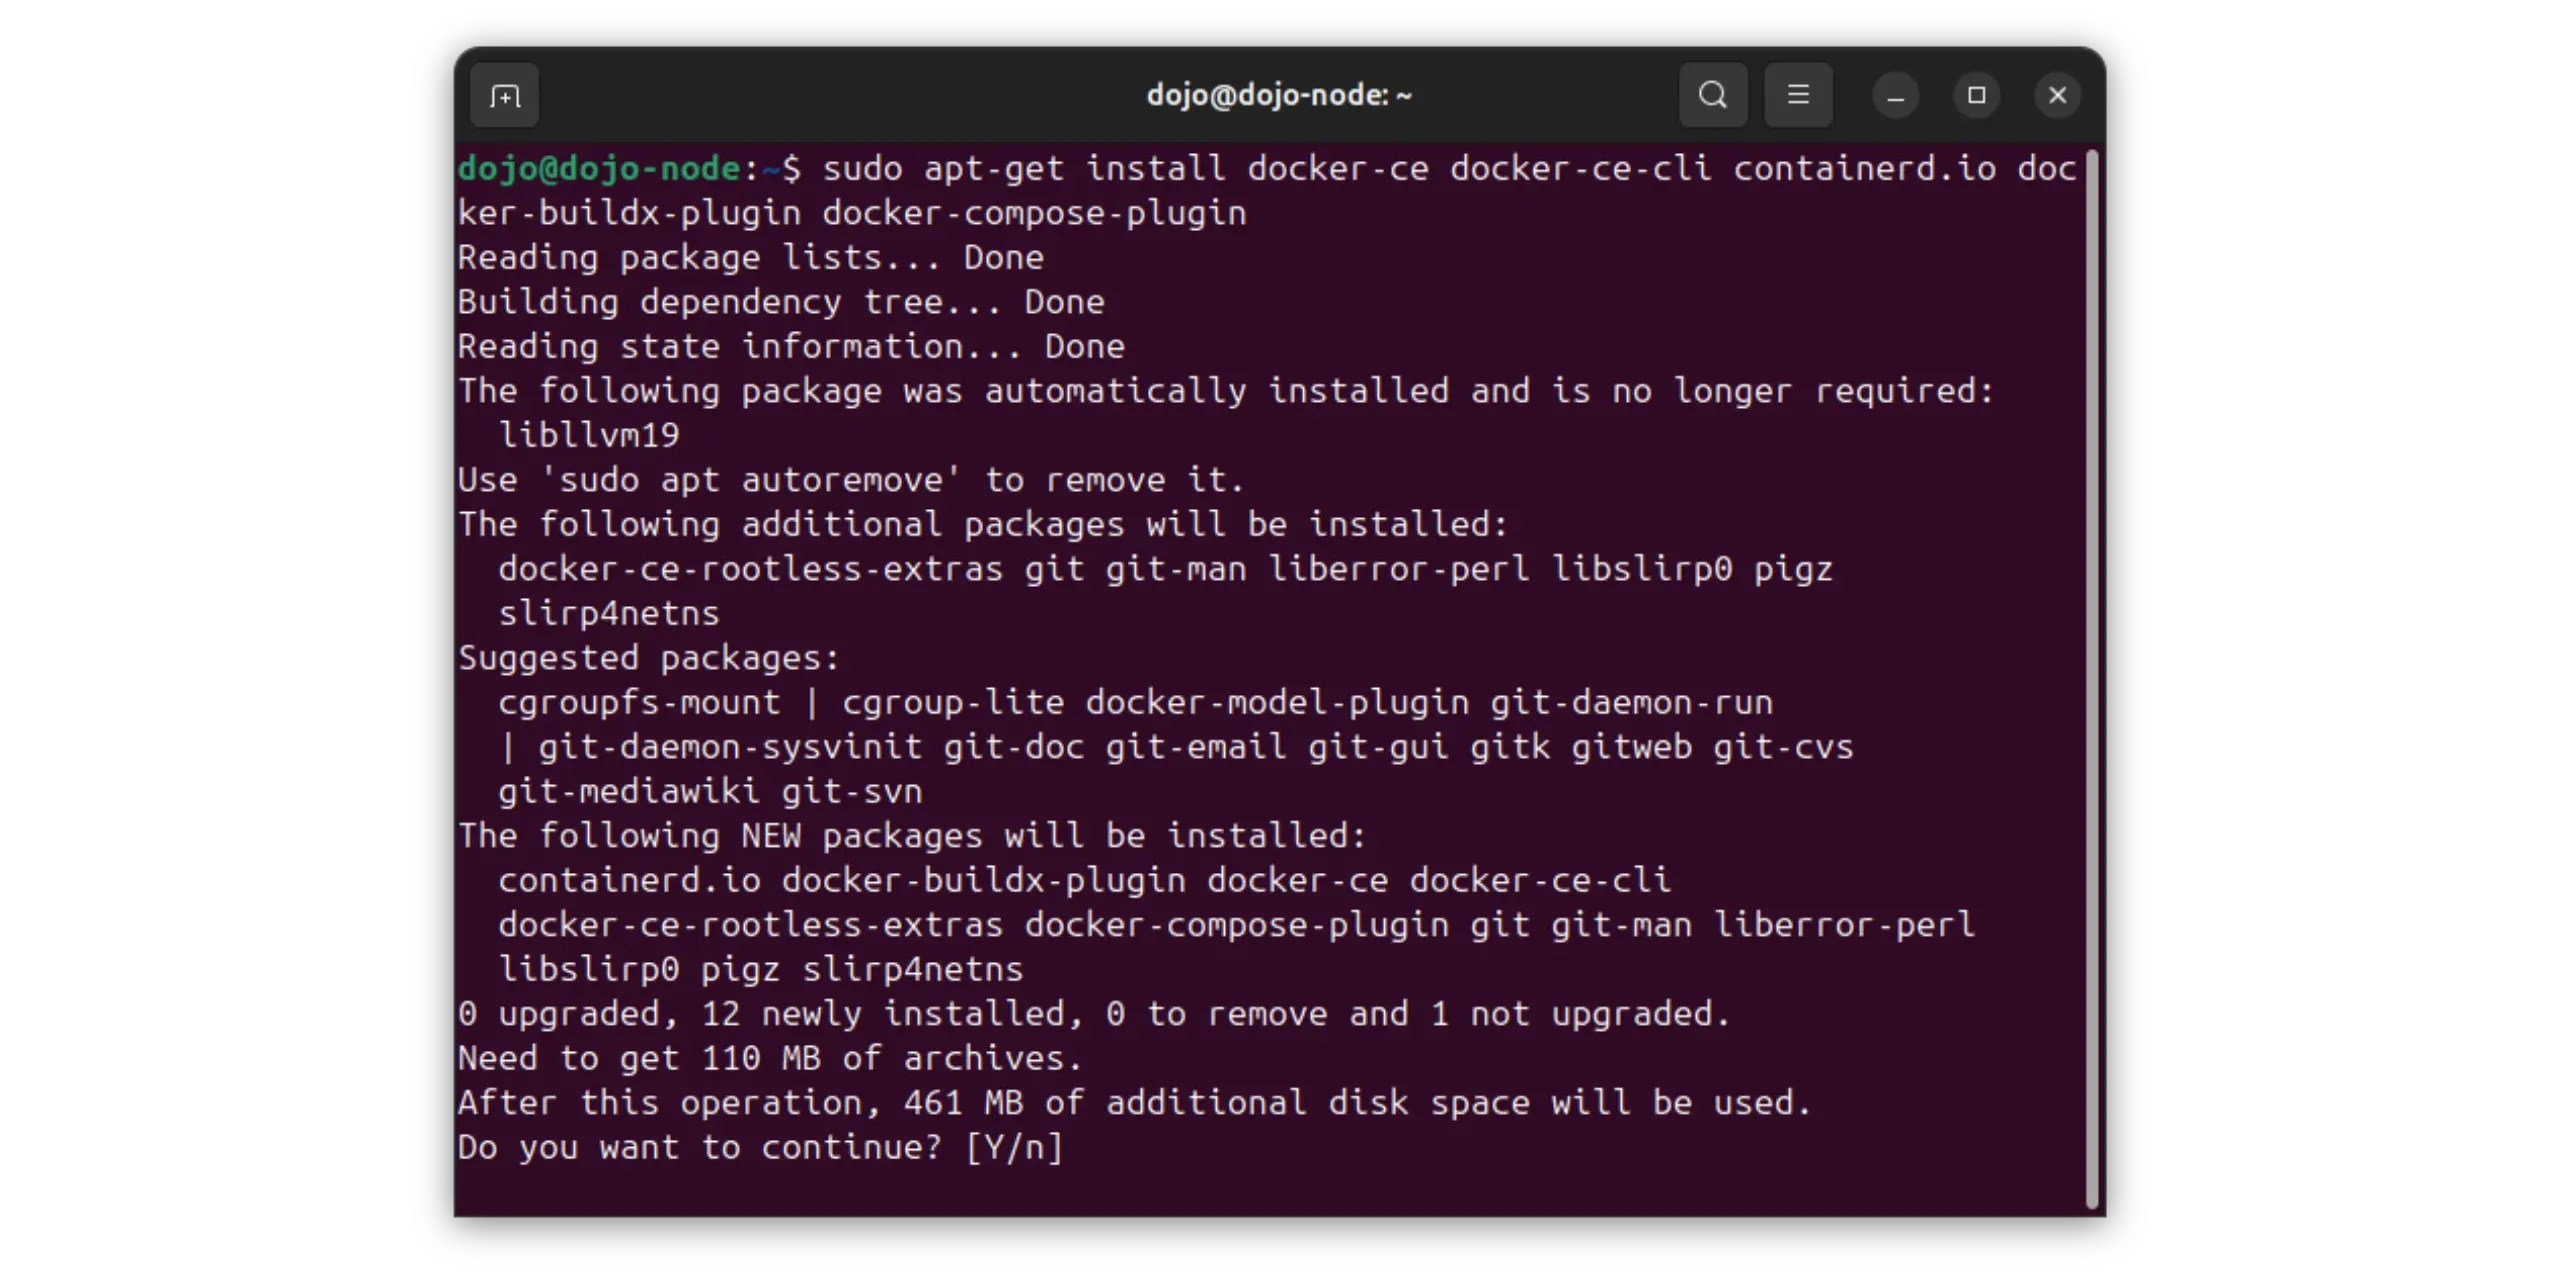
1
sudo apt-get install docker-ce docker-ce-cli containerd.io docker-buildx-plugin docker-compose-plugin
User authorization
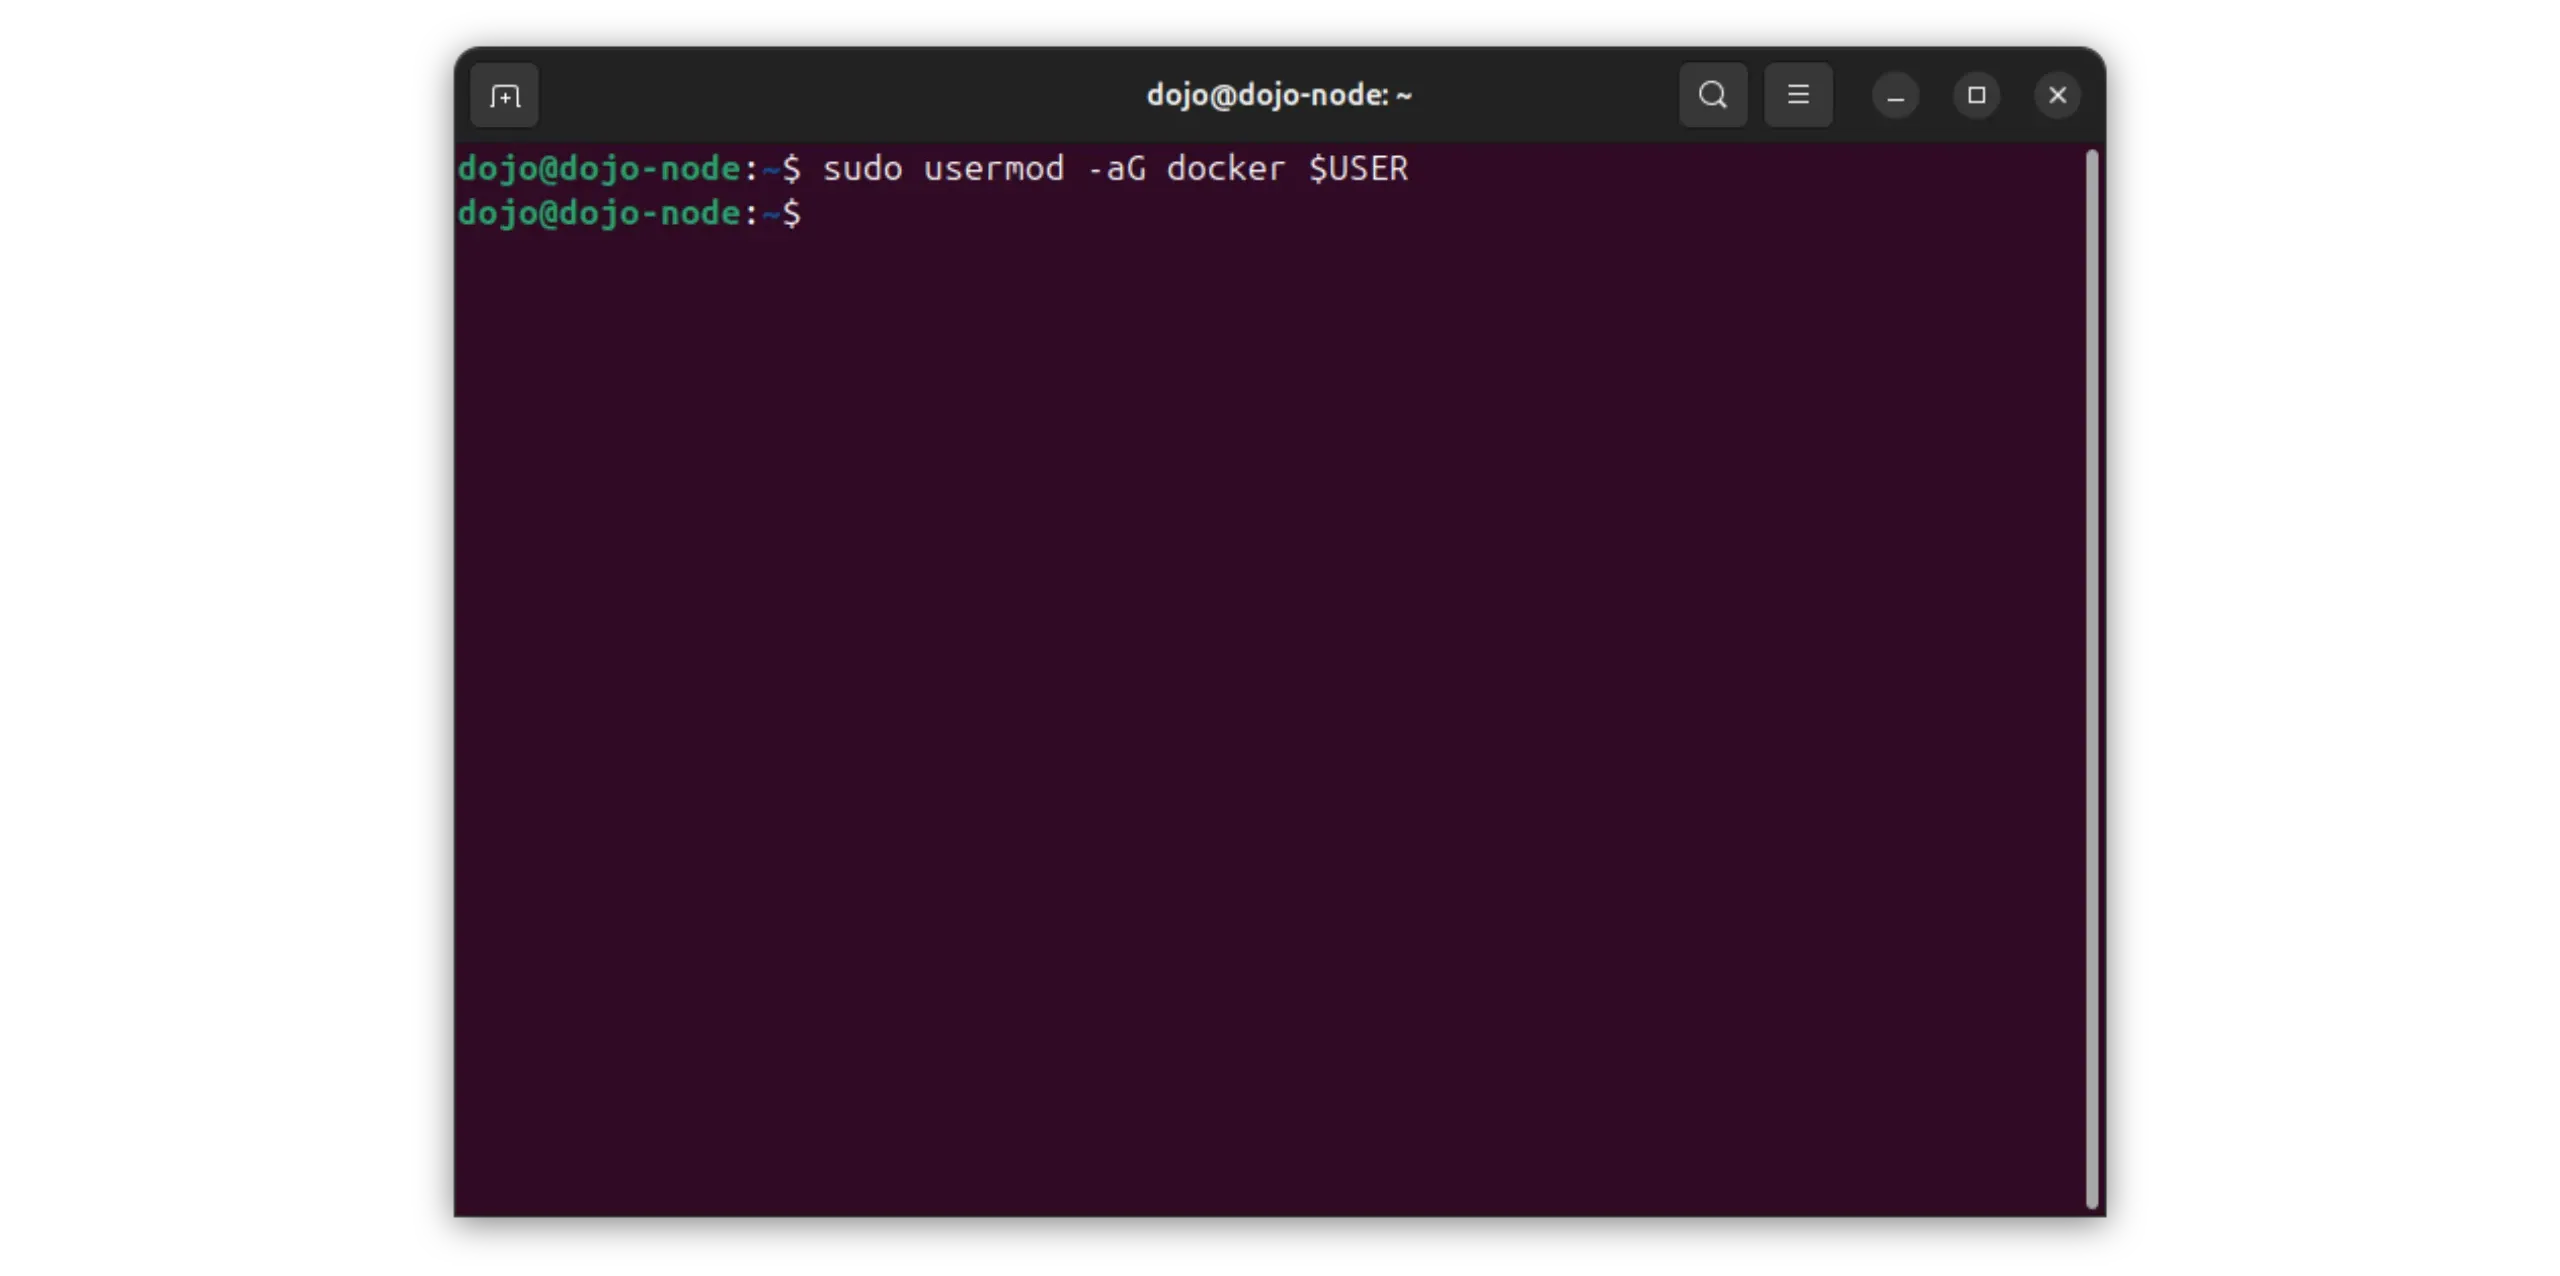
By default, only commands executed with administrator rights can launch Docker. For greater convenience, I recommend adding your current user to the “docker” group. This allows you to use Docker without having to type sudo every time.
1
sudo usermod -aG docker $USER
Members of the “docker” group can escalate to root via Docker. Add only trusted users and secure the host accordingly.
3. Single user creation (optional)
If you want to improve the security of your system, I recommend that you create a separate user exclusively for running Dojo. This separation limits the risks: if a security problem occurs in Dojo, it won’t directly compromise your main account.
Principle of least privilege: isolate services under a dedicated user to reduce blast radius if one component is compromised.
3.1. user account creation
The following command creates a new user named “dojo”. This user will have a home directory /home/dojo and access to the bash terminal. It will also be added to the sudo group to enable execution of admin commands.
1
sudo useradd -s /bin/bash -d /home/dojo -m -G sudo dojo
3.2. Setting a password
It’s important to assign a strong password to this account. Ideally, you should use a password manager such as Bitwarden to generate a long, hard-to-guess combination.
1
sudo passwd dojo
The system will then ask you to enter your chosen password, then confirm it a second time.
3.3. Authorize user to use Docker
To enable the user “dojo” to launch the containers needed to run Dojo, he must be added to the Docker group. This avoids having to precede each command with sudo.
1
sudo usermod -aG docker dojo
As above, giving “dojo” Docker group access is effectively root‑level. Ensure this user is dedicated and secured.
3.4. System restart
In order for group changes to take effect, the machine must be restarted.
1
sudo reboot
3.5. Login with new user
When the system restarts, log in with the dojo login and the password you defined earlier. All subsequent steps must be carried out from this dedicated account.
4. Download and check Dojo
Before installing Dojo, it is essential to make sure that the files have come from the official developer and that they have not been modified. This step relies on the use of PGP and hashes to verify file authenticity and integrity.
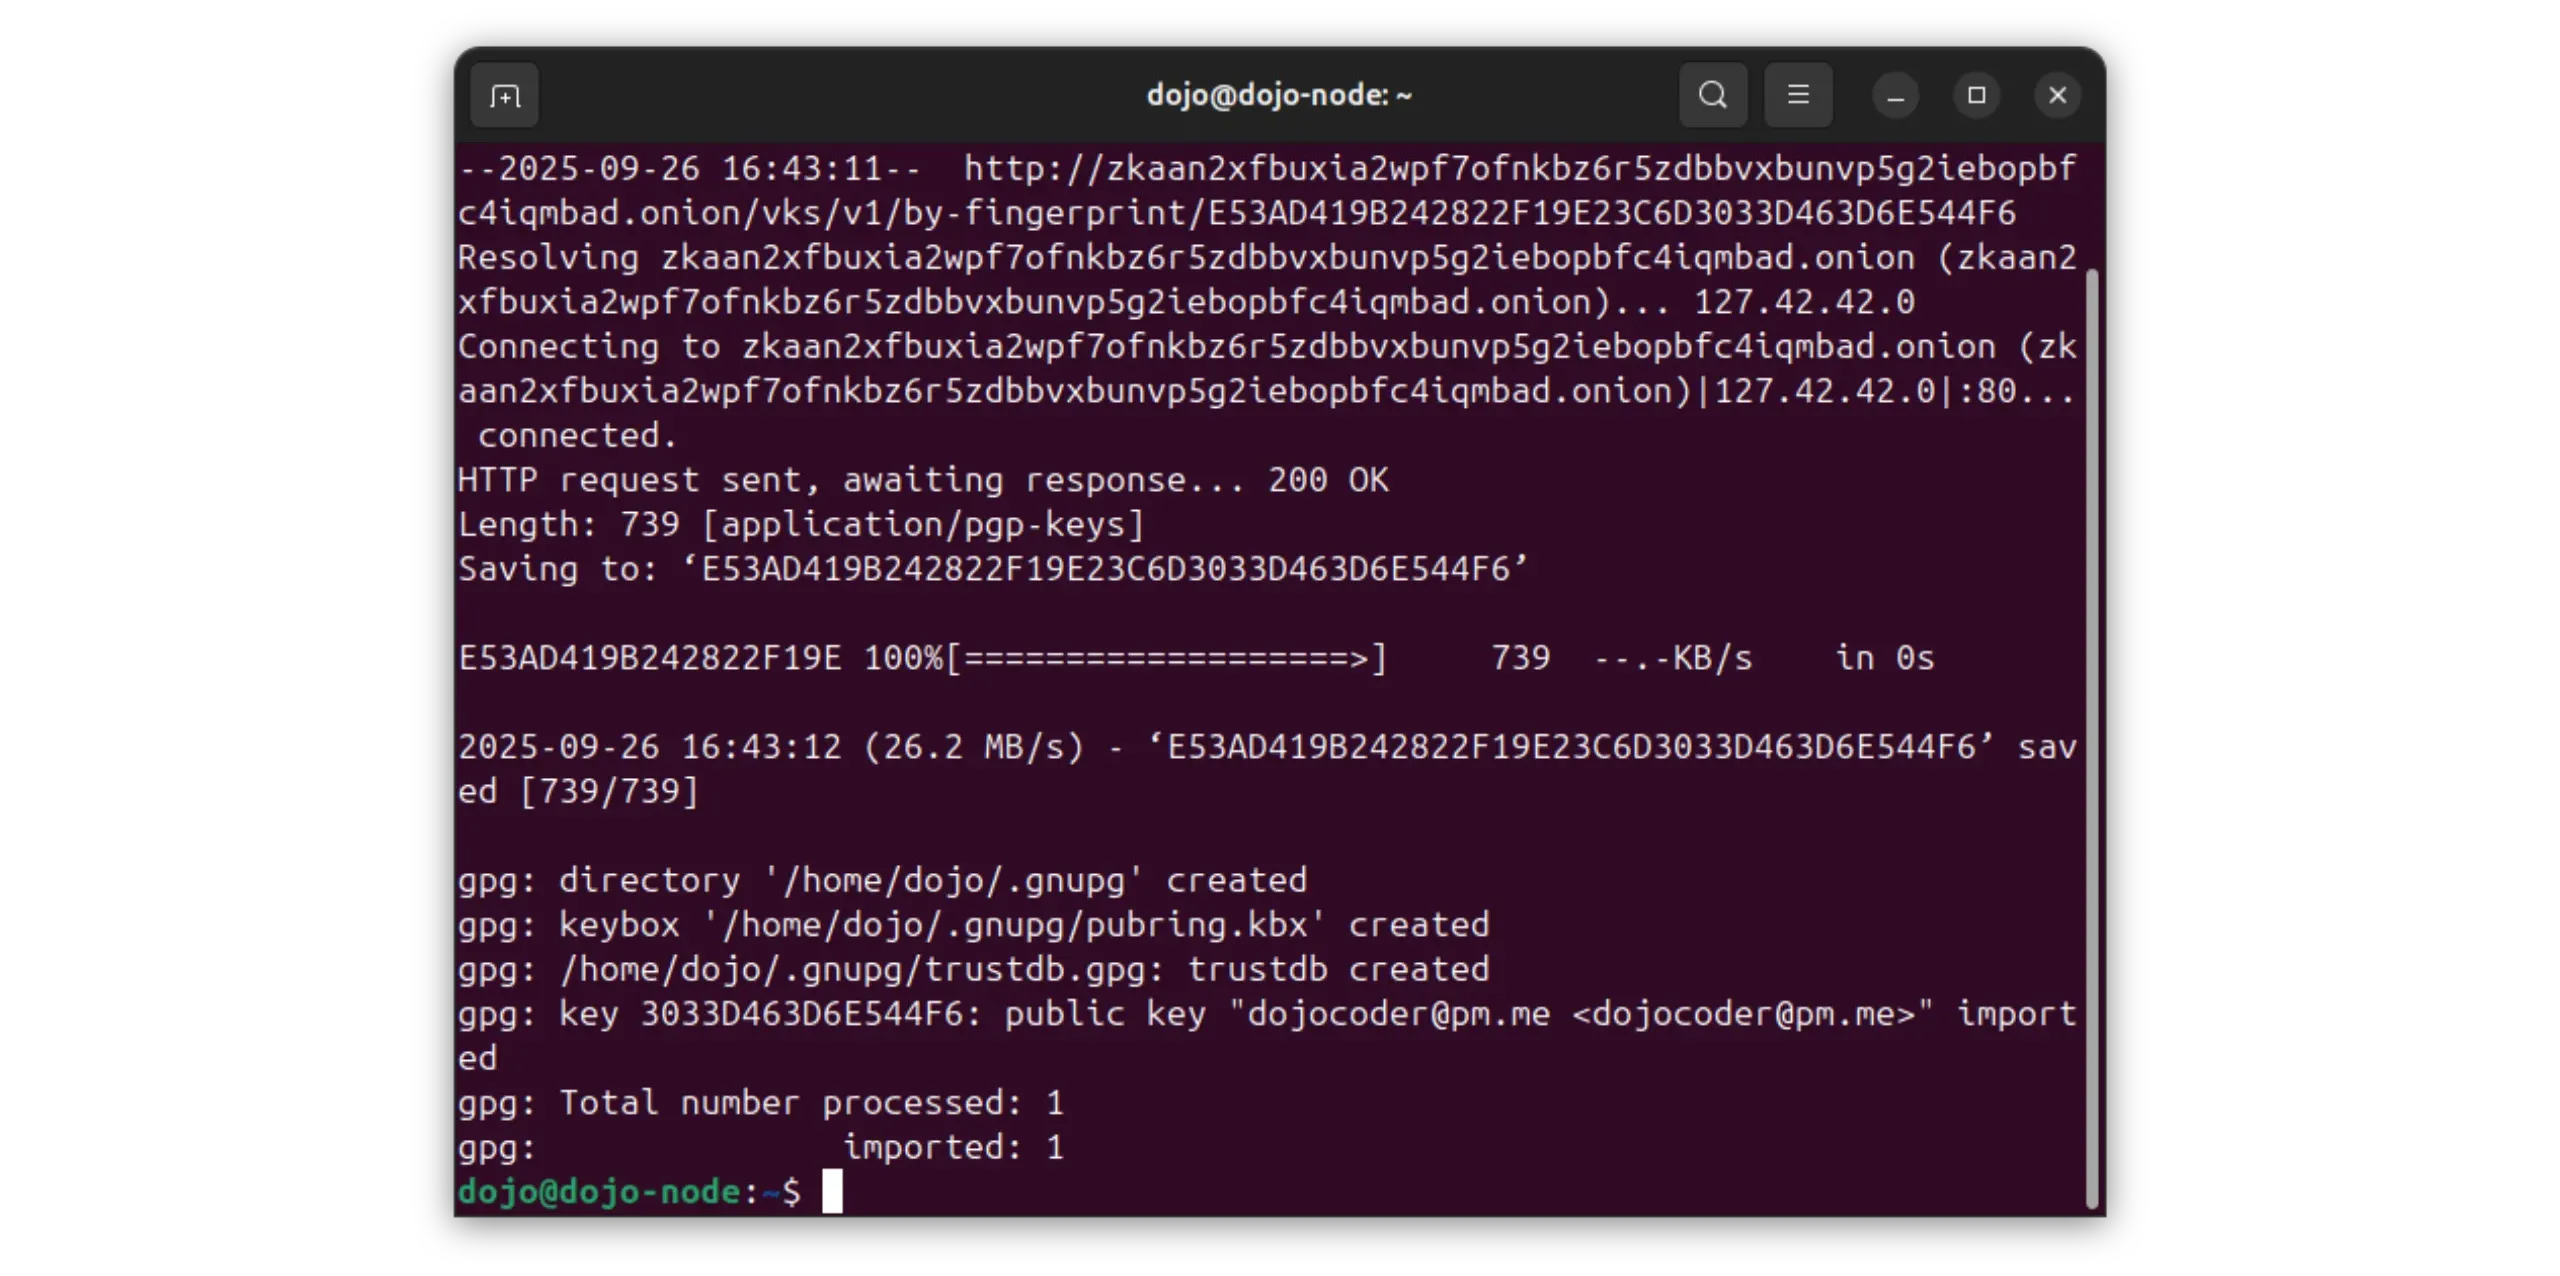
4.1. import the developer’s PGP key
Download the developer’s public key via Tor and import it into your local keychain. This key will be used to verify the signatures associated with Dojo files.
1
torsocks wget http://zkaan2xfbuxia2wpf7ofnkbz6r5zdbbvxbunvp5g2iebopbfc4iqmbad.onion/vks/v1/by-fingerprint/E53AD419B242822F19E23C6D3033D463D6E544F6 && gpg --import E53AD419B242822F19E23C6D3033D463D6E544F6
Verify the key fingerprint from multiple sources (onion, GitHub, project site) before trusting it; do not rely on a single source.
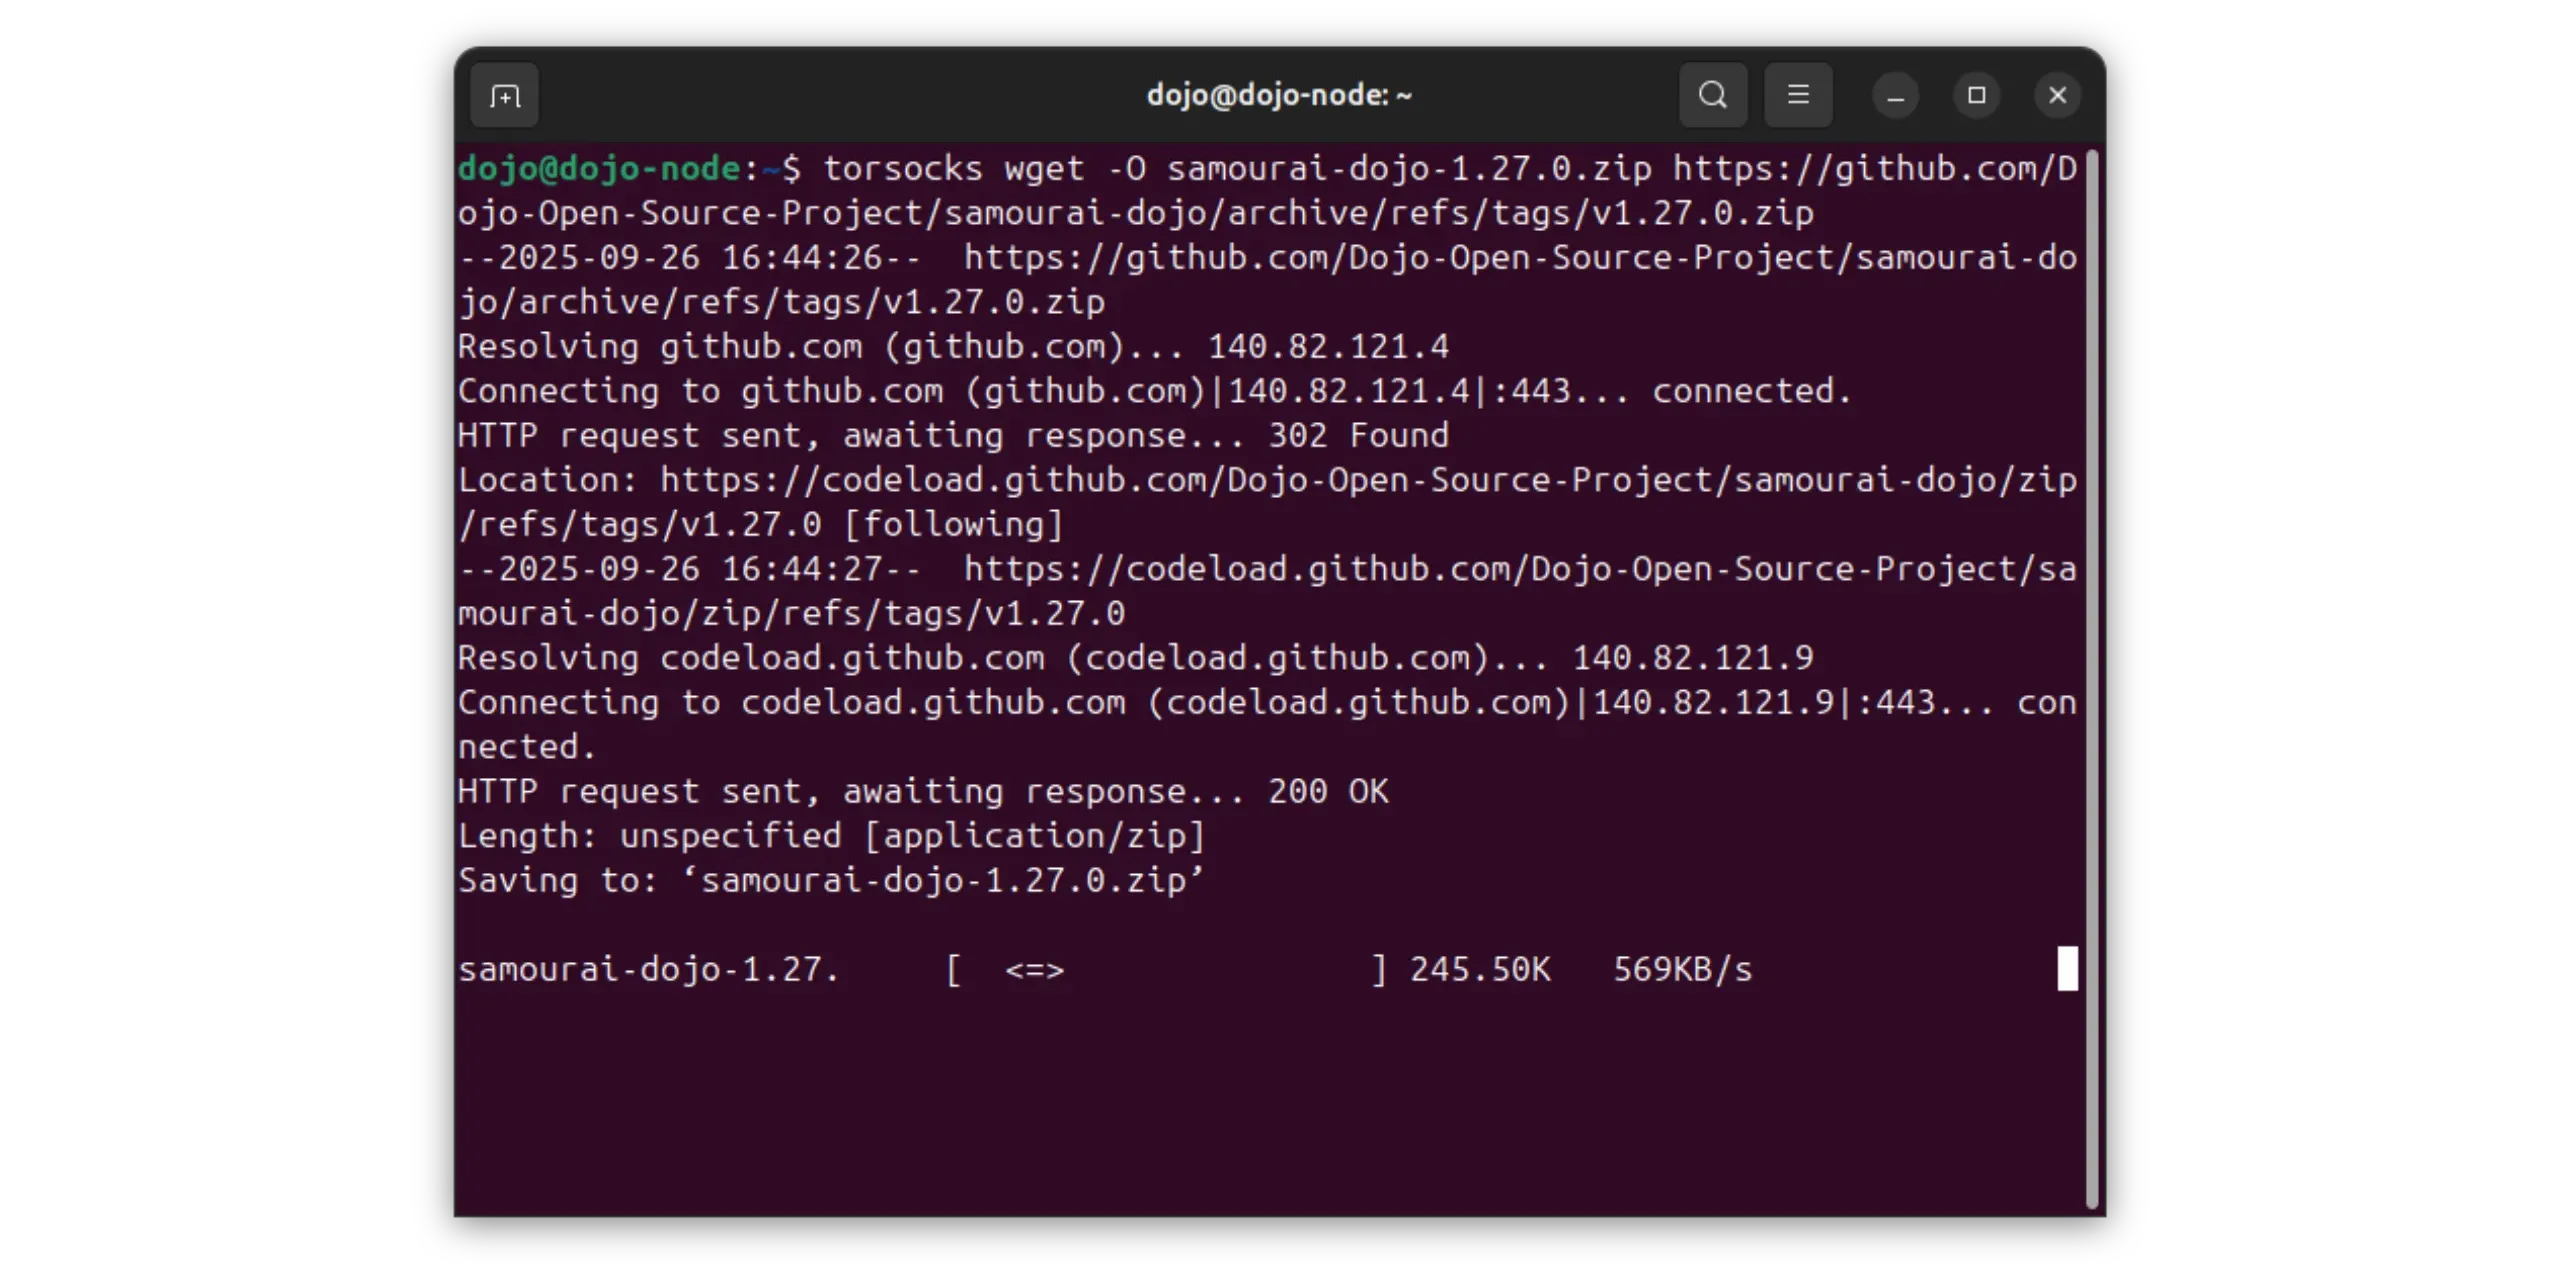
4.2. download the latest version of Dojo
Retrieve the compressed archive containing the Dojo source code. In this example, the most recent version is 1.28.0: modify the command according to the latest version here on the official GitHub repository.
1
torsocks wget -O samourai-dojo-1.28.0.zip https://github.com/Dojo-Open-Source-Project/samourai-dojo/archive/refs/tags/v1.28.0.zip
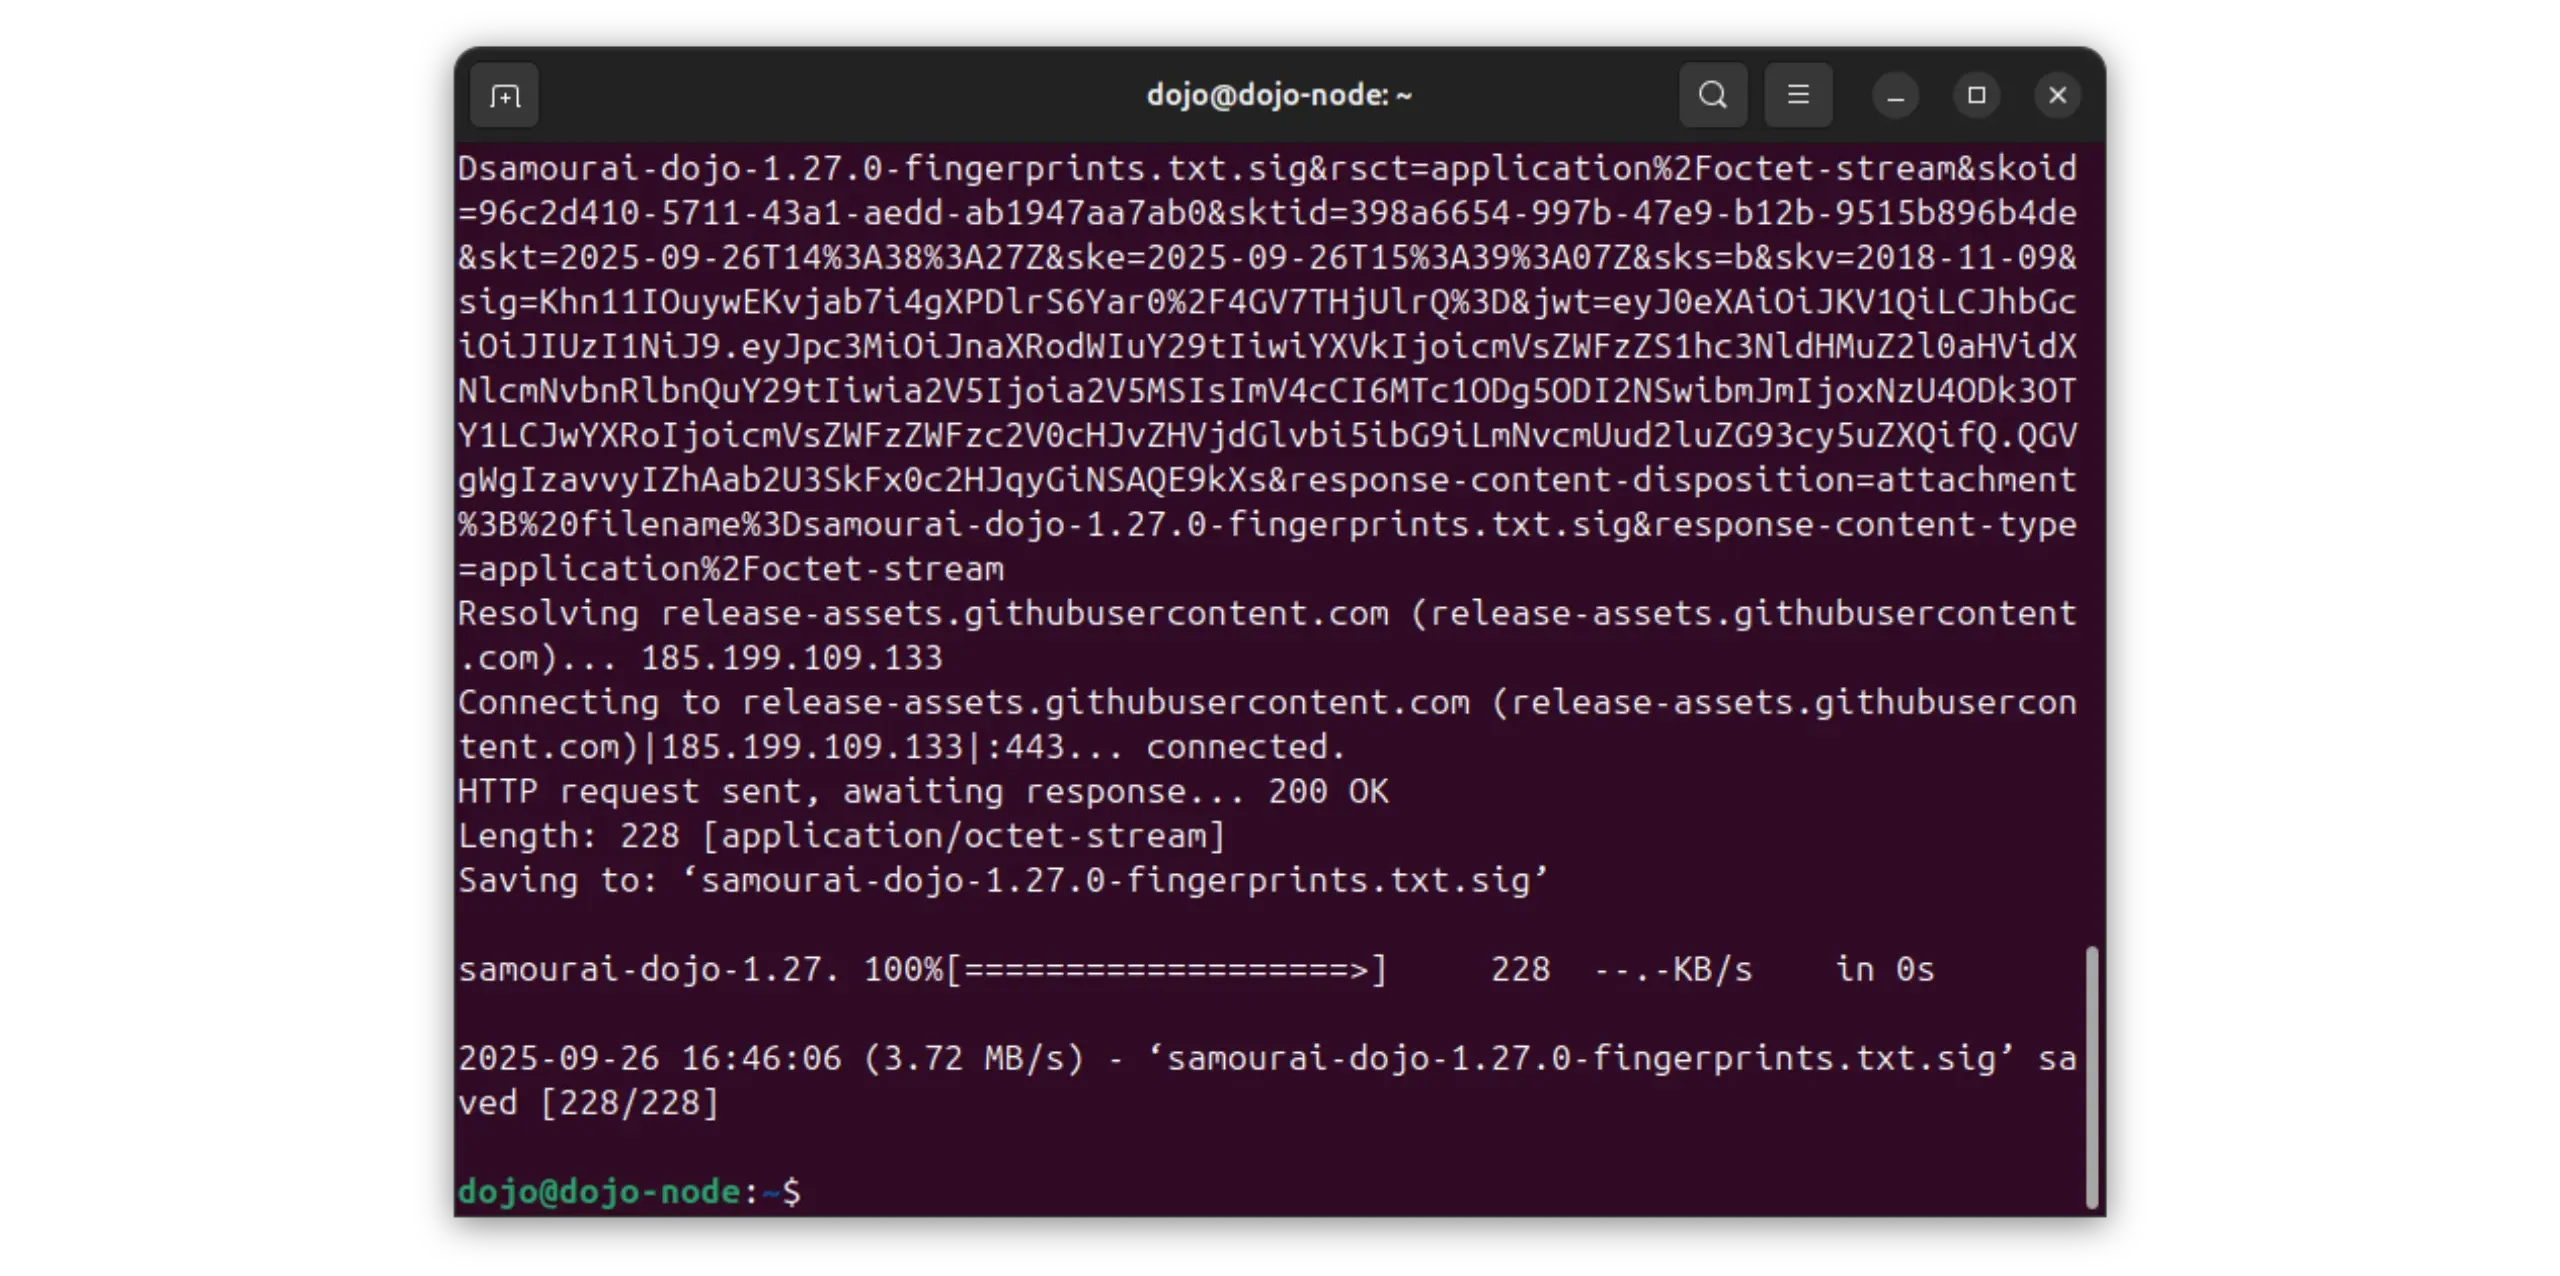
4.3. Download fingerprints and signature
The developers publish a file listing the digital fingerprints of the archives, as well as a file signed by their PGP key. Download them to compare your files locally.
1
torsocks wget https://github.com/Dojo-Open-Source-Project/samourai-dojo/releases/download/v1.28.0/samourai-dojo-1.28.0-fingerprints.txt && torsocks wget https://github.com/Dojo-Open-Source-Project/samourai-dojo/releases/download/v1.28.0/samourai-dojo-1.28.0-fingerprints.txt.sig
4.4. Check PGP signature
Check that the fingerprint file has been signed by the imported key.
1
gpg --verify samourai-dojo-1.28.0-fingerprints.txt.sig
A correct result displays a valid signature with the key E53AD419B242822F19E23C6D3033D463D6E544F6 and the associated address dojocoder@pm.me. A warning may appear stating that the key is not certified: you can ignore it.
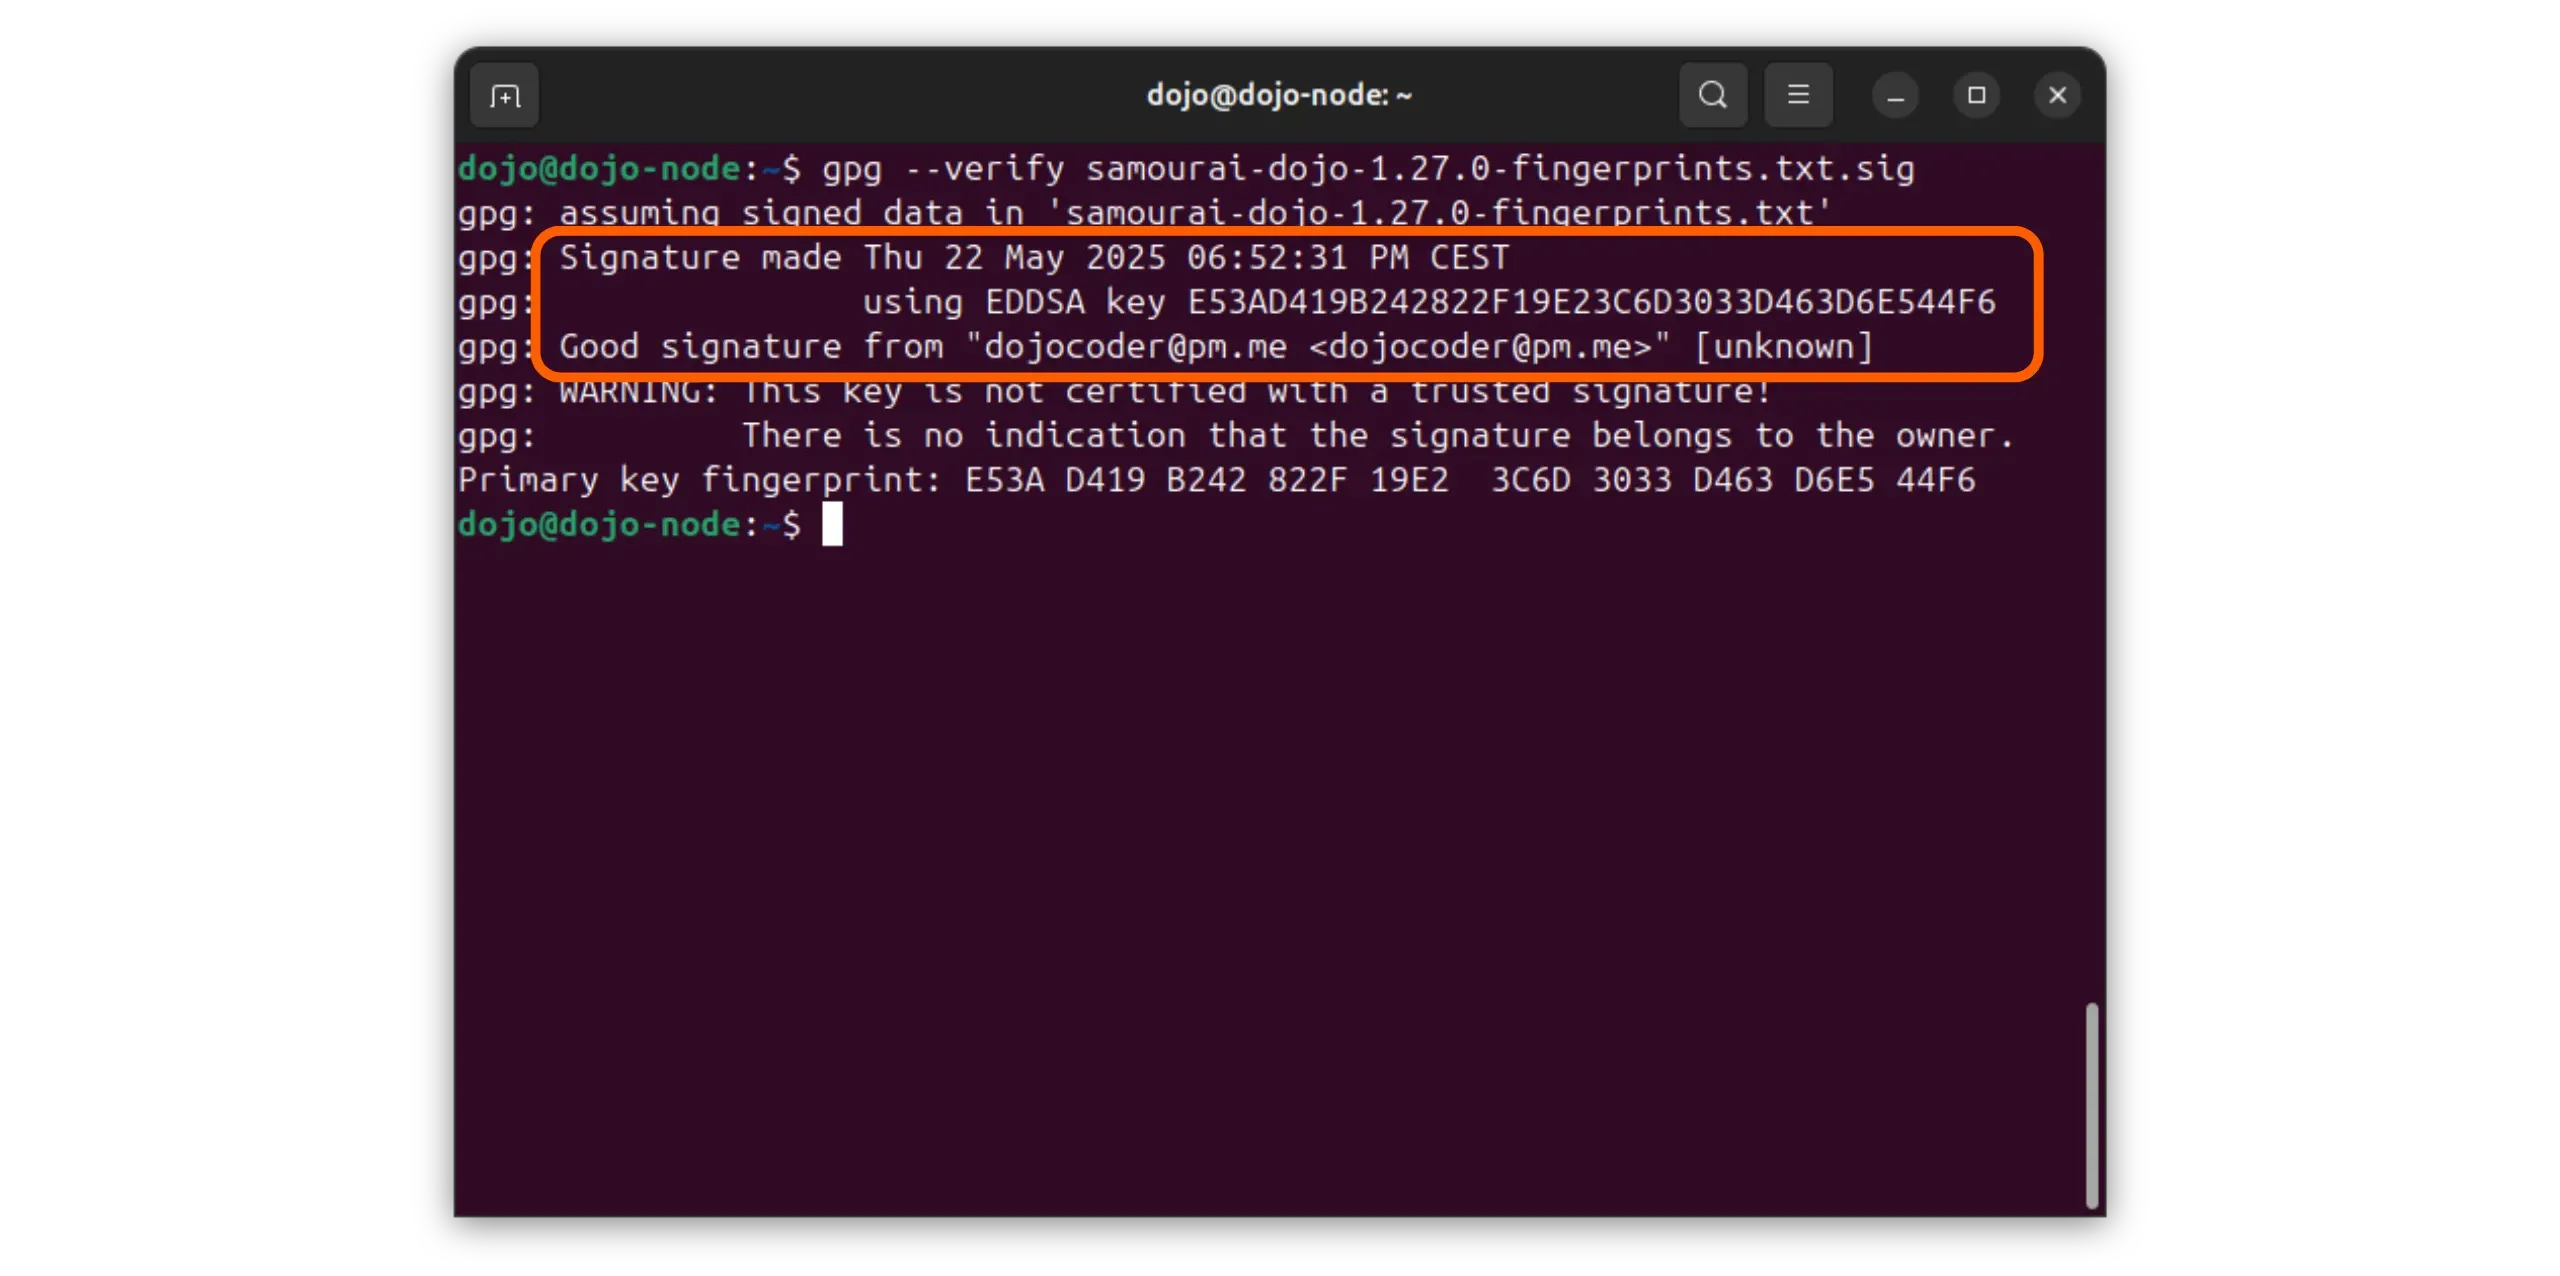
If the signature is invalid or from an unexpected key, stop immediately — do not install unverified software.
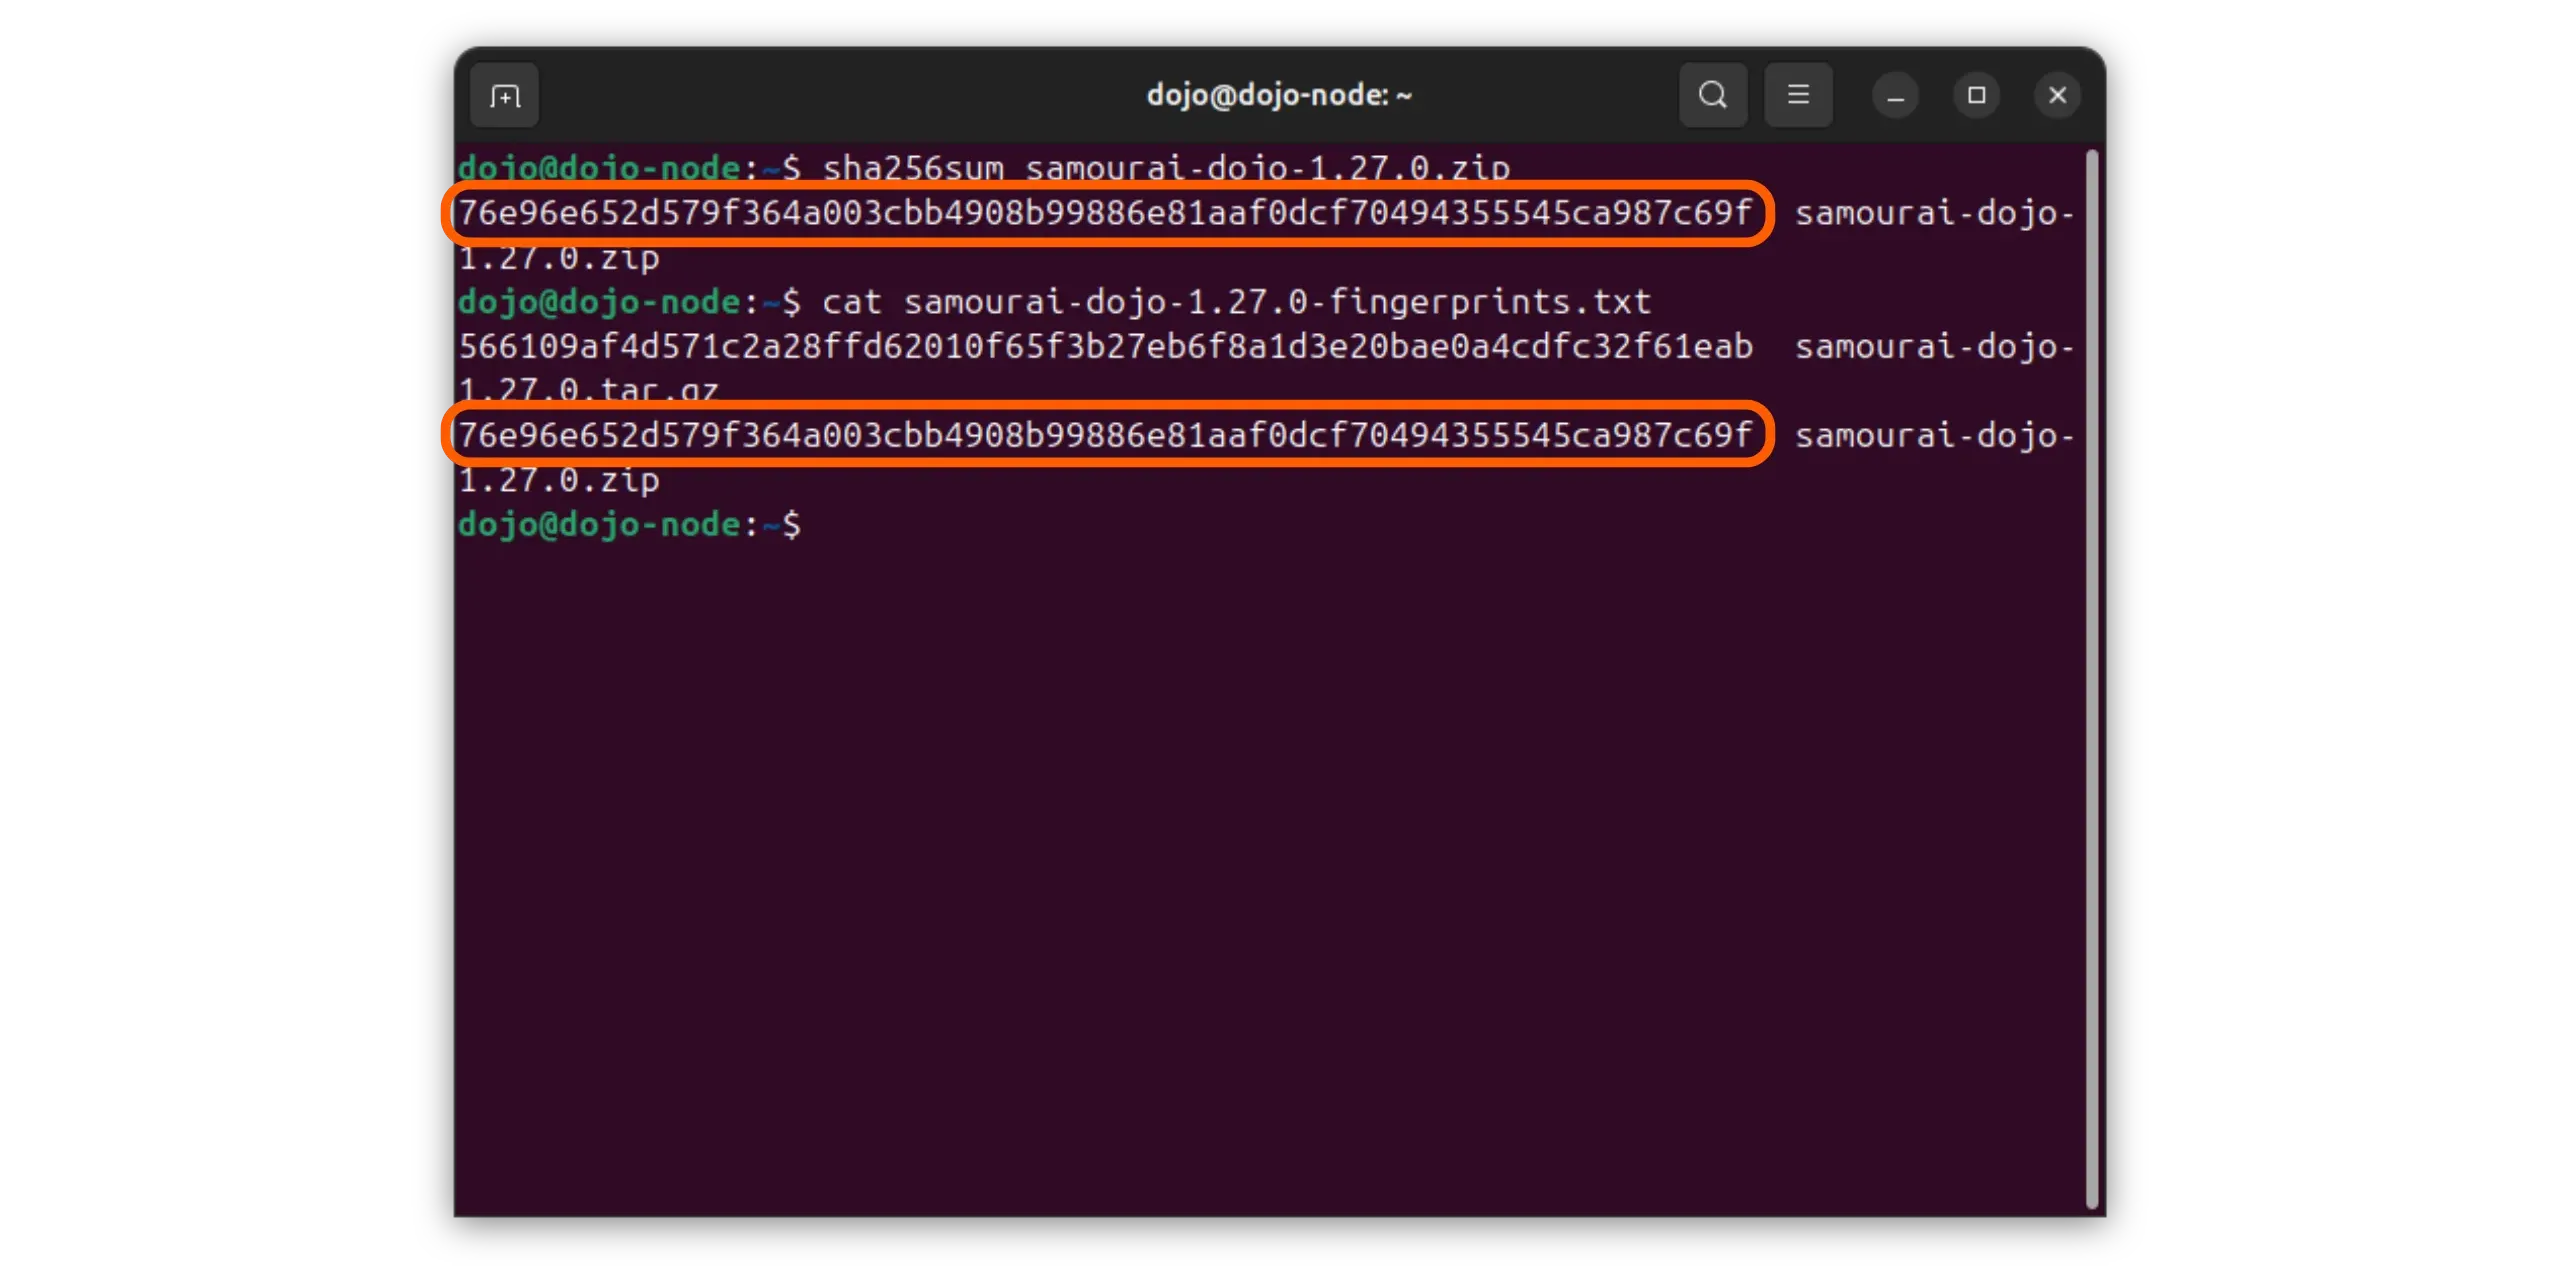
4.5. Check archive integrity
Calculate the SHA256 fingerprint of the downloaded file, then open the fingerprint file to compare the two values.
1
2
sha256sum samourai-dojo-1.28.0.zip
cat samourai-dojo-1.28.0-fingerprints.txt
If the two fingerprints are identical, you can be sure that the archive has not been modified.
If the hash does not match, delete the files and re‑download from the official source; do not proceed with installation.
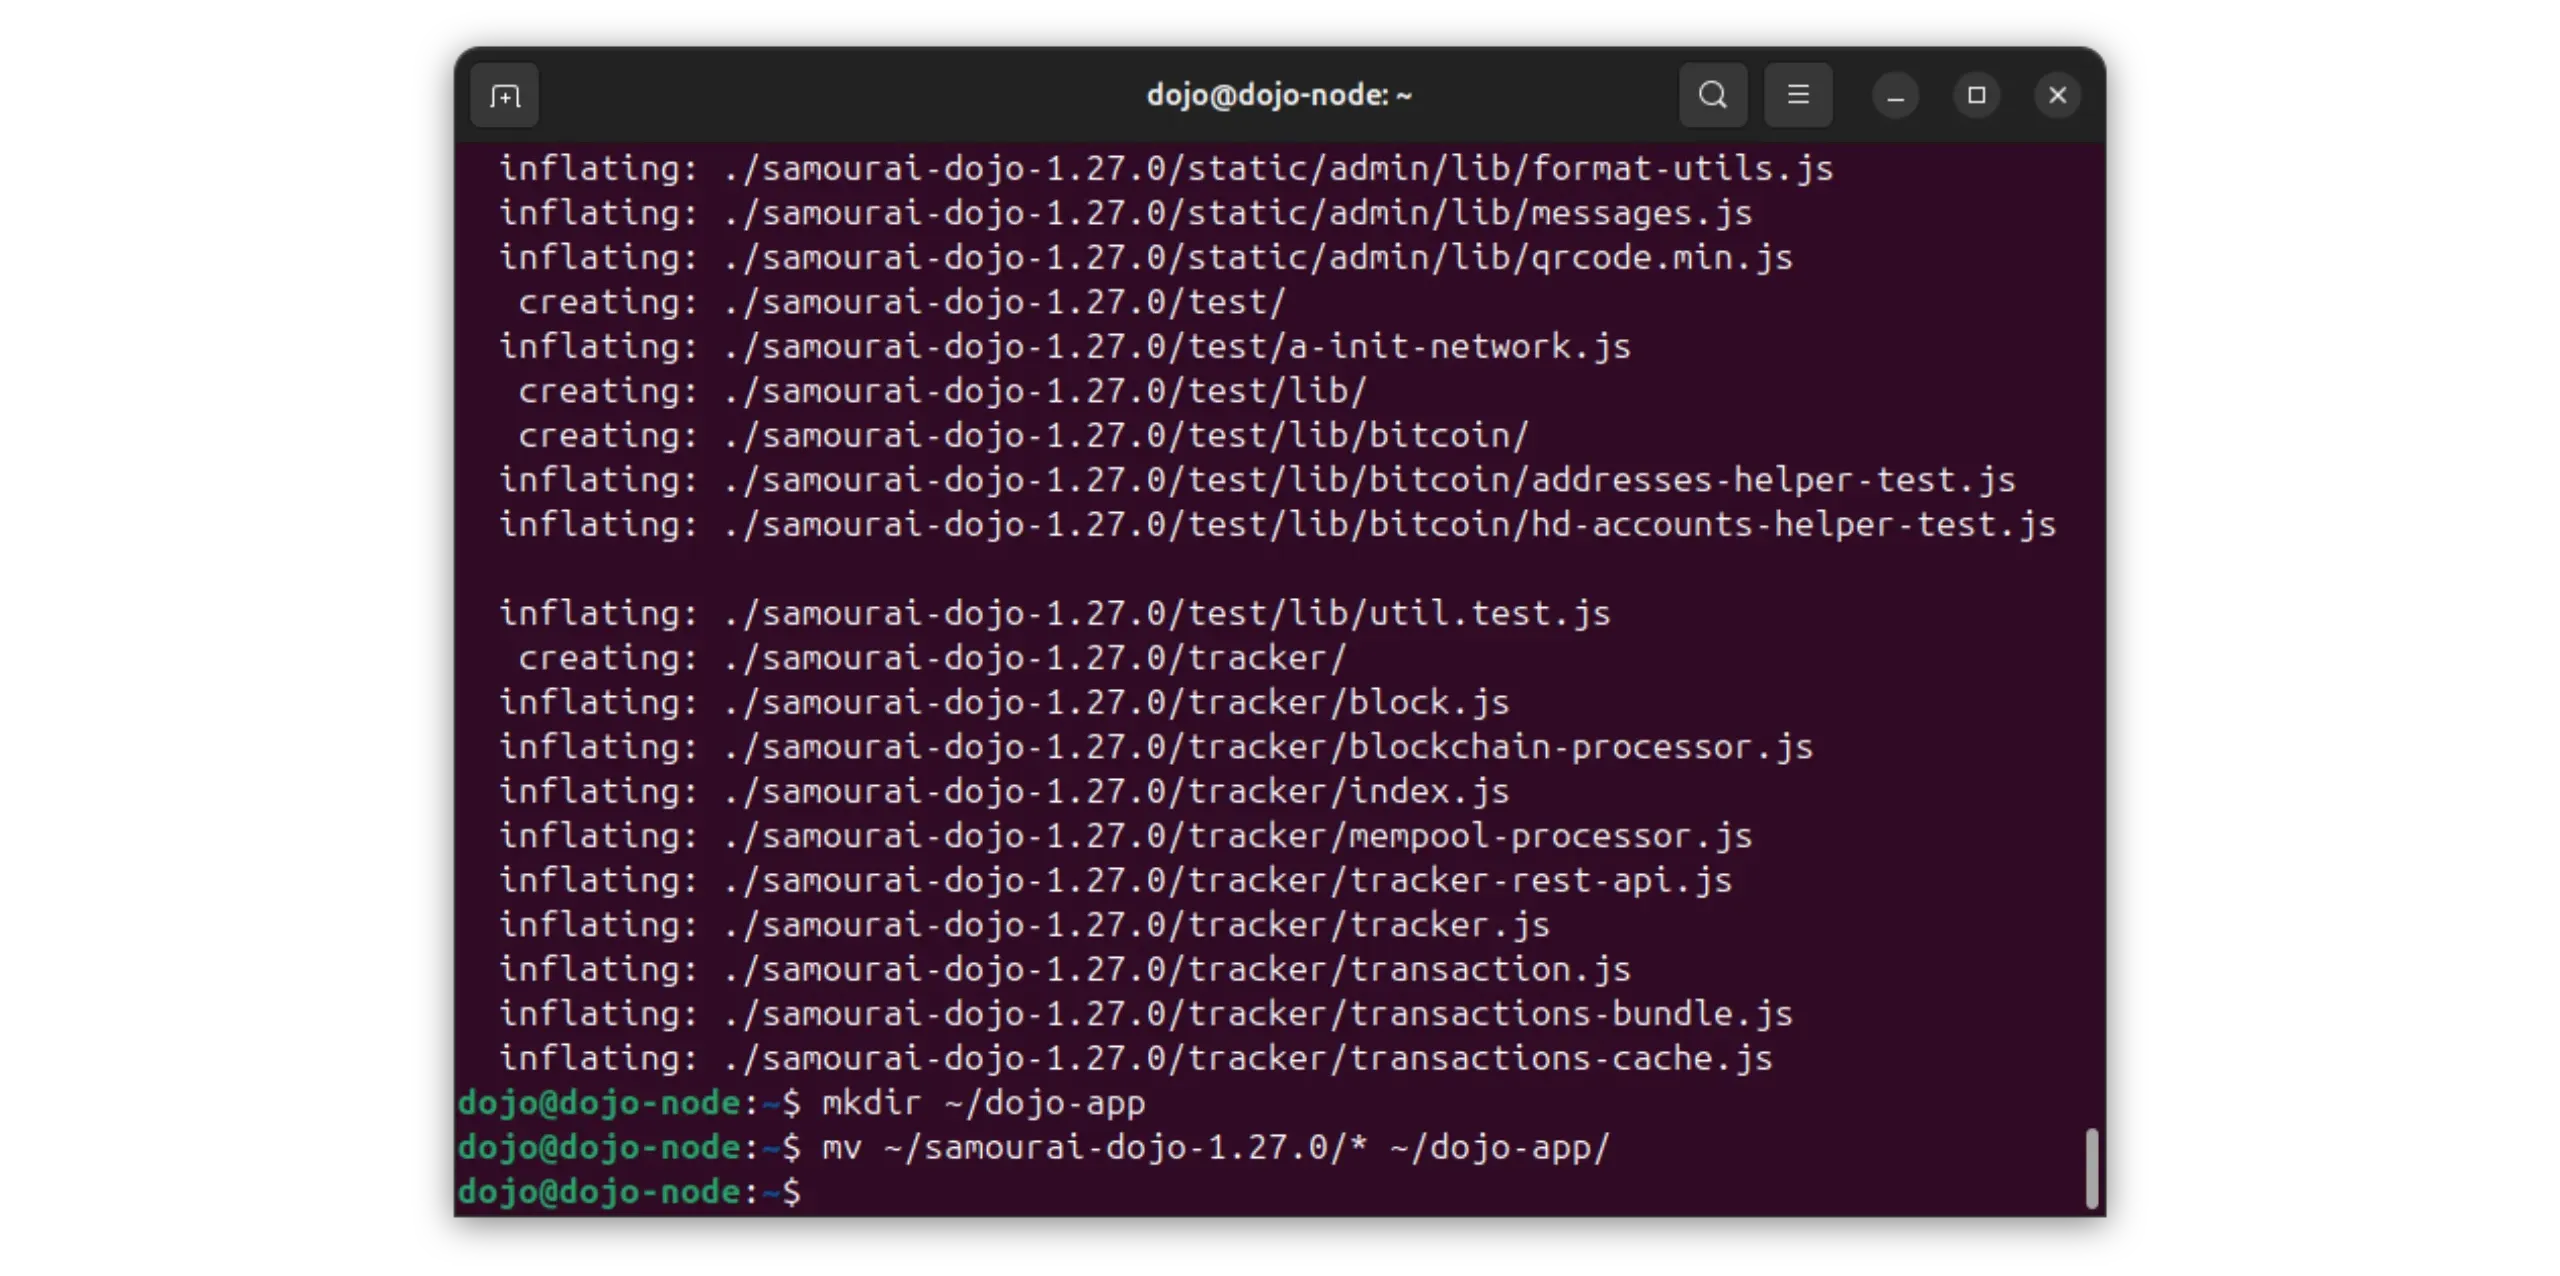
4.6. Extract and organize files
Once verification has been successfully completed, you can unpack the archive and prepare a folder dedicated to Dojo installation.
1
2
3
unzip samourai-dojo-1.28.0.zip -d .
mkdir ~/dojo-app
mv ~/samourai-dojo-1.28.0/* ~/dojo-app/
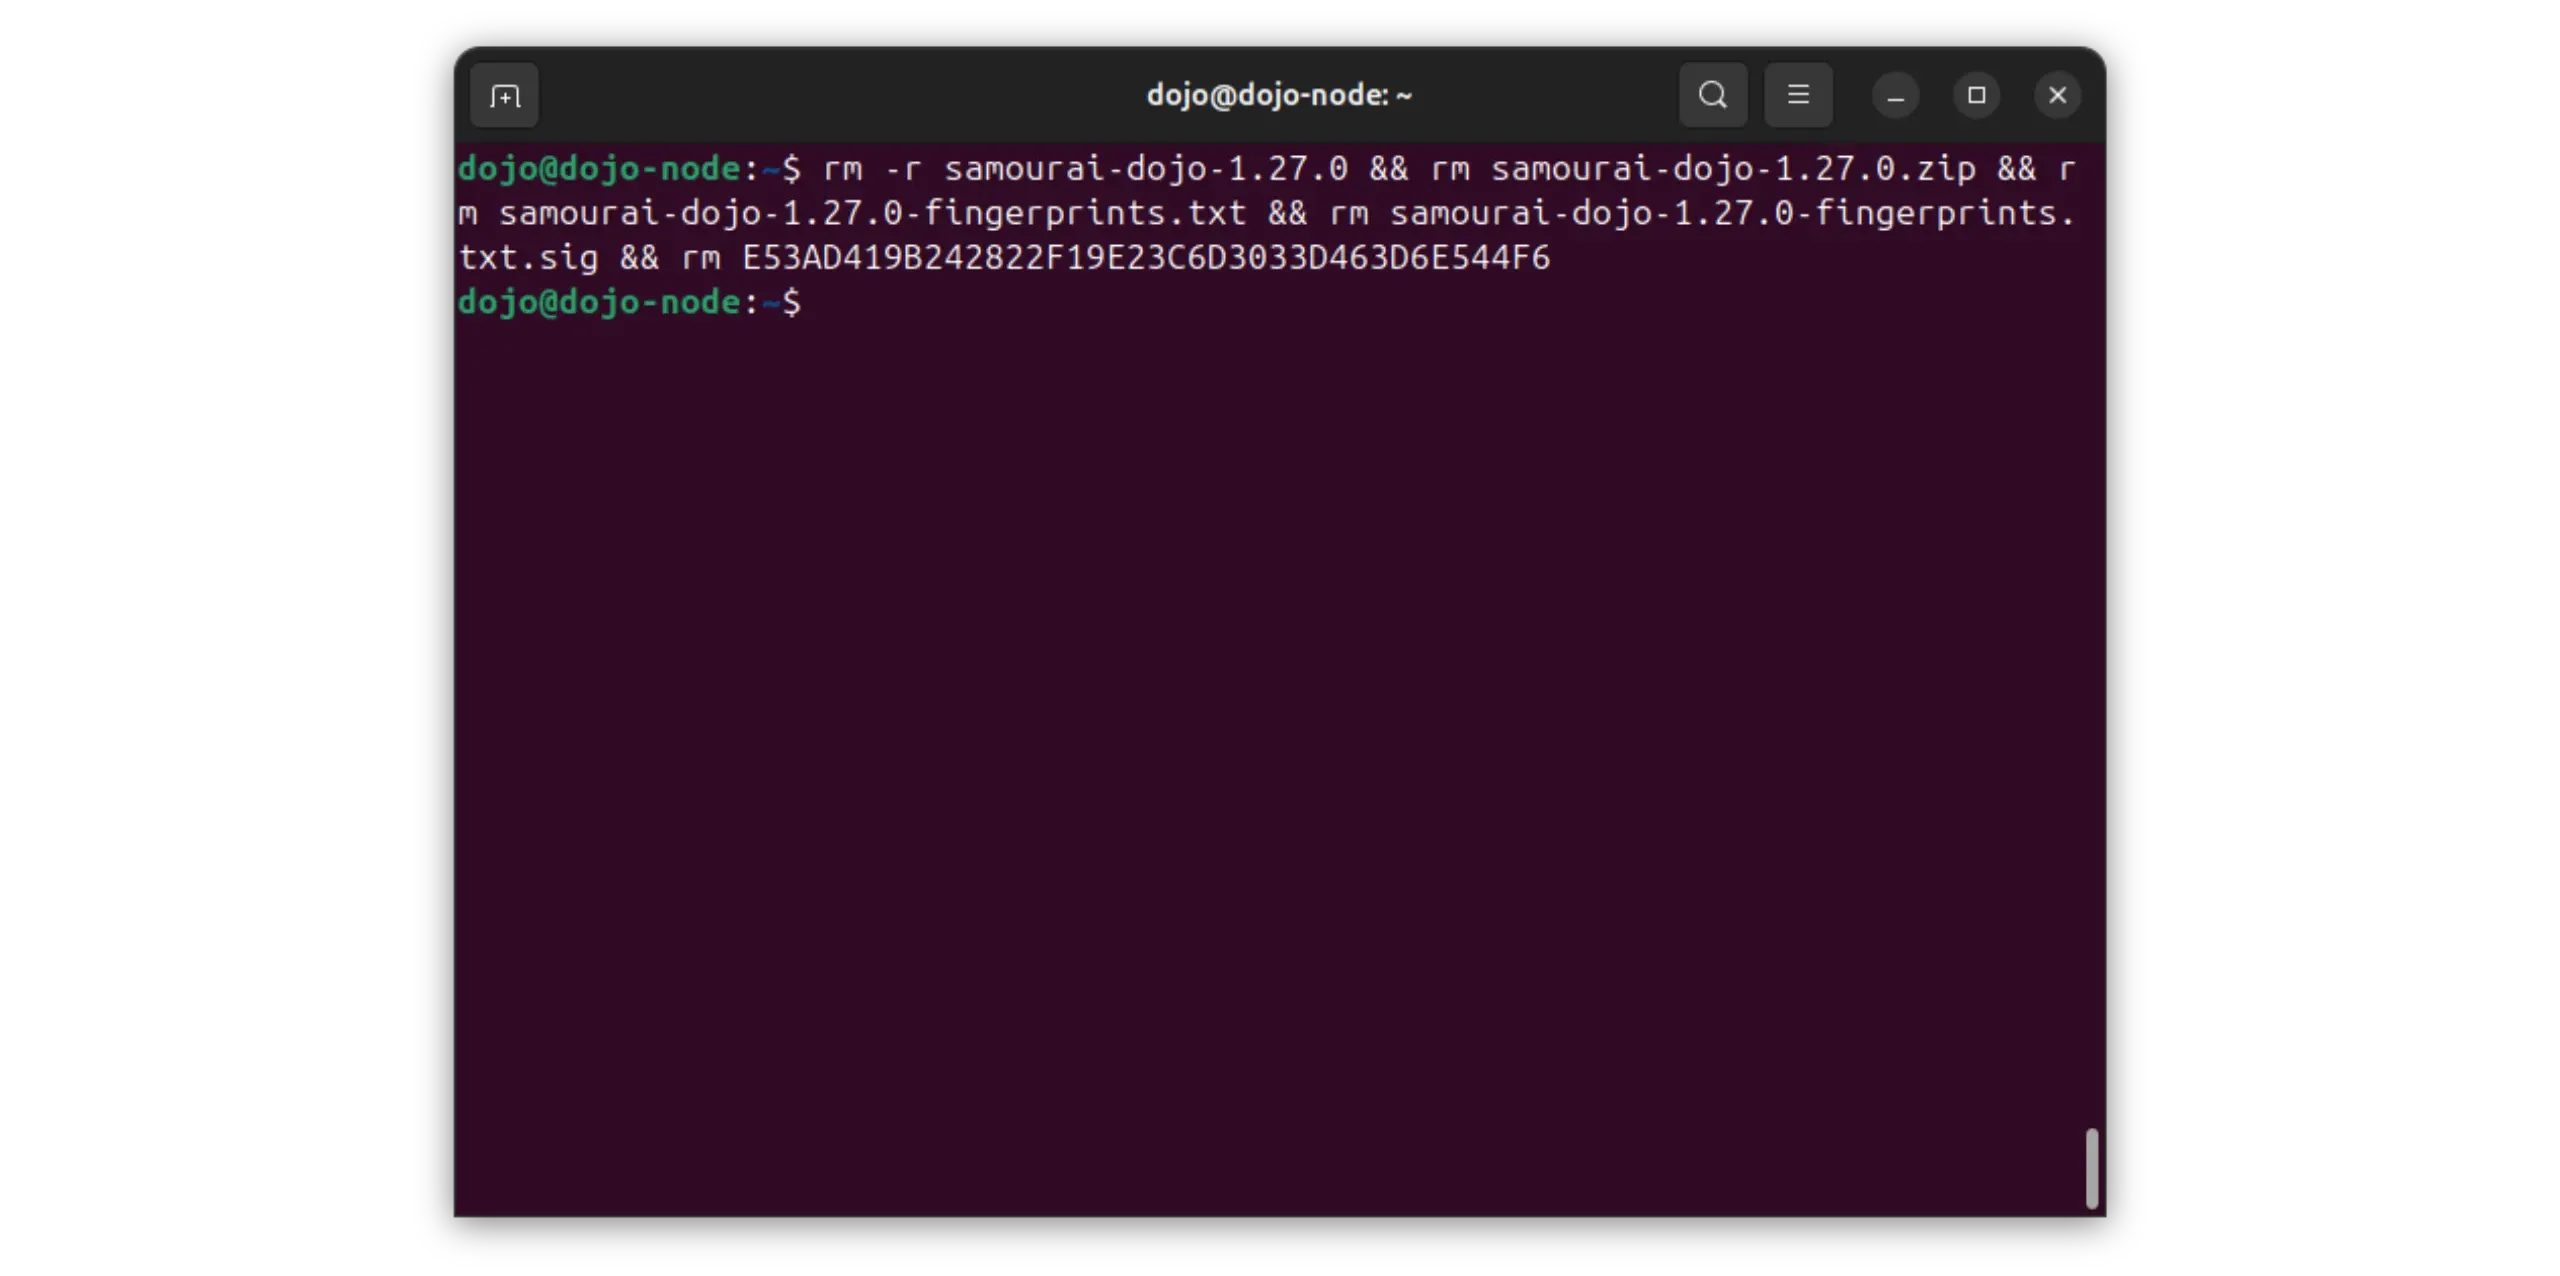
4.7. Clean up unnecessary files
Delete temporary files and archives no longer required to keep your environment clean.
1
rm -r samourai-dojo-1.28.0 && rm samourai-dojo-1.28.0.zip && rm samourai-dojo-1.28.0-fingerprints.txt && rm samourai-dojo-1.28.0-fingerprints.txt.sig && rm E53AD419B242822F19E23C6D3033D463D6E544F6
5. Dojo configuration
Dojo is a backend server that brings together several services to interact with your portfolio and manage your Bitcoin node. Its configuration can be complex, but the project offers a simplified method that automatically installs and configures the following components:
- Dojo (main API)
- Bitcoin core (complete Bitcoin node)
- BTC-RPC Explorer (web block explorer)
- Fulcrum Indexer (rapid indexing of blocks and transactions)
- Fulcrum Electrum Server available on the Tor network
- Fulcrum Electrum Server available on the local network
- Administration credentials
5.1. administration credentials
To secure access to the various services, you need to generate several unique identifiers:
BITCOIND_RPC_USERBITCOIND_RPC_PASSWORDMYSQL_ROOT_PASSWORD- mYSQL_USER
MYSQL_PASSWORD- nODE_API_KEY`
NODE_ADMIN_KEYNODE_JWT_SECRET
These identifiers must be unique (this is very important: you mustn’t use the same password for several services), made up solely of numbers, upper-case letters and lower-case letters (alphanumeric), and be around 40 characters long to guarantee a high level of security. Once again, I strongly recommend the use of a password manager.
Do not reuse credentials across services. Generate long, unique, random secrets (≈40 chars) and store them in a password manager.
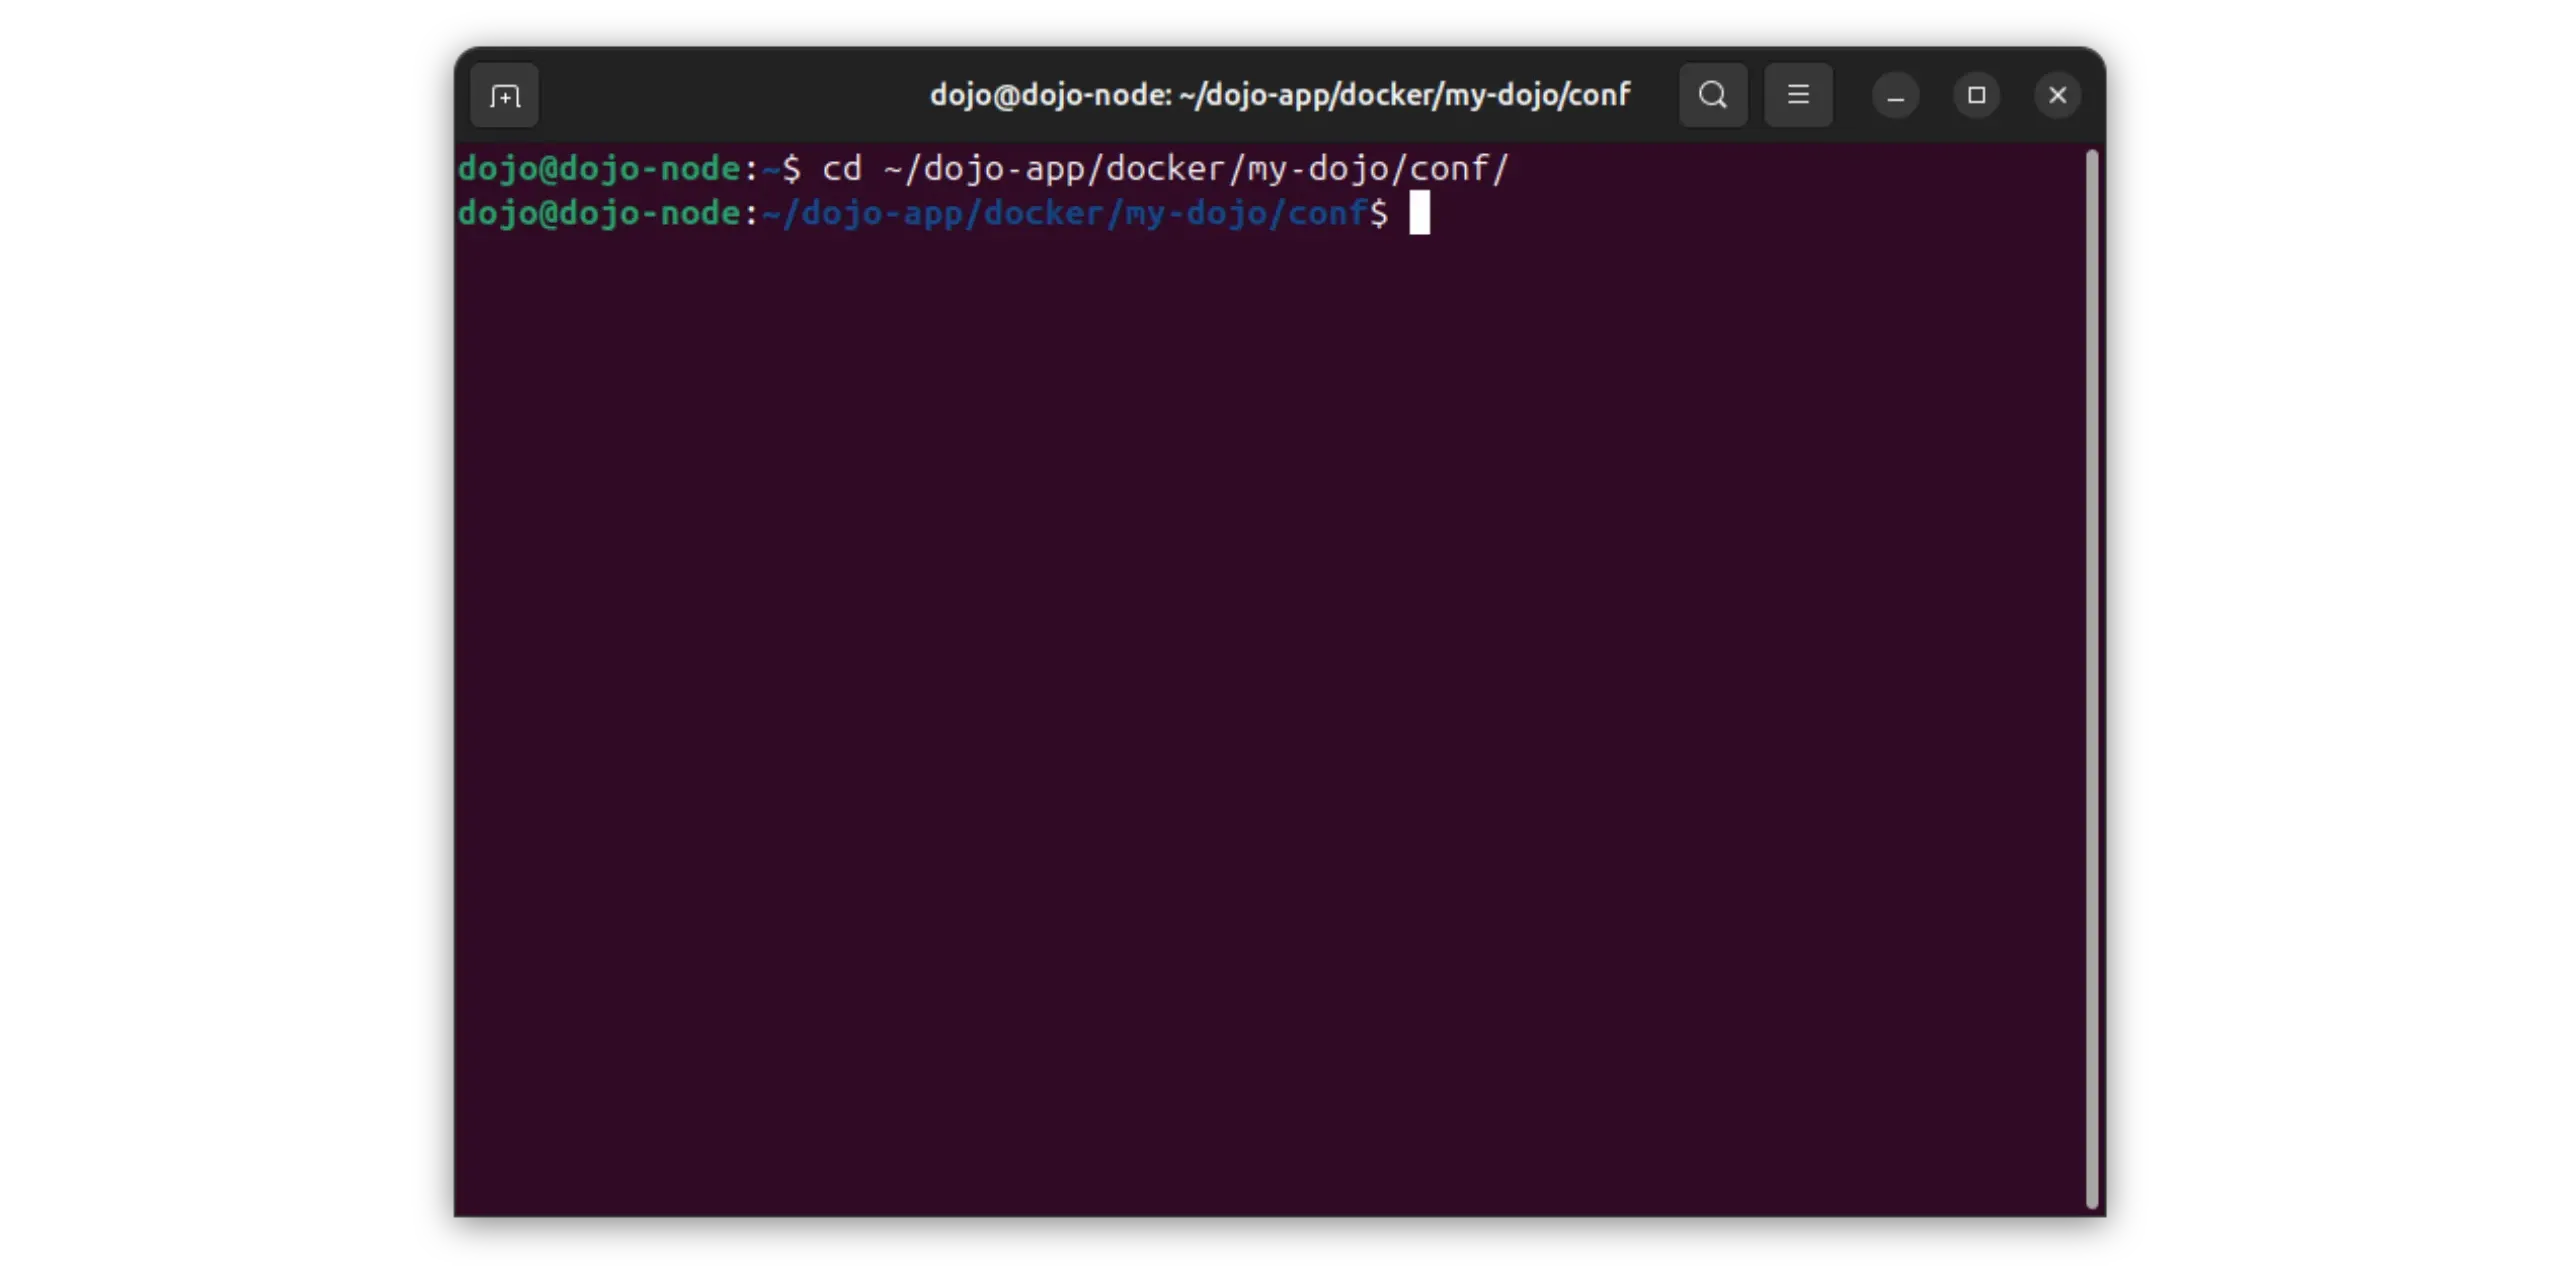
5.2. Access configuration files
Dojo configuration files are located in the conf/ folder. Move to this directory:
1
cd ~/dojo-app/docker/my-dojo/conf/
5.3. Bitcoin core configuration
Open the Bitcoin core configuration file with the nano text editor:
1
nano docker-bitcoind.conf.tpl
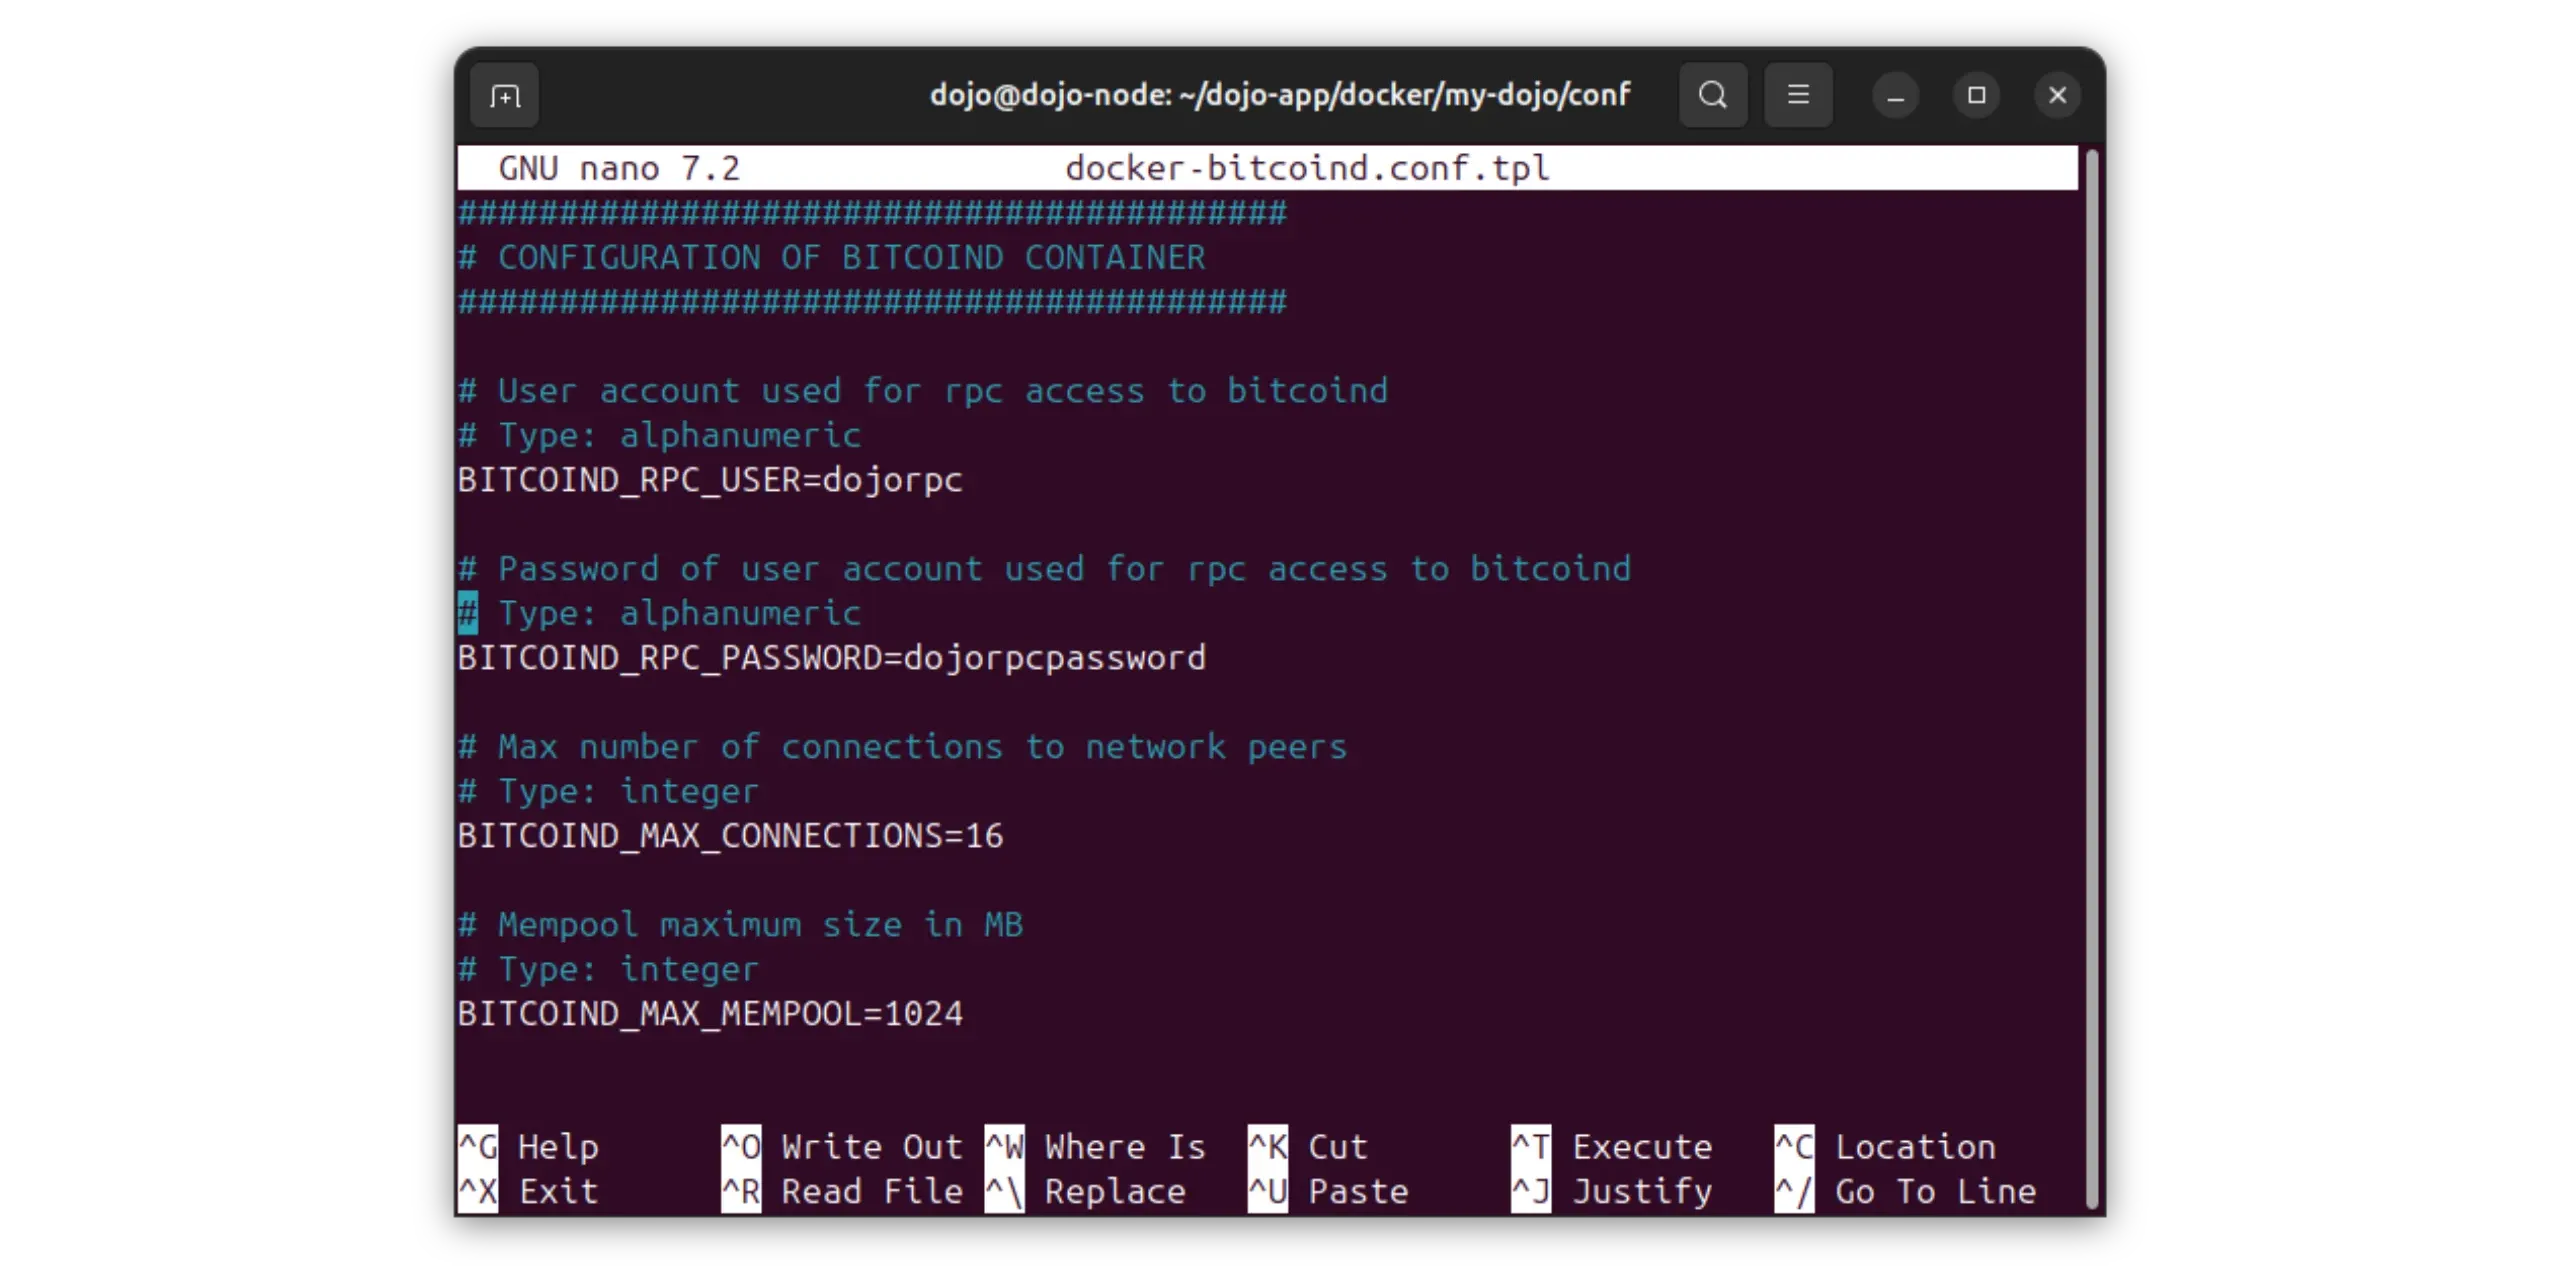
In this file, enter the generated identifiers:
1
2
BITCOIND_RPC_USER=your-ID-here
BITCOIND_RPC_PASSWORD=your-password-here
⚠️ Replace your-ID-here and your-password-here with your own logins (with a strong password).
You can also adjust the size of the cache memory used by Bitcoin core to improve performance (you can even use more if you have a lot of RAM available):
1
BITCOIND_DB_CACHE=2048
To save your changes and close the editor :
- press `Ctrl + X
- type
y - then press “Enter”
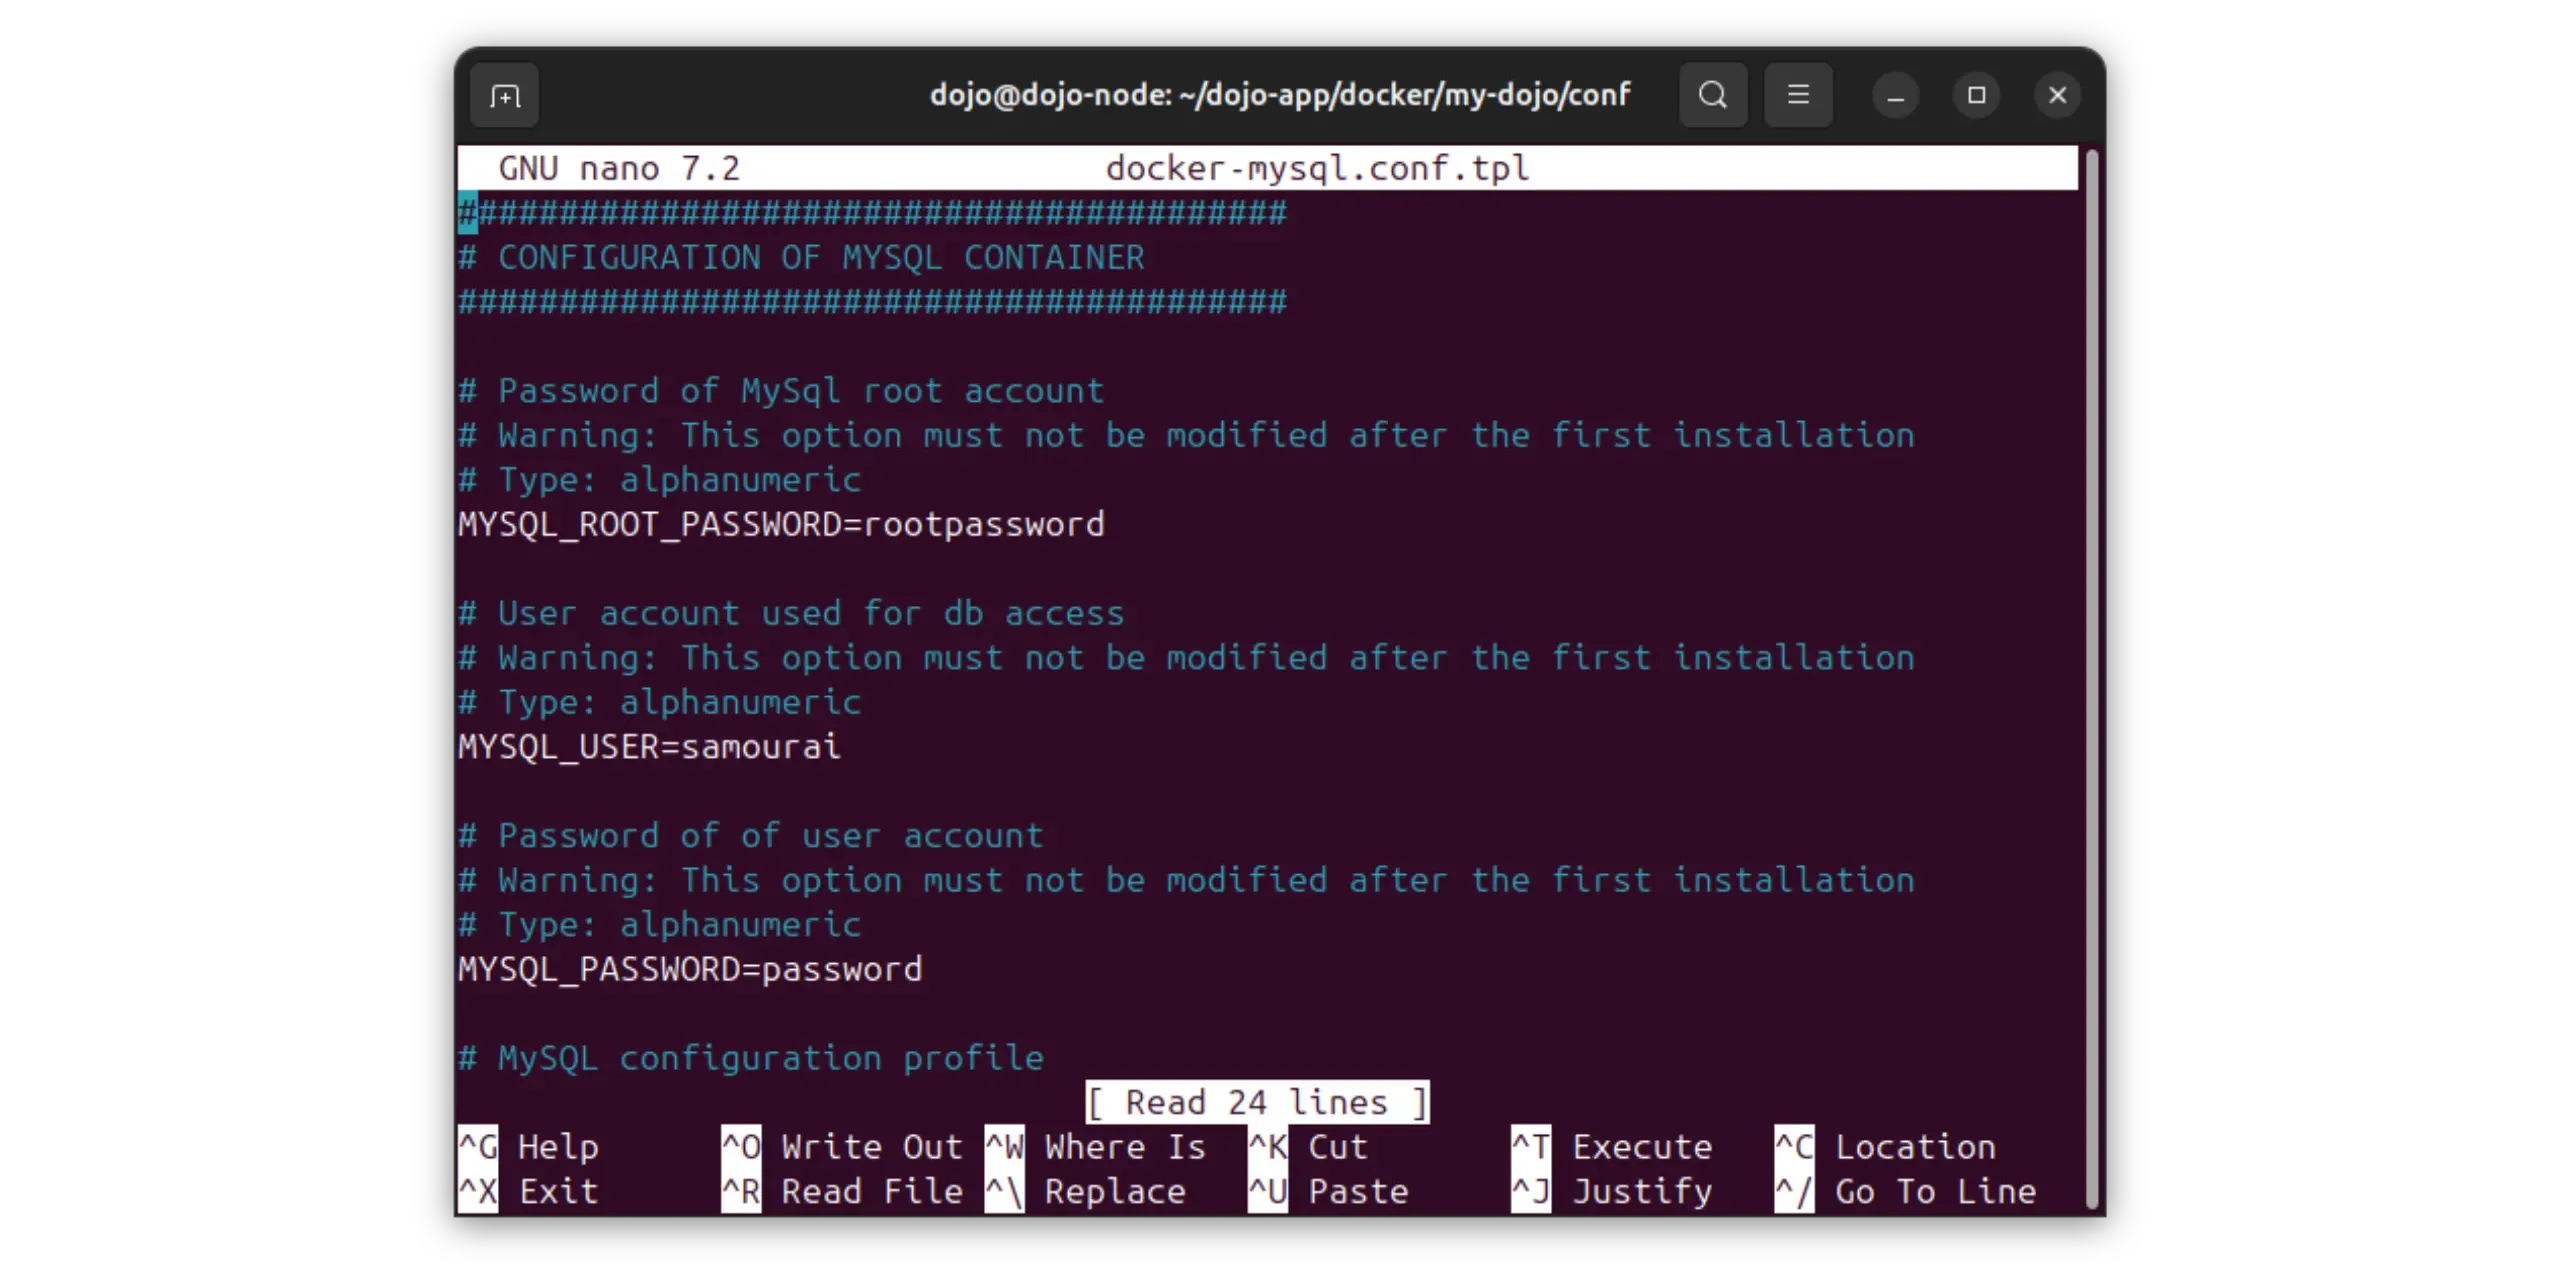
5.4. MySQL configuration
Then open the MySQL database configuration:
1
nano docker-mysql.conf.tpl
Please enter your login details:
1
2
3
MYSQL_ROOT_PASSWORD=your-password-here
MYSQL_USER=your-ID-here
MYSQL_PASSWORD=your-password-here
⚠️ Replace your-ID-here and your-password-here with your own logins (with strong, unique passwords).
Save in the same way (Ctrl + X, y, “Enter”).
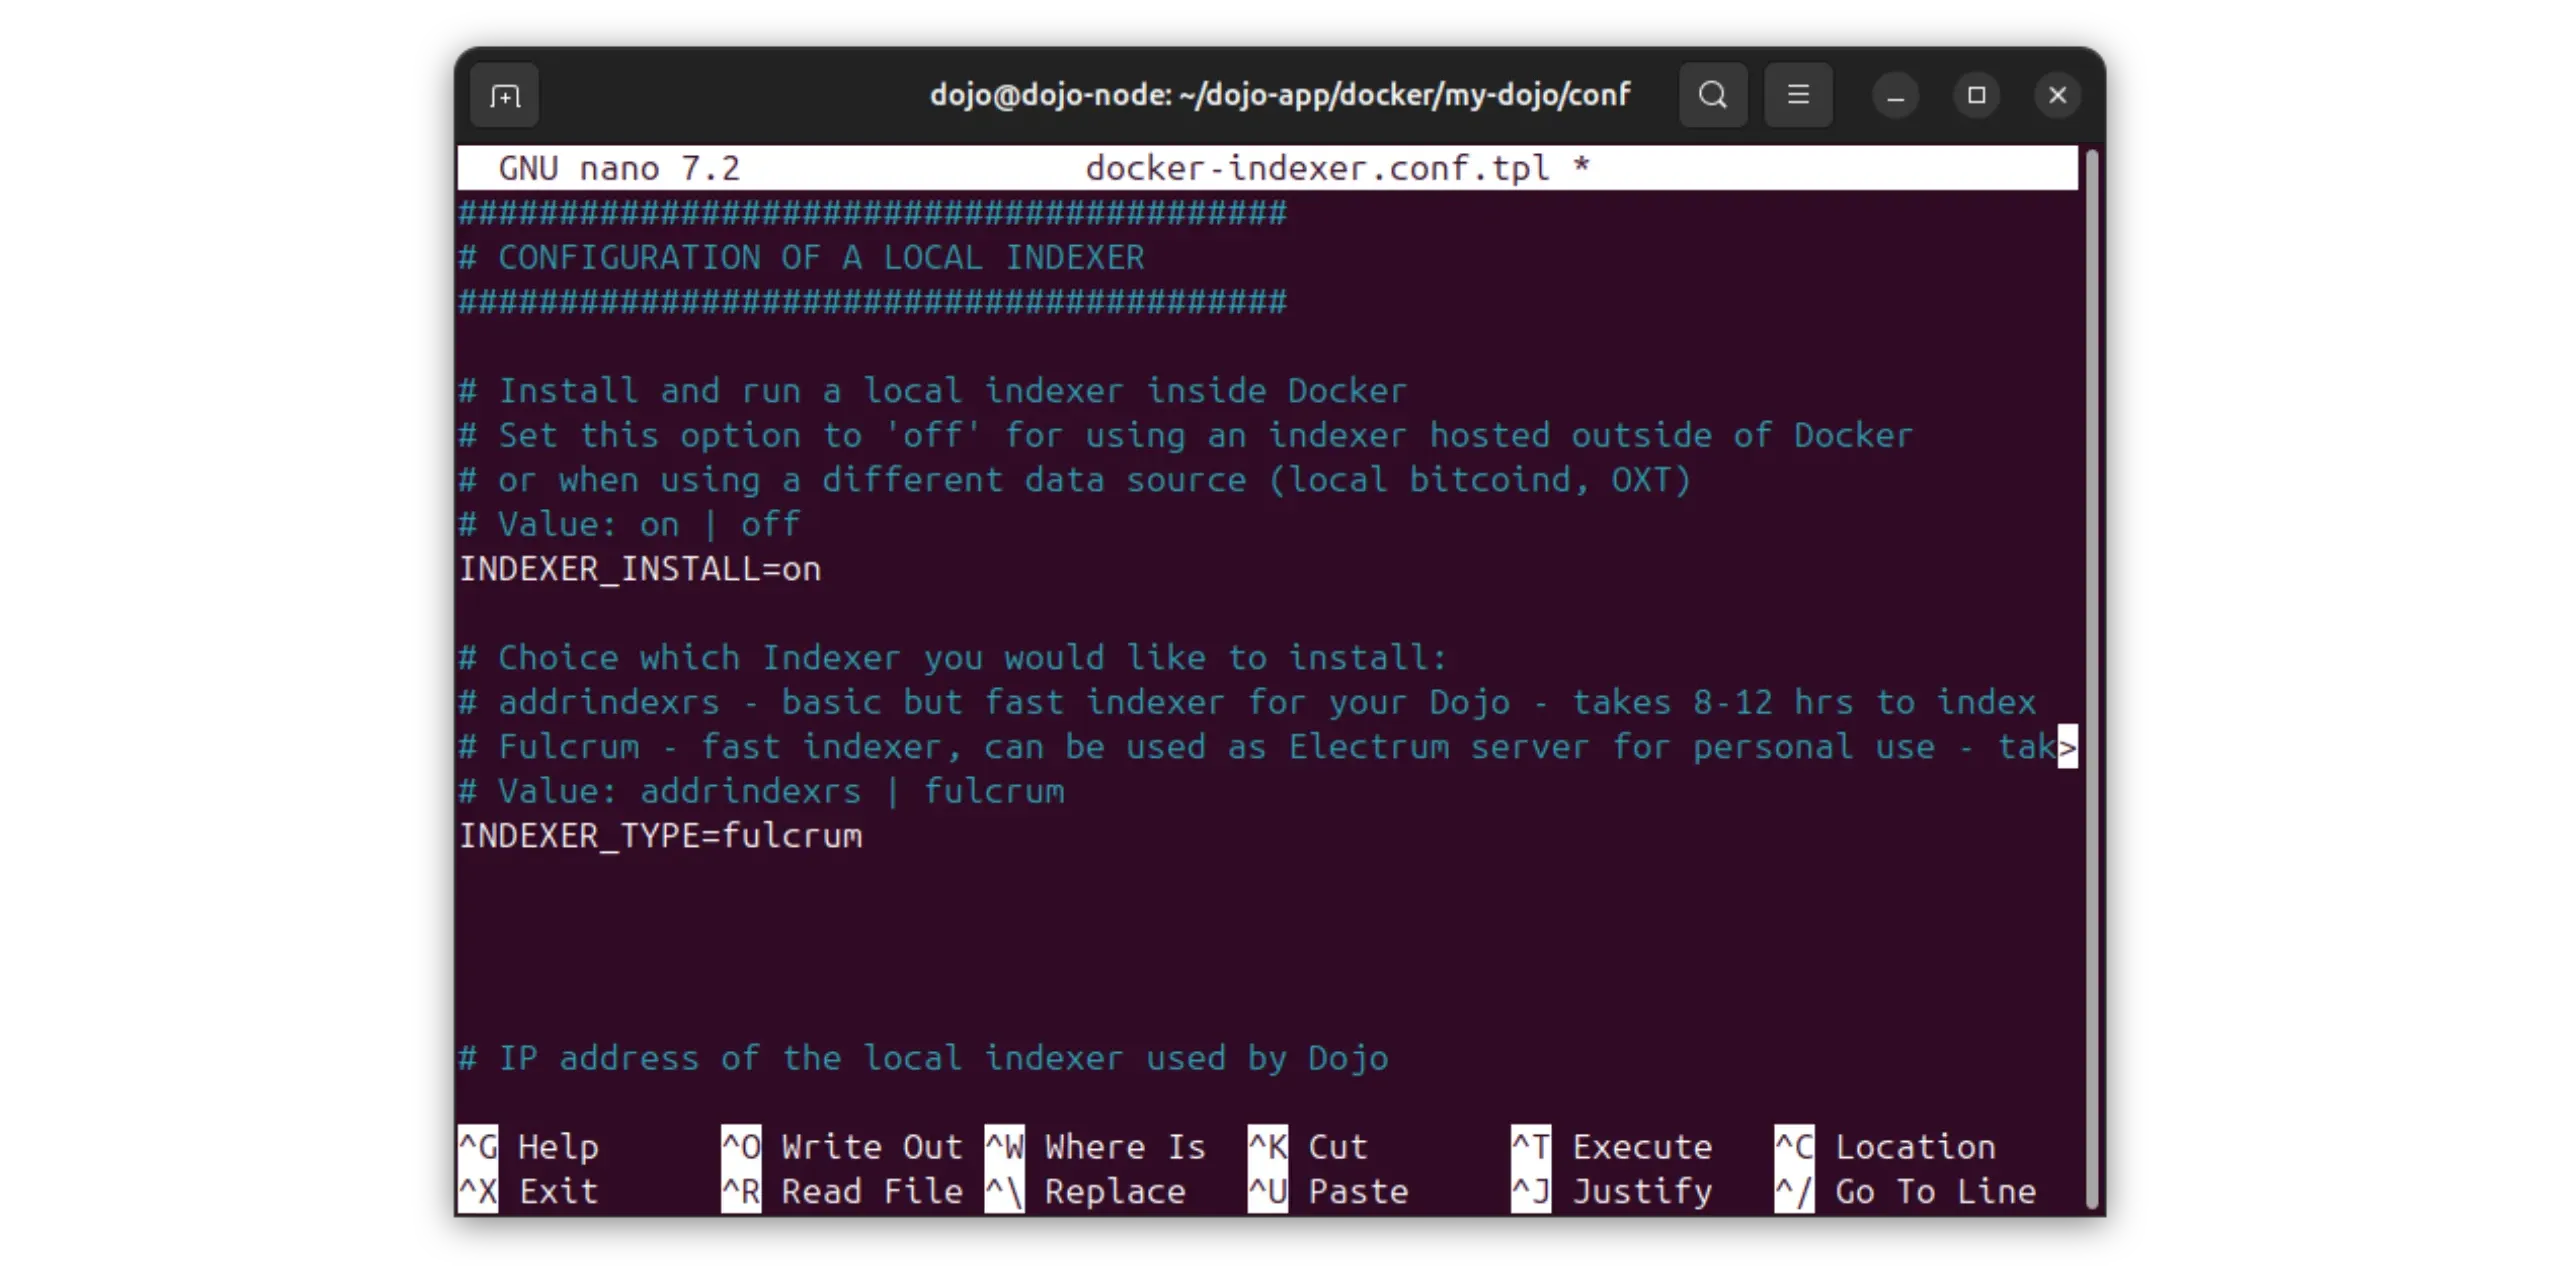
5.5. Fulcrum indexer configuration
Open the following file:
1
nano docker-indexer.conf.tpl
Add the parameters to activate Fulcrum and integrate it correctly into Dojo :
1
2
3
4
INDEXER_INSTALL=on
INDEXER_TYPE=fulcrum
INDEXER_BATCH_SUPPORT=active
INDEXER_EXTERNAL=on
Next, there are 2 possibilities, depending on your configuration. If Dojo is installed on a machine separate from your everyday computer (on a dedicated machine, a server…), enter its IP address in your local network, for example :
1
INDEXER_EXTERNAL_IP=192.168.1.157
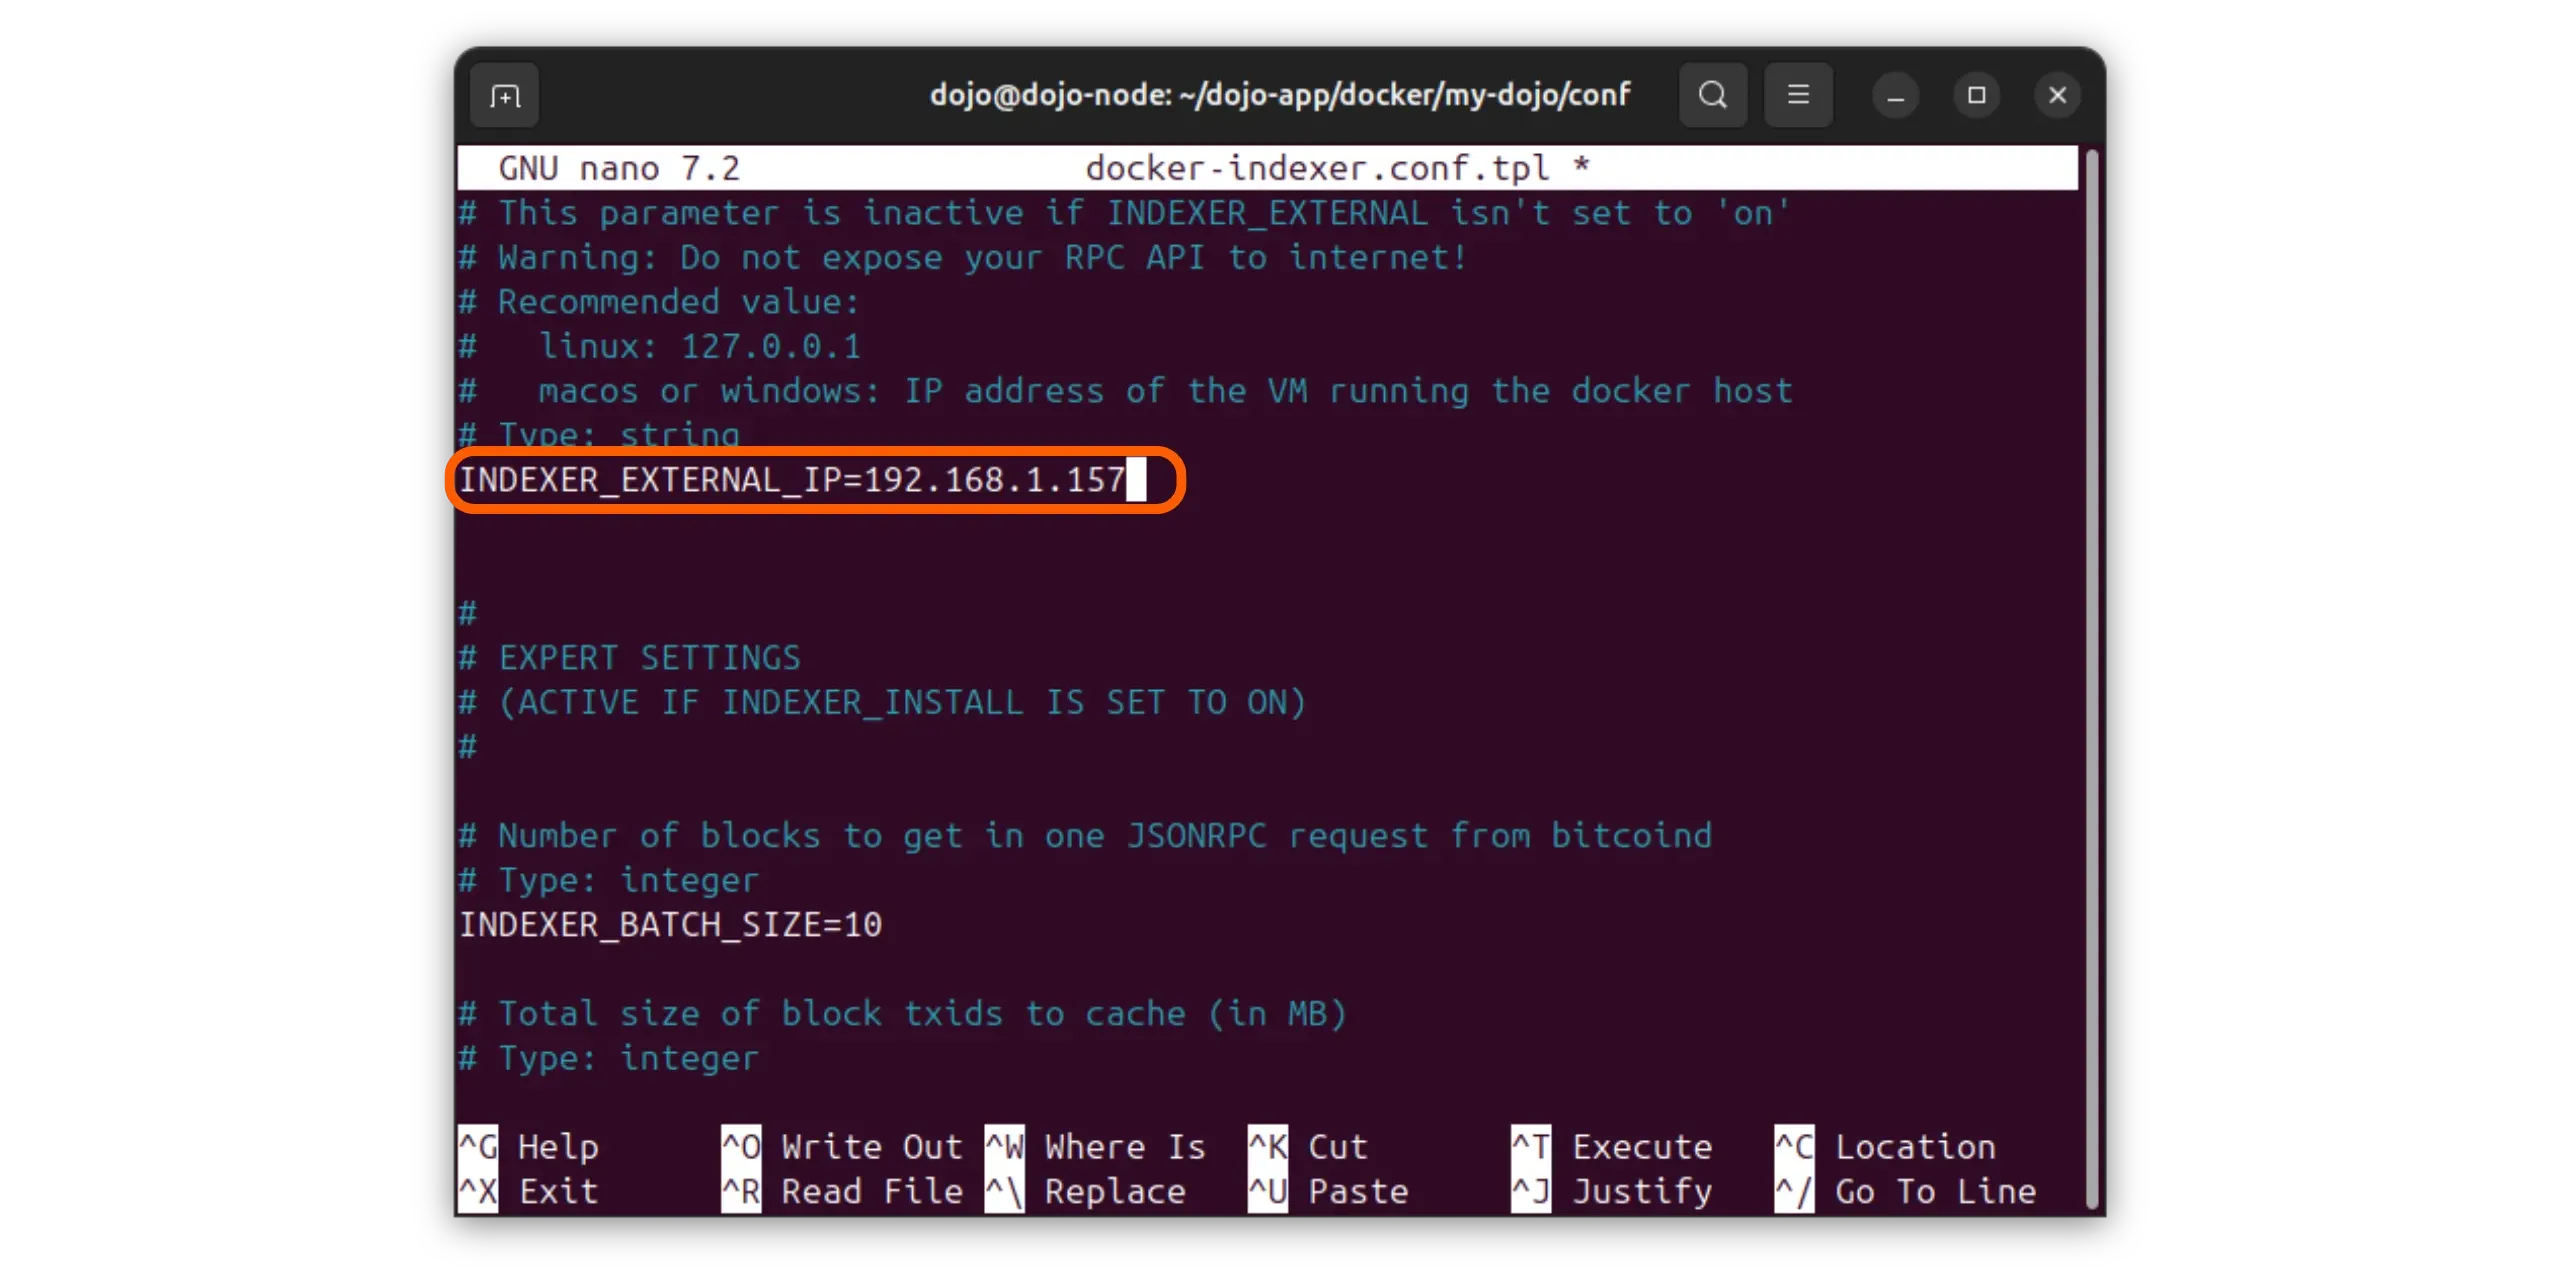
To find out the local IP address of your machine, open another terminal and enter the following command:
1
hostname -I
Second possibility: if Dojo is run directly on your everyday personal computer, keep the default value already present in the configuration file :
1
INDEXER_EXTERNAL_IP=127.0.0.1
Save and exit the editor (Ctrl + X, y, “Enter”).
Bind Fulcrum only to your LAN or localhost. Do not expose indexer ports to the public internet; restrict access via firewall/Tor.
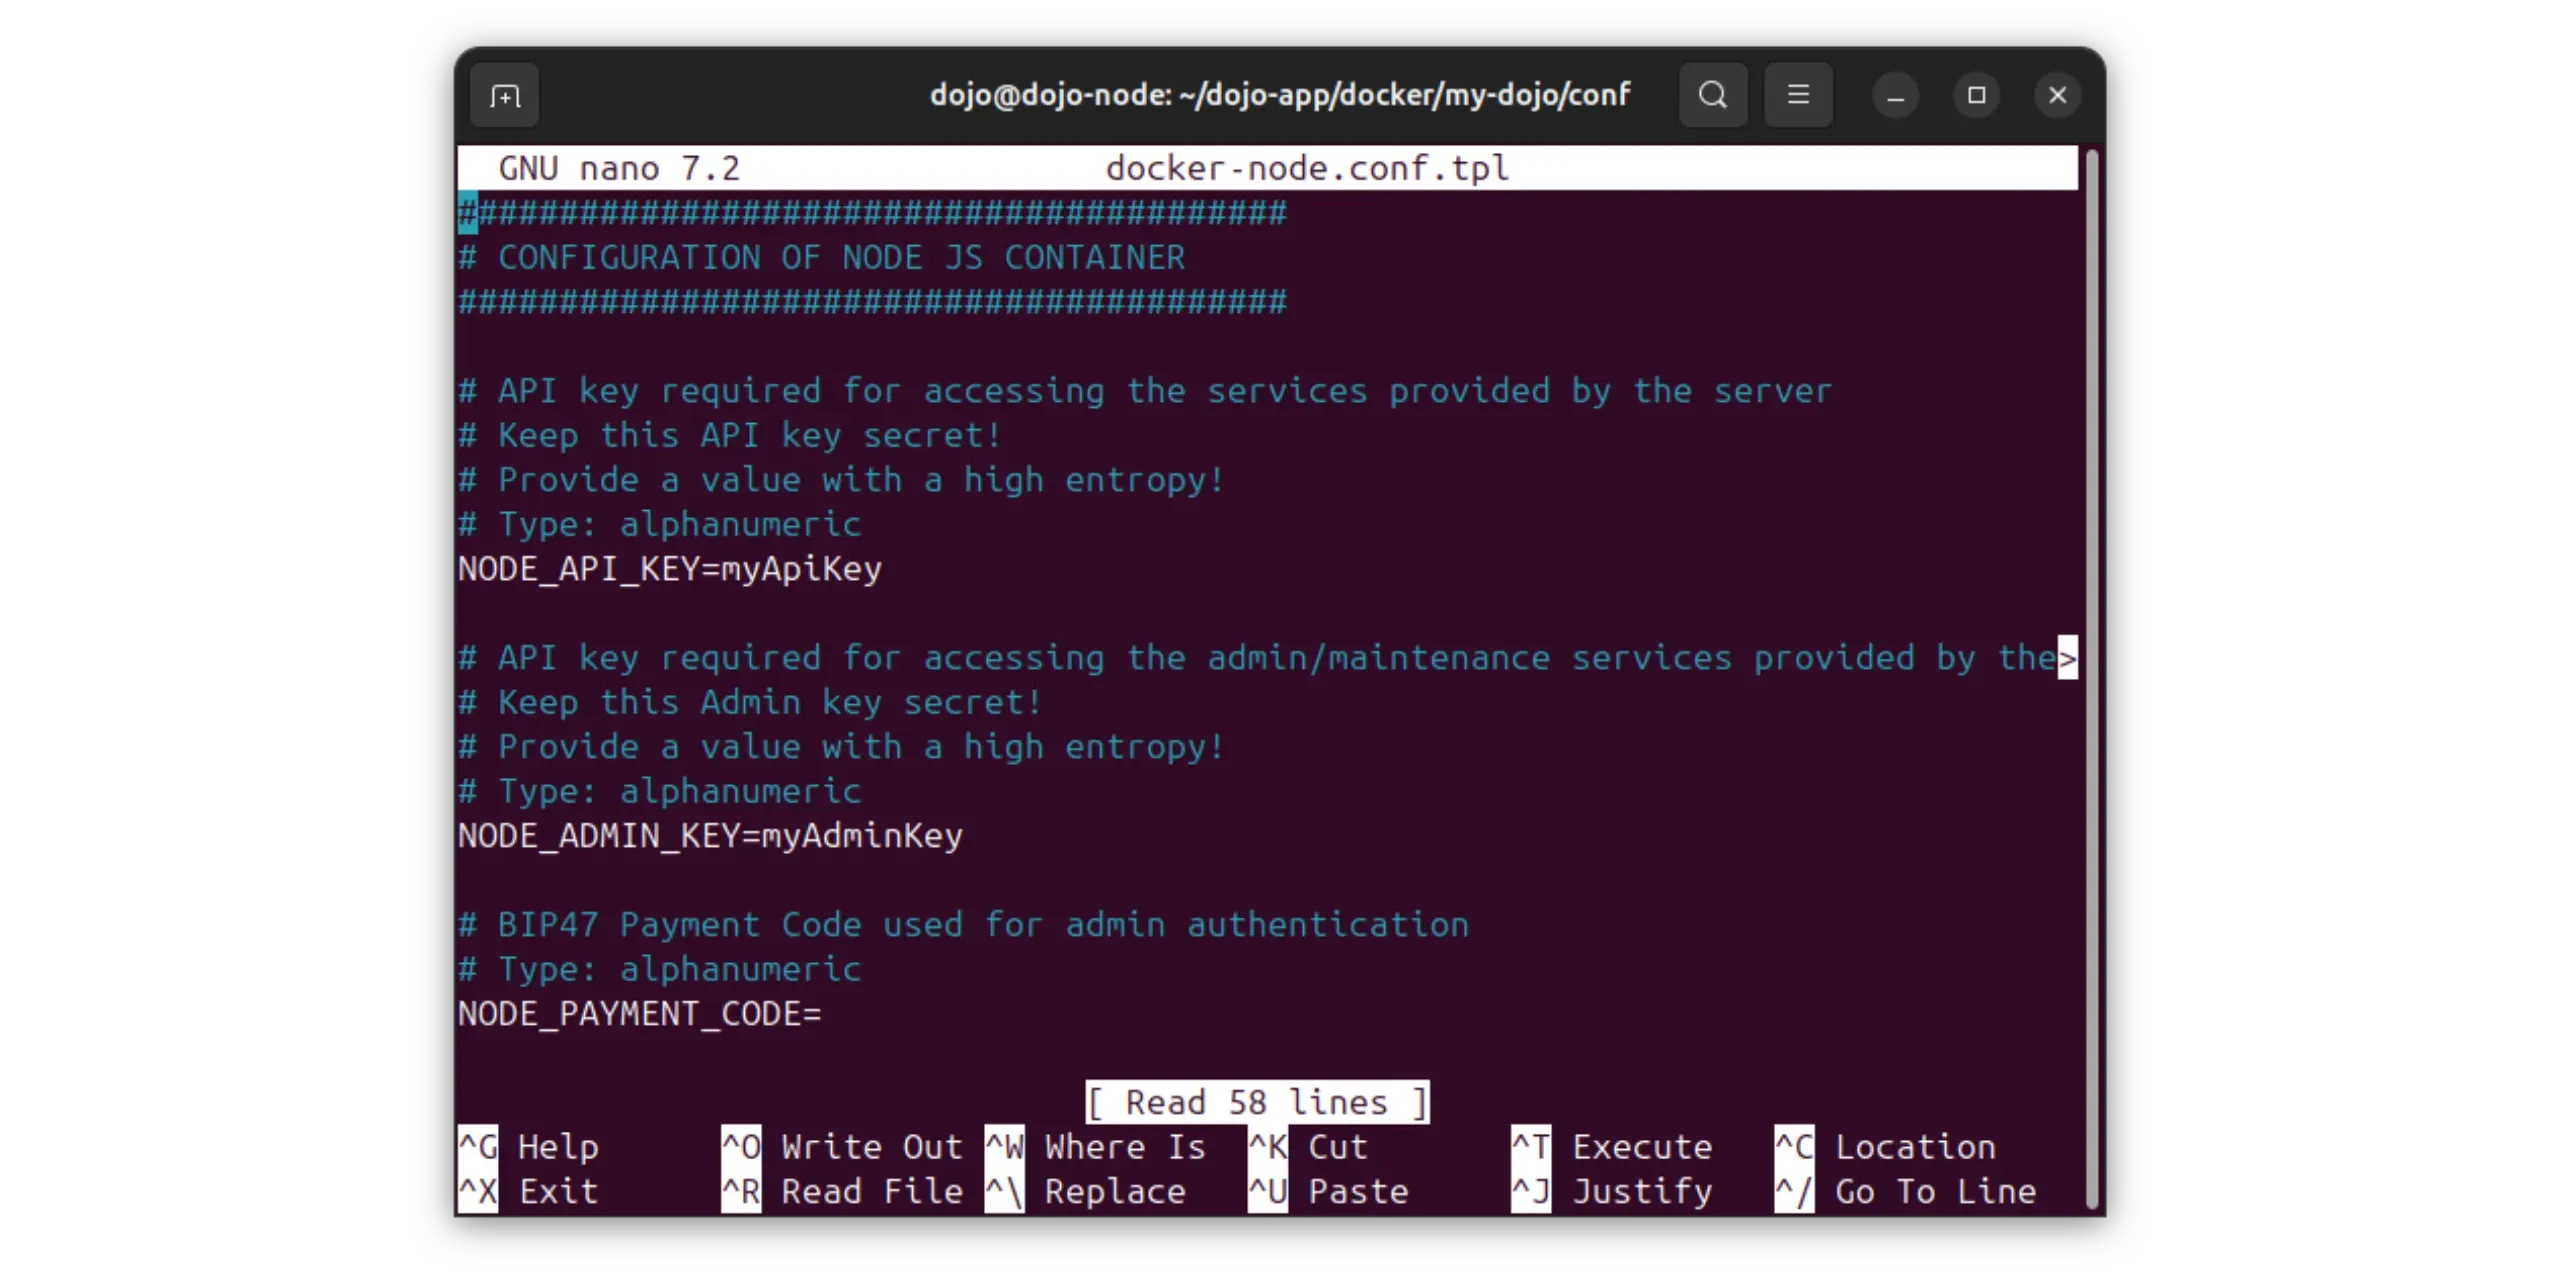
5.6. Node service configuration
Finally, open the configuration of the main Dojo service:
1
nano docker-node.conf.tpl
Please enter your login details:
1
2
3
NODE_API_KEY=your-password-here
NODE_ADMIN_KEY=your-password-here
NODE_JWT_SECRET=your-password-here
⚠️ Replace your-password-here with your own credentials (with strong, unique passwords).
Then activate the local indexer:
1
NODE_ACTIVE_INDEXER=local_indexer
Save and exit the editor (Ctrl + X, y, “Enter”).
5.7. Login management
Once configuration is complete, it is not necessary to save all the identifiers generated. The only one that absolutely must be saved is :
1
NODE_ADMIN_KEY
This login will enable you to log in later to the Dojo maintenance tool. All other logins can be removed from your password manager or handwritten notes. They remain accessible from the Dojo configuration files should you need to retrieve them in the future.
Store NODE_ADMIN_KEY securely (offline if possible). Anyone with this key can access the Dojo Maintenance Tool.
6. Dojo installation
At this stage, Dojo will be installed and started on your machine. The operation will launch several services (Bitcoin core, the Fulcrum indexer, the Dojo backend, etc.) and initiate full synchronization of the Blockchain Bitcoin. This may take several days, depending on your hardware and Internet connection.
6.1. Check that Docker is working properly
Before starting the installation, make sure that Docker is operational. Run the following command:
1
docker run hello-world
This command downloads and launches a small test container. If everything works correctly, you should see a message similar to :
1
2
Hello from Docker!
This message shows that your installation appears to be working correctly...

If this message is not displayed, start by rebooting your machine with :
1
sudo reboot
Then log back into your dojo account and run the test command again. If the error persists, Docker has not been installed correctly. In this case, go back to step 2.4. on installing Docker and check each command carefully.
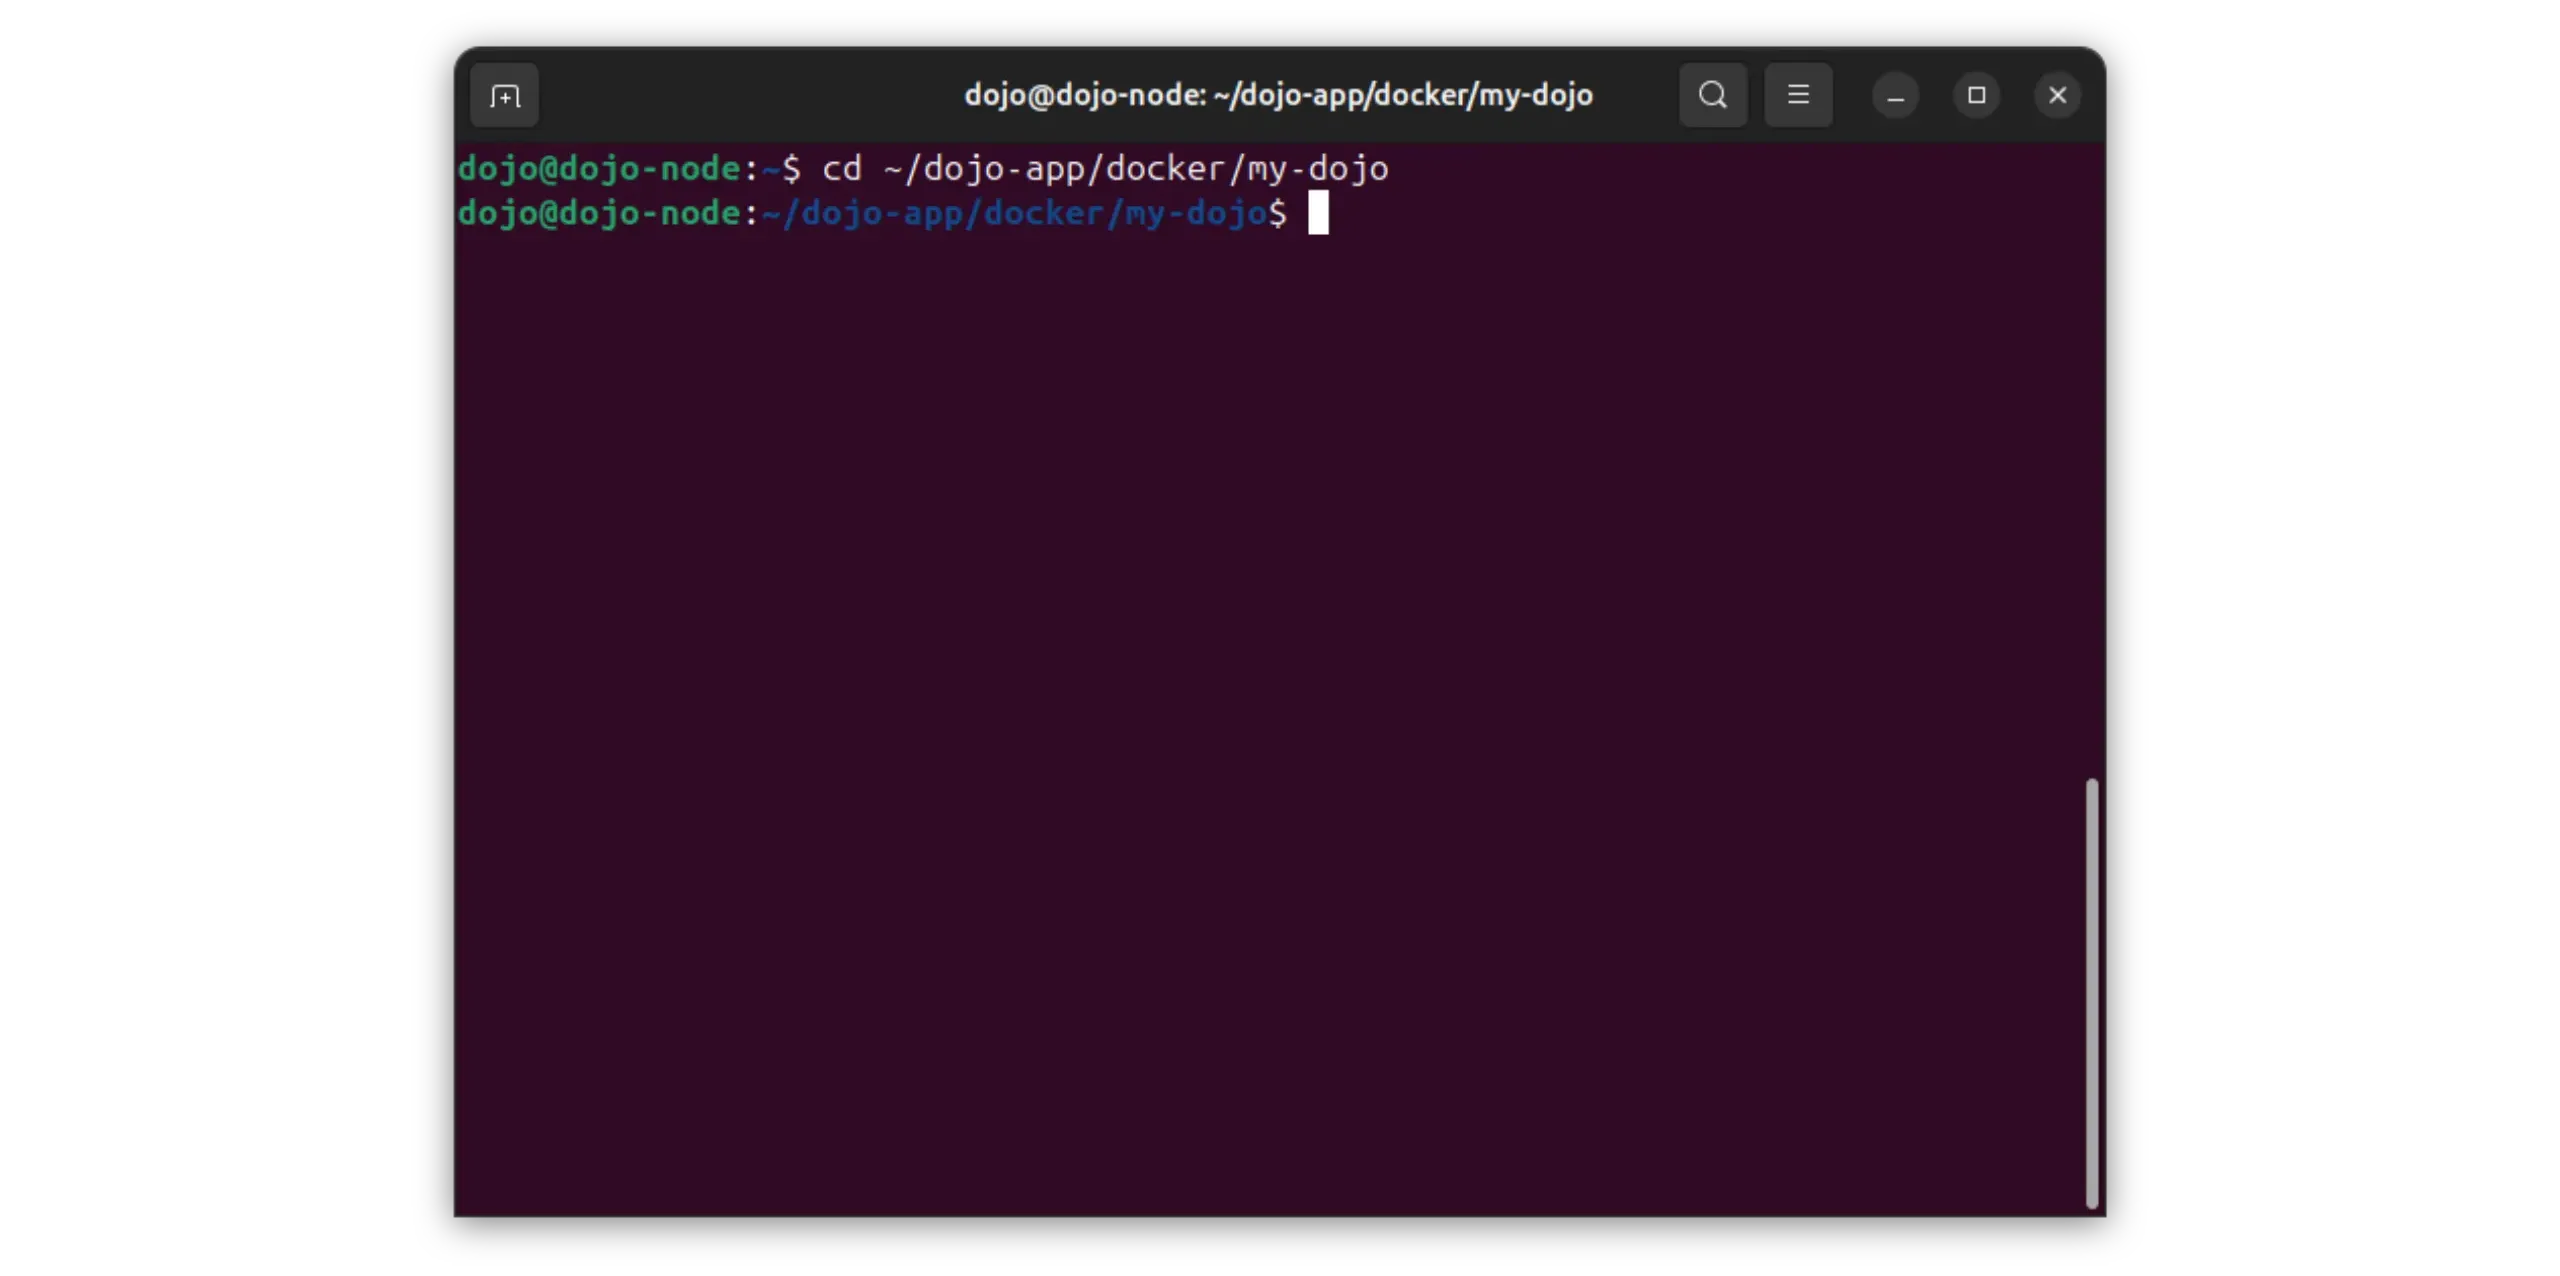
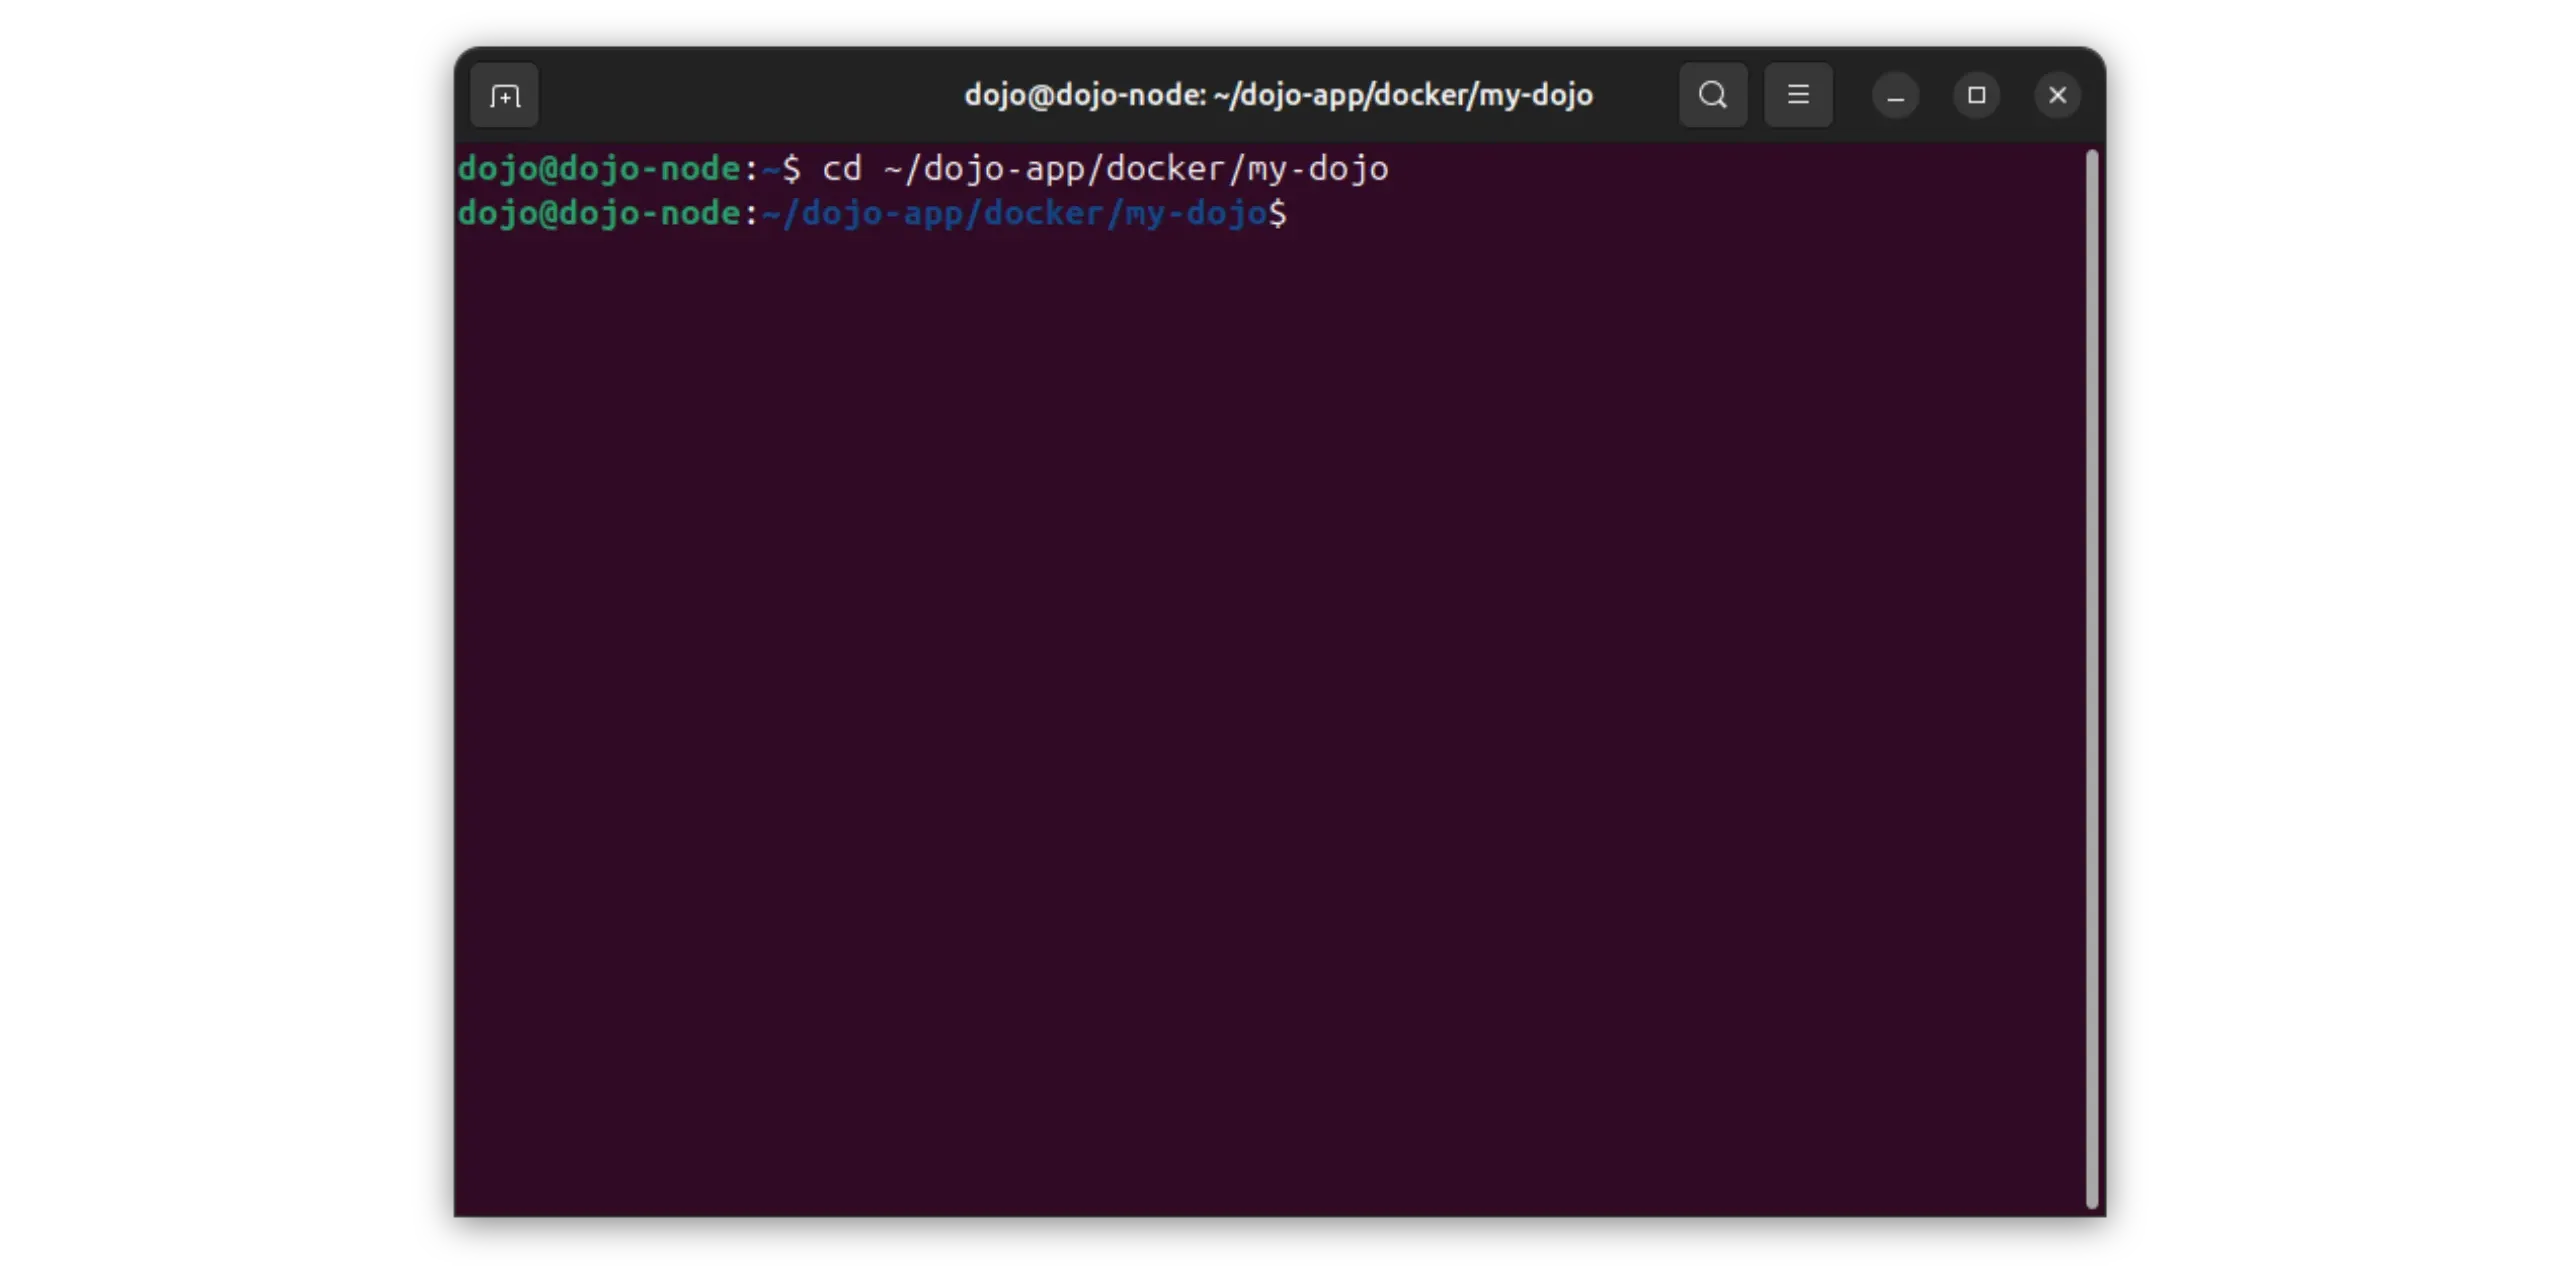
6.2. Go to Dojo installation directory
The scripts required for installation are located in the my-dojo folder. Move to this directory:
1
cd ~/dojo-app/docker/my-dojo
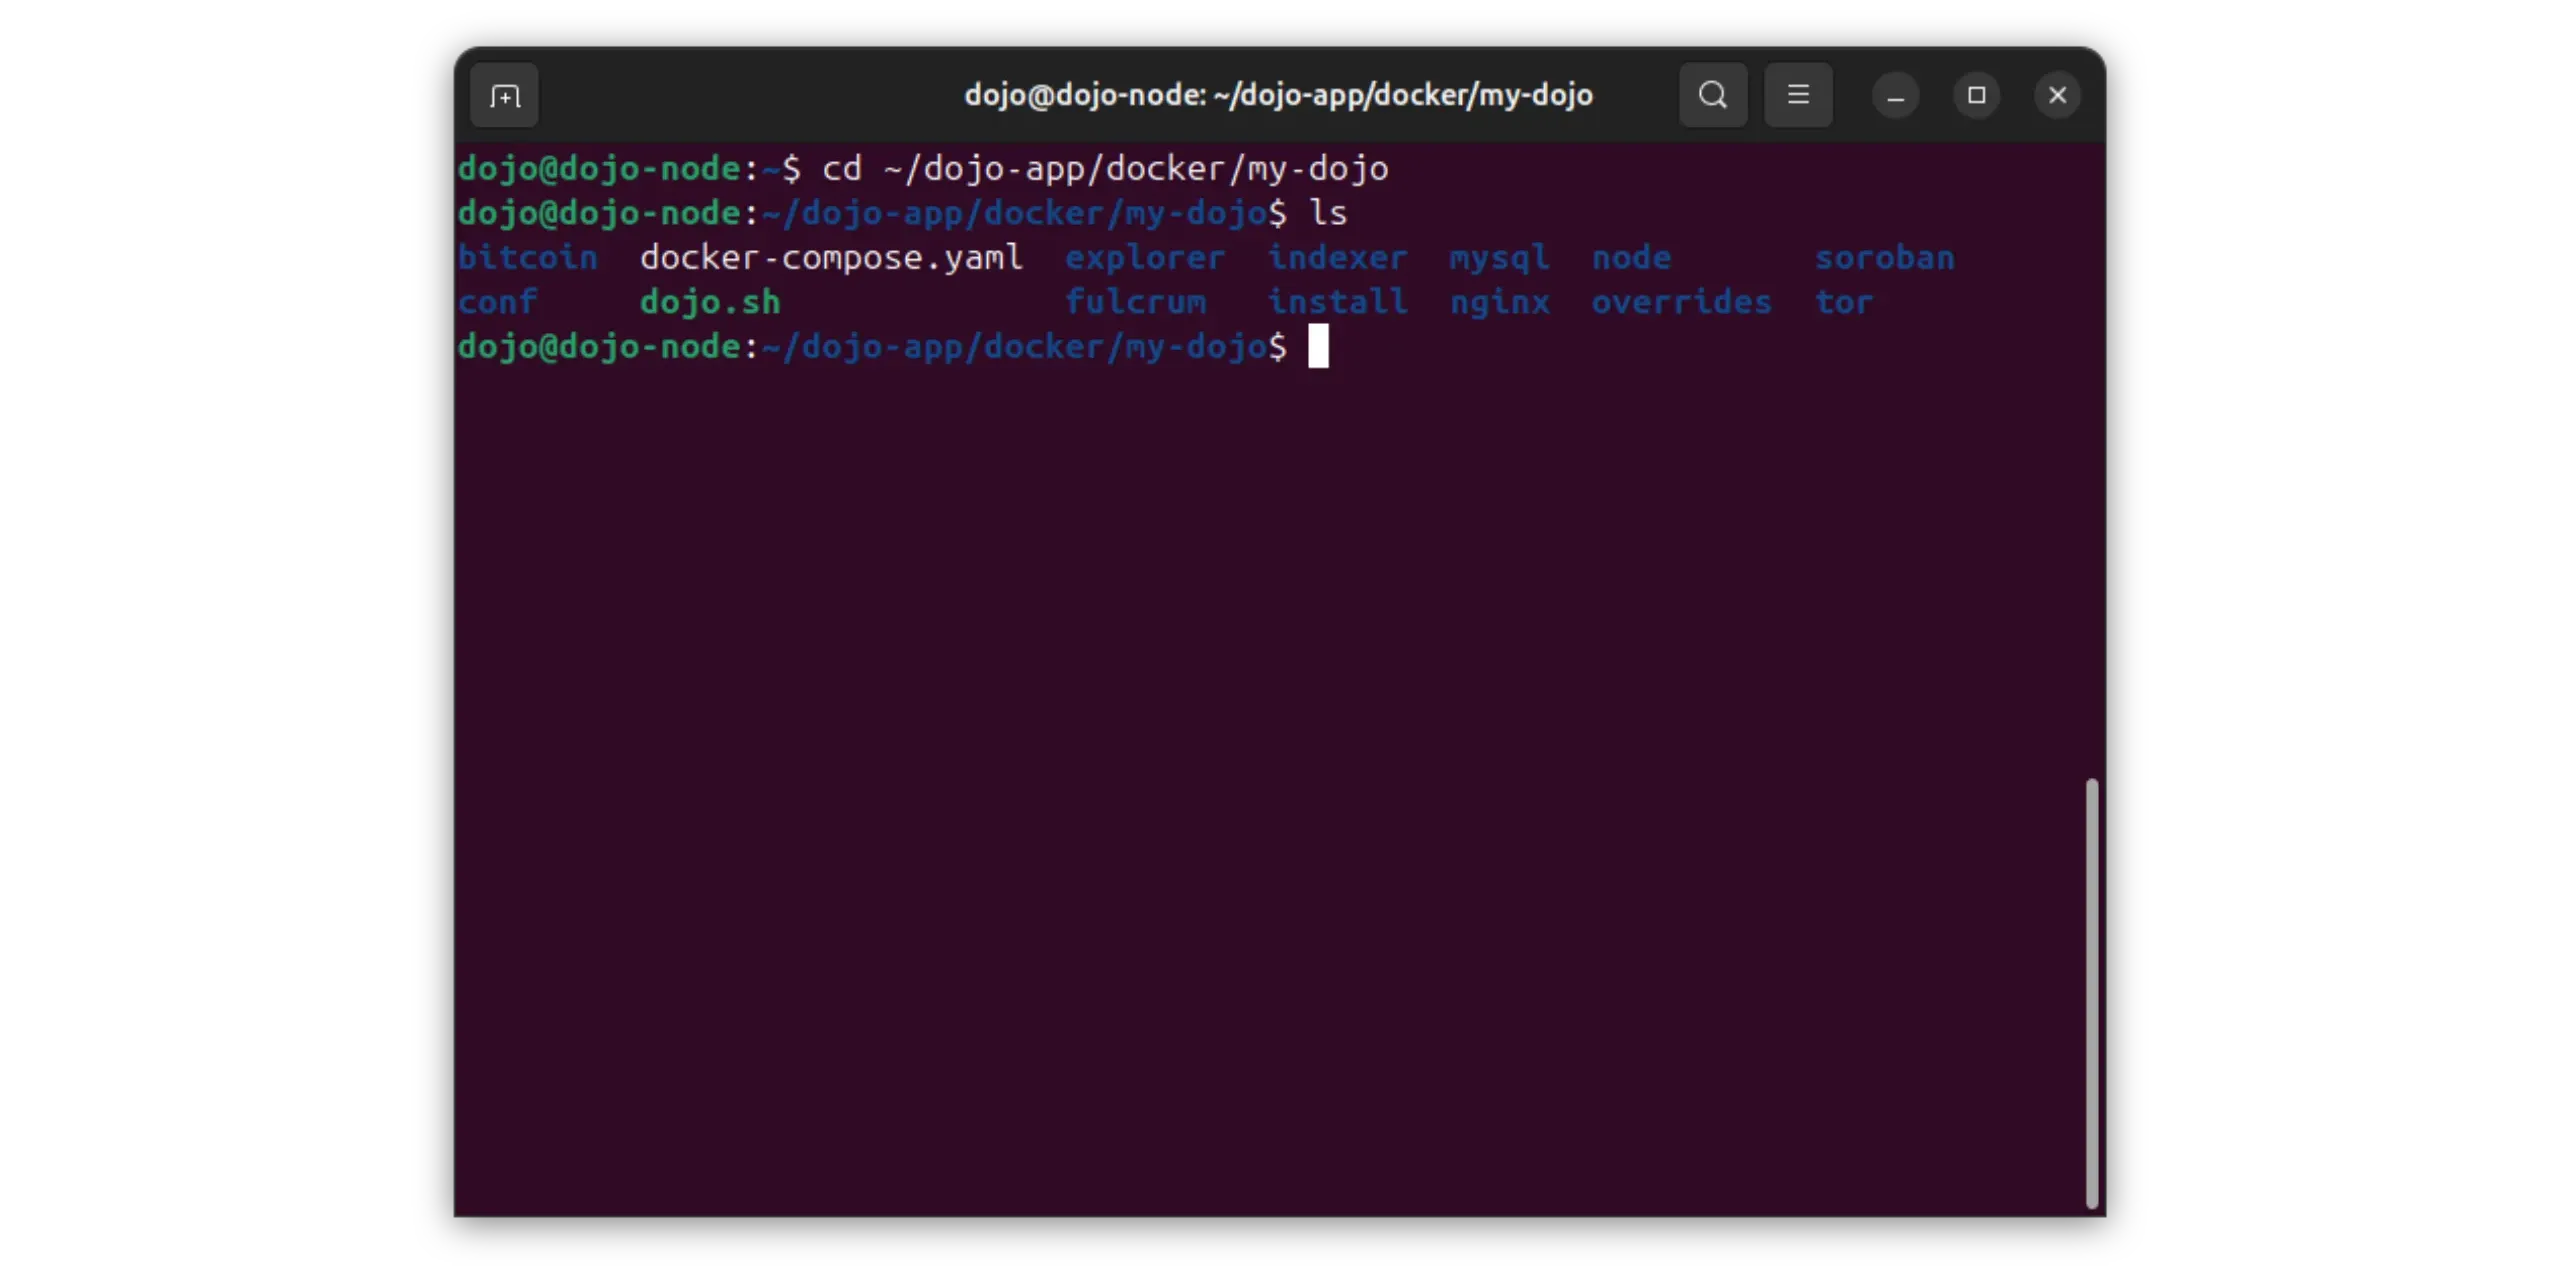
Use the ls command to check that the dojo.sh file is present. This is the main script that automates the installation of Dojo and the launch of all its services.
6.3. Start installation
Start the installation by running the :
1
./dojo.sh install
Confirm the installation by pressing y and then “Enter”.
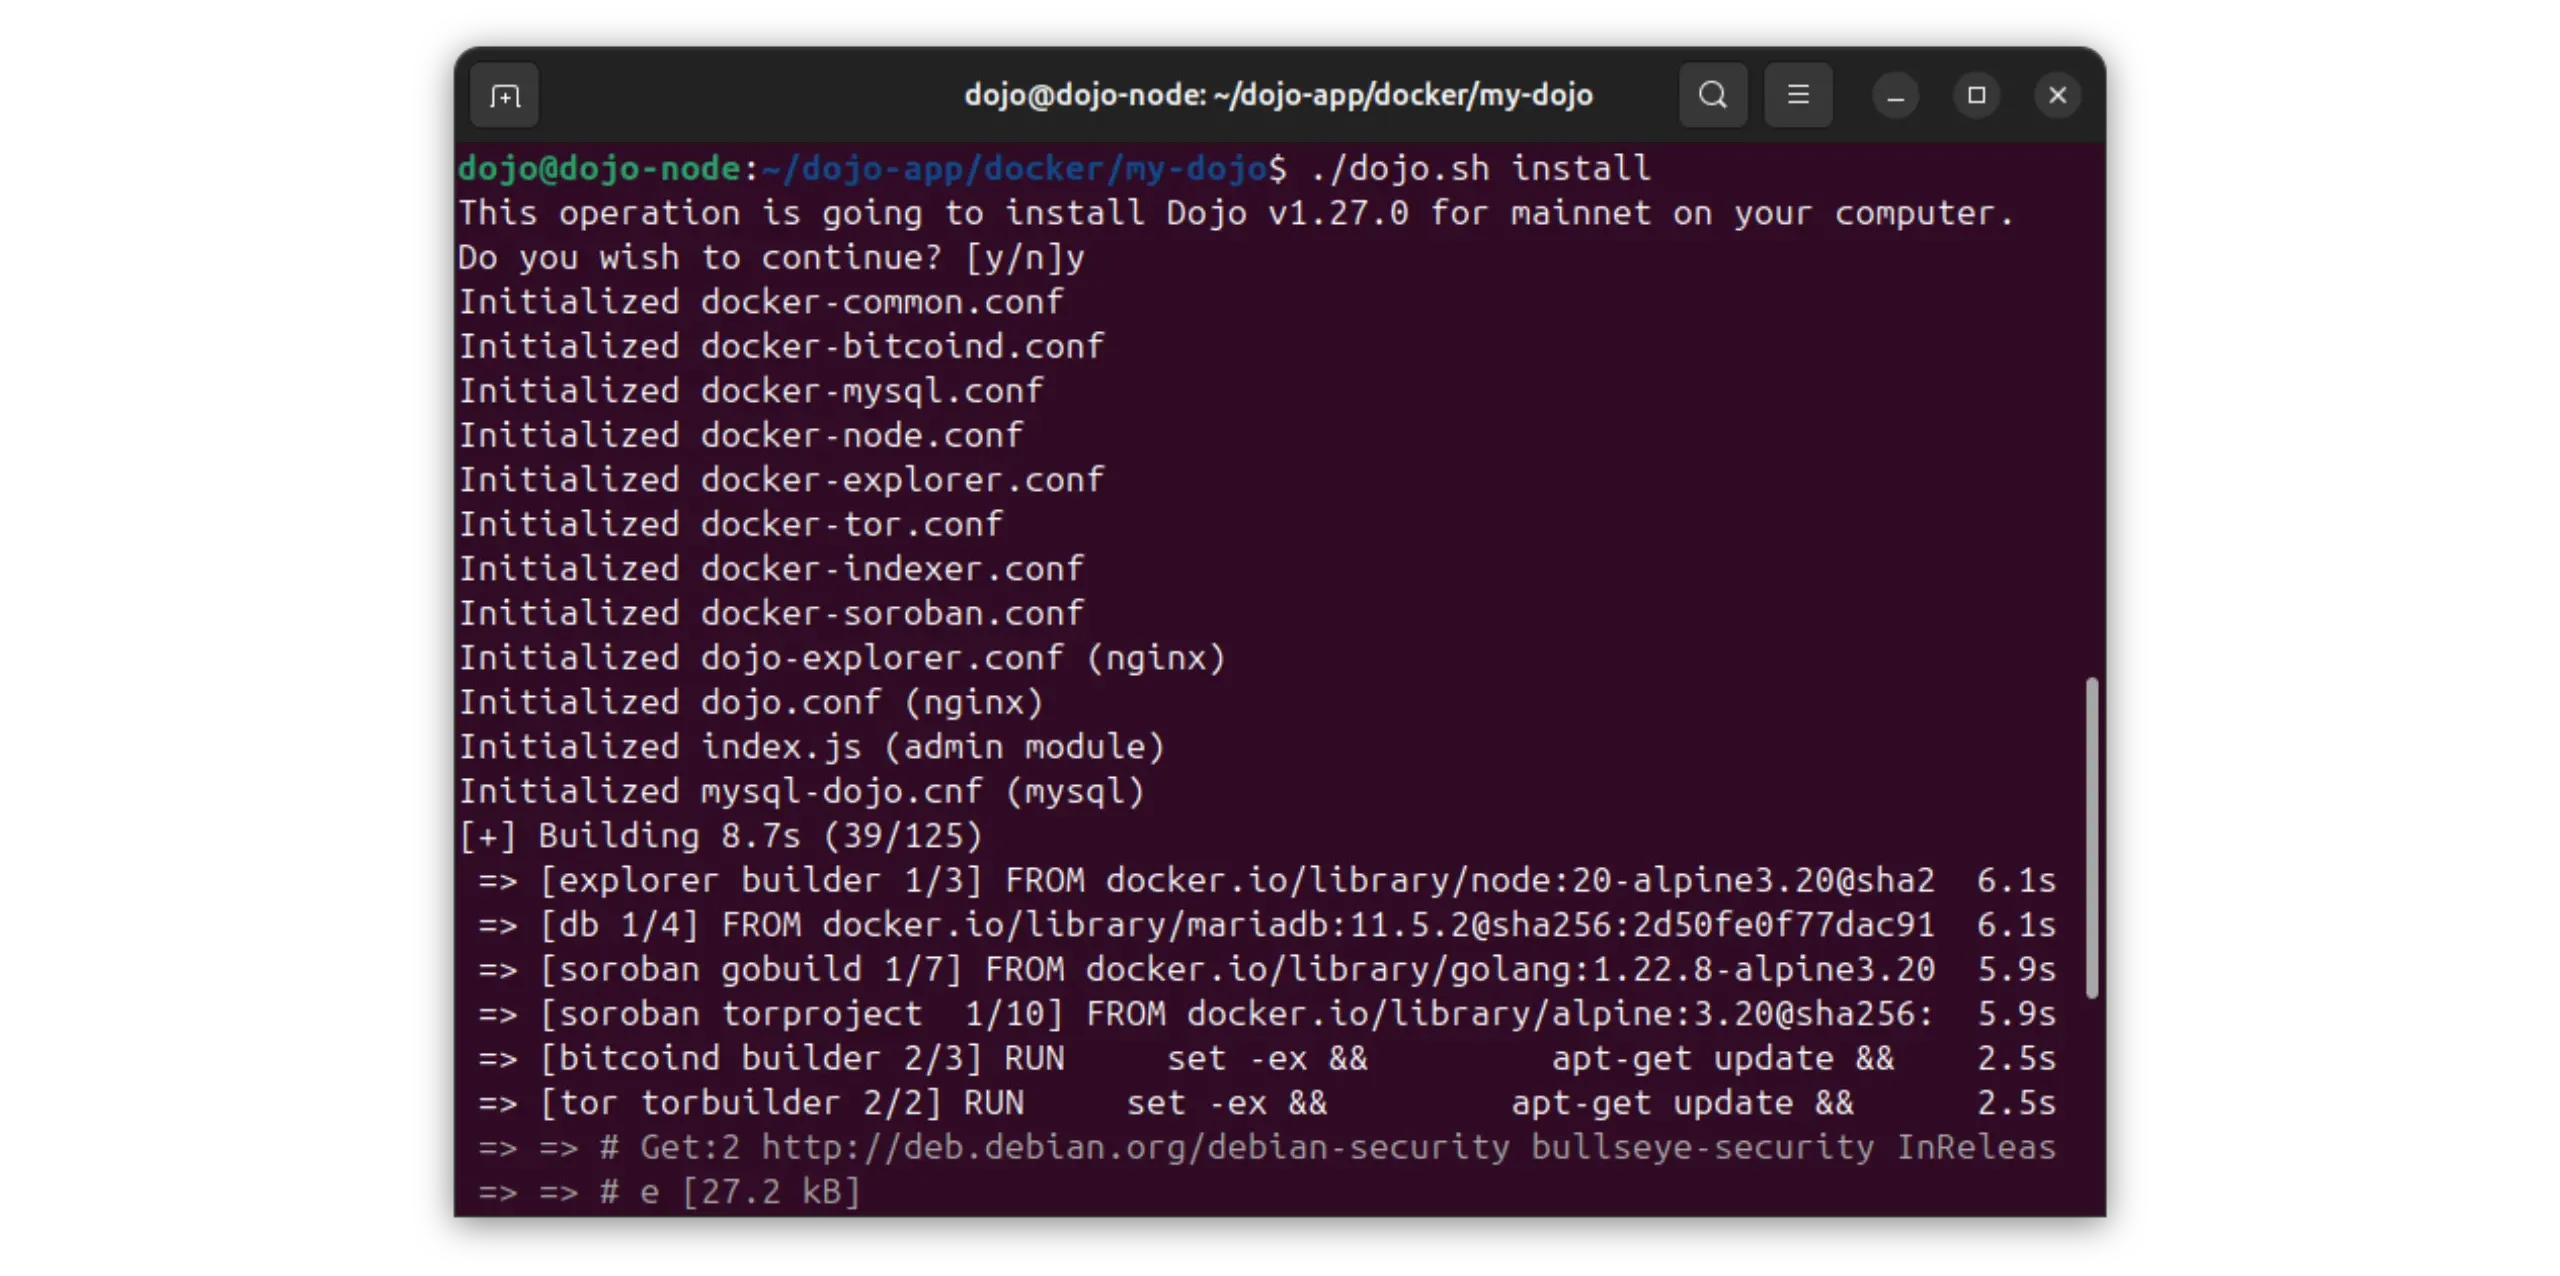
This script will :
- download and launch the necessary Docker containers,
- initialize Bitcoin core and start synchronizing Blockchain,
- start the Fulcrum indexer to track transactions and addresses,
- activate the Dojo backend and its APIs.
You’ll see a steady stream of logs scrolling by, with colorful references such as bitcoind, soroban, nodejs or fulcrum. This scrolling indicates that Dojo is up and running and starting to execute the various services.
6.4. Exit log display
Logs appear in real time in your terminal. To return to the command prompt while Dojo is running in the background, type :
1
Ctrl + C
Don’t worry: stopping the log display doesn’t stop the services. Docker continues to run Dojo in the background (you obviously don’t need to stop the computer if you want IBD to continue).
6.5. Understanding Initial Block Download (IBD)
On startup, Bitcoin core must download and verify the entire Blockchain since 2009. This step is called Initial Block Download (IBD). It is essential, as it enables your Dojo node to verify each Bitcoin block and transaction independently.
The duration of this synchronization depends on several factors:
- the power of your processor and the amount of RAM memory available,
- the speed of your disk,
- the number and quality of peers your node connects to,
- the speed of your Internet connection.
In practice, this operation generally takes between 2 and 7 days. During this period, you can leave your machine running continuously. The longer the machine is on, the faster the synchronization will be completed. I advise you to check the synchronization status regularly by consulting the Bitcoin core logs, or by using the Dojo maintenance tool once installed (see next section).
To deepen your knowledge of IBD and, more generally, of the operation and role of your Bitcoin node, I recommend you take a look at this course
IBD can take several days. Do not power off abruptly; keep the machine running to complete sync and indexing reliably.
7. Synchronization monitoring
When installing Dojo for the first time, you need to wait for two main operations to be fully completed: the complete download of the Blockchain Bitcoin (IBD) and the indexing of this Blockchain by Fulcrum. Depending on your connection and machine power, this may take several days. During this time, you can monitor the progress of the process to make sure everything’s running smoothly.
There are two ways to monitor the status of synchronization:
- use of the Dojo Maintenance Tool (or DMT), which is simple but provides few details during IBD;
- direct consultation of Dojo logs on your machine, more technical but much more precise.
7.1. Check via Dojo Maintenance Tool (DMT)
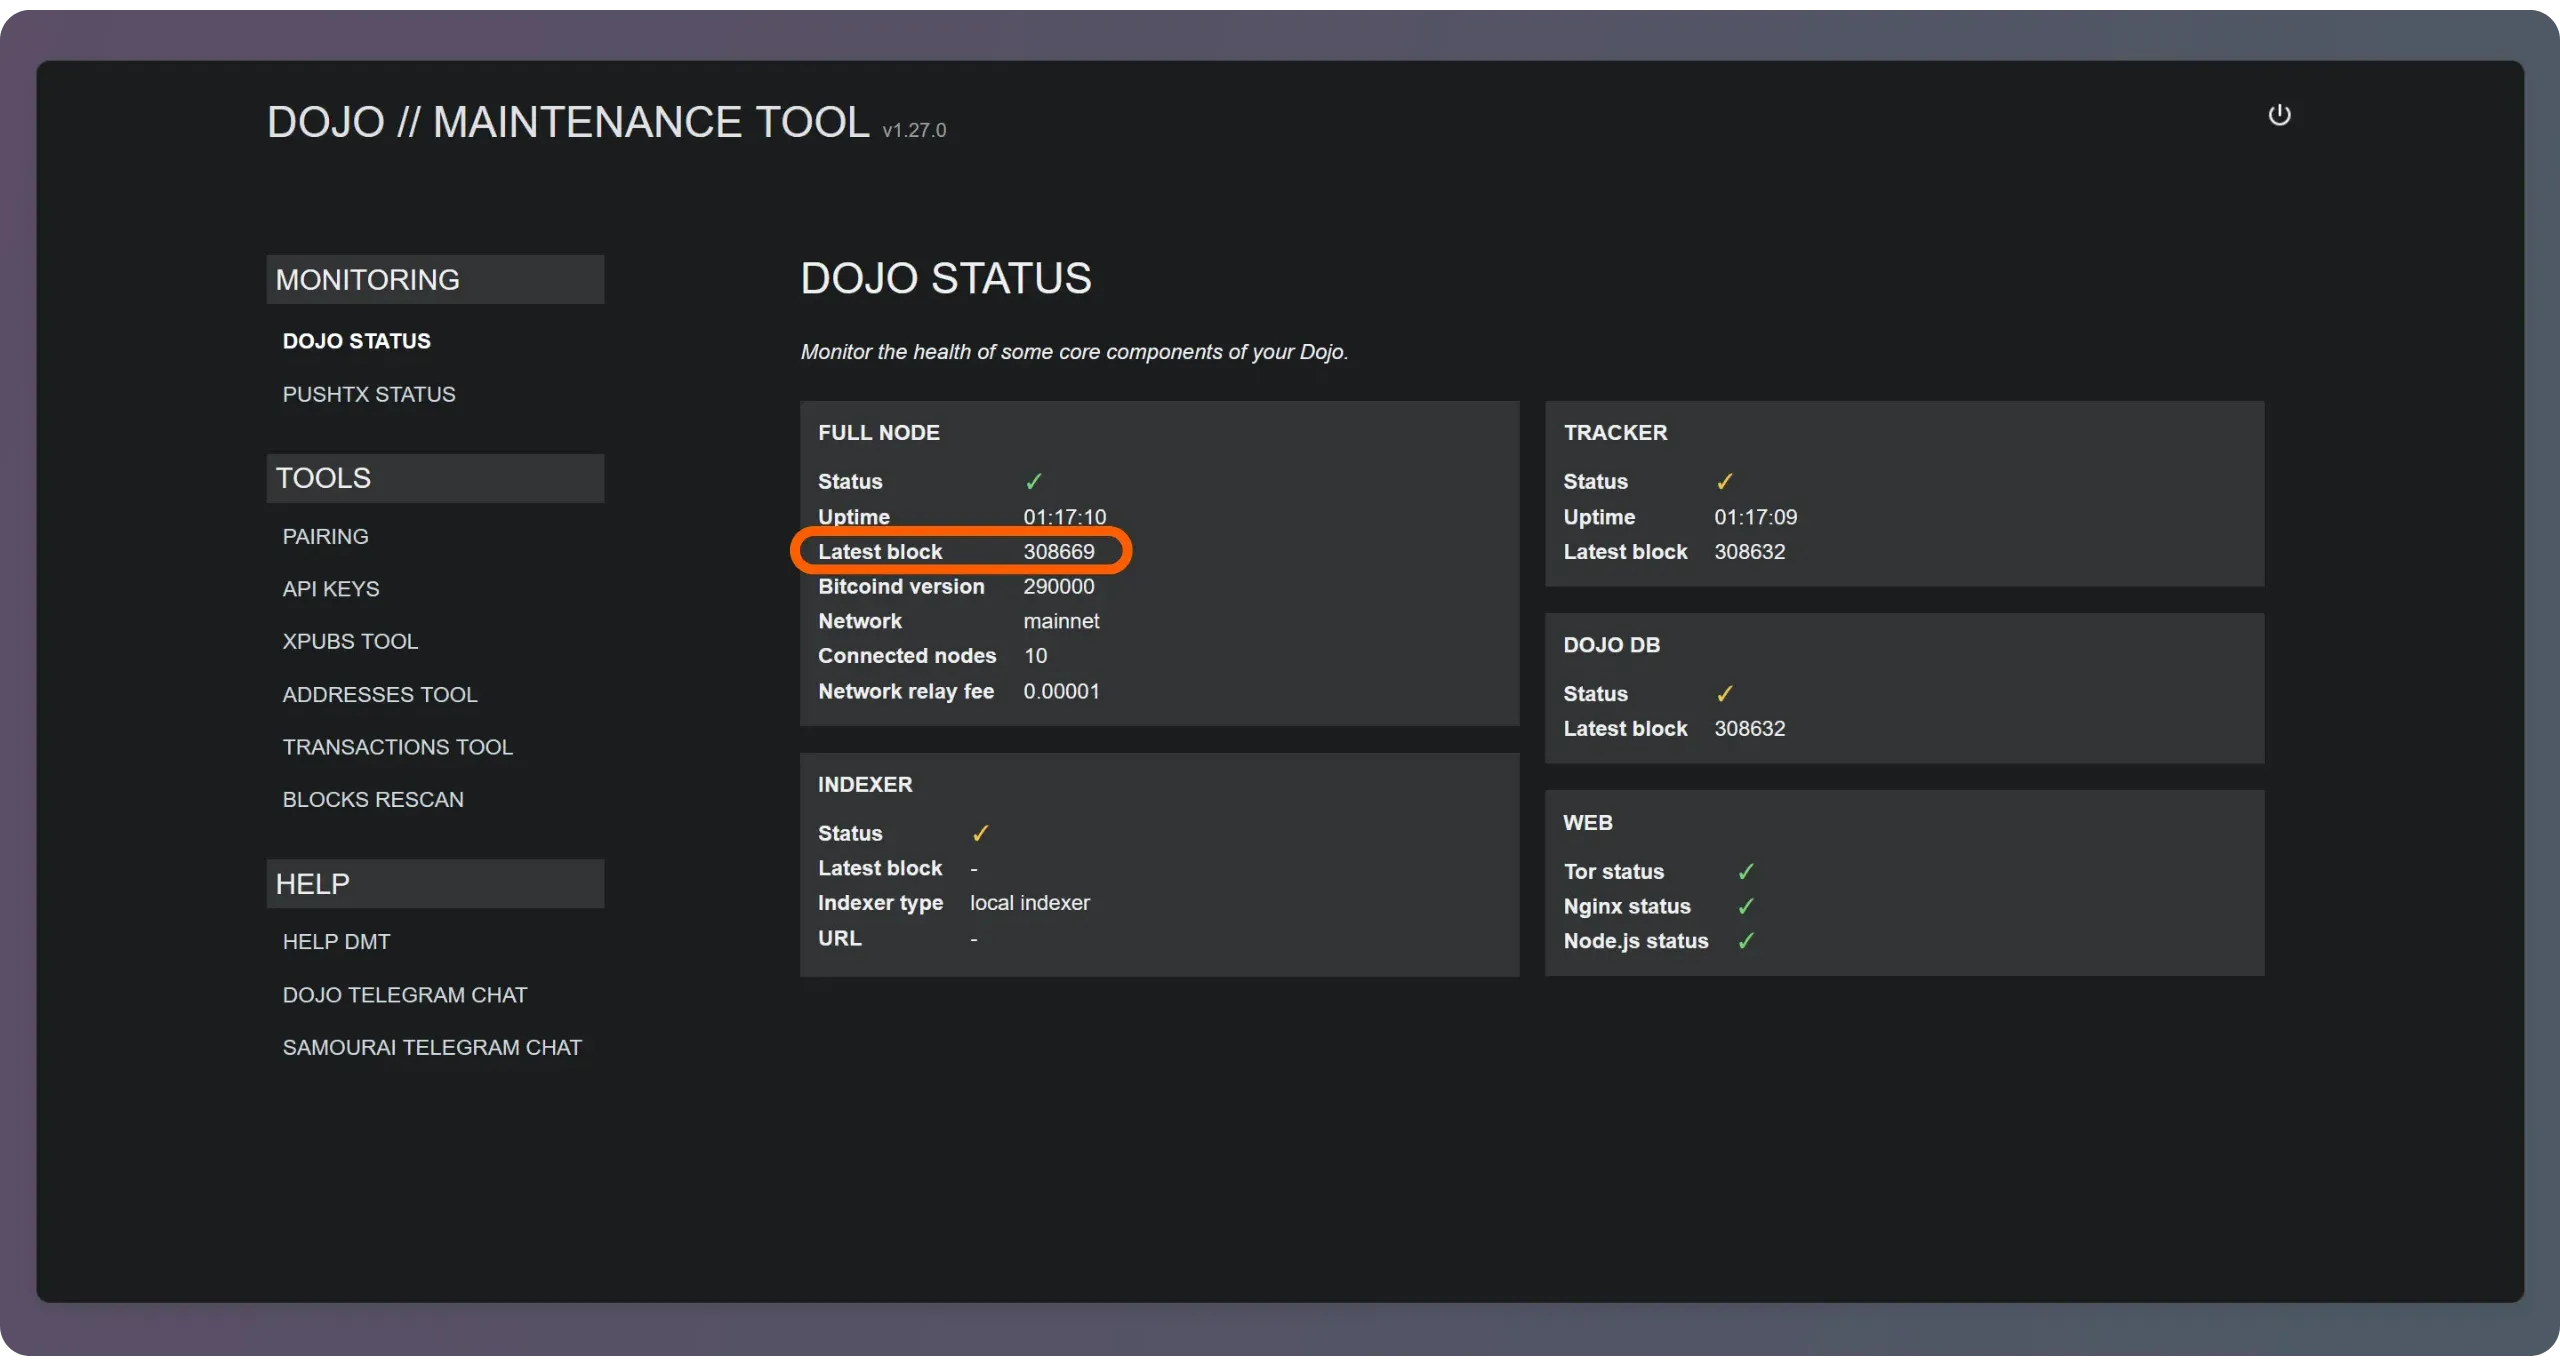
The Dojo Maintenance Tool is a secure, web-based Interface that lets you monitor the status of your plant, and perform certain operations. It’s the easiest and most accessible way to monitor the IBD’s progress. During the initial synchronization phase, the information displayed may be limited. For example, the DMT does not show the detailed progress of Fulcrum indexing. On the other hand, once synchronization is complete, the DMT will clearly display :
- all lights on green;
- the last validated block for each service (Node, Indexer, Dojo DB).
To access it, you need to know the URL of your DMT and connect to it via the Tor browser. To do this, open a terminal and go to the /my-dojo directory:
1
cd ~/dojo-app/docker/my-dojo
Then run the following command:
1
./dojo.sh onion
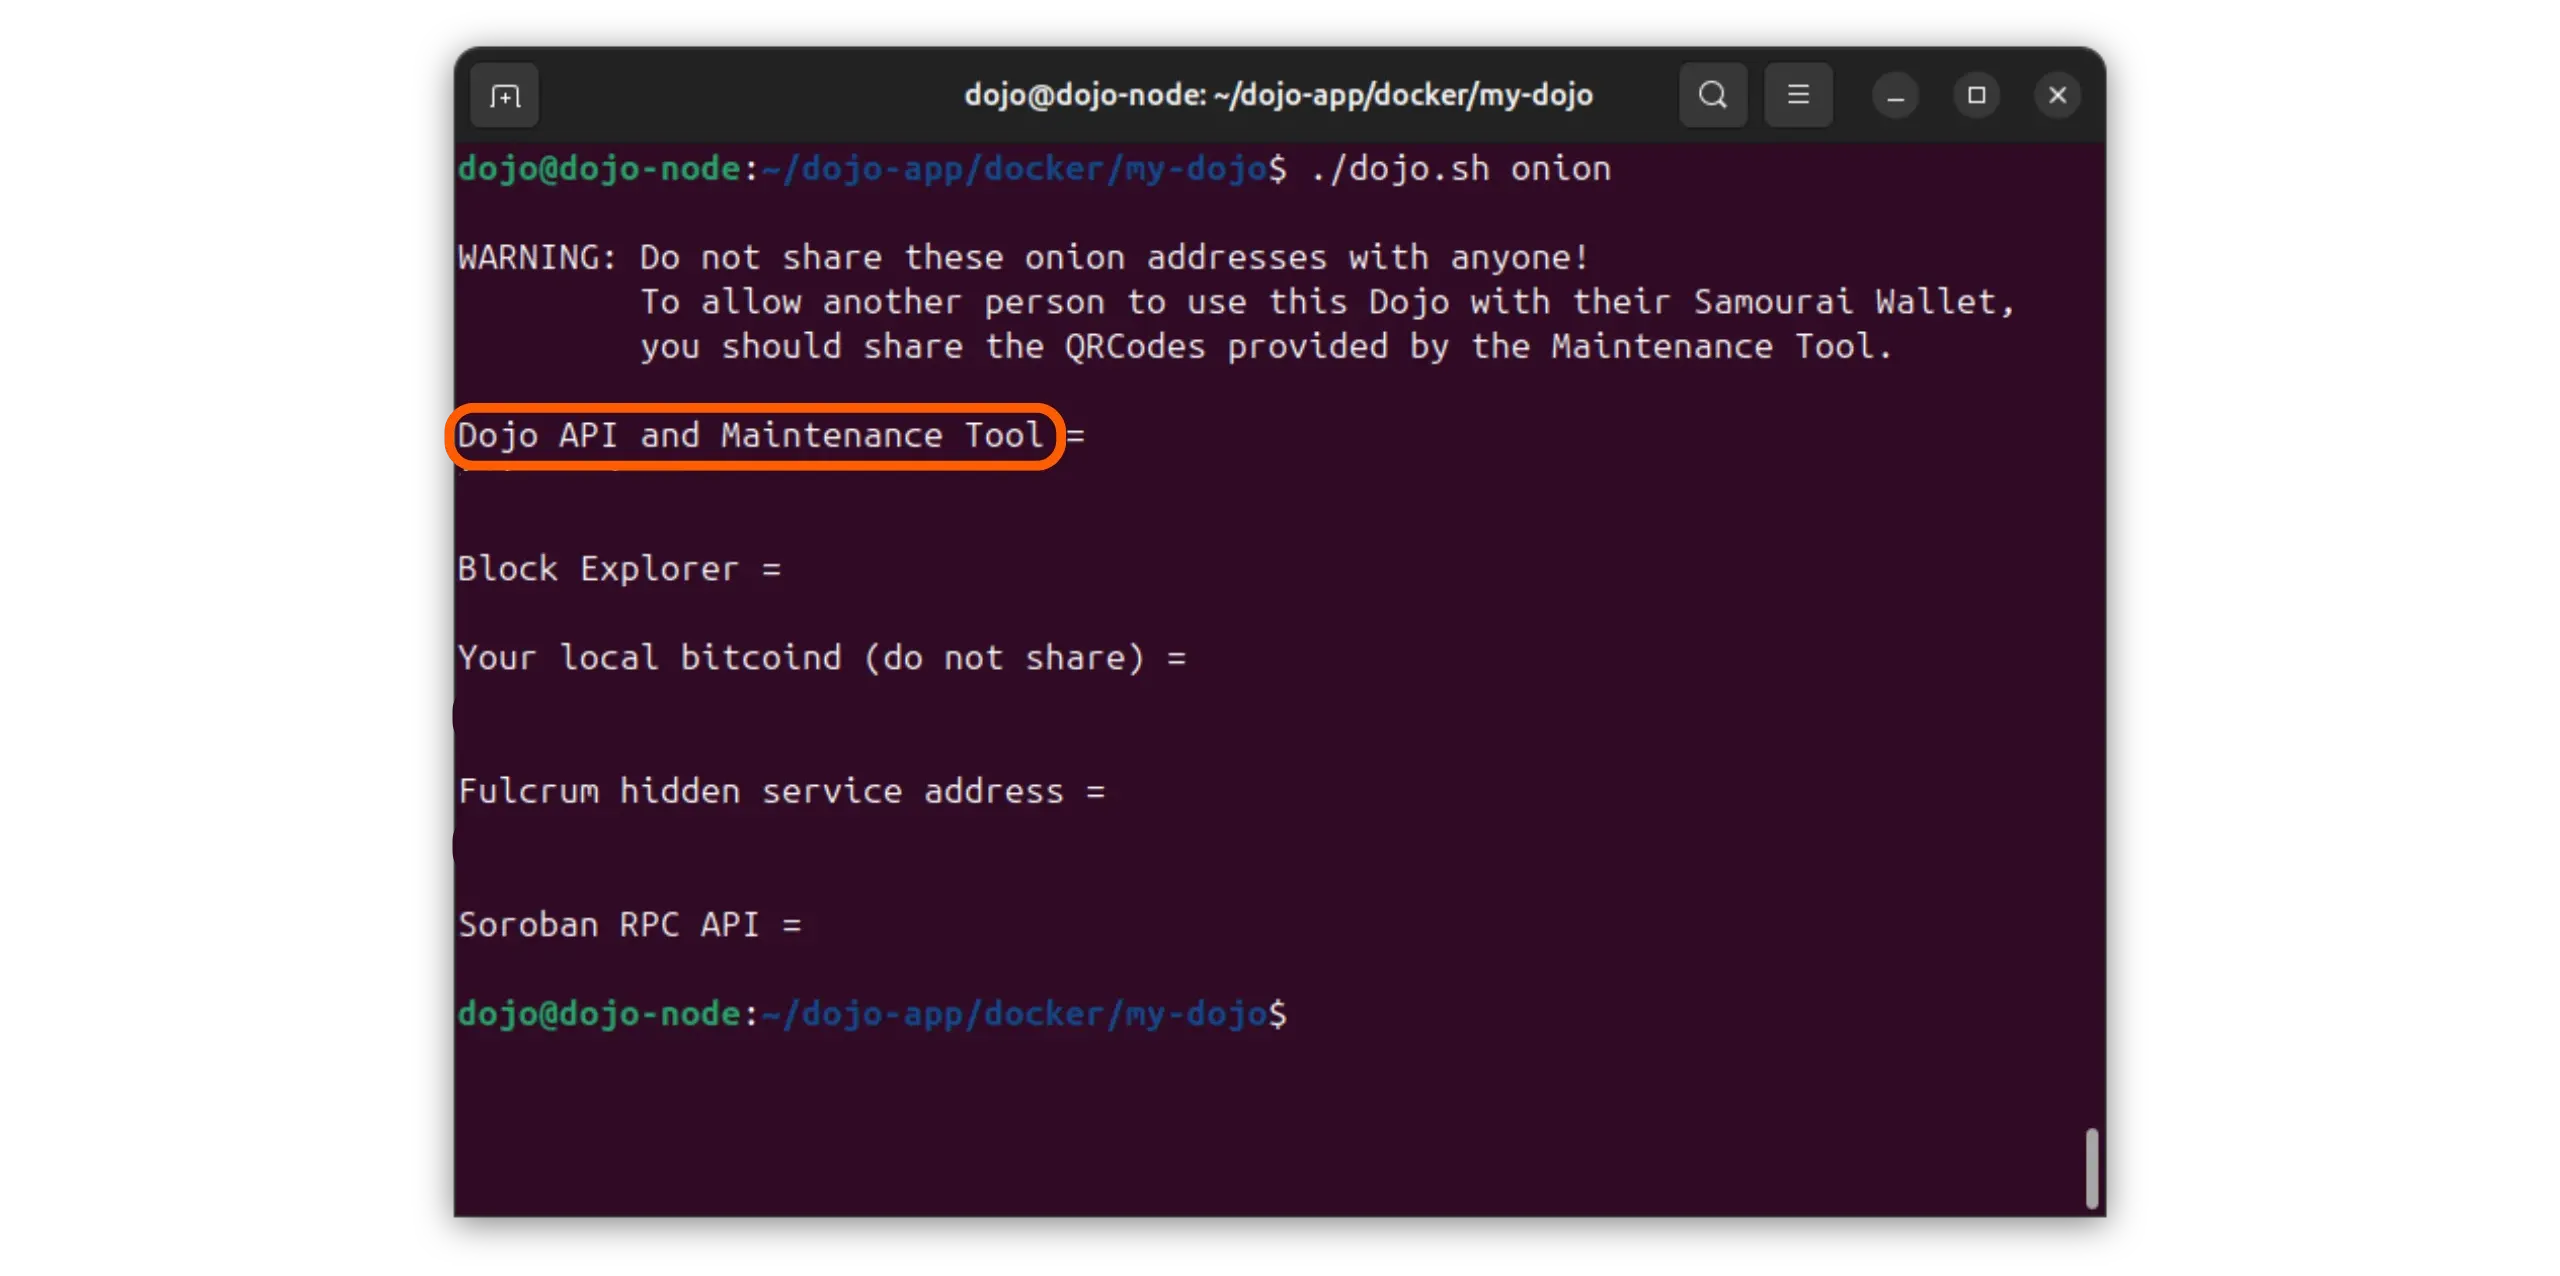
You’ll then have access to all the information relating to connections to your Dojo via Tor. The one we’re interested in here is the following URL:
1
Dojo API and Maintenance Tool =
To access the DMT from any machine on any network (even remotely), open Tor Browser and enter this URL followed by /admin. For example, if your URL is wo4zobymdl45gmmzzmpoypeemoukbj74wpibc22rxs2yfgpej62v6dyd.onion, you’ll need to enter in the Tor Browser bar:
1
wo4zobymdl45gmmzzmpoypeemoukbj74wpibc22rxs2yfgpej62v6dyd.onion/admin
Keep your onion service addresses strictly confidential; sharing them can expose your services to unwanted access.
You will then be redirected to an authentication page. The DMT is logged in using the NODE_ADMIN_KEY password you generated earlier.
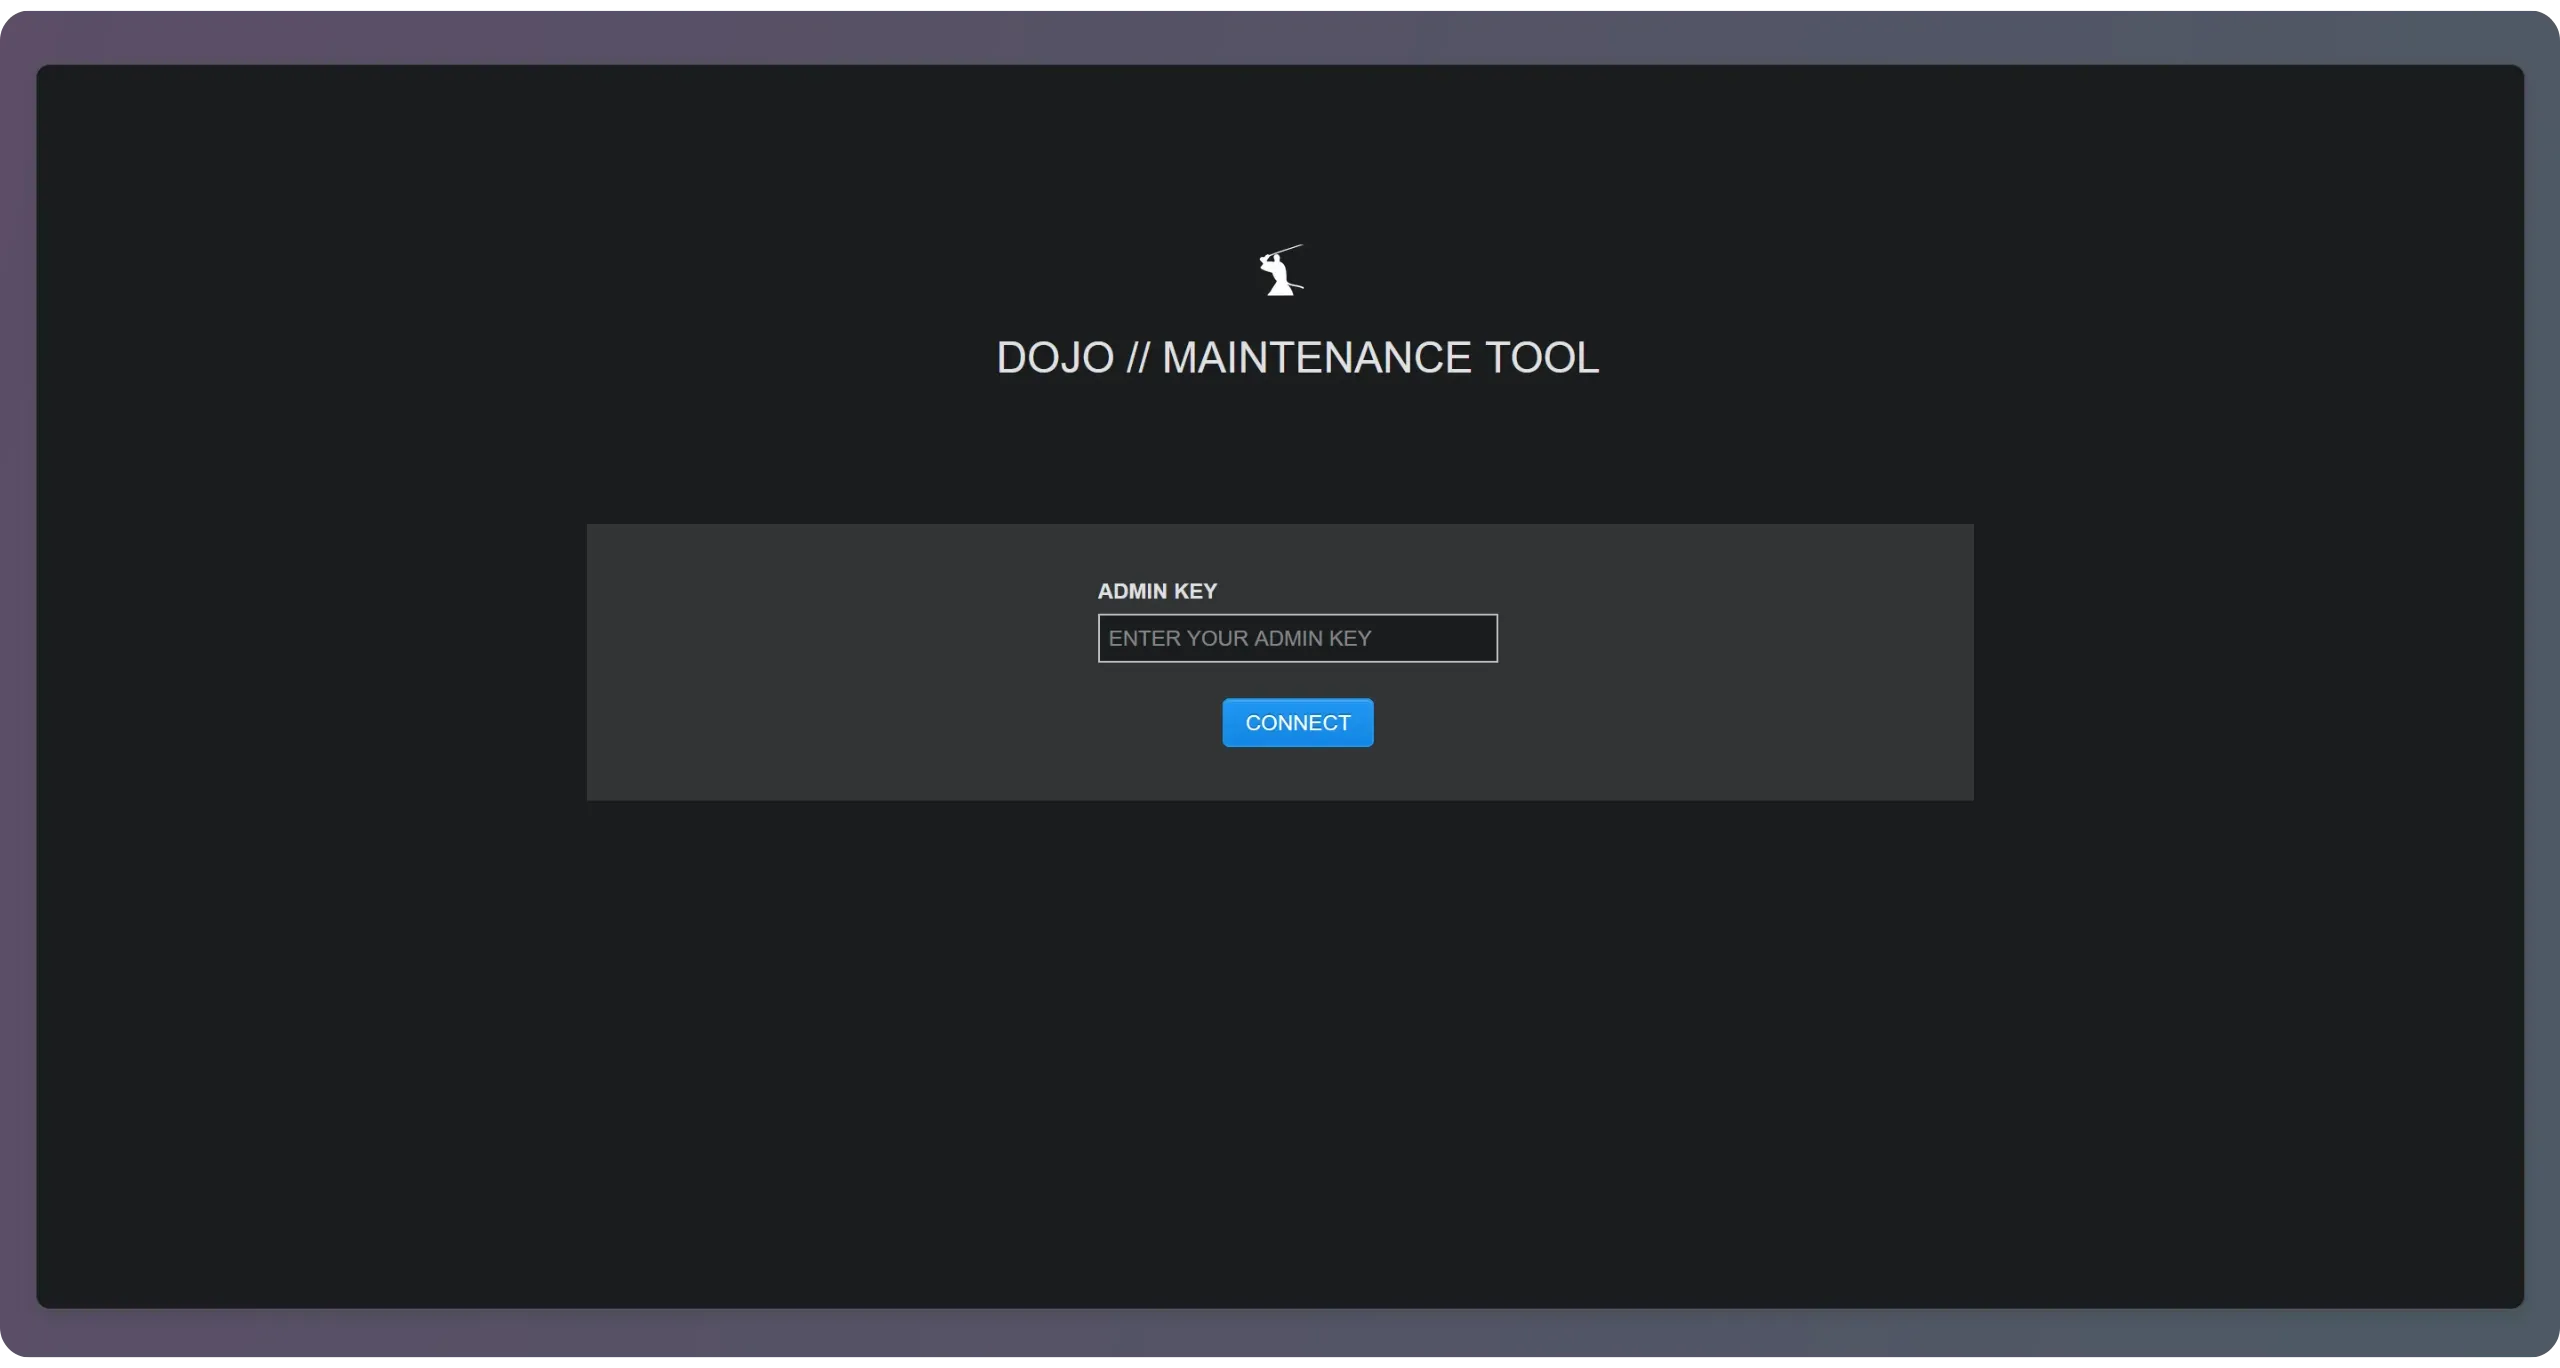
Once logged in, you can access the Dojo Maintenance Tool! During IBD, you can see the “Latest Block” information in the “Full node” menu, which lets you know the current status of your Bitcoin node.
Remember to bookmark this address in Tor Browser for easy retrieval later.
Once your Dojo is fully synchronized, you should see Green check ✅ on all the indicators on the DMT home page.
7.2. Verification via Dojo logs
The second way to track the progress of your IBD is to consult your machine logs directly. This approach offers much more precise, real-time monitoring. You can see how Bitcoin core is progressing in downloading blocks, and how Fulcrum is indexing them.
Connect to the machine hosting your Dojo and open a terminal. All commands should be executed from the my-dojo directory. Position yourself in this folder:
1
cd ~/dojo-app/docker/my-dojo
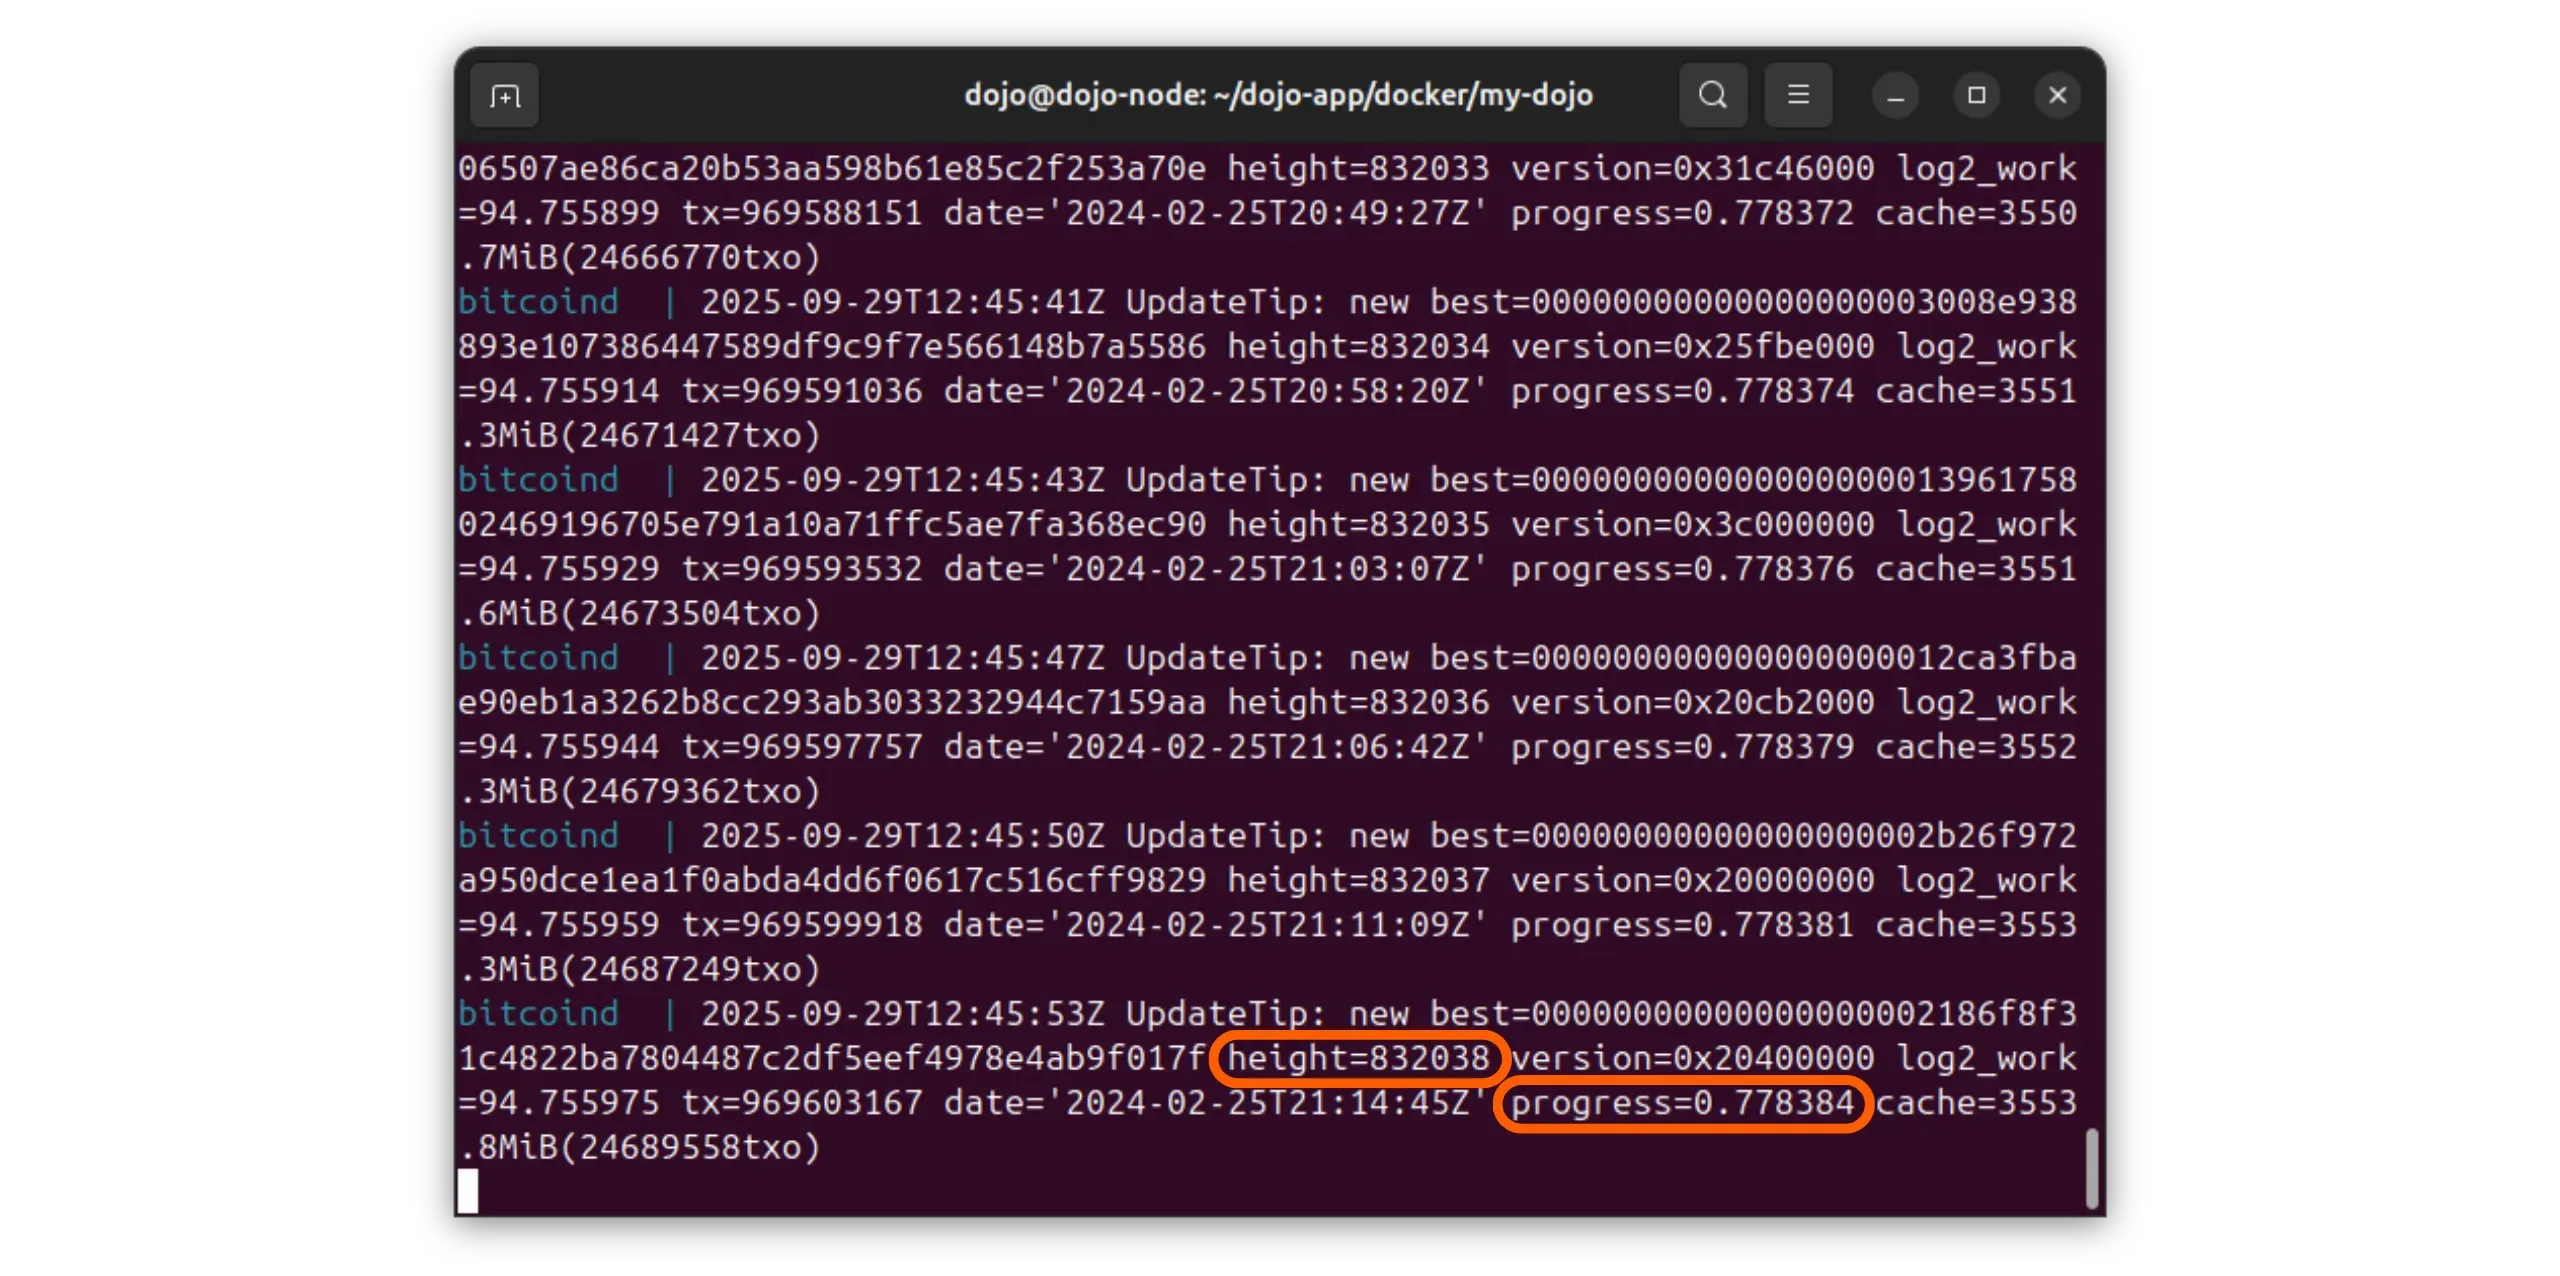
Bitcoin core logs
View Bitcoin core logs to track IBD progress:
1
./dojo.sh logs bitcoind
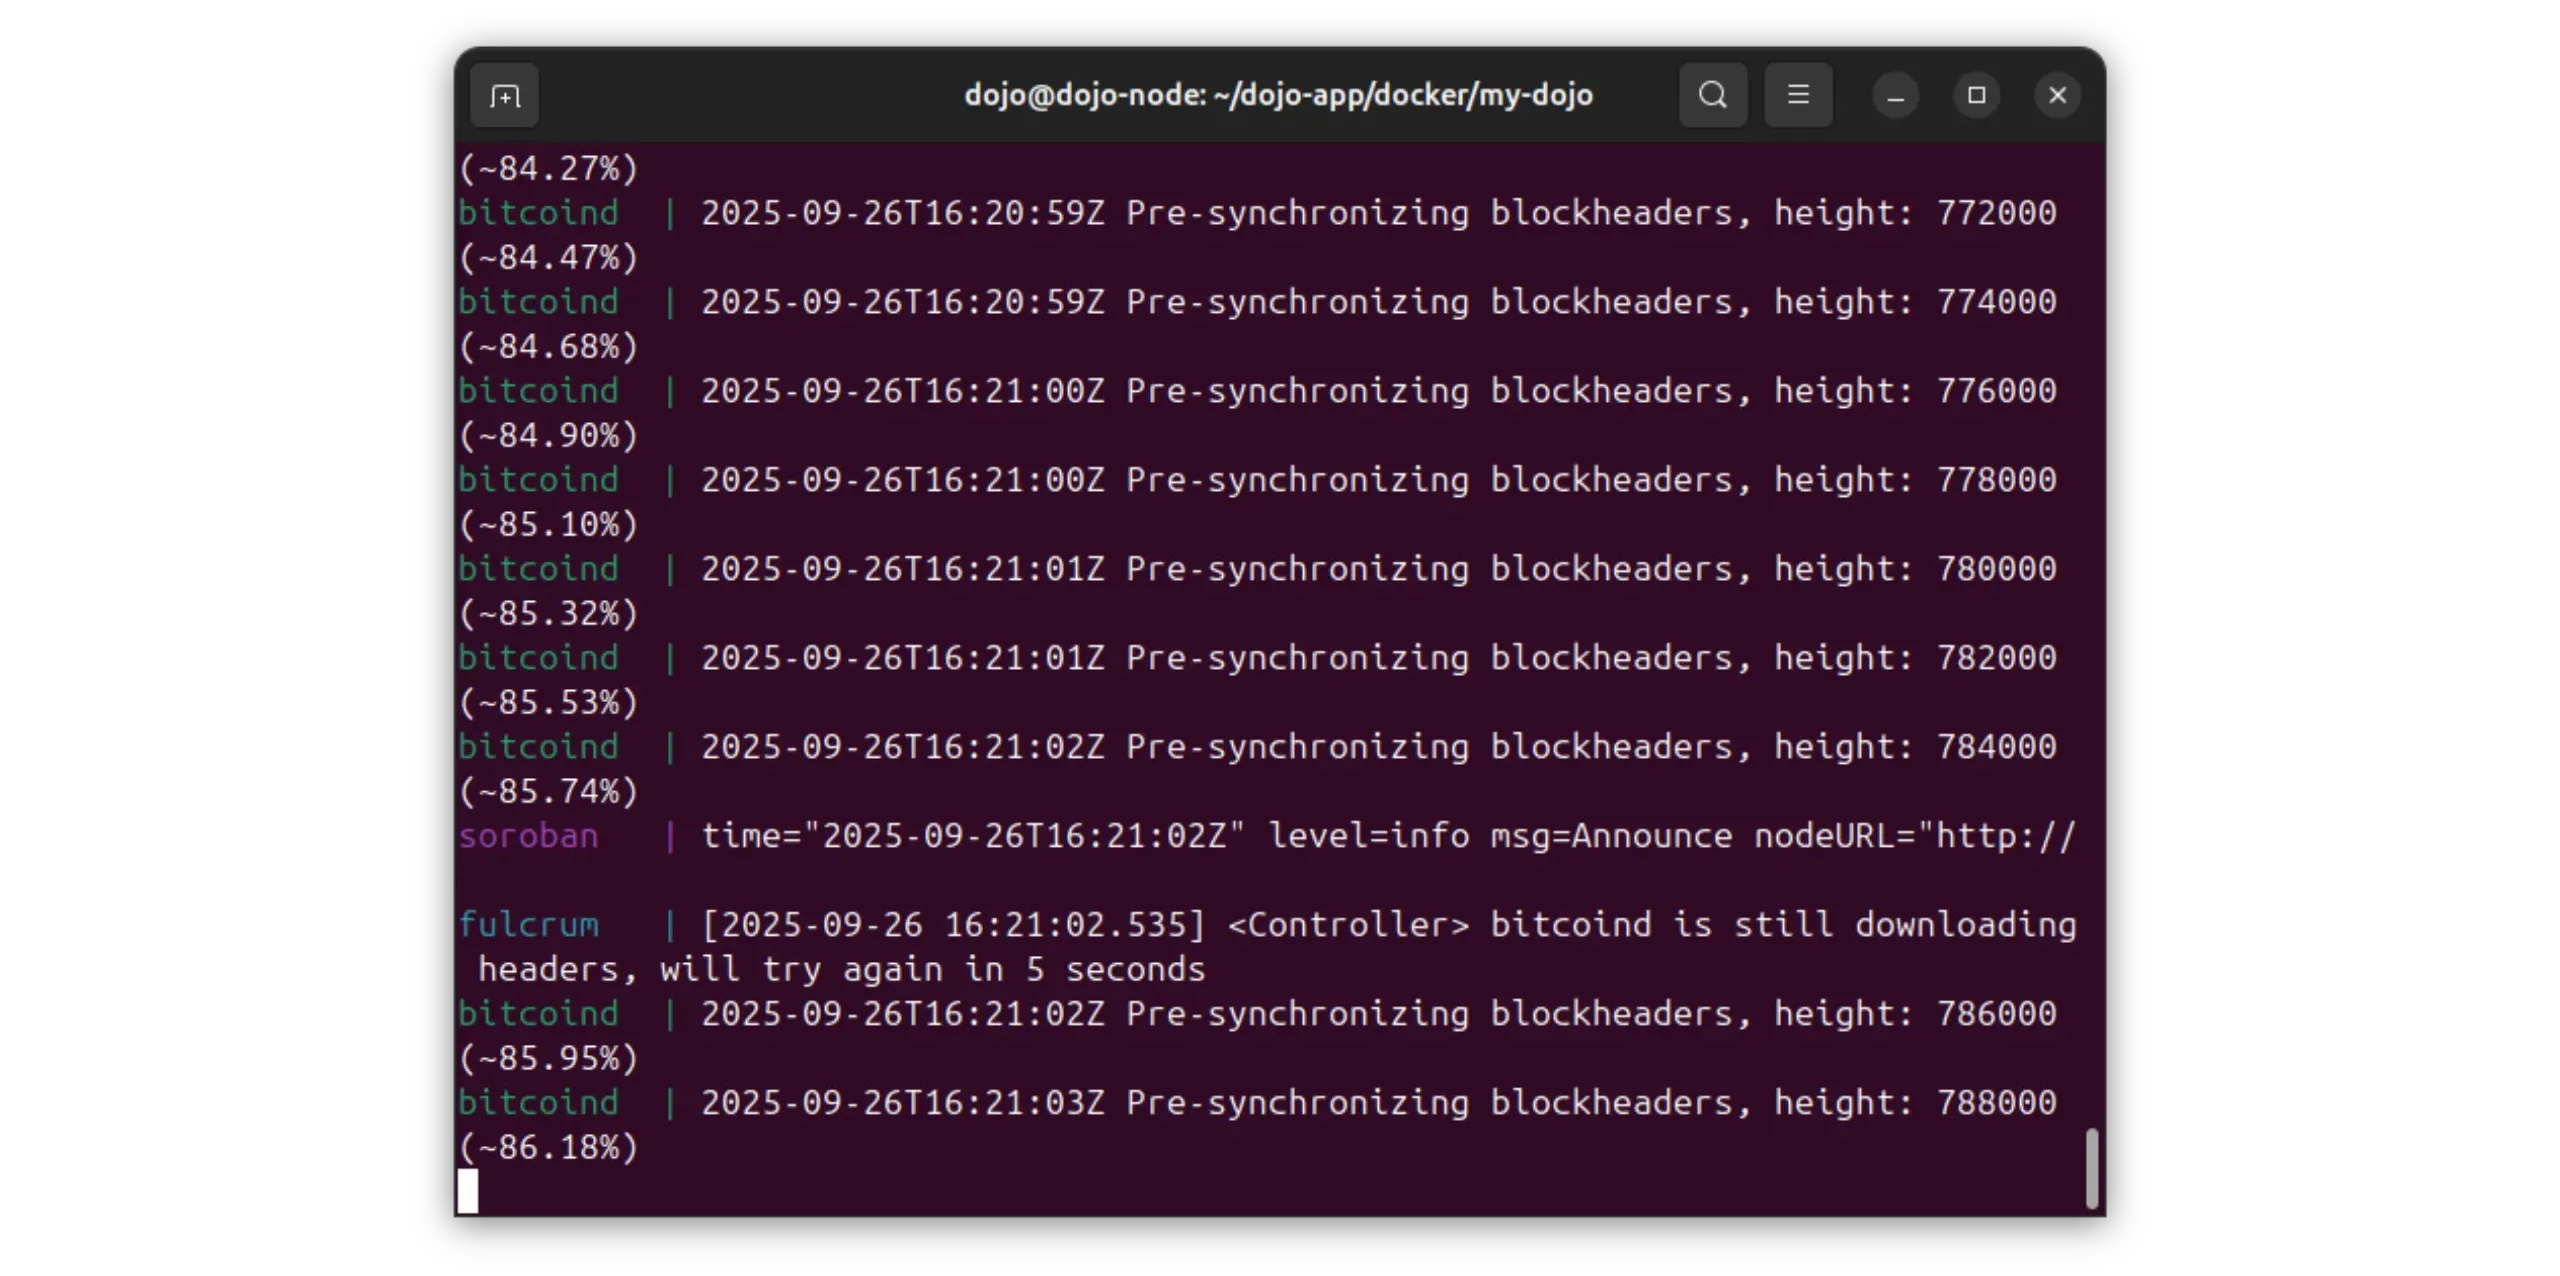
At the beginning, you will see a pre-synchronization phase of the block headers:
1
bitcoind | Pre-synchronizing blockheader, height : NNNNNN
When this figure reaches 100%, Bitcoin core will begin the complete download of Blockchain. You’ll see the IBD progress. To find out the current block height, look at the value indicated by height=. You can also follow the key progress=, which indicates the percentage of IBD progress.
As always, to close the logs and return to the command prompt, use the Ctrl + C combination.
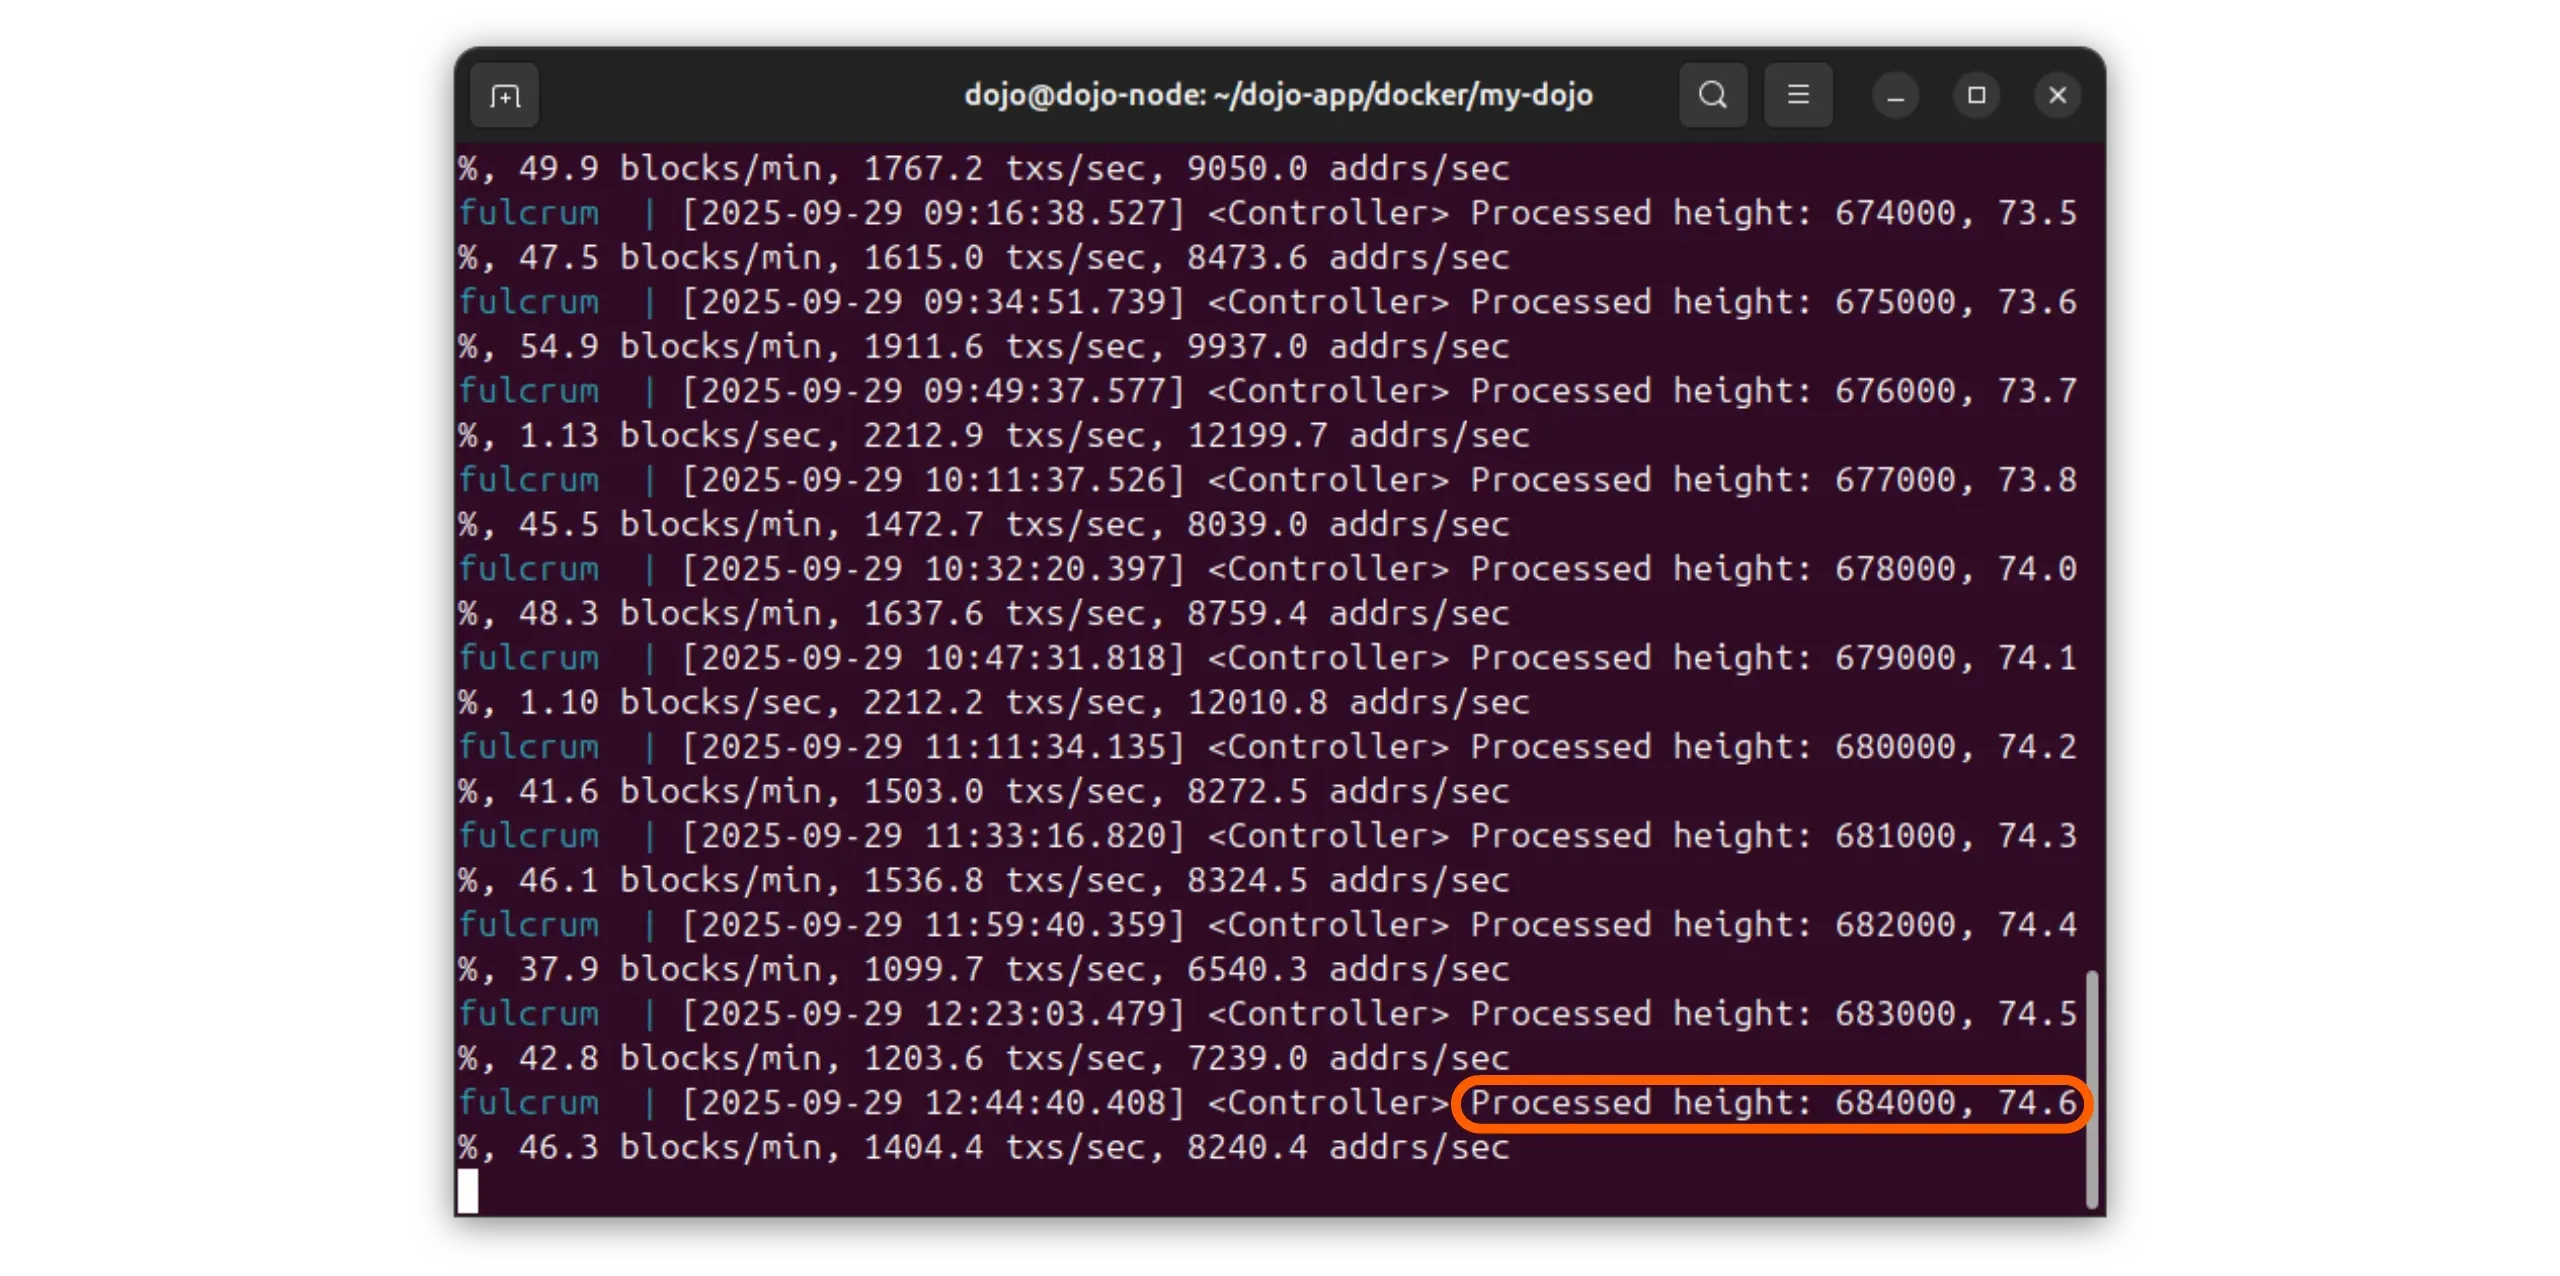
Fulcrum logs
Once Bitcoin core has completed header pre-synchronization, Fulcrum starts indexing Blockchain as it goes along. View its logs with :
1
./dojo.sh logs fulcrum
You’ll then see the height of the last block indexed, indicated after height:, as well as the indexing progress percentage.
7.3. Fulcrum database corruption
Fulcrum is a particularly powerful indexer, but its installation can be complex, not least because of its delicate database management. In the event of a power cut or sudden machine shutdown during initial synchronization, the indexer’s database may be corrupted. You can see this, for example, if you have the following logs:
1
fulcrum | The database has been corrupted etc...
Note: This type of error should be corrected with the upcoming release of Fulcrum 2.0.
Abrupt shutdowns can corrupt Fulcrum’s database. Always perform clean service stops and use reliable power to avoid reindexing.
If this happens to you, there is no impact on bitcoind (your Bitcoin node): its IBD will continue to progress independently of Fulcrum. However, you won’t be able to use Fulcrum until you’ve deleted its corrupted data and restarted its synchronization from the beginning. Here’s how it works:
Stop Dojo:
1
2
cd ~/dojo-app/docker/my-dojo
./dojo.sh stop
Delete only the Fulcrum container and volume:
1
2
3
docker rm -f fulcrum || true
docker volume ls | grep -i fulcrum
docker volume rm my-dojo_data-fulcrum
Normally the name is my-dojo_data-fulcrum, if this isn’t the case for you, adapt the name returned by the previous command.
Then relaunch Dojo and rebuild Fulcrum from scratch:
1
./dojo.sh upgrade
You can then check that Fulcrum is working properly by consulting the logs:
1
docker logs -f fulcrum
8. Using the Dojo Maintenance Tool
Once your Bitcoin knot is synchronized to the warp head with the most proof of work, and the Blockchain is 100% indexed by Fulcrum, you can start using your Dojo.
Your Dojo offers a wide range of features, regularly enhanced with each new version. In my opinion, the 2 most important are :
- the possibility of connecting your Ashigaru wallet to use your own node to consult Blockchain data and broadcast your transactions,
- and the block explorer, which gives you access to information about the Blockchain Bitcoin without exposing your data to an external instance you don’t control.
Let’s find out how to use them.
8.1. Connect Ashigaru to your Dojo
Connecting your Ashigaru wallet to your Dojo is very simple: once on your DMT, open the “Pairing” menu. A QR code appears, which you can scan directly with the Ashigaru application.
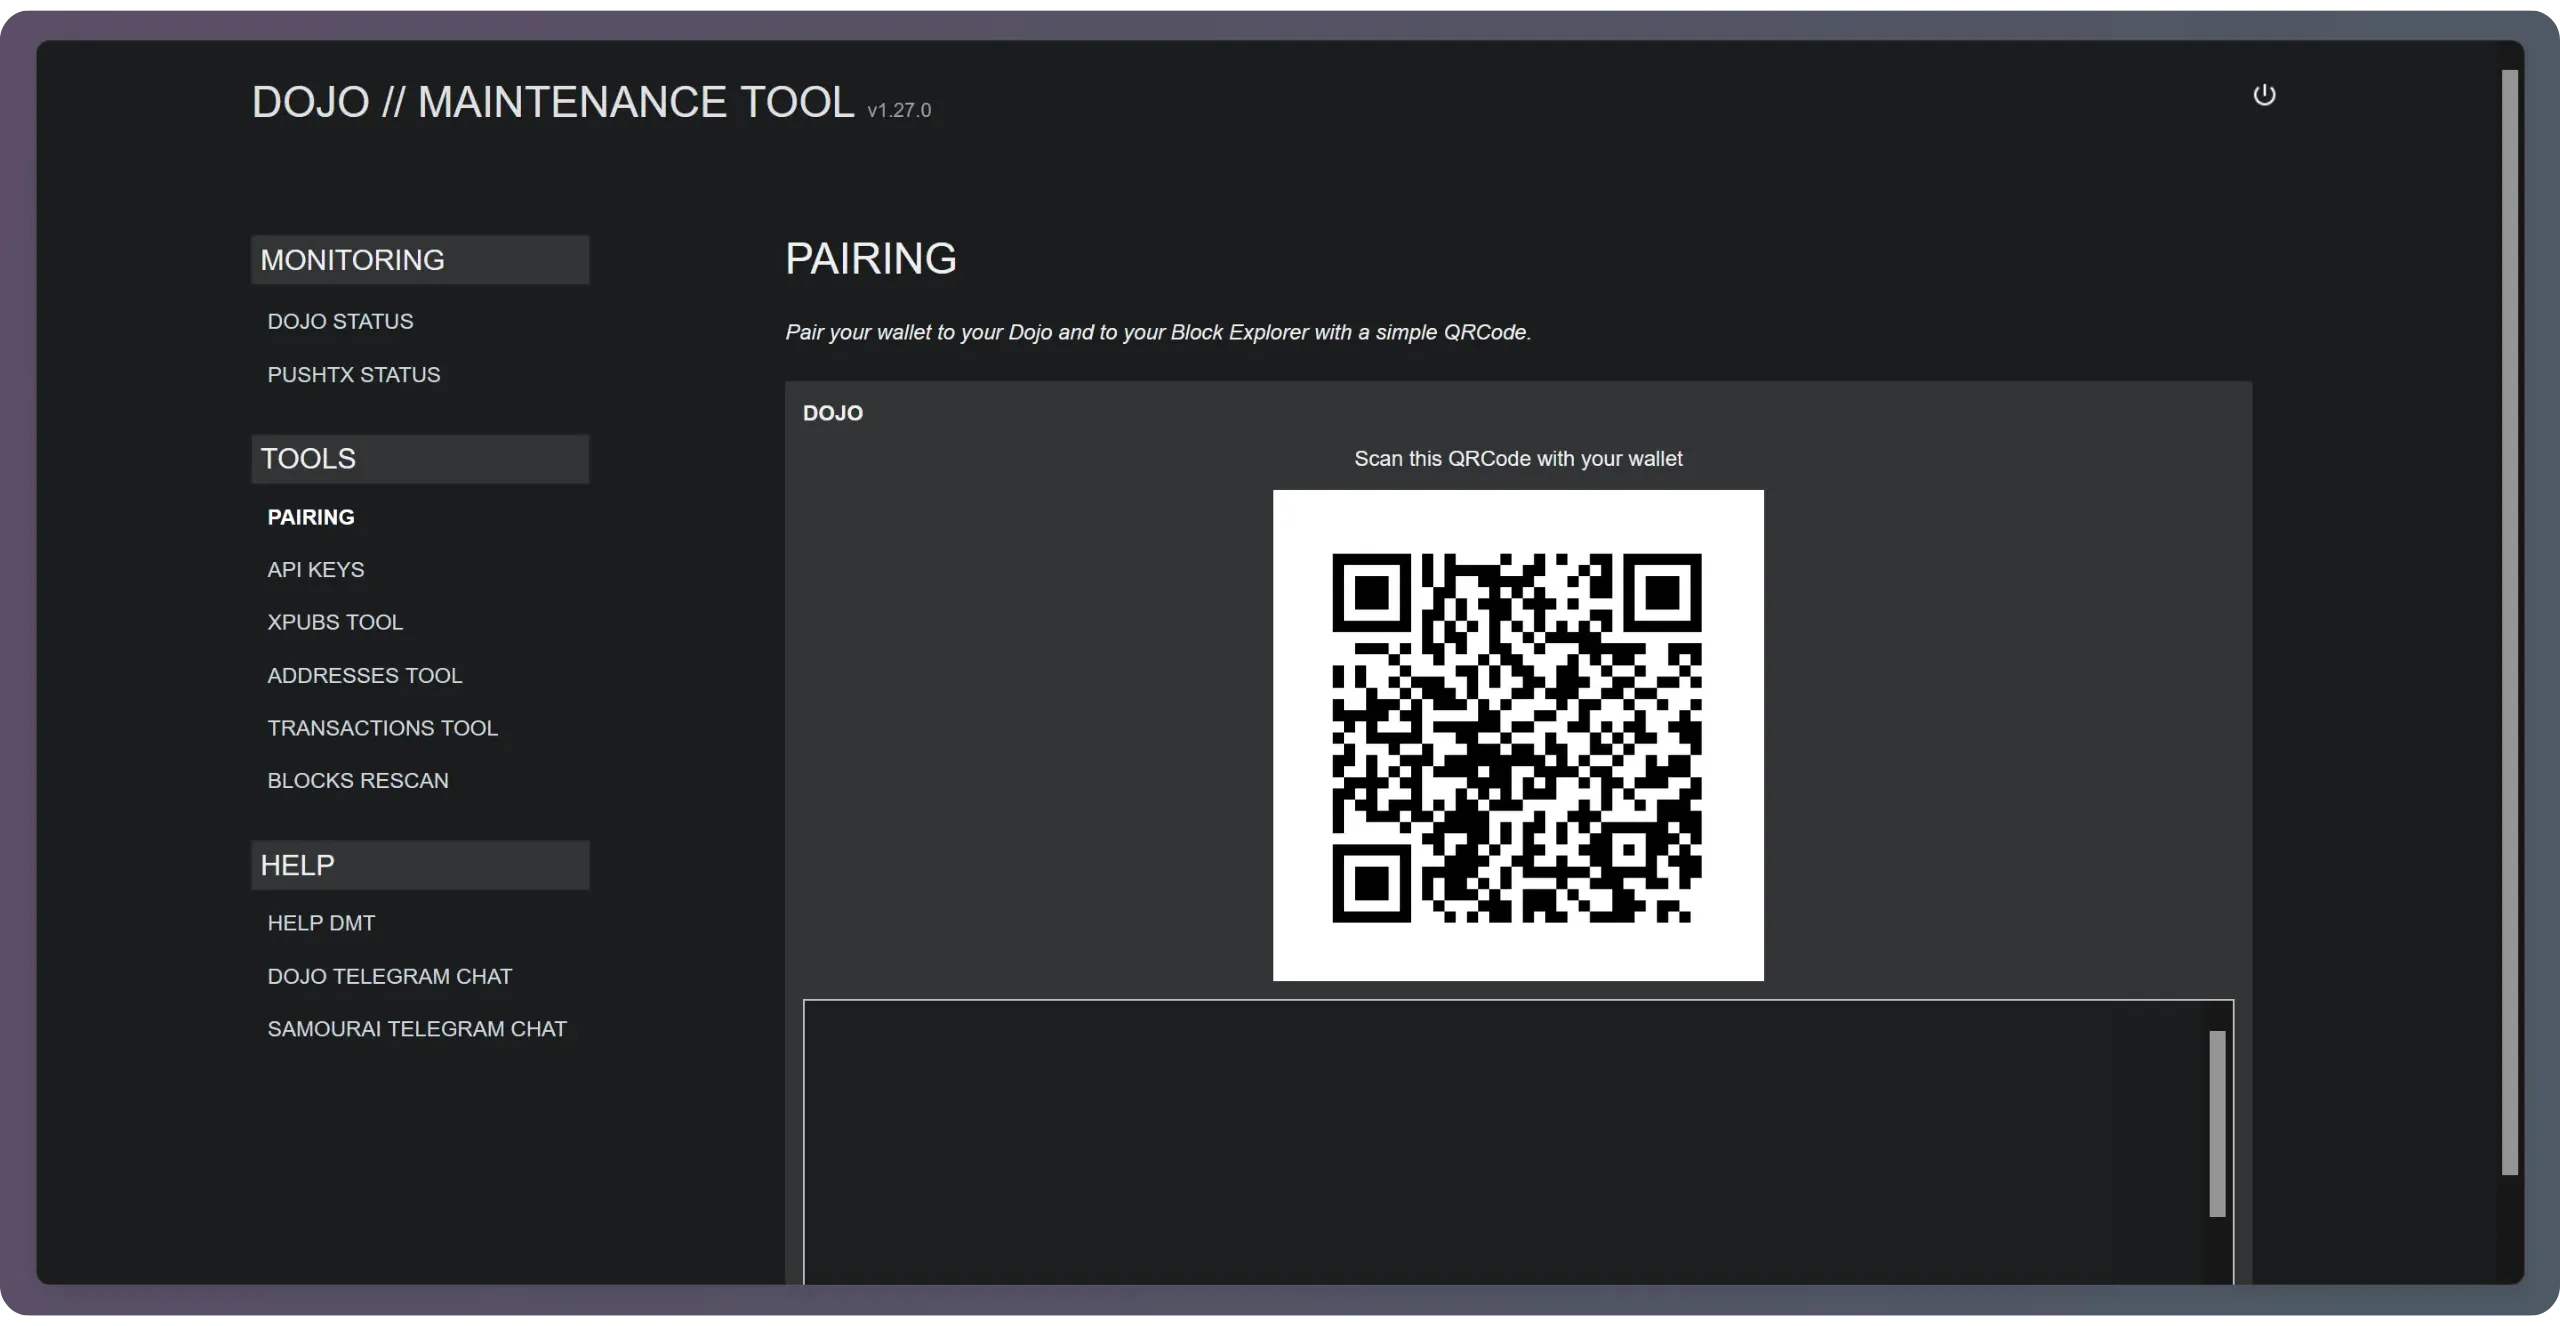
In the Ashigaru application, the first time you launch it after creating or restoring your wallet, you’ll be redirected to the “Configure your Dojo server” page. Press “Scan QR”, then scan the QR code displayed on your DMT.
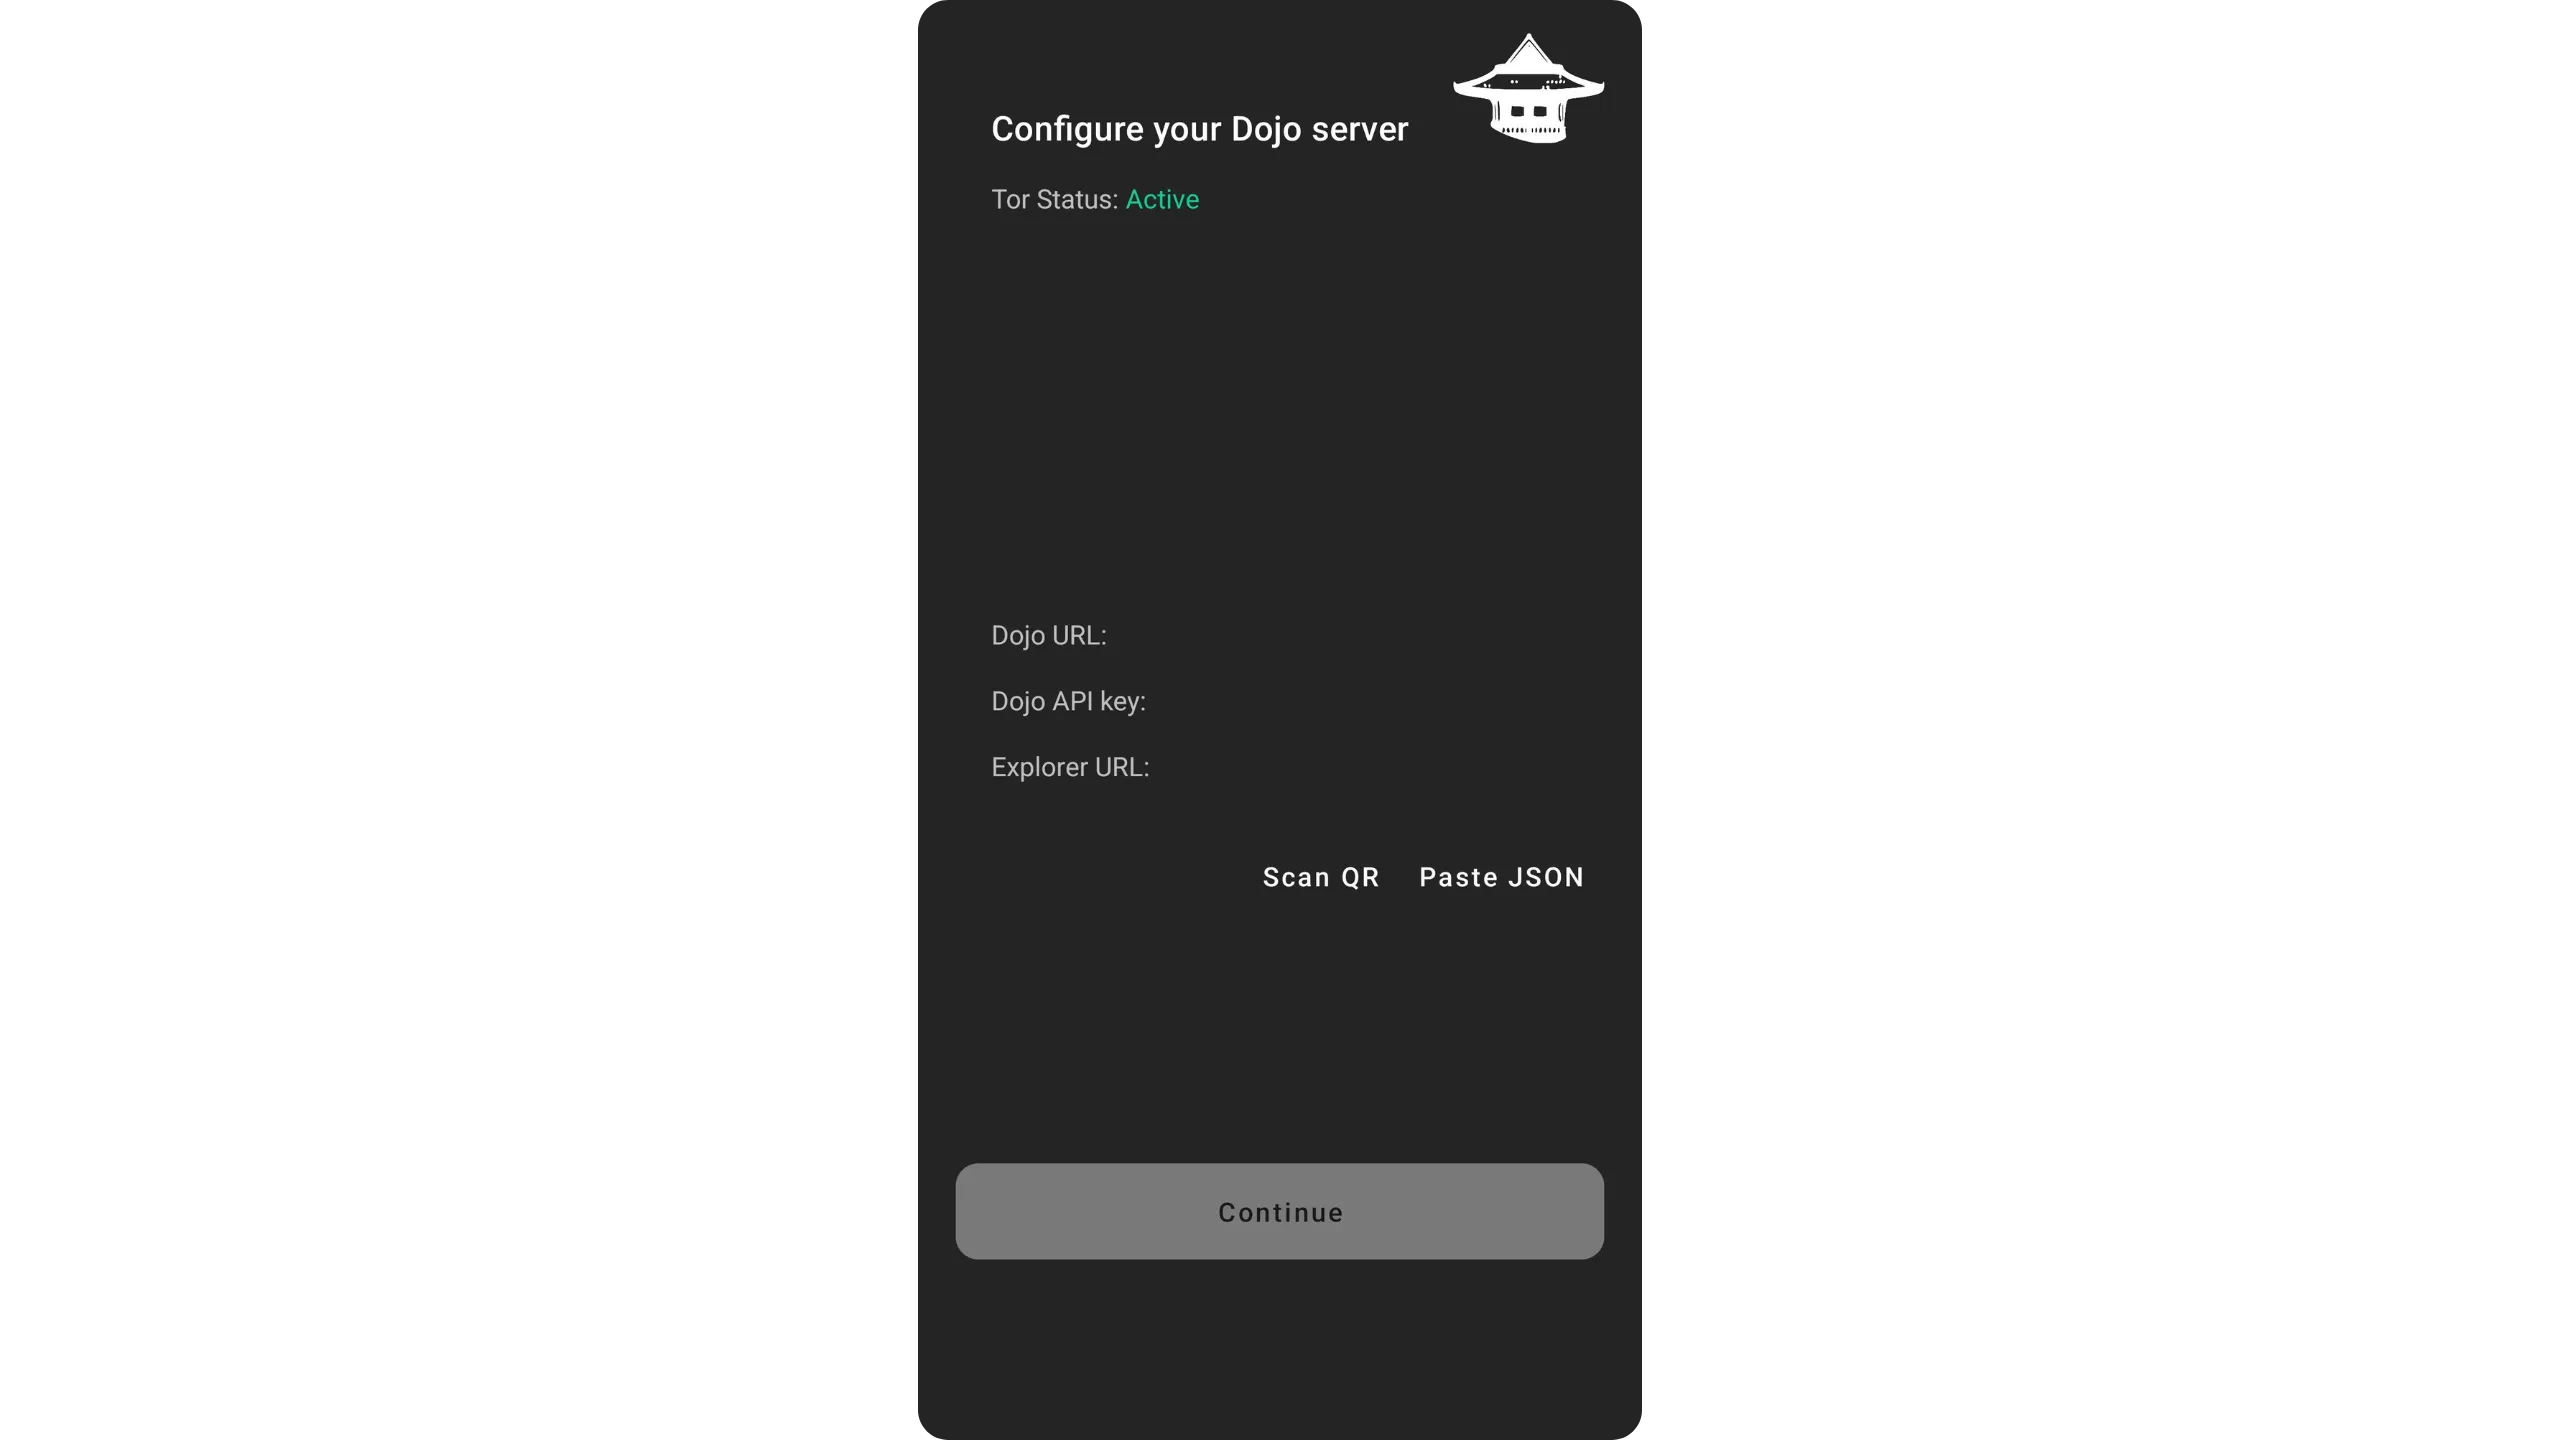
Then click on the “Continue” button.
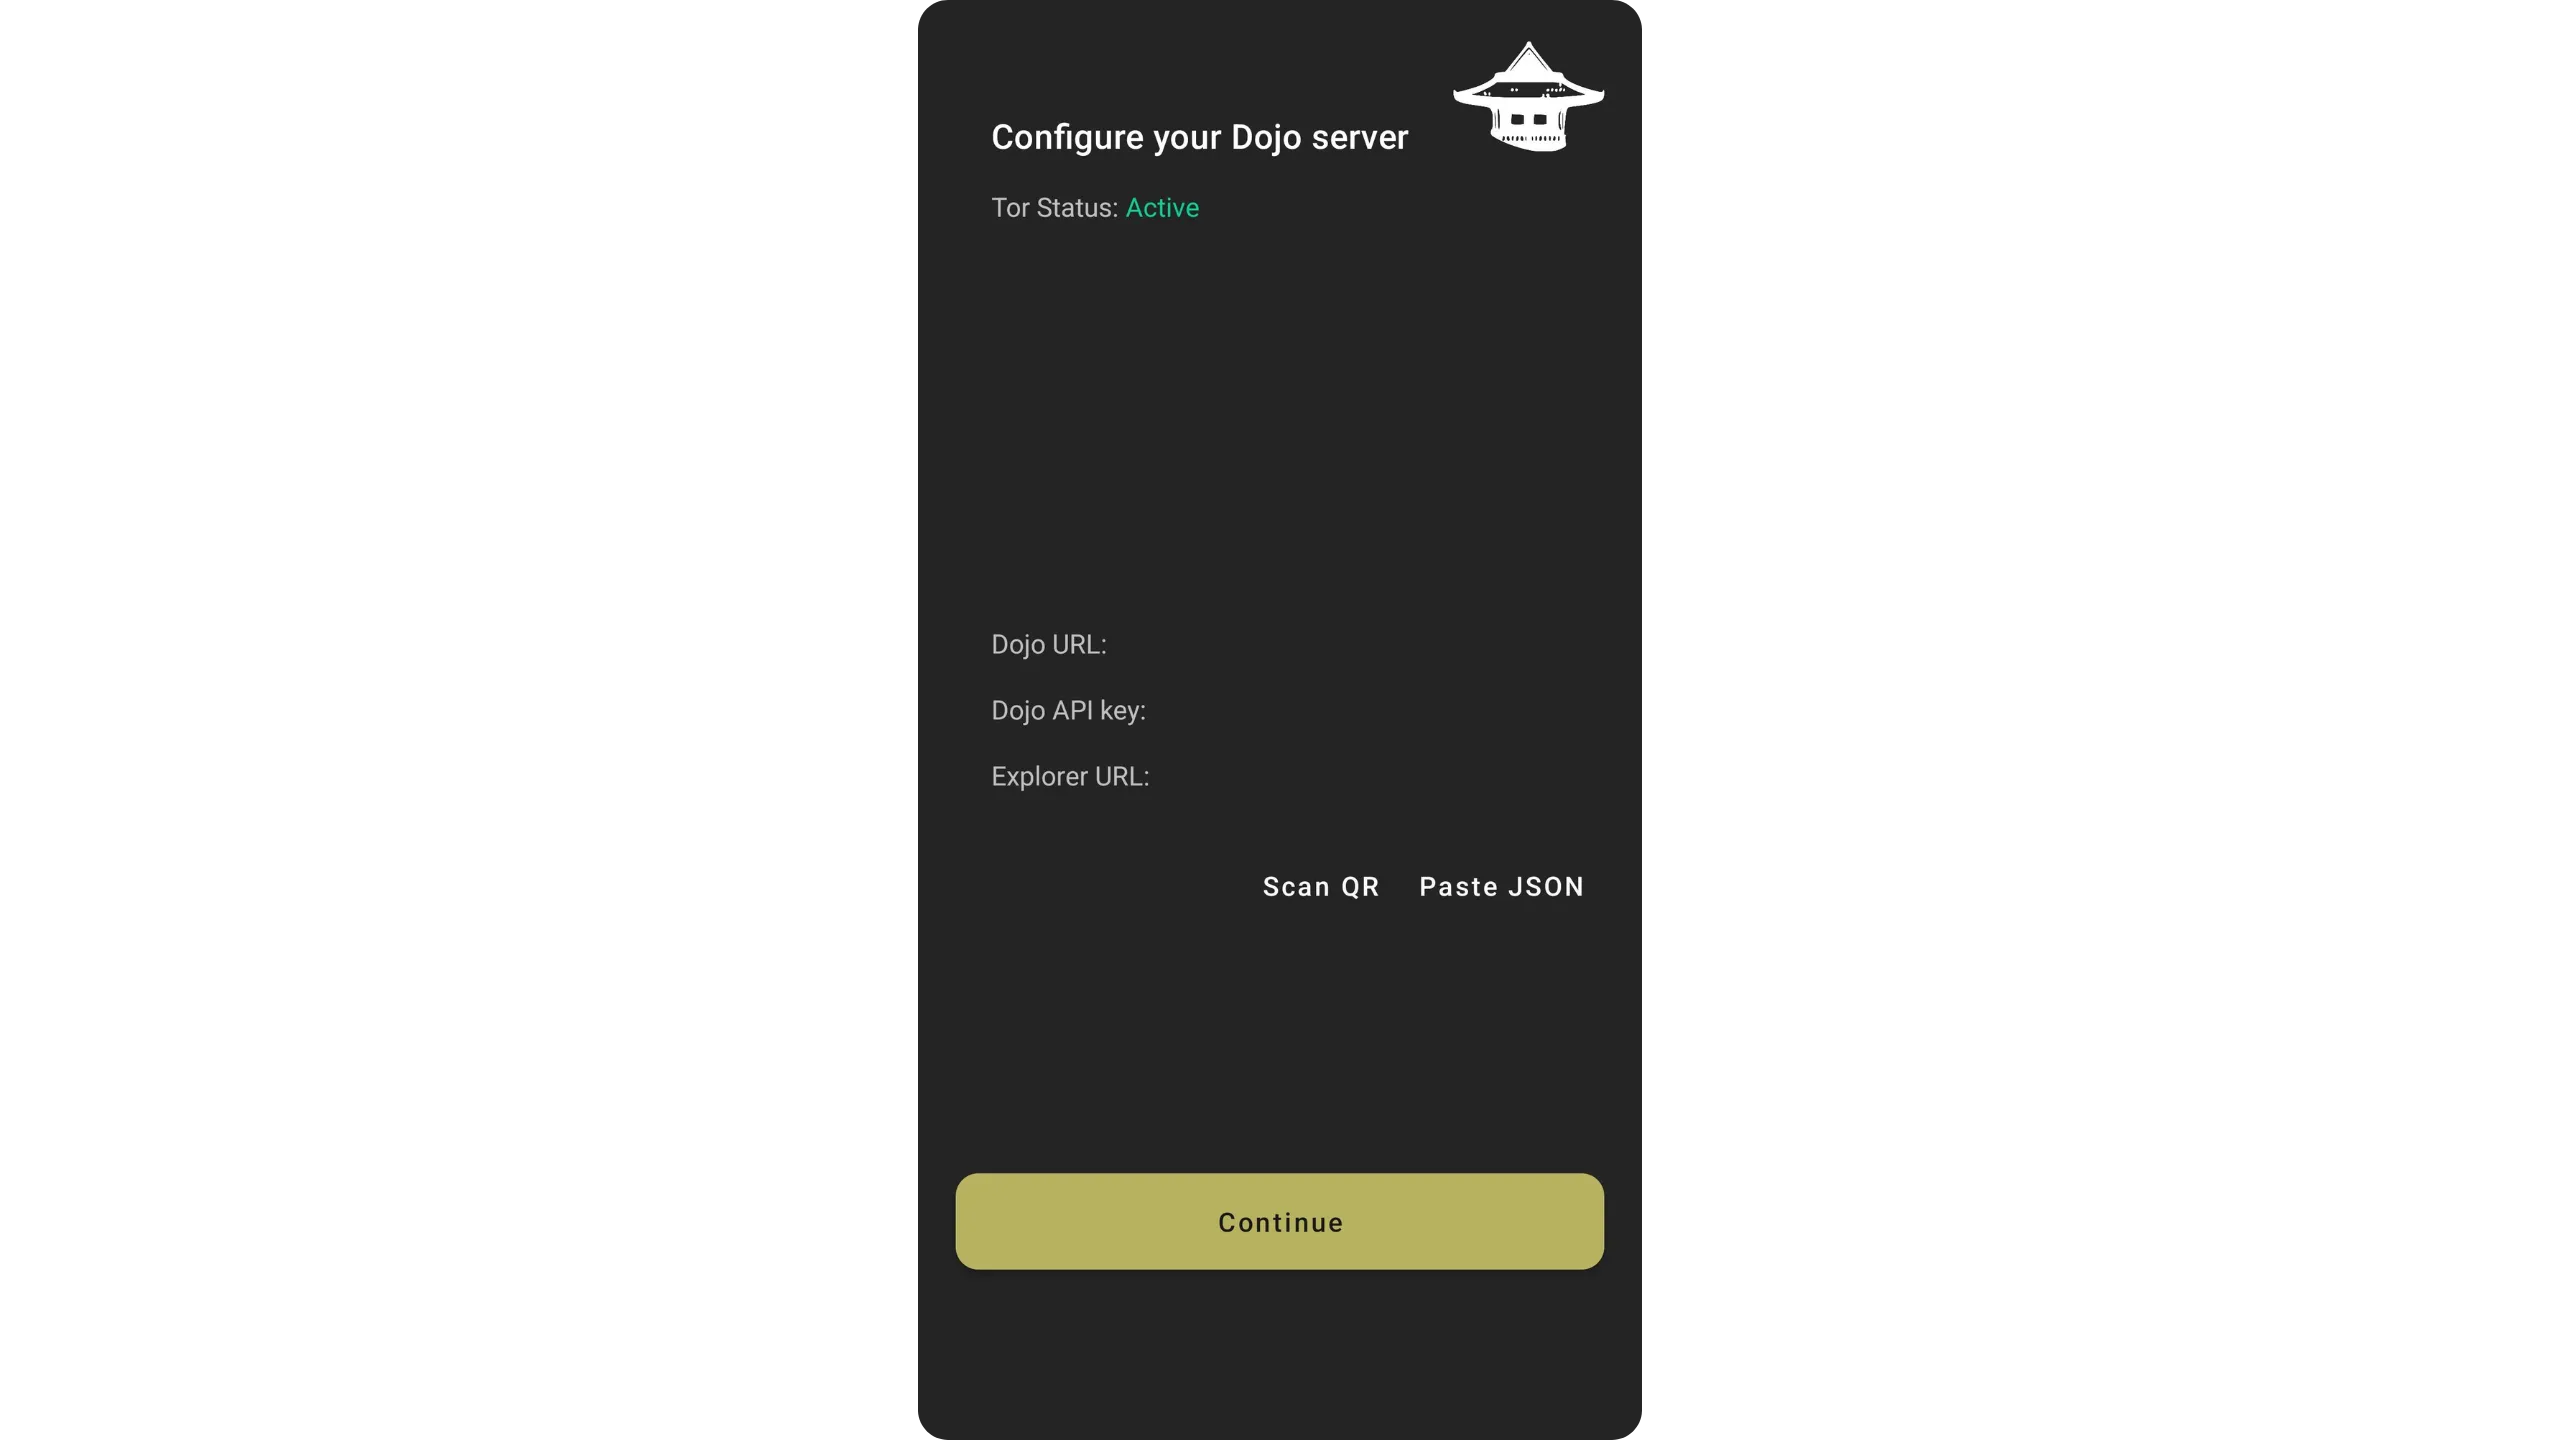
You are now connected to your Dojo.

Pair only over Tor and keep your DMT onion address private to avoid exposing wallet metadata to unauthorized parties.
8.2. Using the block explorer
Dojo automatically installs a block explorer, BTC-RPC Explorer, which draws directly on data from your own Bitcoin node. An explorer lets you access raw information from Blockchain and your Mempool through an easy-to-understand Interface web. So you can, for example, check the status of a pending transaction, view the balance of an address or examine the composition of a block with ease.
To access it, simply retrieve the Tor address from your browser. To do this, run the same command you used to obtain the address of your DMT:
1
./dojo.sh onion
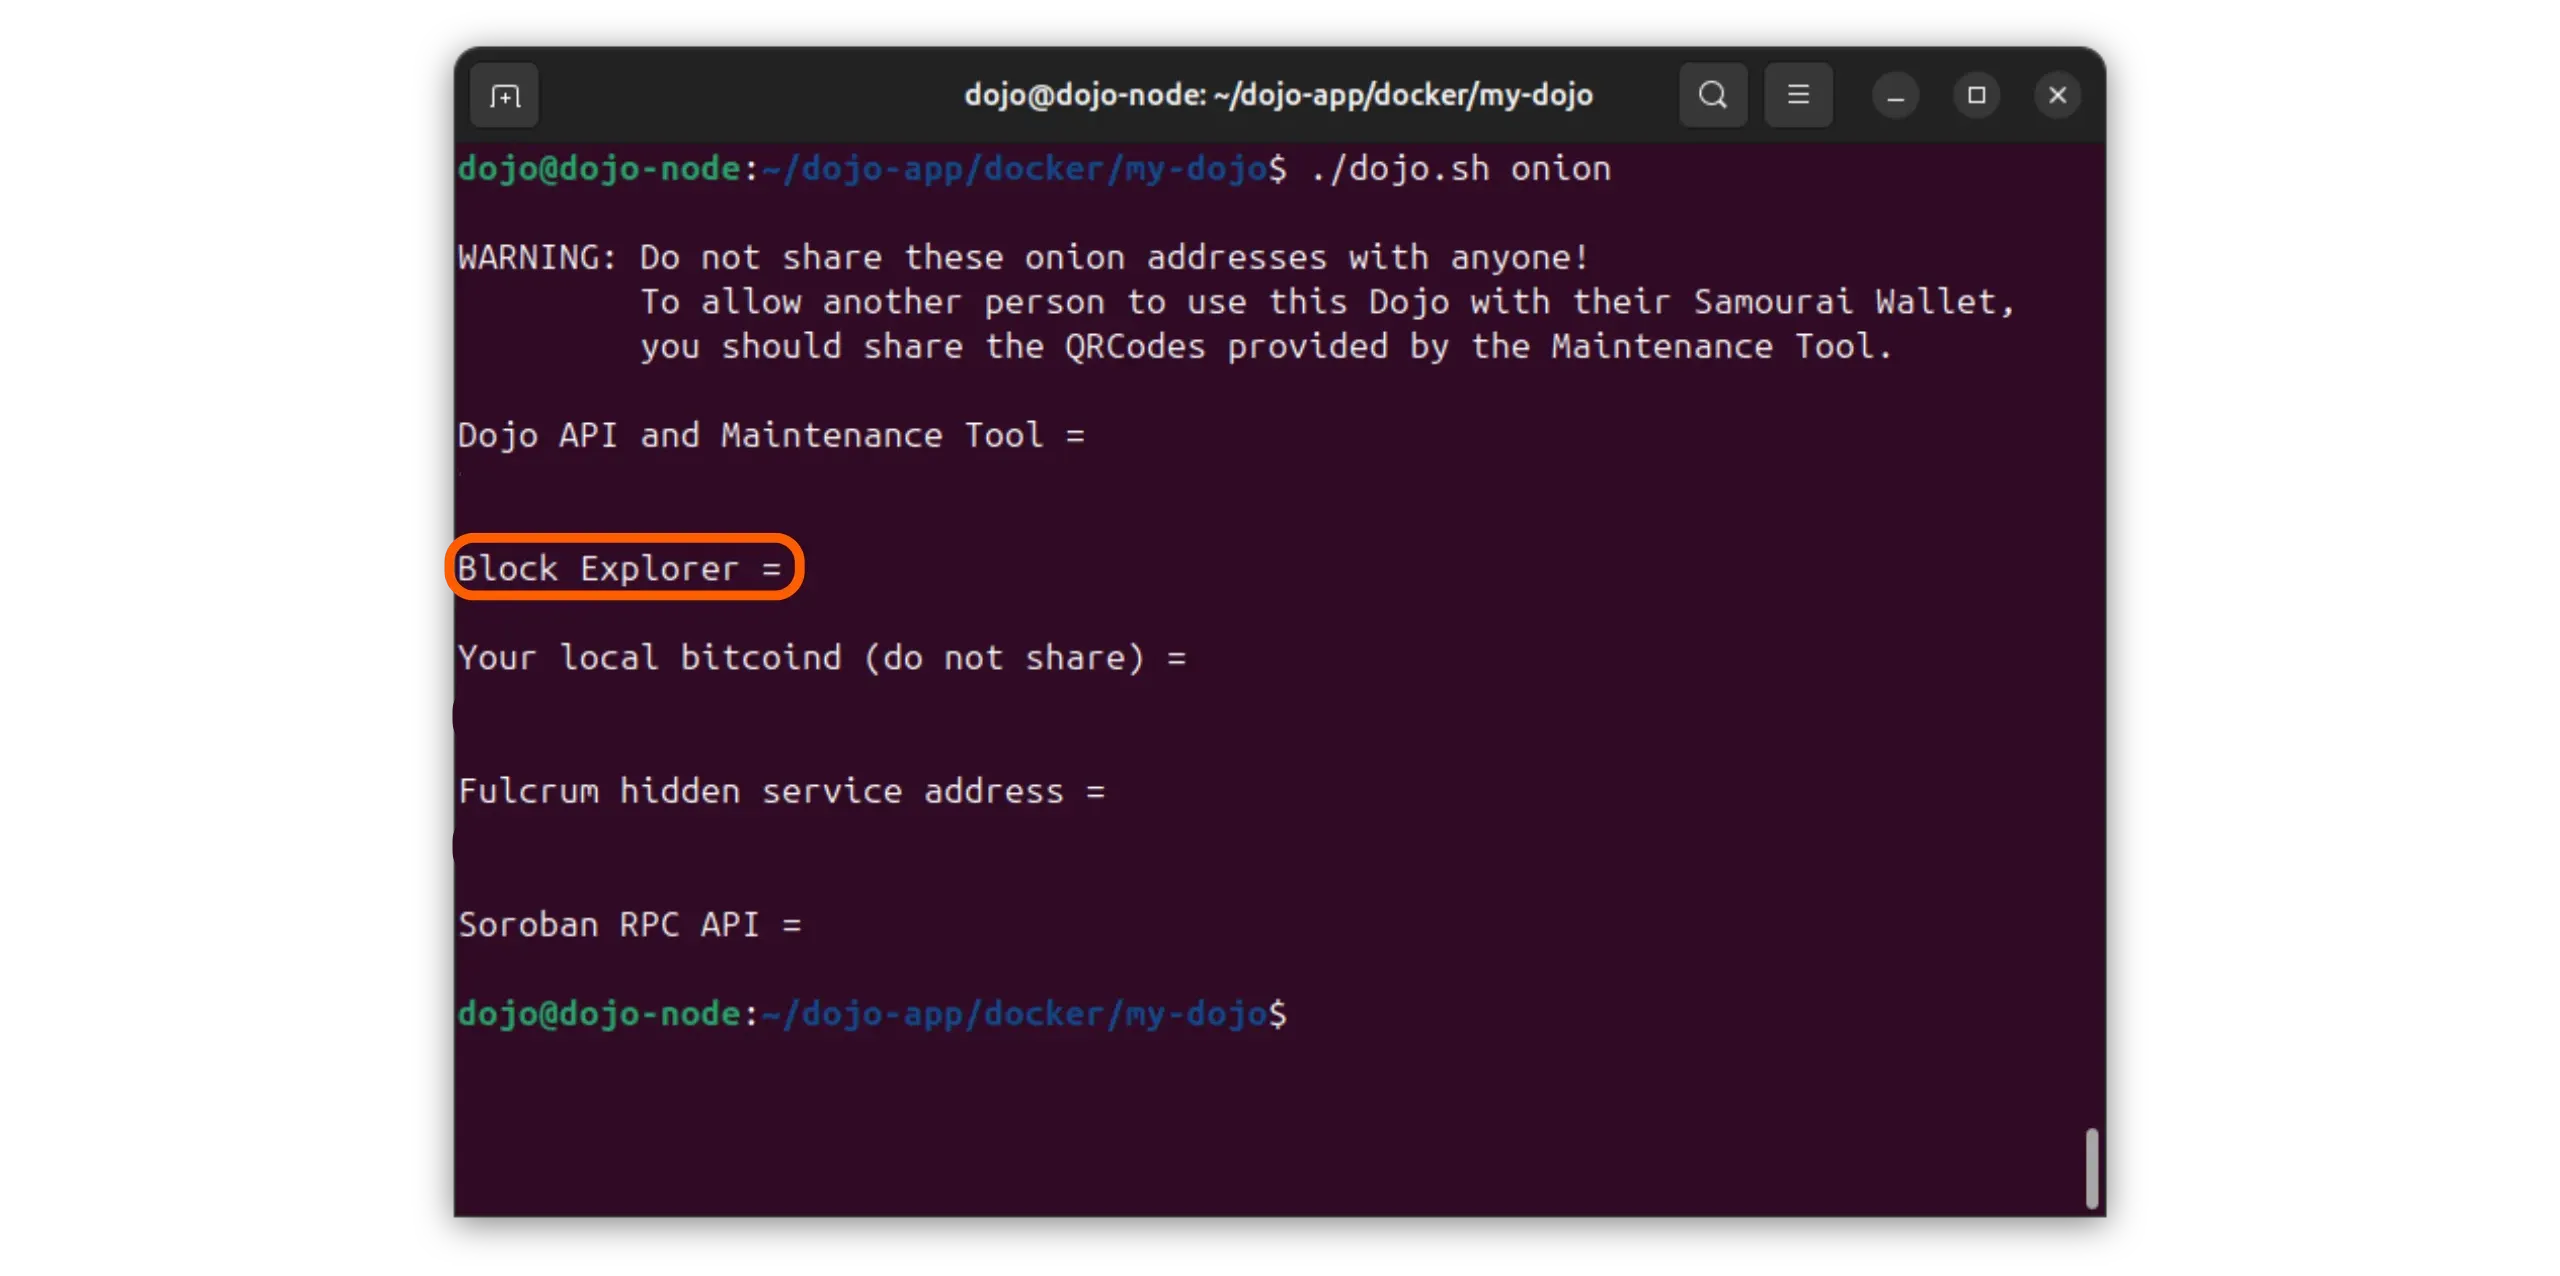
You’ll have access to all your Dojo connection information via Tor. The one we’re interested in here is the following URL:
1
Block Explorer =
If you’re already connected to your DMT, you can also find this address in the “Pairing” menu, inside the connection JSON:
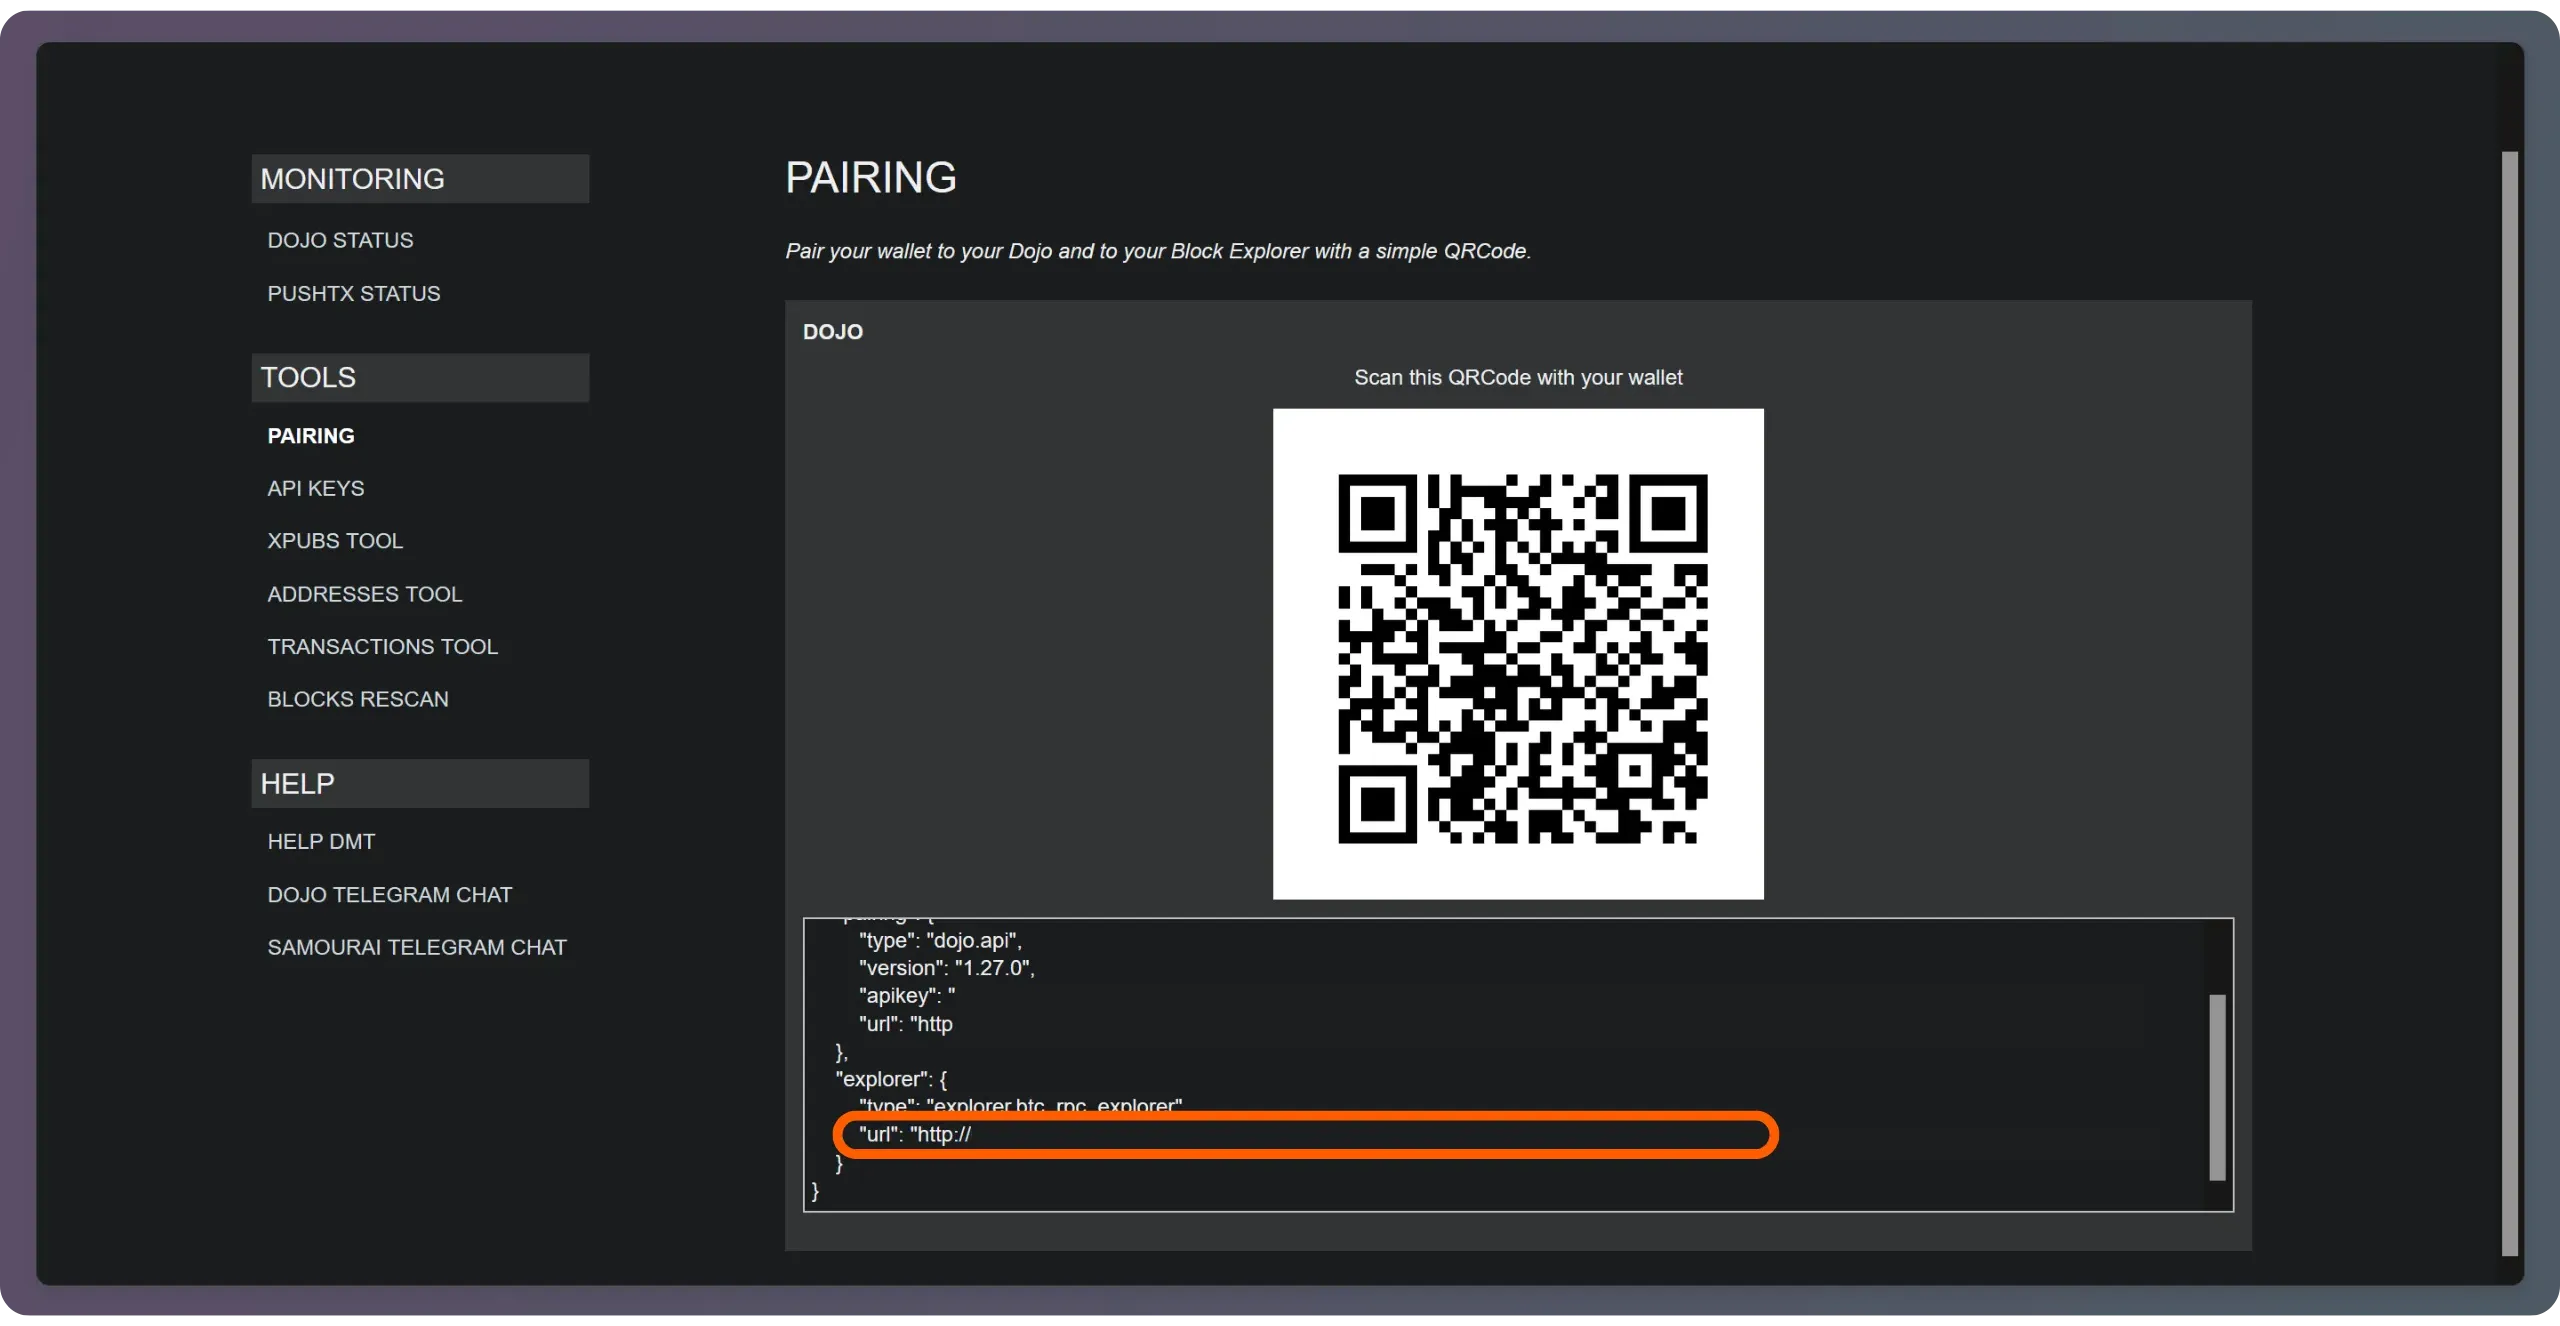
To access your browser from any machine on any network (even remotely), open Tor Browser and enter the URL you’ve just retrieved.
Keep your block explorer onion URL confidential; accessing over Tor preserves privacy and prevents unwanted exposure.
You’ll then have access to your own block explorer.
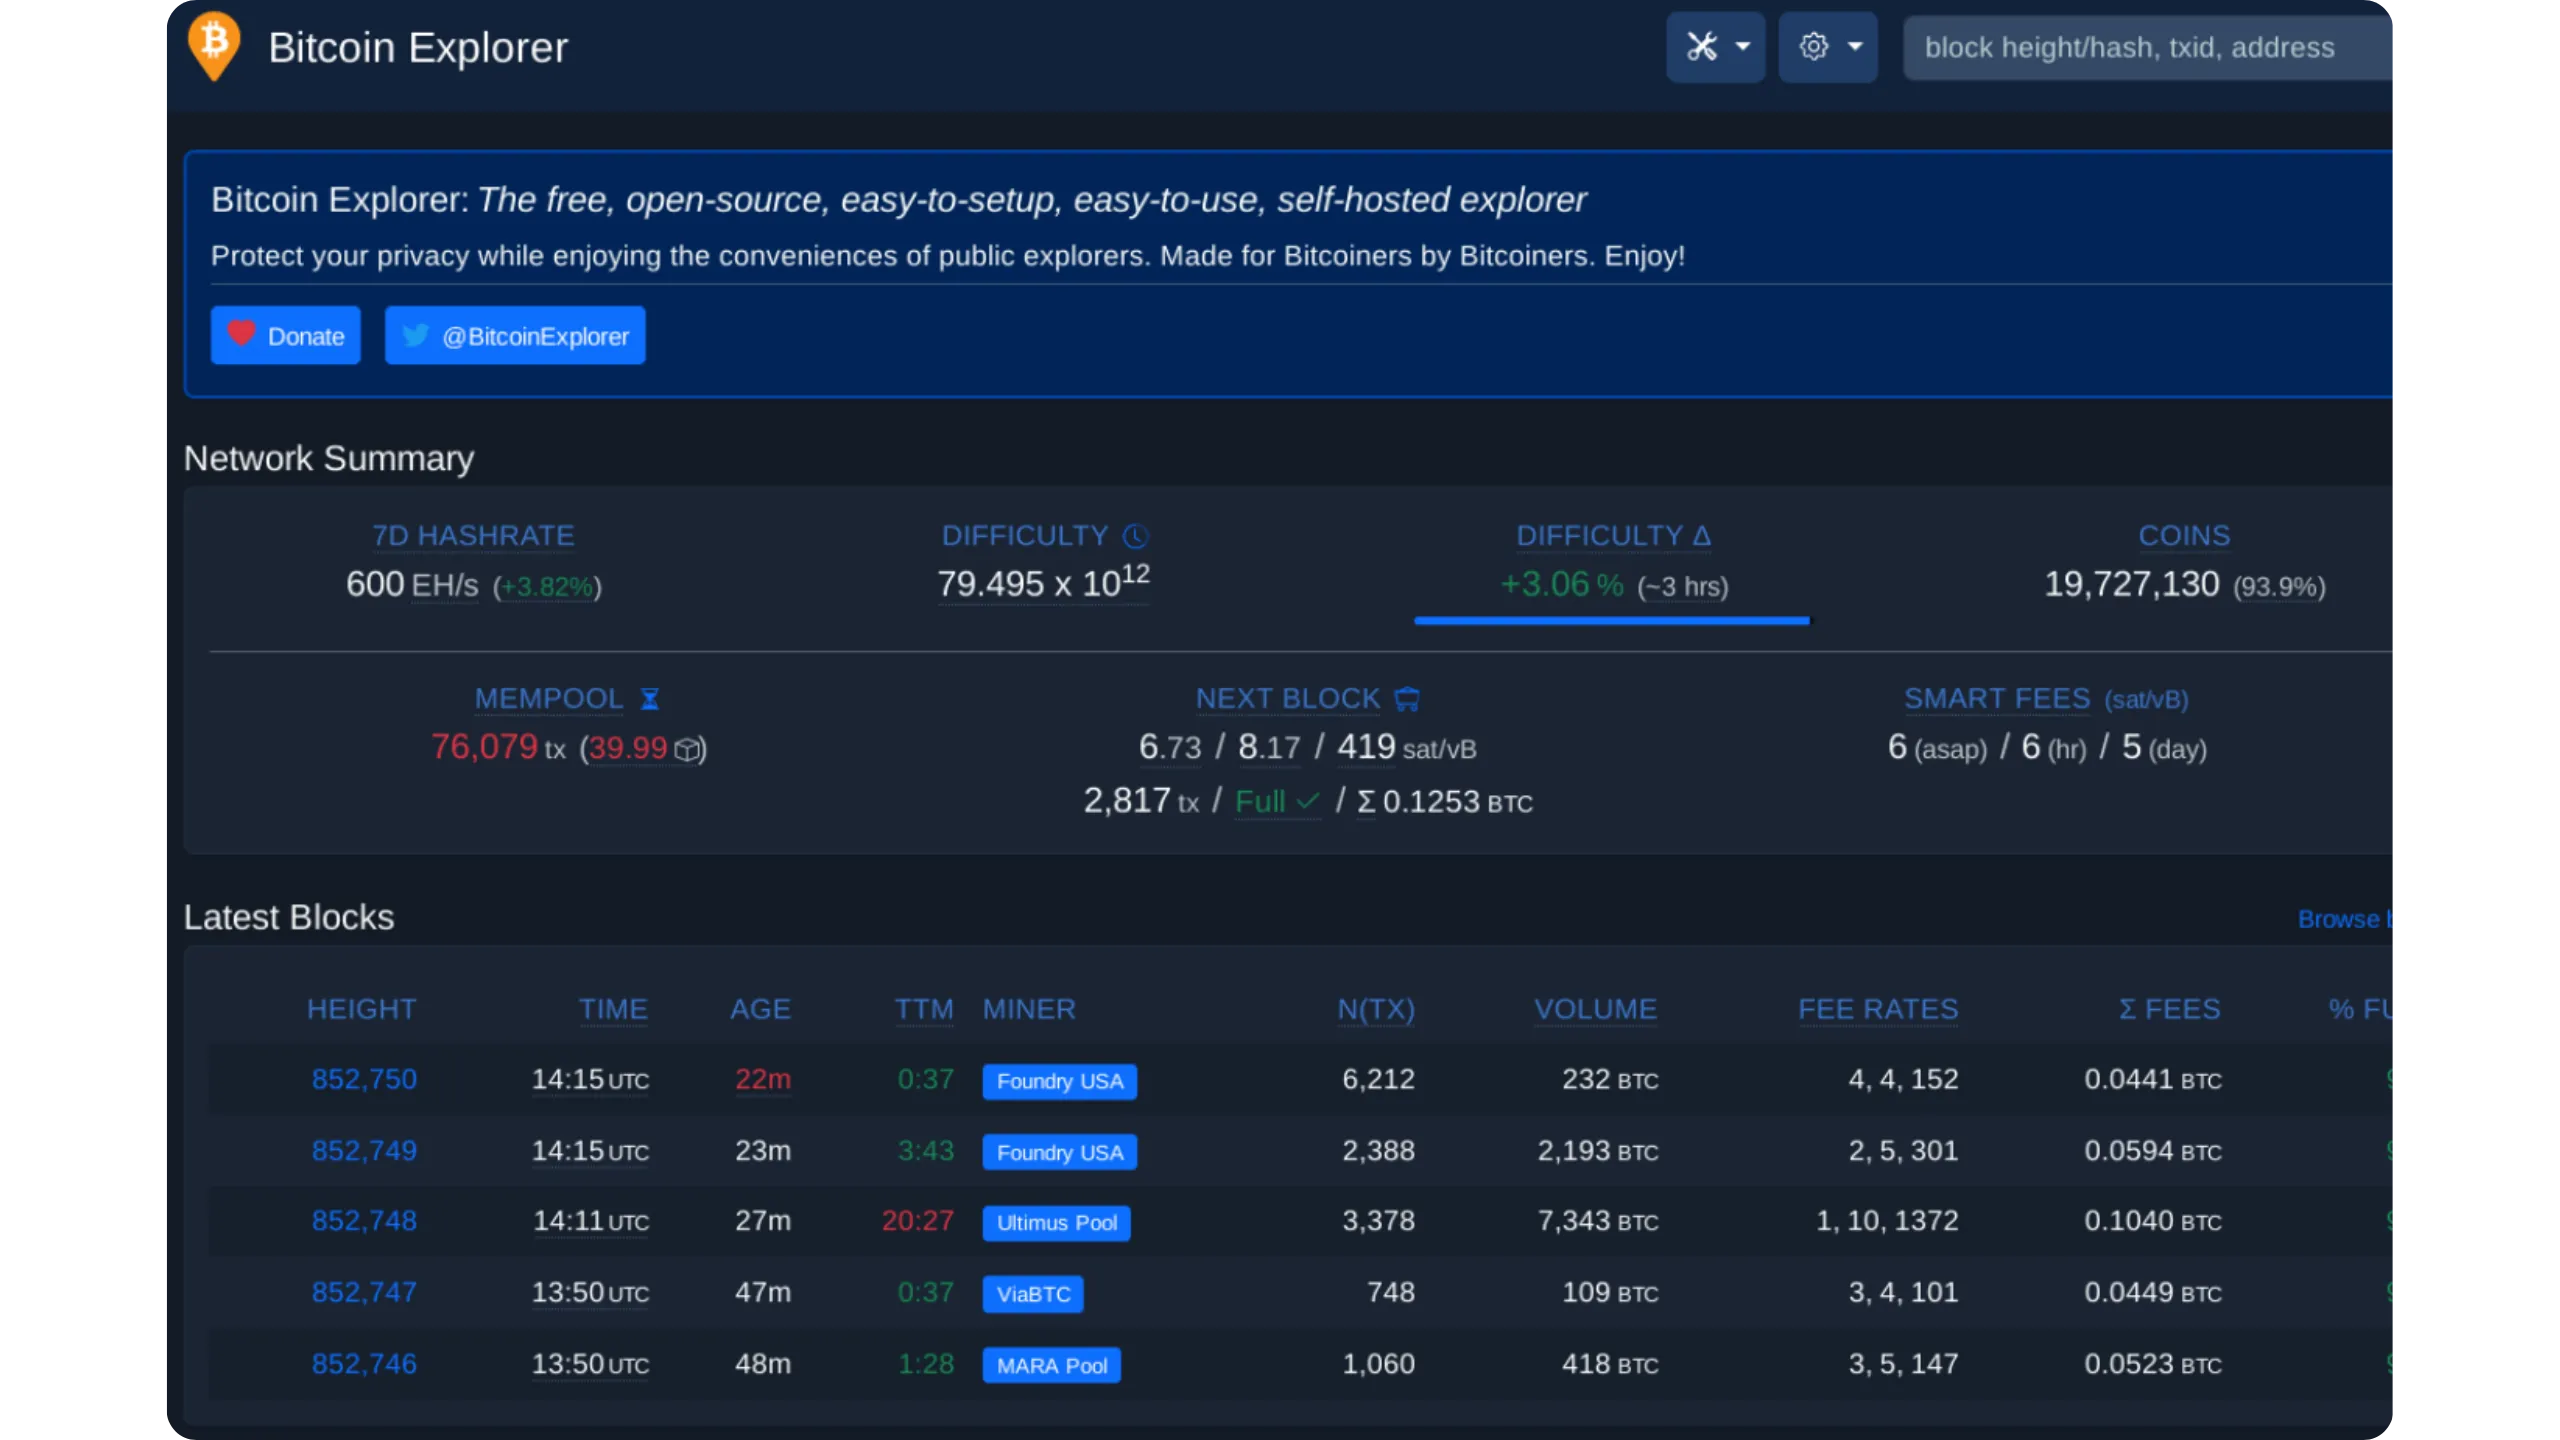
Image credit: https://ashigaru.rs/.
To track a transaction, simply enter its txid in the search bar at top right.
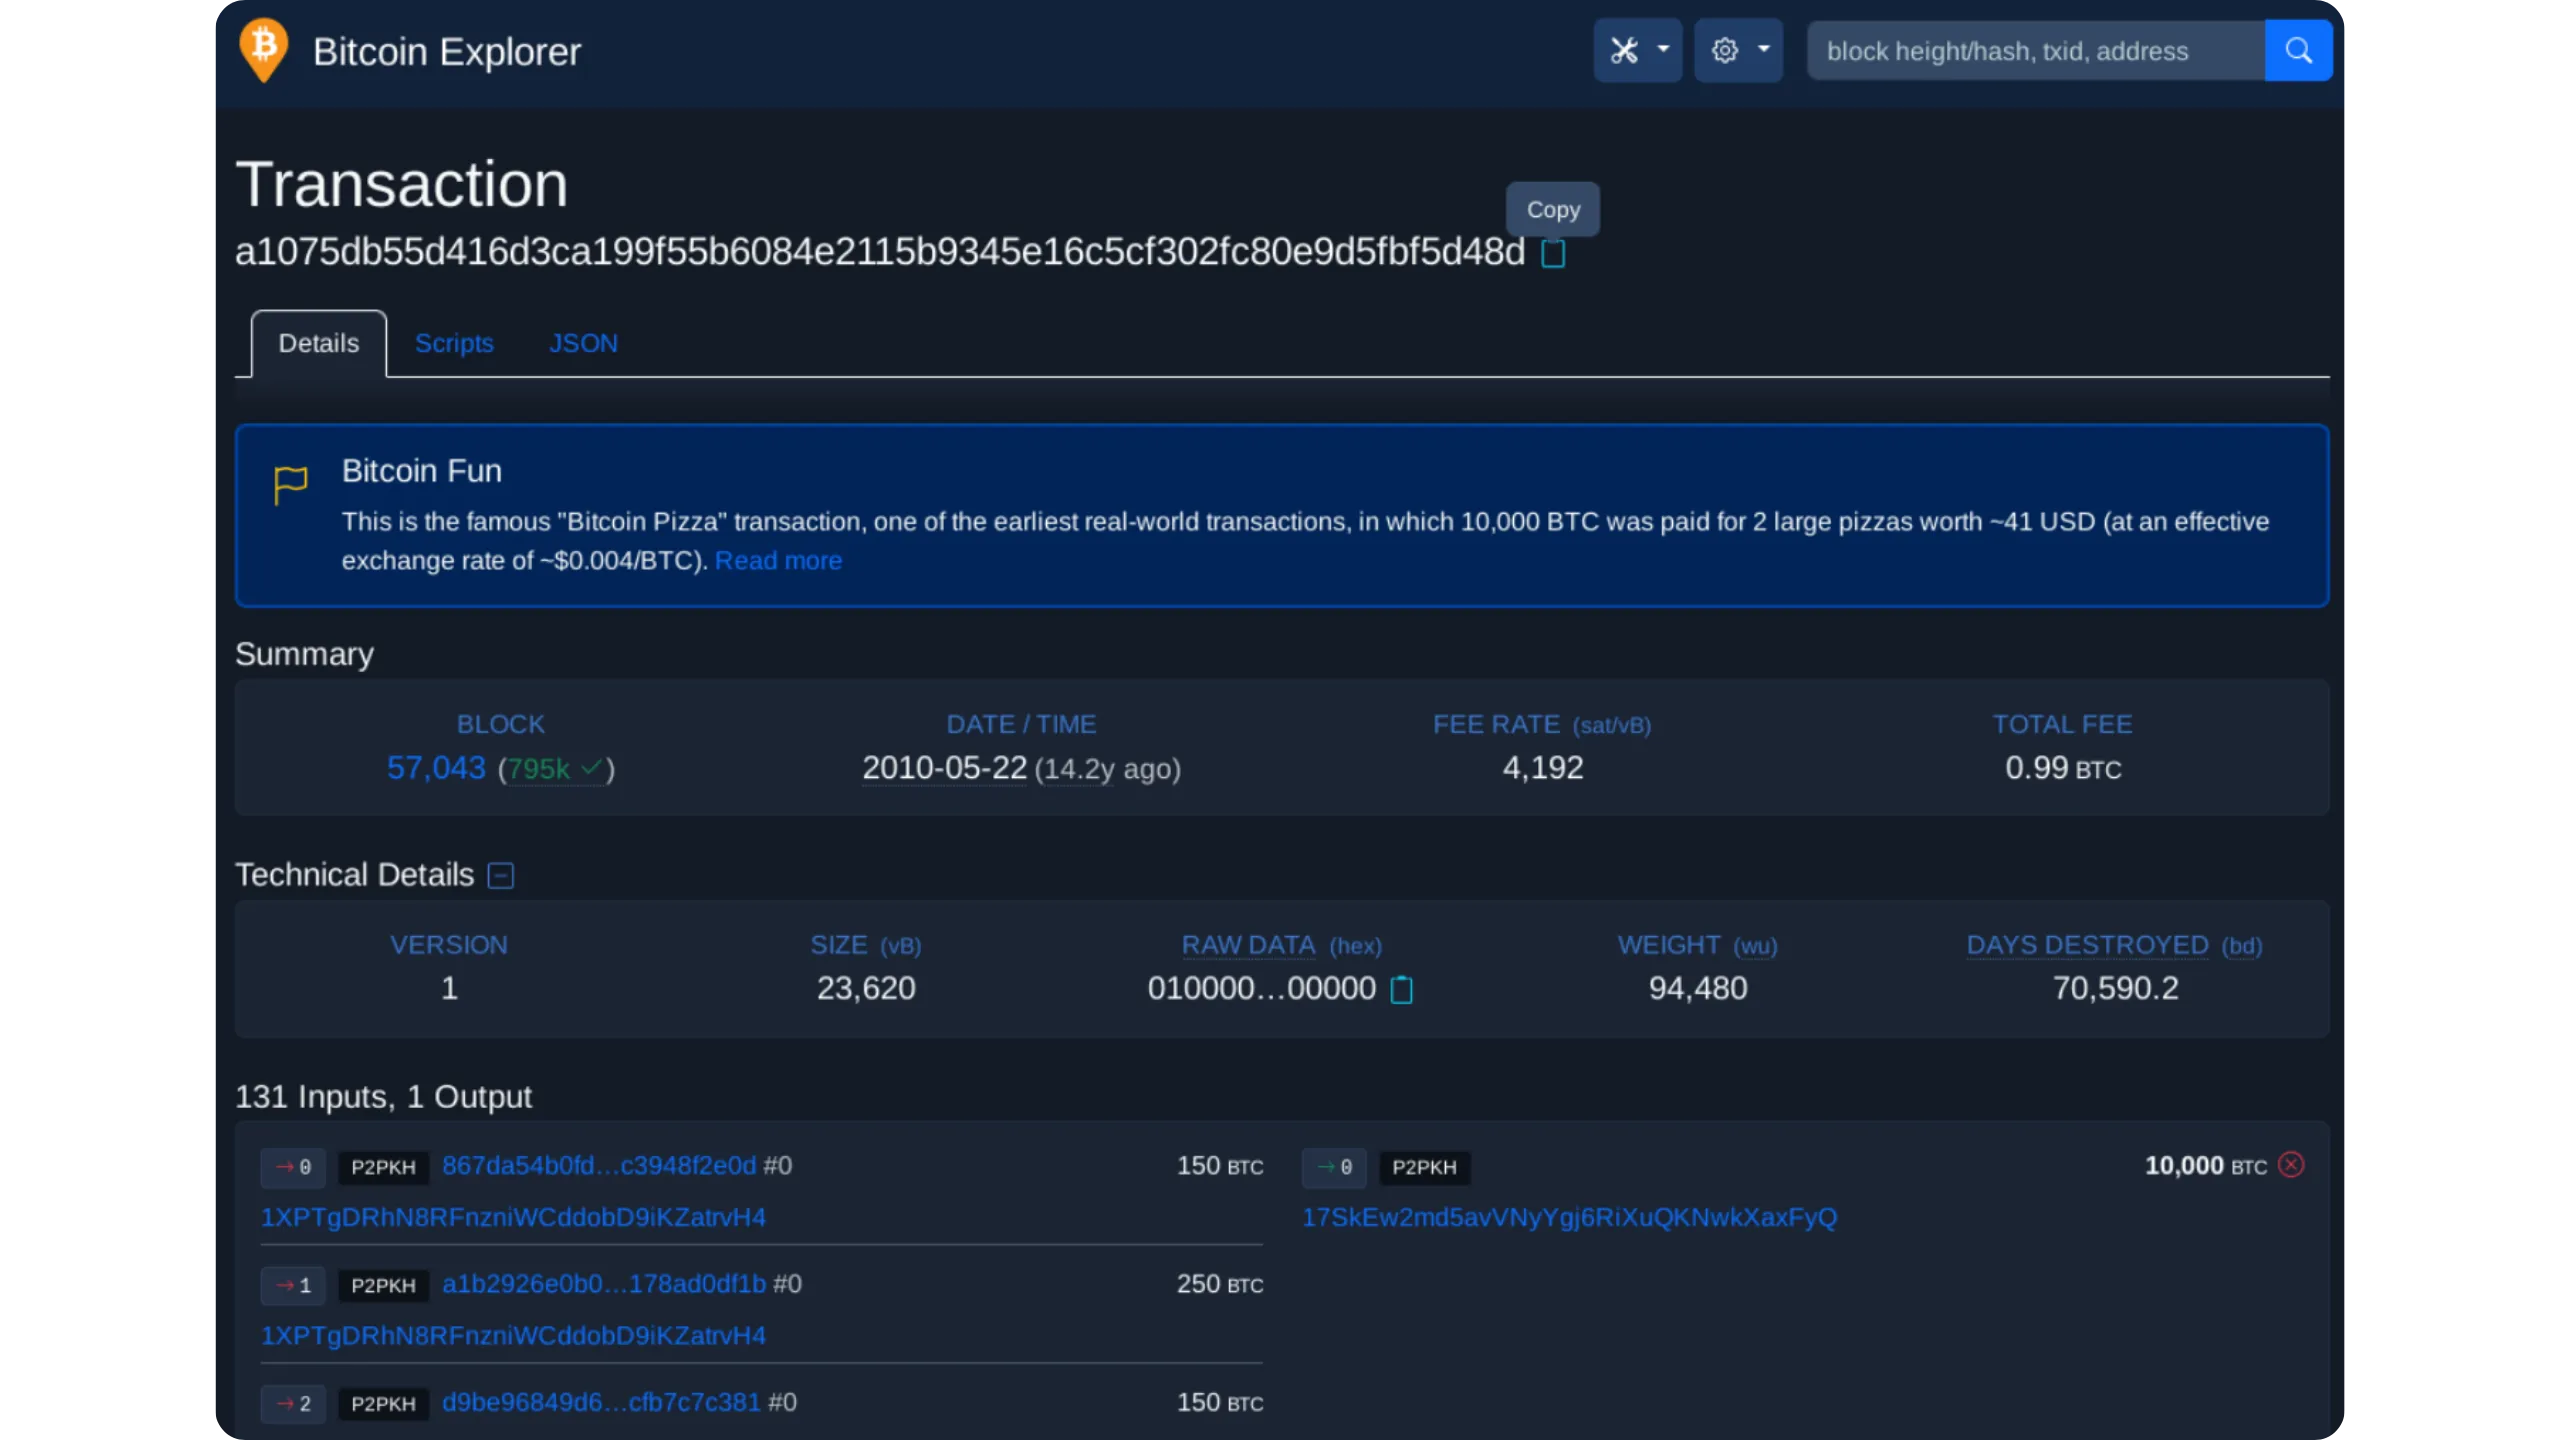
Image credit: https://ashigaru.rs/.
To check the movements associated with an address, proceed in the same way by entering the address in the search bar.
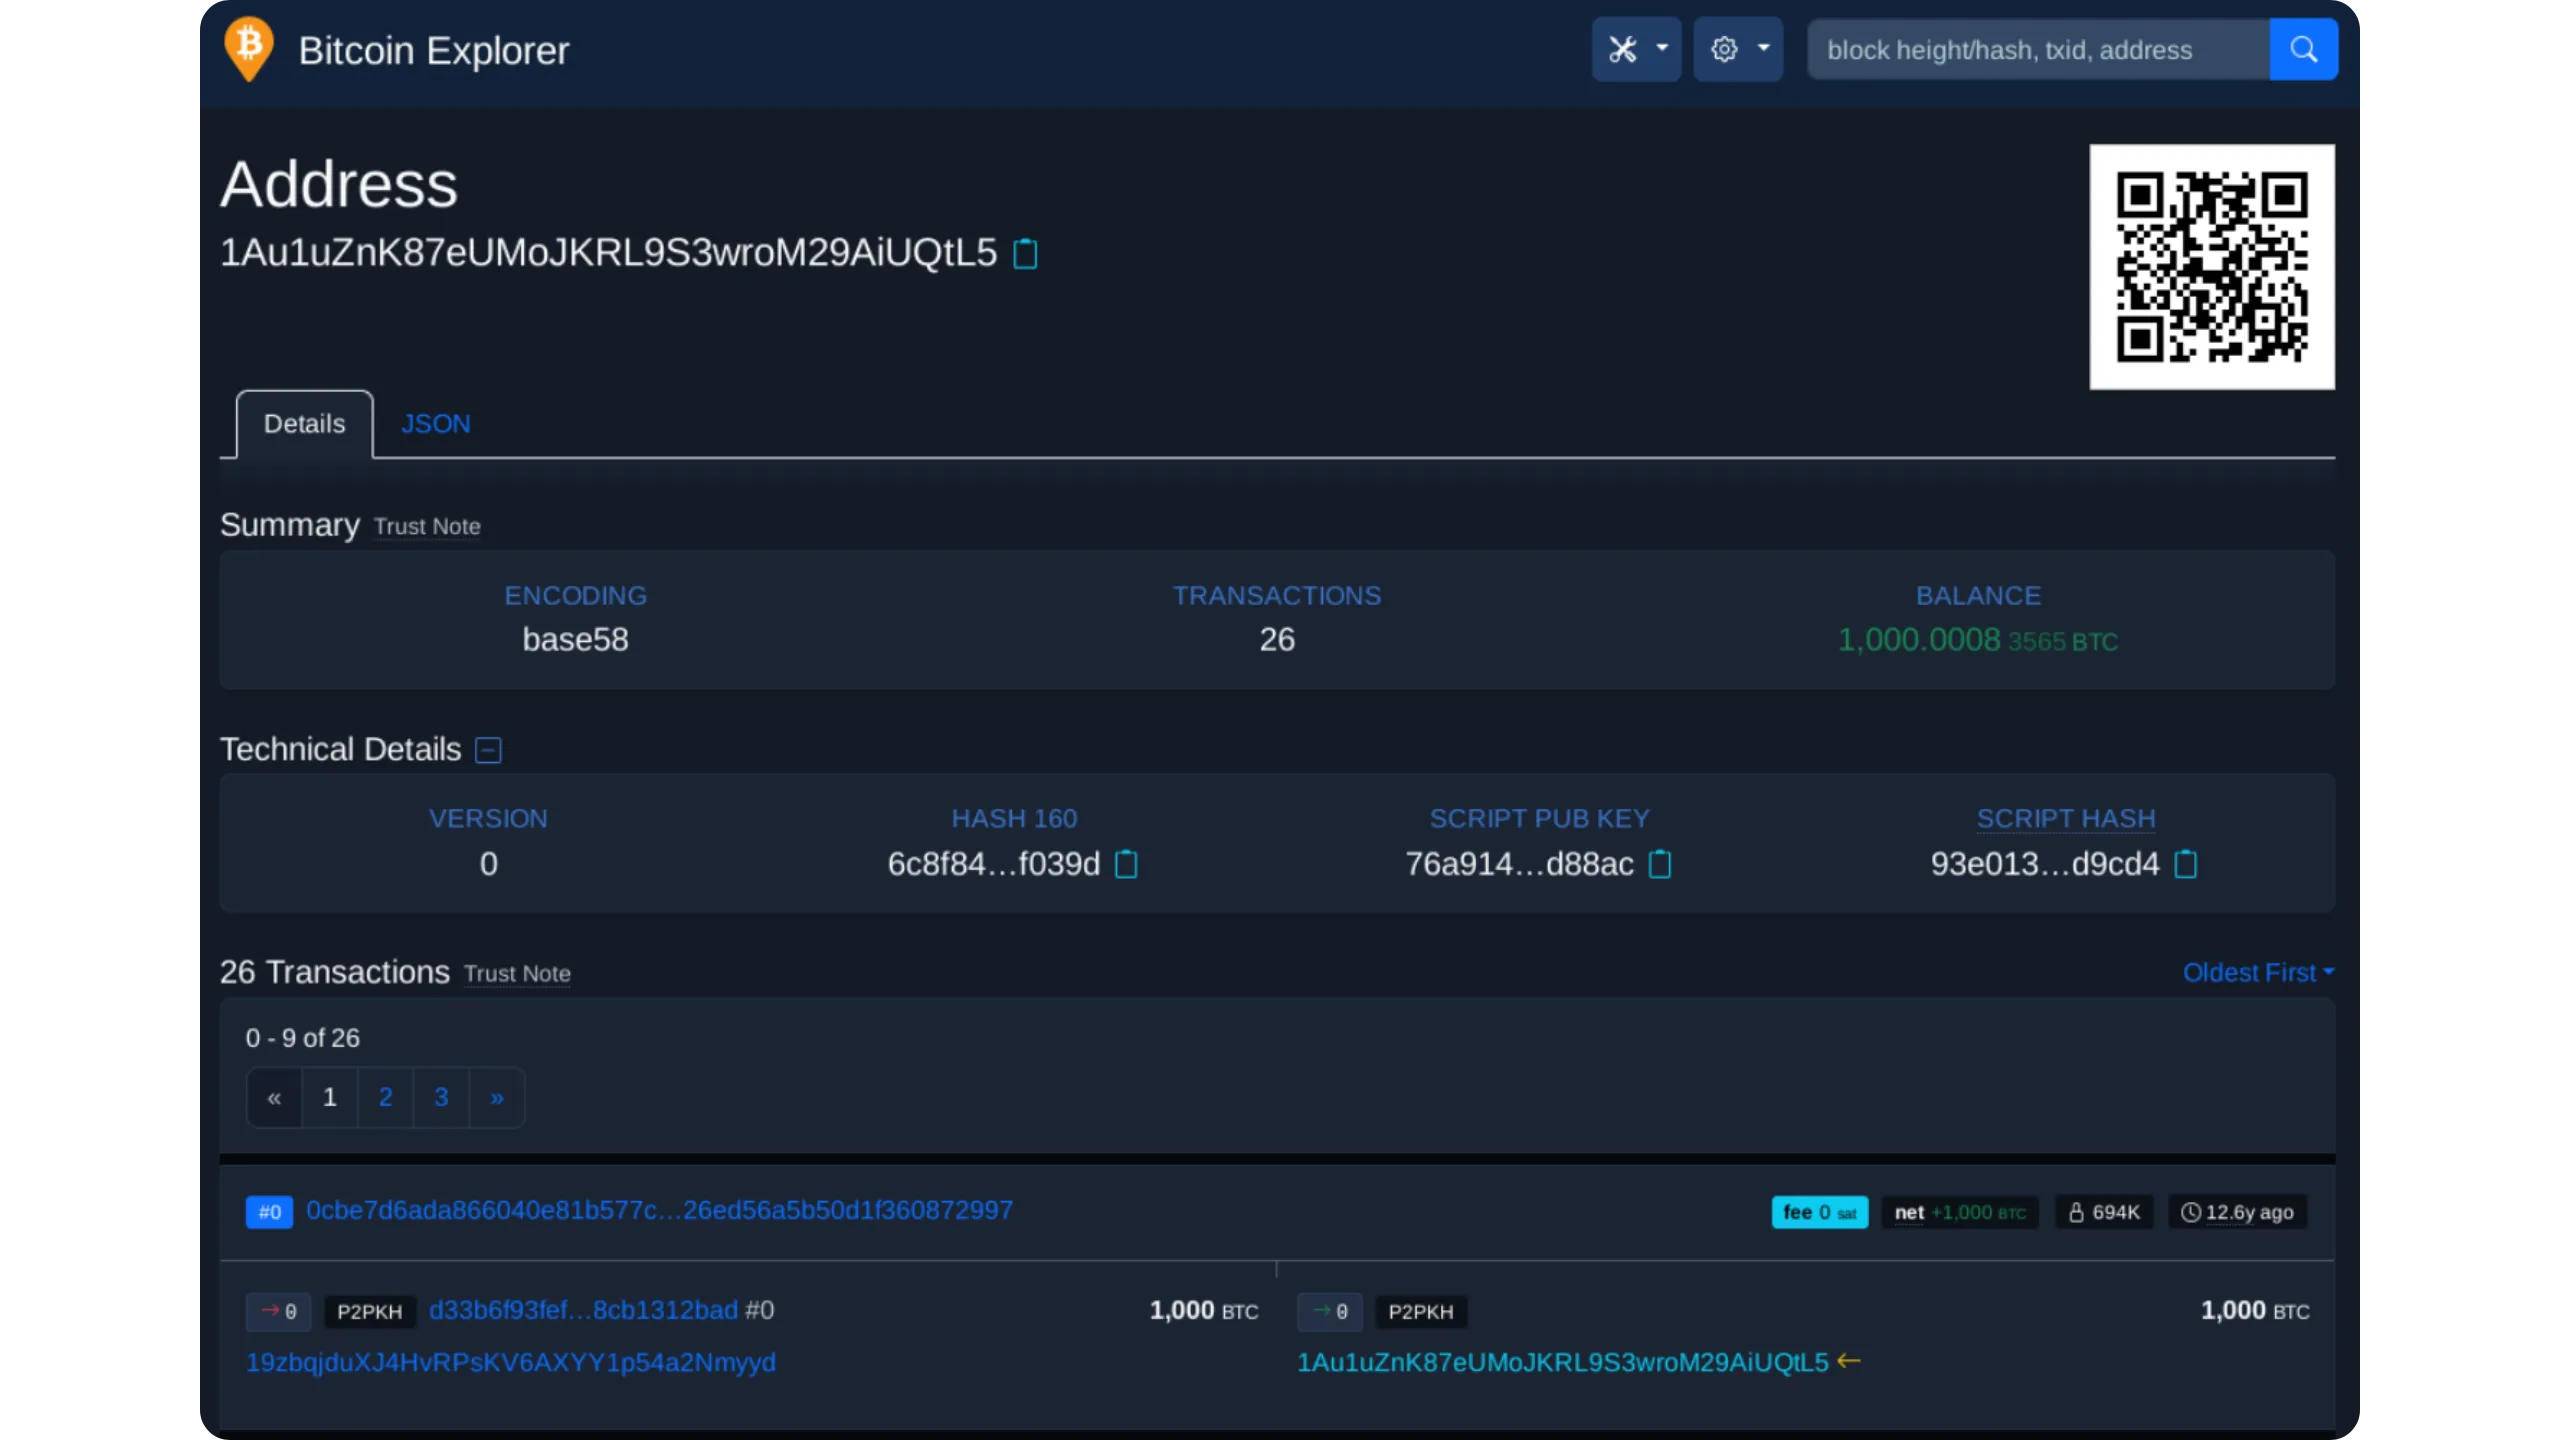
Image credit: https://ashigaru.rs/.
You can also enter a block’s Hash or height in the search bar to display details.
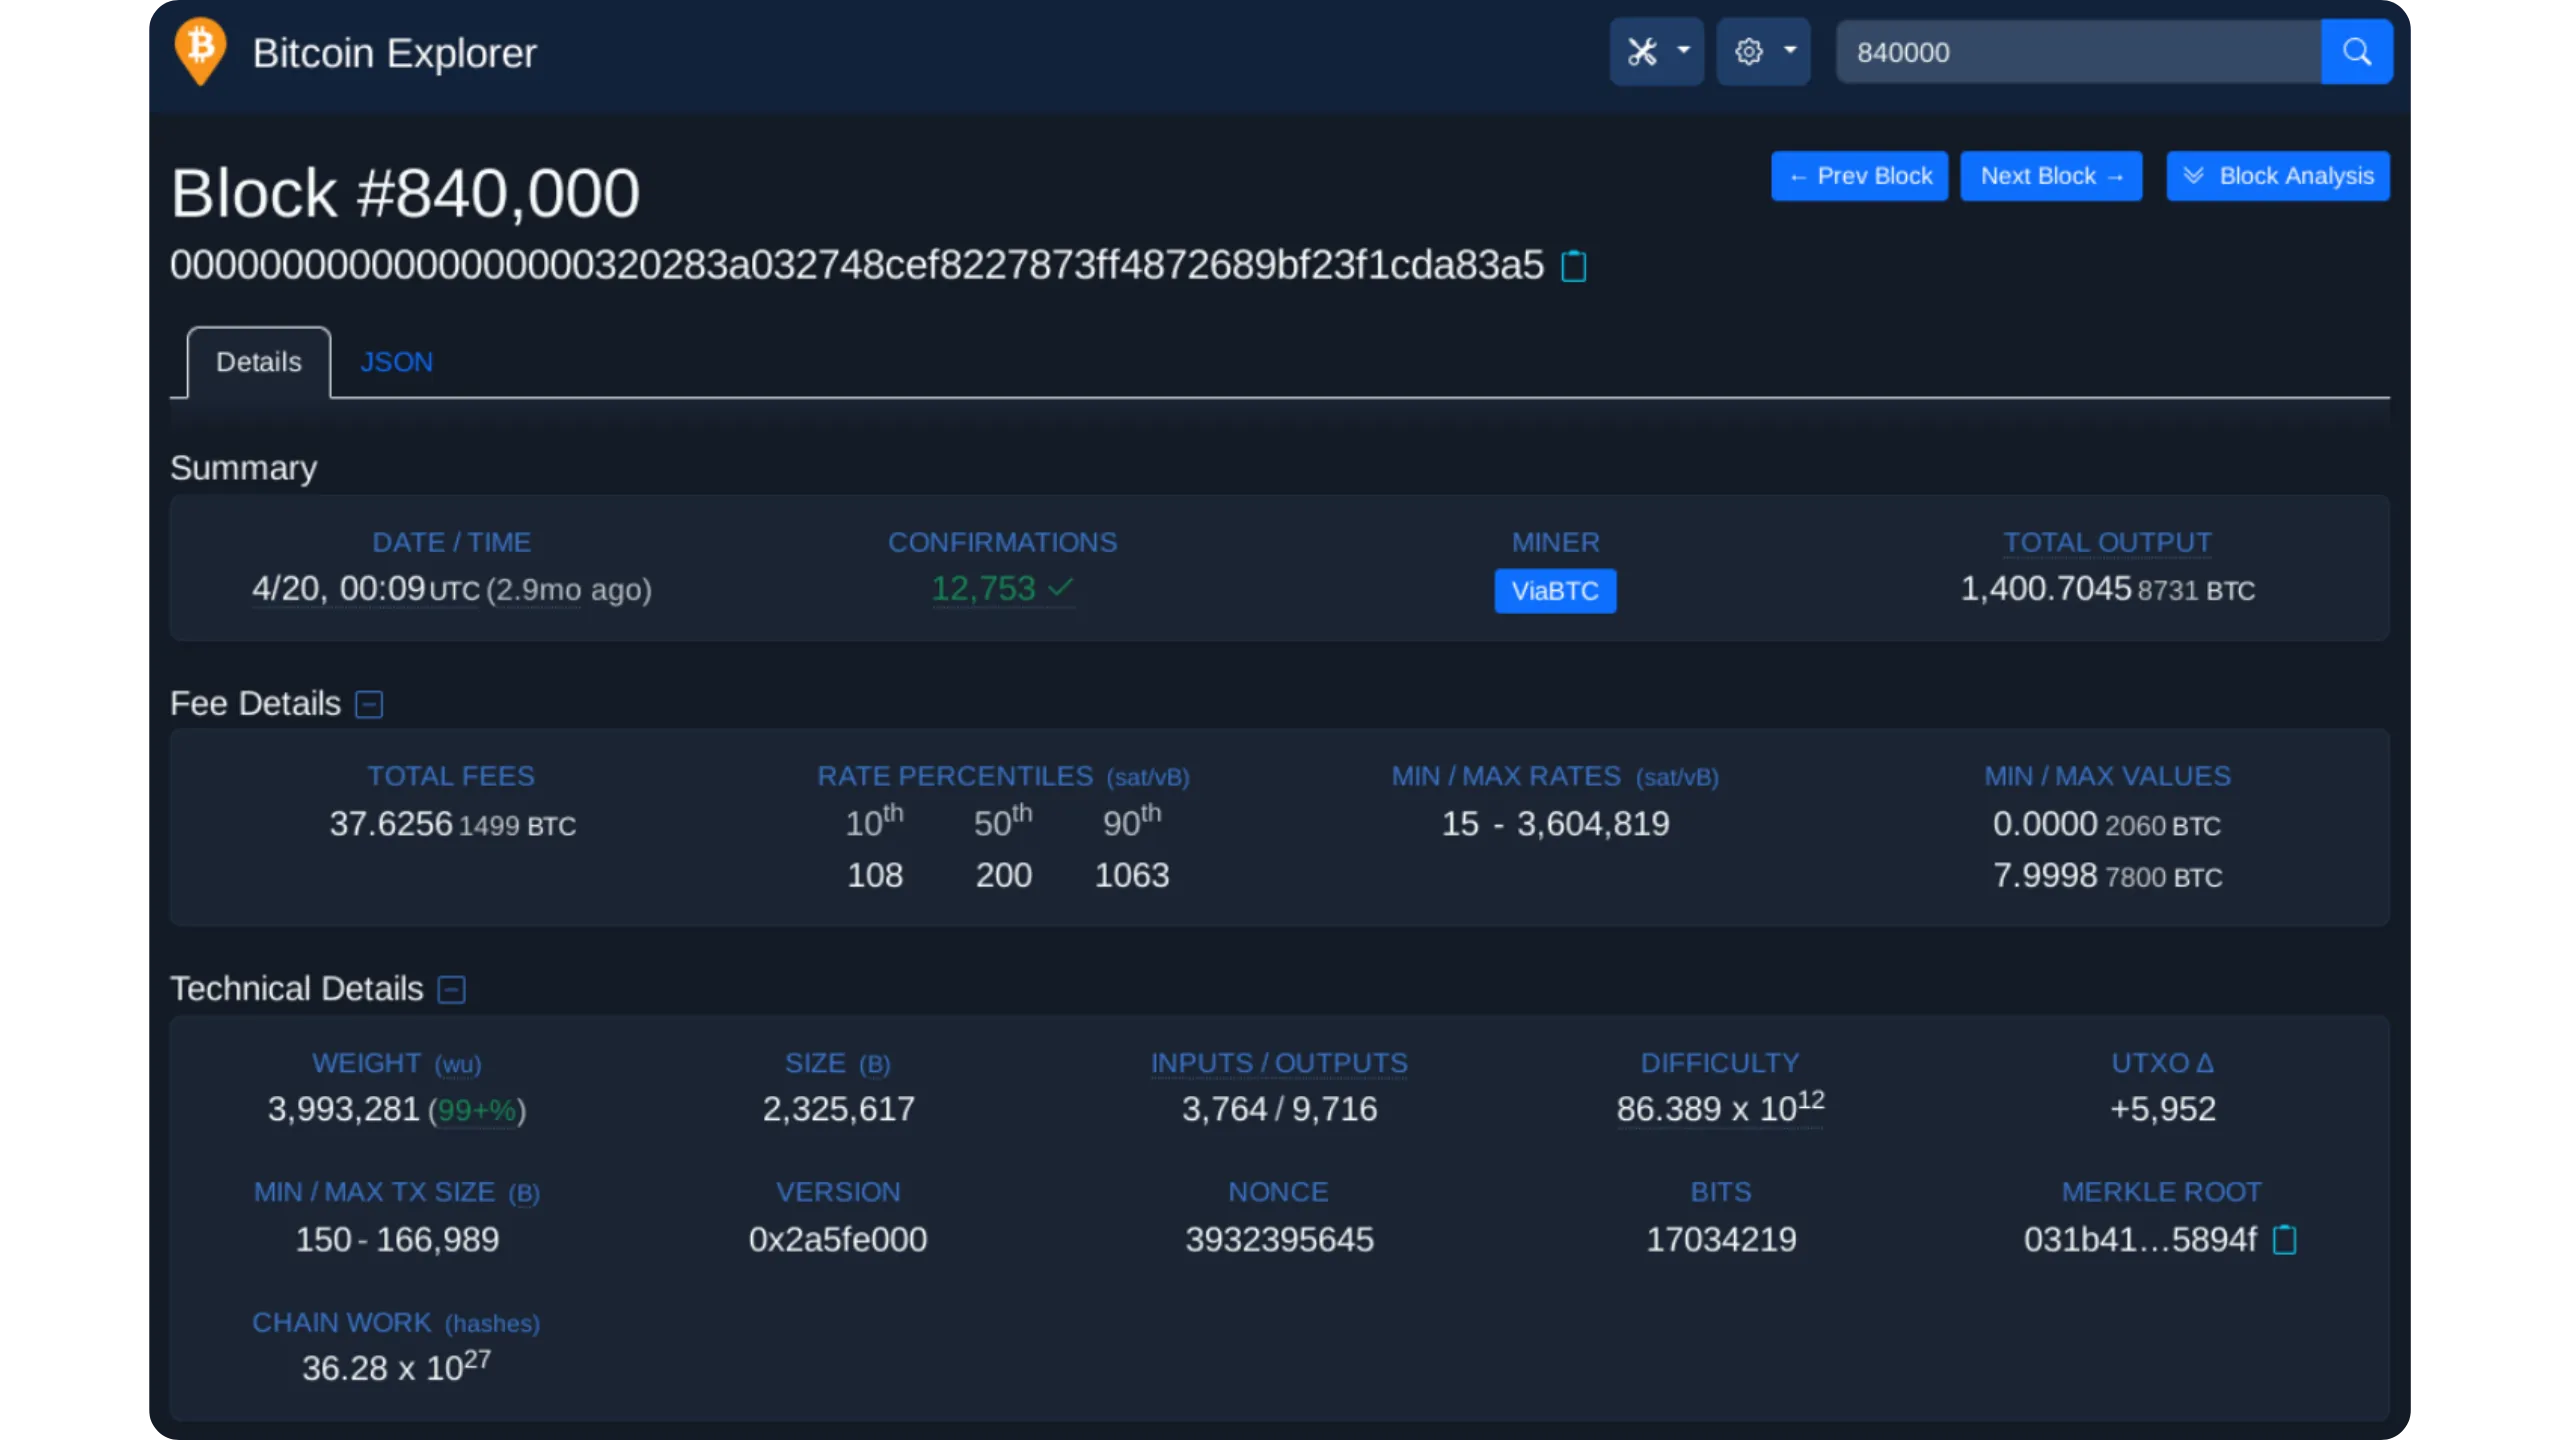
Image credit: https://ashigaru.rs/.
9. Dojo maintenance
9.1 Stop your Dojo
Never abruptly cut power to your Dojo, as this may corrupt certain databases, particularly the Fulcrum indexer. If you do have to switch it off, always perform a clean shutdown of Dojo, then, once all procedures have been completed, switch the machine off as well:
1
2
cd ~/dojo-app/docker/my-dojo
./dojo.sh stop
Avoid abrupt power cuts; always stop services cleanly before shutting down to prevent database corruption.
9.2 Update your Dojo
Dojo evolves regularly and new versions are released to fix bugs, improve stability and add features. It is therefore important to check regularly for updates and to update your Dojo. The process is similar to the initial installation, but requires you to replace certain files with the latest available version, while maintaining your configuration. Here are the detailed steps to follow for a clean and secure update:
To find out the current version of your Dojo, run the command :
1
./dojo.sh version
Although this step is optional, I recommend that you start by updating your OS. This reduces the risk of incompatibilities and ensures that the dependencies used by Dojo are up to date:
1
2
sudo apt-get update
sudo apt-get upgrade
Go to the Dojo directory and stop the current services:
1
2
cd ~/dojo-app/docker/my-dojo
./dojo.sh stop
Then reboot your system to get a clean slate:
1
sudo reboot
Dojo comes with digitally signed files. These PGP signatures ensure that the files originate from the developer and have not been altered in any way. It’s important to check them every time you update Dojo, just as you did when you first installed it. Start by downloading the developer’s public key via Tor, then import it :
1
torsocks wget http://zkaan2xfbuxia2wpf7ofnkbz6r5zdbbvxbunvp5g2iebopbfc4iqmbad.onion/vks/v1/by-fingerprint/E53AD419B242822F19E23C6D3033D463D6E544F6 && gpg --import E53AD419B242822F19E23C6D3033D463D6E544F6
Return to your personal directory:
1
cd ~/
Download the latest version of Dojo from GitHub via Tor. In this example, it’s version 1.28.0 (which doesn’t yet exist at the time of writing: this is just to give an example). Remember to replace the file and link with the version you wish to install:
1
torsocks wget -O samourai-dojo-1.28.0.zip https://github.com/Dojo-Open-Source-Project/samourai-dojo/archive/refs/tags/v1.28.0.zip
Also download the file containing the PGP fingerprints and signature (once again, remember to adjust the version in the command):
1
torsocks wget https://github.com/Dojo-Open-Source-Project/samourai-dojo/releases/download/v1.28.0/samourai-dojo-1.28.0-fingerprints.txt && torsocks wget https://github.com/Dojo-Open-Source-Project/samourai-dojo/releases/download/v1.28.0/samourai-dojo-1.28.0-fingerprints.txt.sig
Check that the downloaded fingerprint file has been signed by the developer’s key:
1
gpg --verify samourai-dojo-1.28.0-fingerprints.txt.sig
A correct result should display :
1
2
3
gpg: Signature made [date + time]
gpg: using EDDSA key E53AD419B242822F19E23C6D3033D463D6E544F6
gpg: Good signature from "dojocoder@pm.me" <dojocoder@pm.me> [unknown]
A warning that the key is uncertified may appear, but this is of no importance. On the other hand, if the signature is invalid or corresponds to another key, go no further and start again, checking the links.
Then calculate the SHA256 fingerprint of the archive and compare it with the official fingerprint file :
1
2
sha256sum samourai-dojo-1.28.0.zip
cat samourai-dojo-1.28.0-fingerprints.txt
If the two fingerprints match perfectly, the archive is genuine and intact. If they differ, delete the files immediately and do not continue.
Always verify signatures and hashes on updates; do not install if verification fails.
Uncompress the archive in your home directory:
1
unzip samourai-dojo-1.28.0.zip -d .
Then copy the contents to the Dojo directory, overwriting the old :
1
cp -a samourai-dojo-1.28.0/. dojo-app/
This operation keeps your configuration files located in ~/dojo-app/docker/my-dojo/conf, but replaces all other files with the updated versions.
To keep your environment clean, delete unnecessary files :
1
rm -r samourai-dojo-1.28.0 && rm samourai-dojo-1.28.0.zip && rm samourai-dojo-1.28.0-fingerprints.txt && rm samourai-dojo-1.28.0-fingerprints.txt.sig && rm E53AD419B242822F19E23C6D3033D463D6E544F6
Return to the Dojo scripts directory and run the update command:
1
2
cd ~/dojo-app/docker/my-dojo
./dojo.sh upgrade -y
This command instructs Docker to rebuild the images with the new files, then automatically restart all services. At the end of the process, check the logs to make sure that Bitcoin core, Fulcrum and Dojo are all working correctly:
1
2
./dojo.sh logs bitcoind
./dojo.sh logs fulcrum
If the services start without error and the logs show blocks being processed, your Dojo is now up to date and operational.