Ashigaru Mobile Guide
How to Setup and Use Ashigaru Mobile to Privately Secure and Manage your Bitcoin
Ashigaru is a mobile Bitcoin wallet that continues the work of the Samourai Wallet project in a new form. The software emerged in a specific context: in April 2024, Samourai Wallet’s founders were arrested by U.S. authorities and their servers were seized. Although the Samourai app itself remained usable, it is currently no longer maintained. Ashigaru is a free and open fork of Samourai Wallet, maintained by an anonymous team, to preserve Samourai’s features and its original philosophy: defending the privacy and sovereignty of Bitcoin users.
Ashigaru keeps the core DNA of Samourai: a similar interface, a self‑custodial approach, open‑source code, and a strong focus on privacy. The code is licensed under GNU GPLv3, which guarantees anyone can audit, modify, or redistribute the software.
Ashigaru integrates a suite of advanced tools for privacy and UTXO management:
- Whirlpool, a coinjoin protocol based on Zerolink, to break deterministic links between transaction inputs and outputs without surrendering custody.
- PayNym, which implements reusable payment codes (BIP47), now represented via “Pepehash” avatars.
- Ricochet, which adds intermediate hops to transactions to complicate tracing.
- Coin Control to precisely select, freeze, and label your UTXOs.
- Batch Spending to reduce fees by grouping multiple payments into one transaction.
- Stealth Mode, which hides the app behind a decoy launcher to pass unnoticed during a physical phone inspection.
- Advanced spending tools to optimize privacy (payjoin, stonewall etc).
- An optimized recovery flow using a BIP39 passphrase.
- Automatic fee selection to optimize miner fees.

Ashigaru is designed for users who are mindful of transaction traceability on Bitcoin. Whether you care about preserving privacy, you’re an experienced bitcoiner focused on self‑custody, or you face heightened surveillance risks, this wallet gives you the tools to take back control of your on‑chain activity.
Ashigaru is available as a mobile app, which we’ll explore in this tutorial. It has a companion desktop application called Ashigaru Terminal, which I’ve covered in this guide.

In this tutorial, we’ll cover Ashigaru’s basic use: installation, connecting to Dojo, backups, receiving, and sending bitcoin. Advanced tools will be covered in separate guides in the future.
1. Prerequisites for Ashigaru
Ashigaru requires a few prerequisites to work correctly. First, it is not available from mainstream app stores like Google Play or the App Store. It must be sideloaded on your phone from its .apk file, downloaded via Tor. Therefore, if you use an iPhone, this method will not work: you will need an Android device.
To download the .apk via Tor, you’ll need a browser that can access .onion sites. The easiest way is to install Tor Browser on your phone, available on the Google Play Store or directly via its .apk.
Most modern smartphones block app installs from unknown sources by default. You will need to temporarily enable this option for Tor Browser in your device settings to allow the install. Once Ashigaru is installed, disable this option again to keep your phone secure.
Only enable “Install unknown apps” temporarily, and restrict it to Tor Browser for the install — then disable it again.
Another critical prerequisite for using Ashigaru is running a Dojo Bitcoin node. For security and sovereignty, the Ashigaru team does not maintain centralized servers to connect your app. You must run your own Dojo instance or connect to one operated by someone you trust.
Dojo lets your Ashigaru app query blockchain data, view the balance of your addresses, and broadcast transactions to the Bitcoin network.
To learn more about Dojo and how to install it, I have written the following dedicated guides:
How to Run a Bitcoin Node (Advanced)
If you truly cannot run your own Dojo, you can find people willing to share their instance on dojobay.pw. This can be a temporary solution, but for the long term, it is strongly recommended to run your own Dojo to ensure sovereignty and privacy.
Relying on a third‑party Dojo introduces trust and privacy trade‑offs. Treat it as a temporary measure and migrate to your own Dojo as soon as feasible.
2. Verify and install the Ashigaru app
2.1. Download Ashigaru
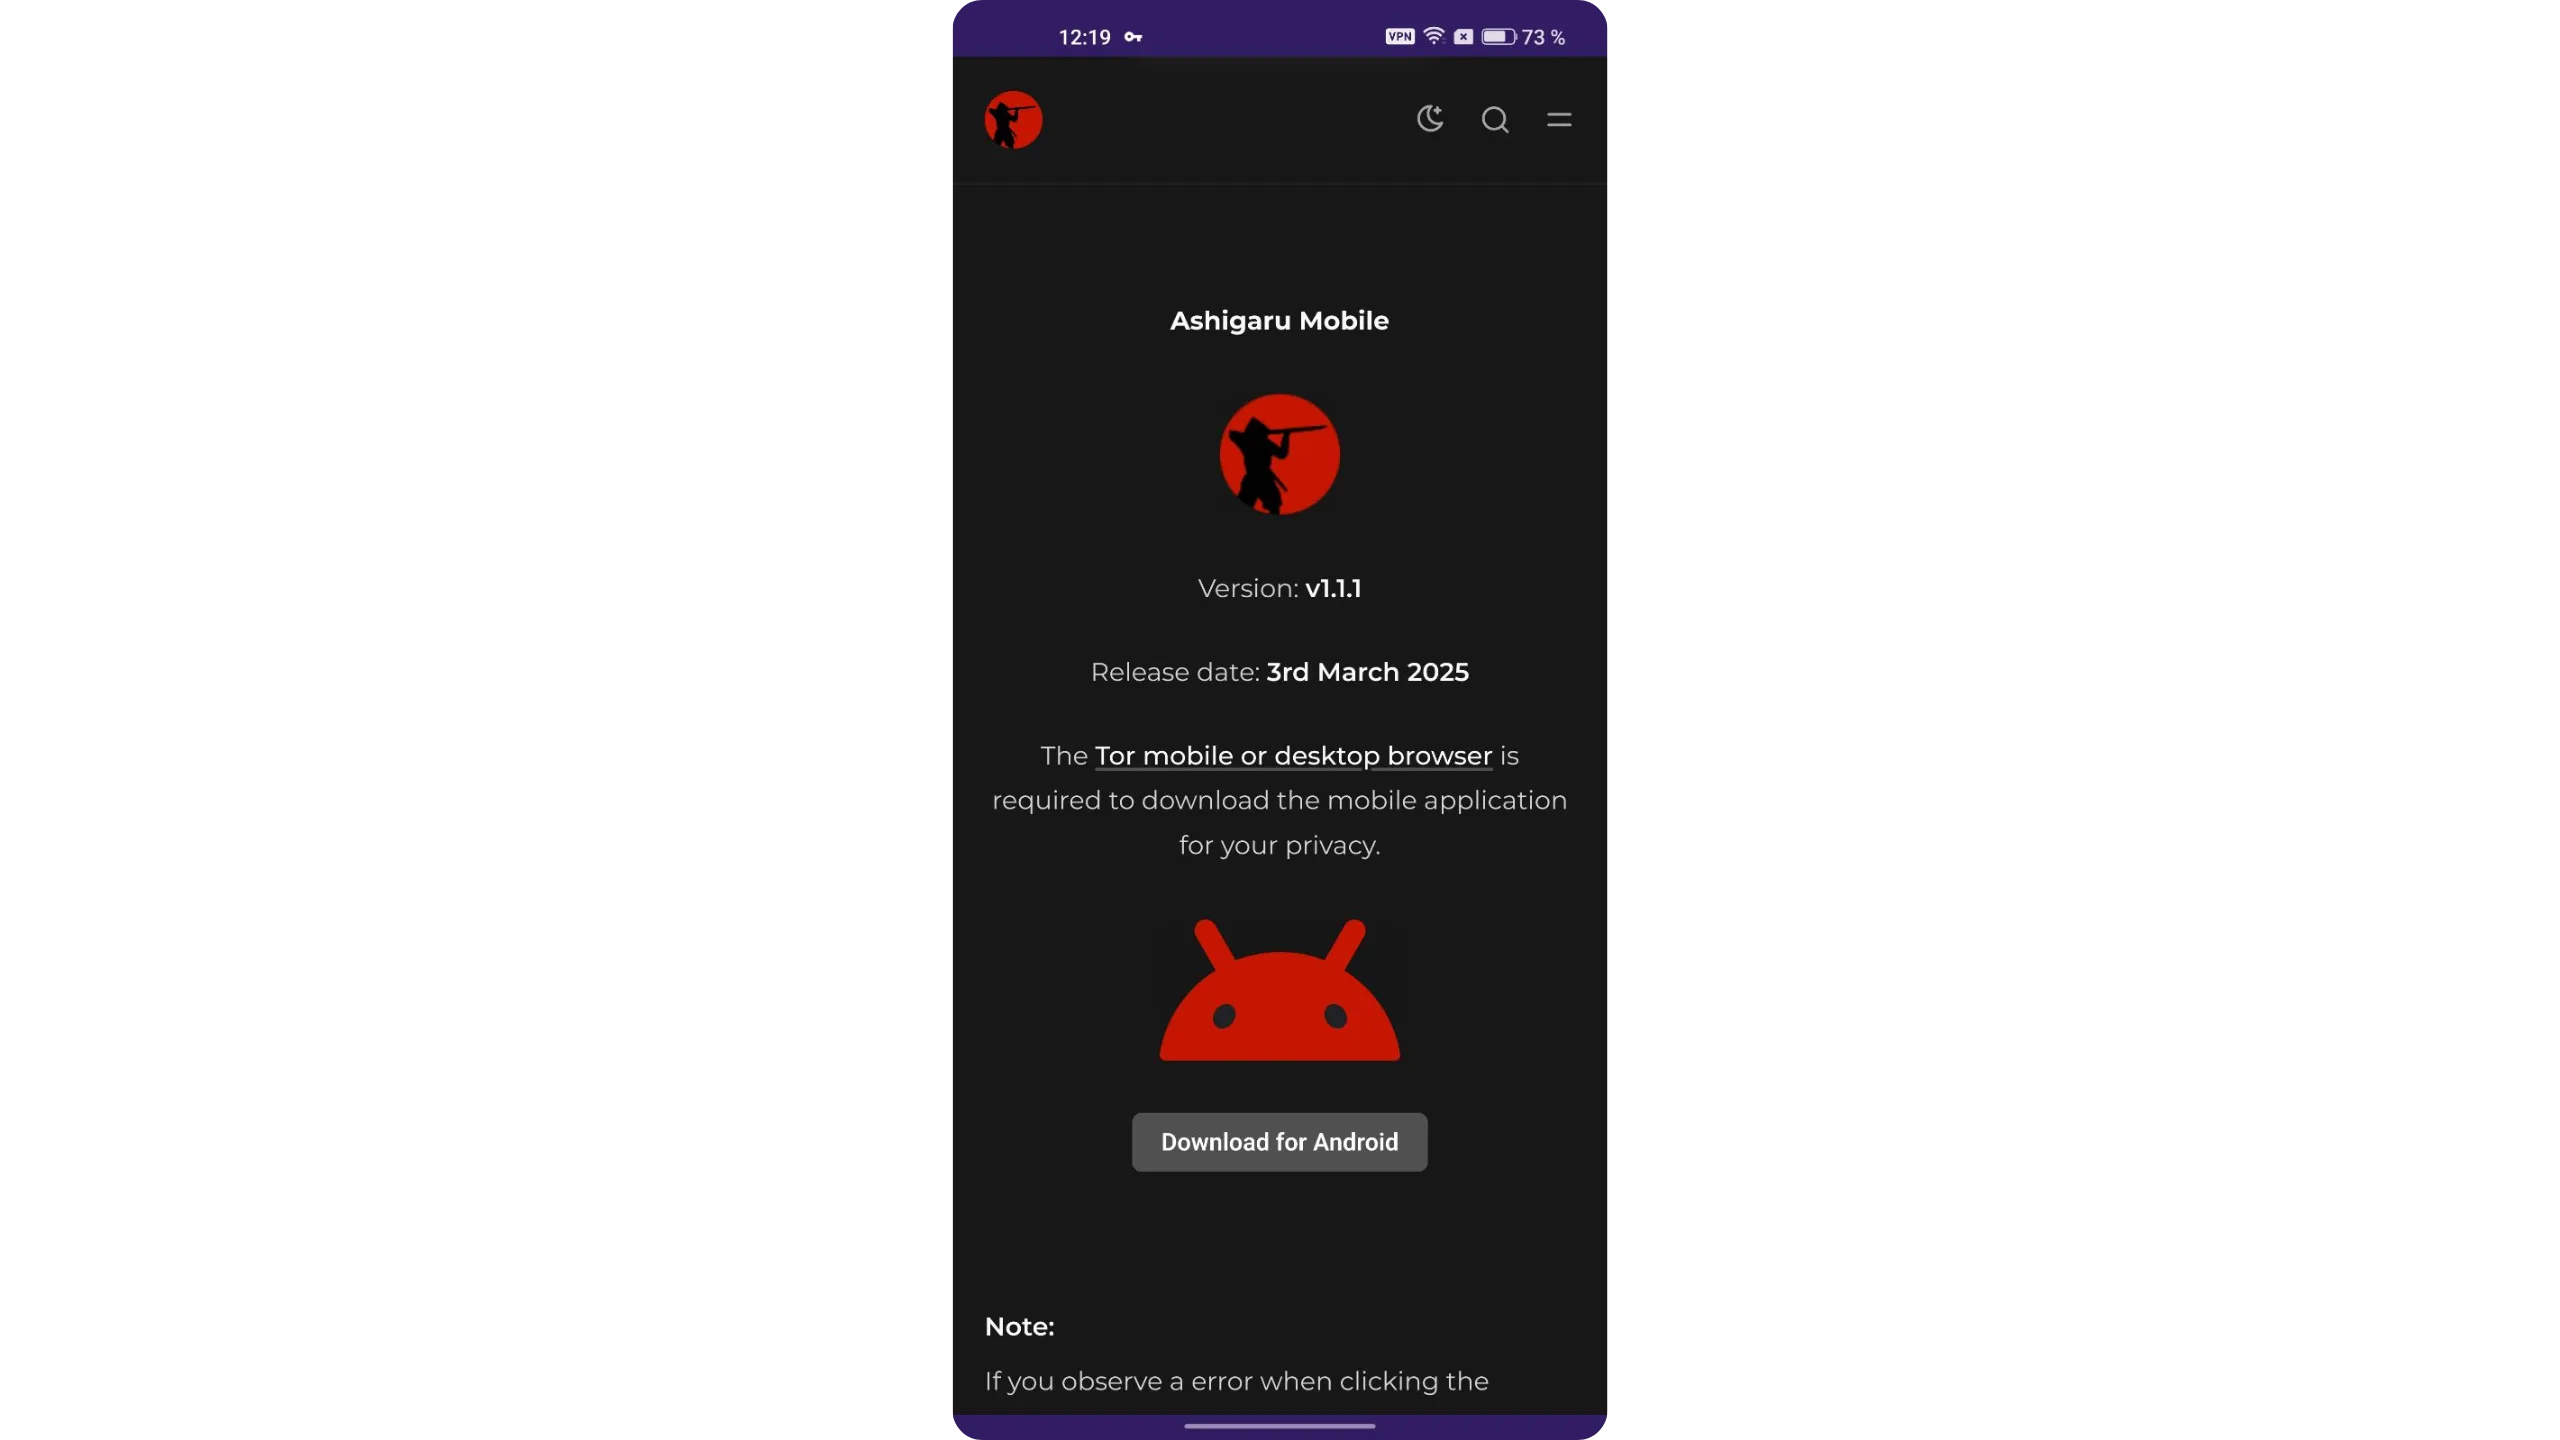
On your phone, open Tor Browser and go to Ashigaru’s official website, under the “Download” section. Tap “Download for Android” to get the .apk installer.
Before installing, we will verify the app’s authenticity and integrity. This is especially important when installing from a .apk.
2.2. Verify the Ashigaru app
Back on Ashigaru’s official website in the “Download” section, copy the message shown under “SHA-256 Hash of the APK file.” Copy the entire block, from “BEGIN PGP SIGNED MESSAGE” to “END PGP SIGNATURE.”
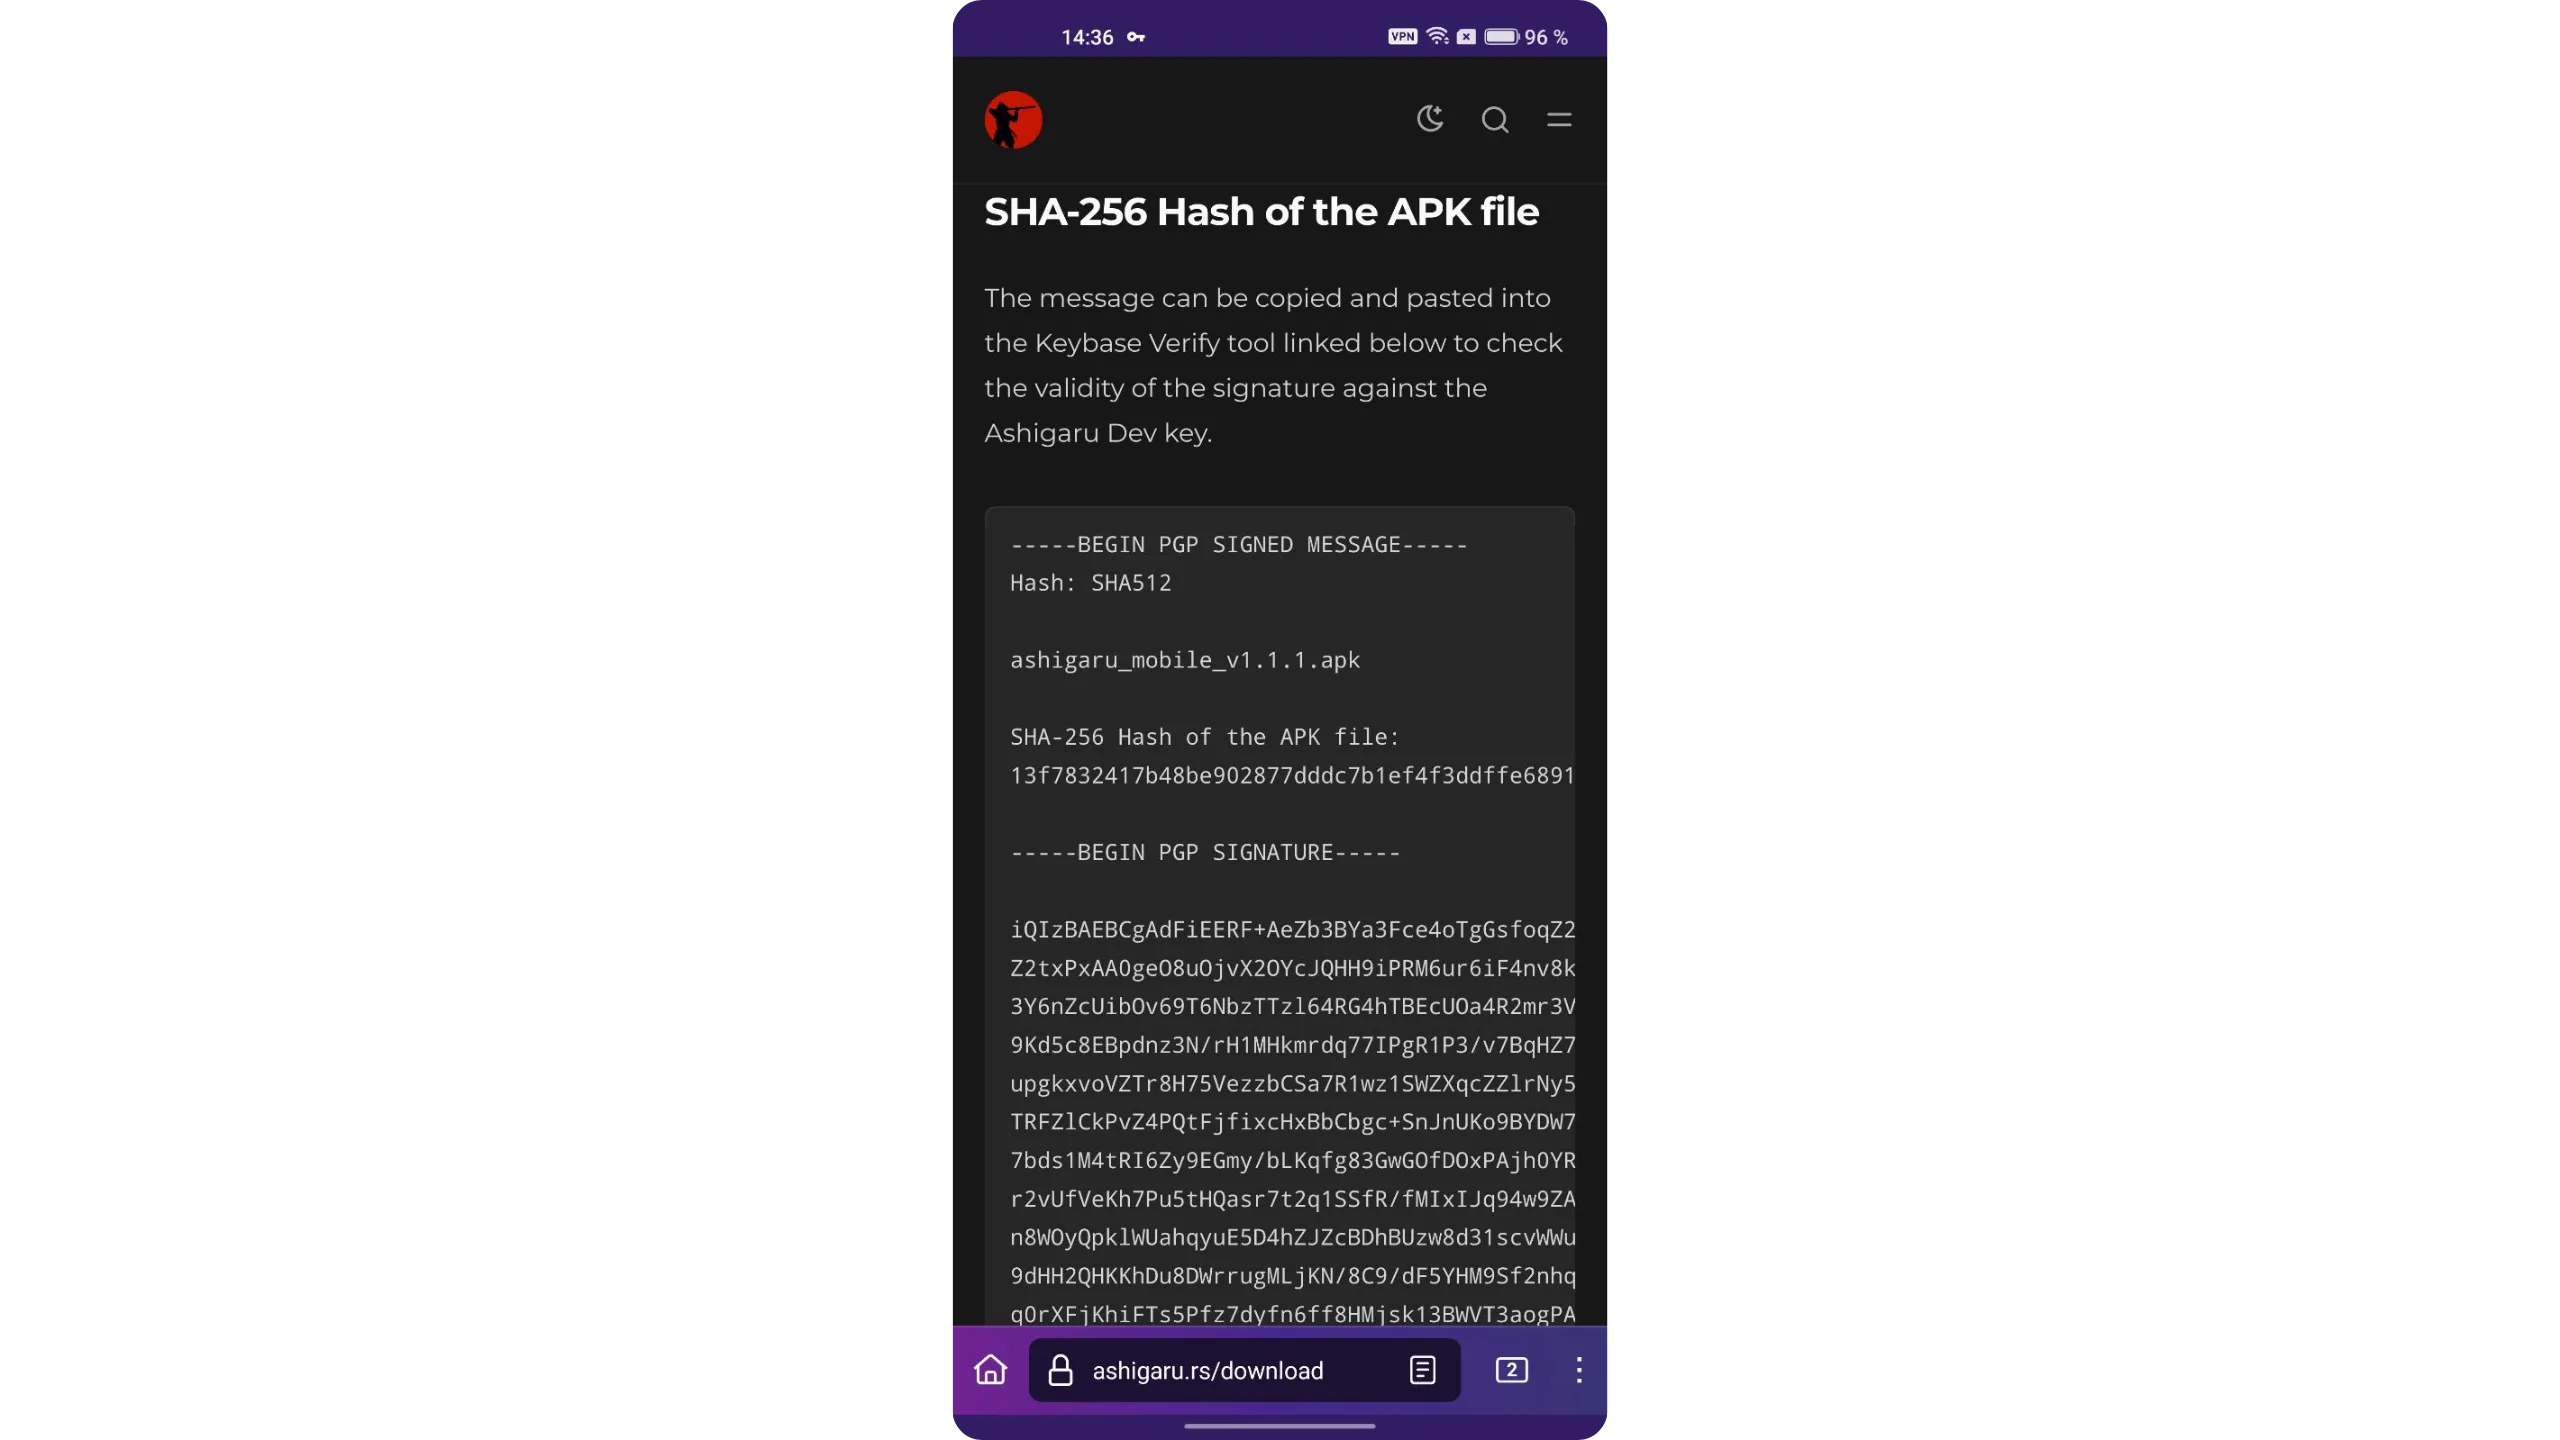
Still on your phone, open a new tab in Tor Browser and visit the Keybase verify tool. Paste the message you just copied and tap “Verify.”
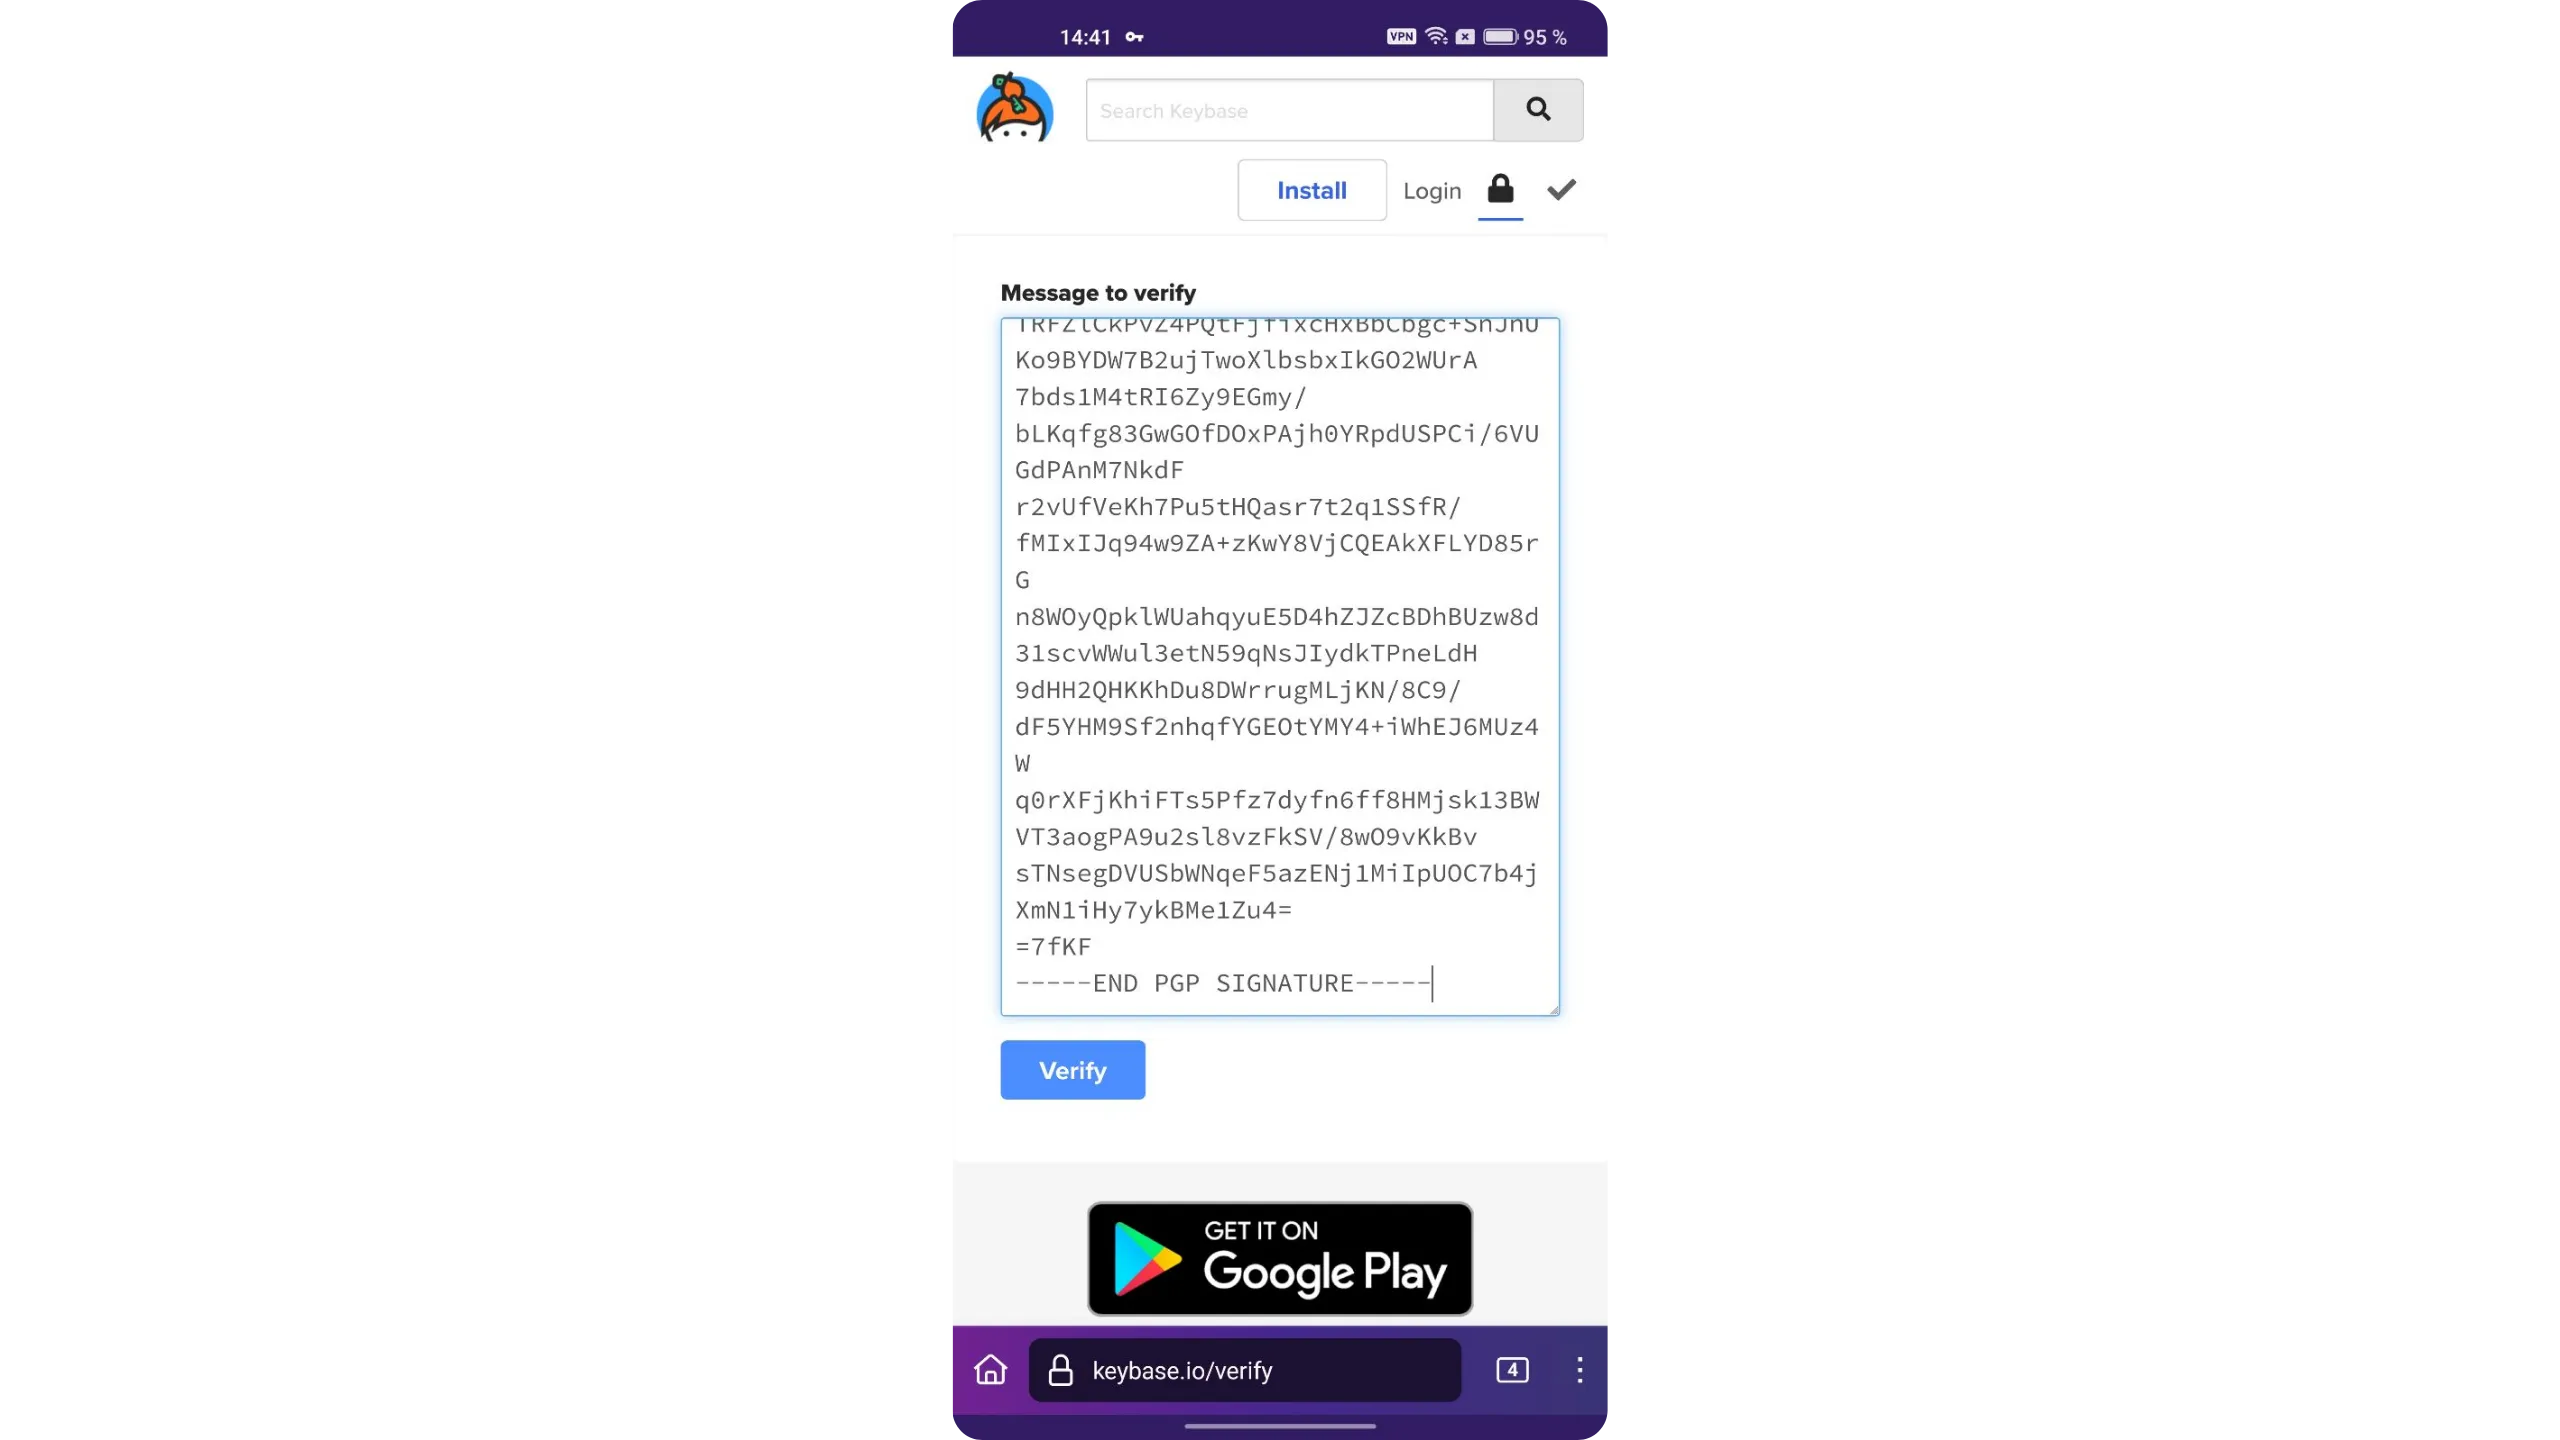
If the signature is valid, Keybase will confirm the file was signed by Ashigaru’s developers. You can also tap the “ashigarudev” profile shown by Keybase and verify that the key fingerprint matches exactly: A138 06B1 FA2A 676B.
If an error appears at this step, the signature is invalid. In that case, do not install the APK. Restart the process from the beginning or ask the community for help before proceeding.
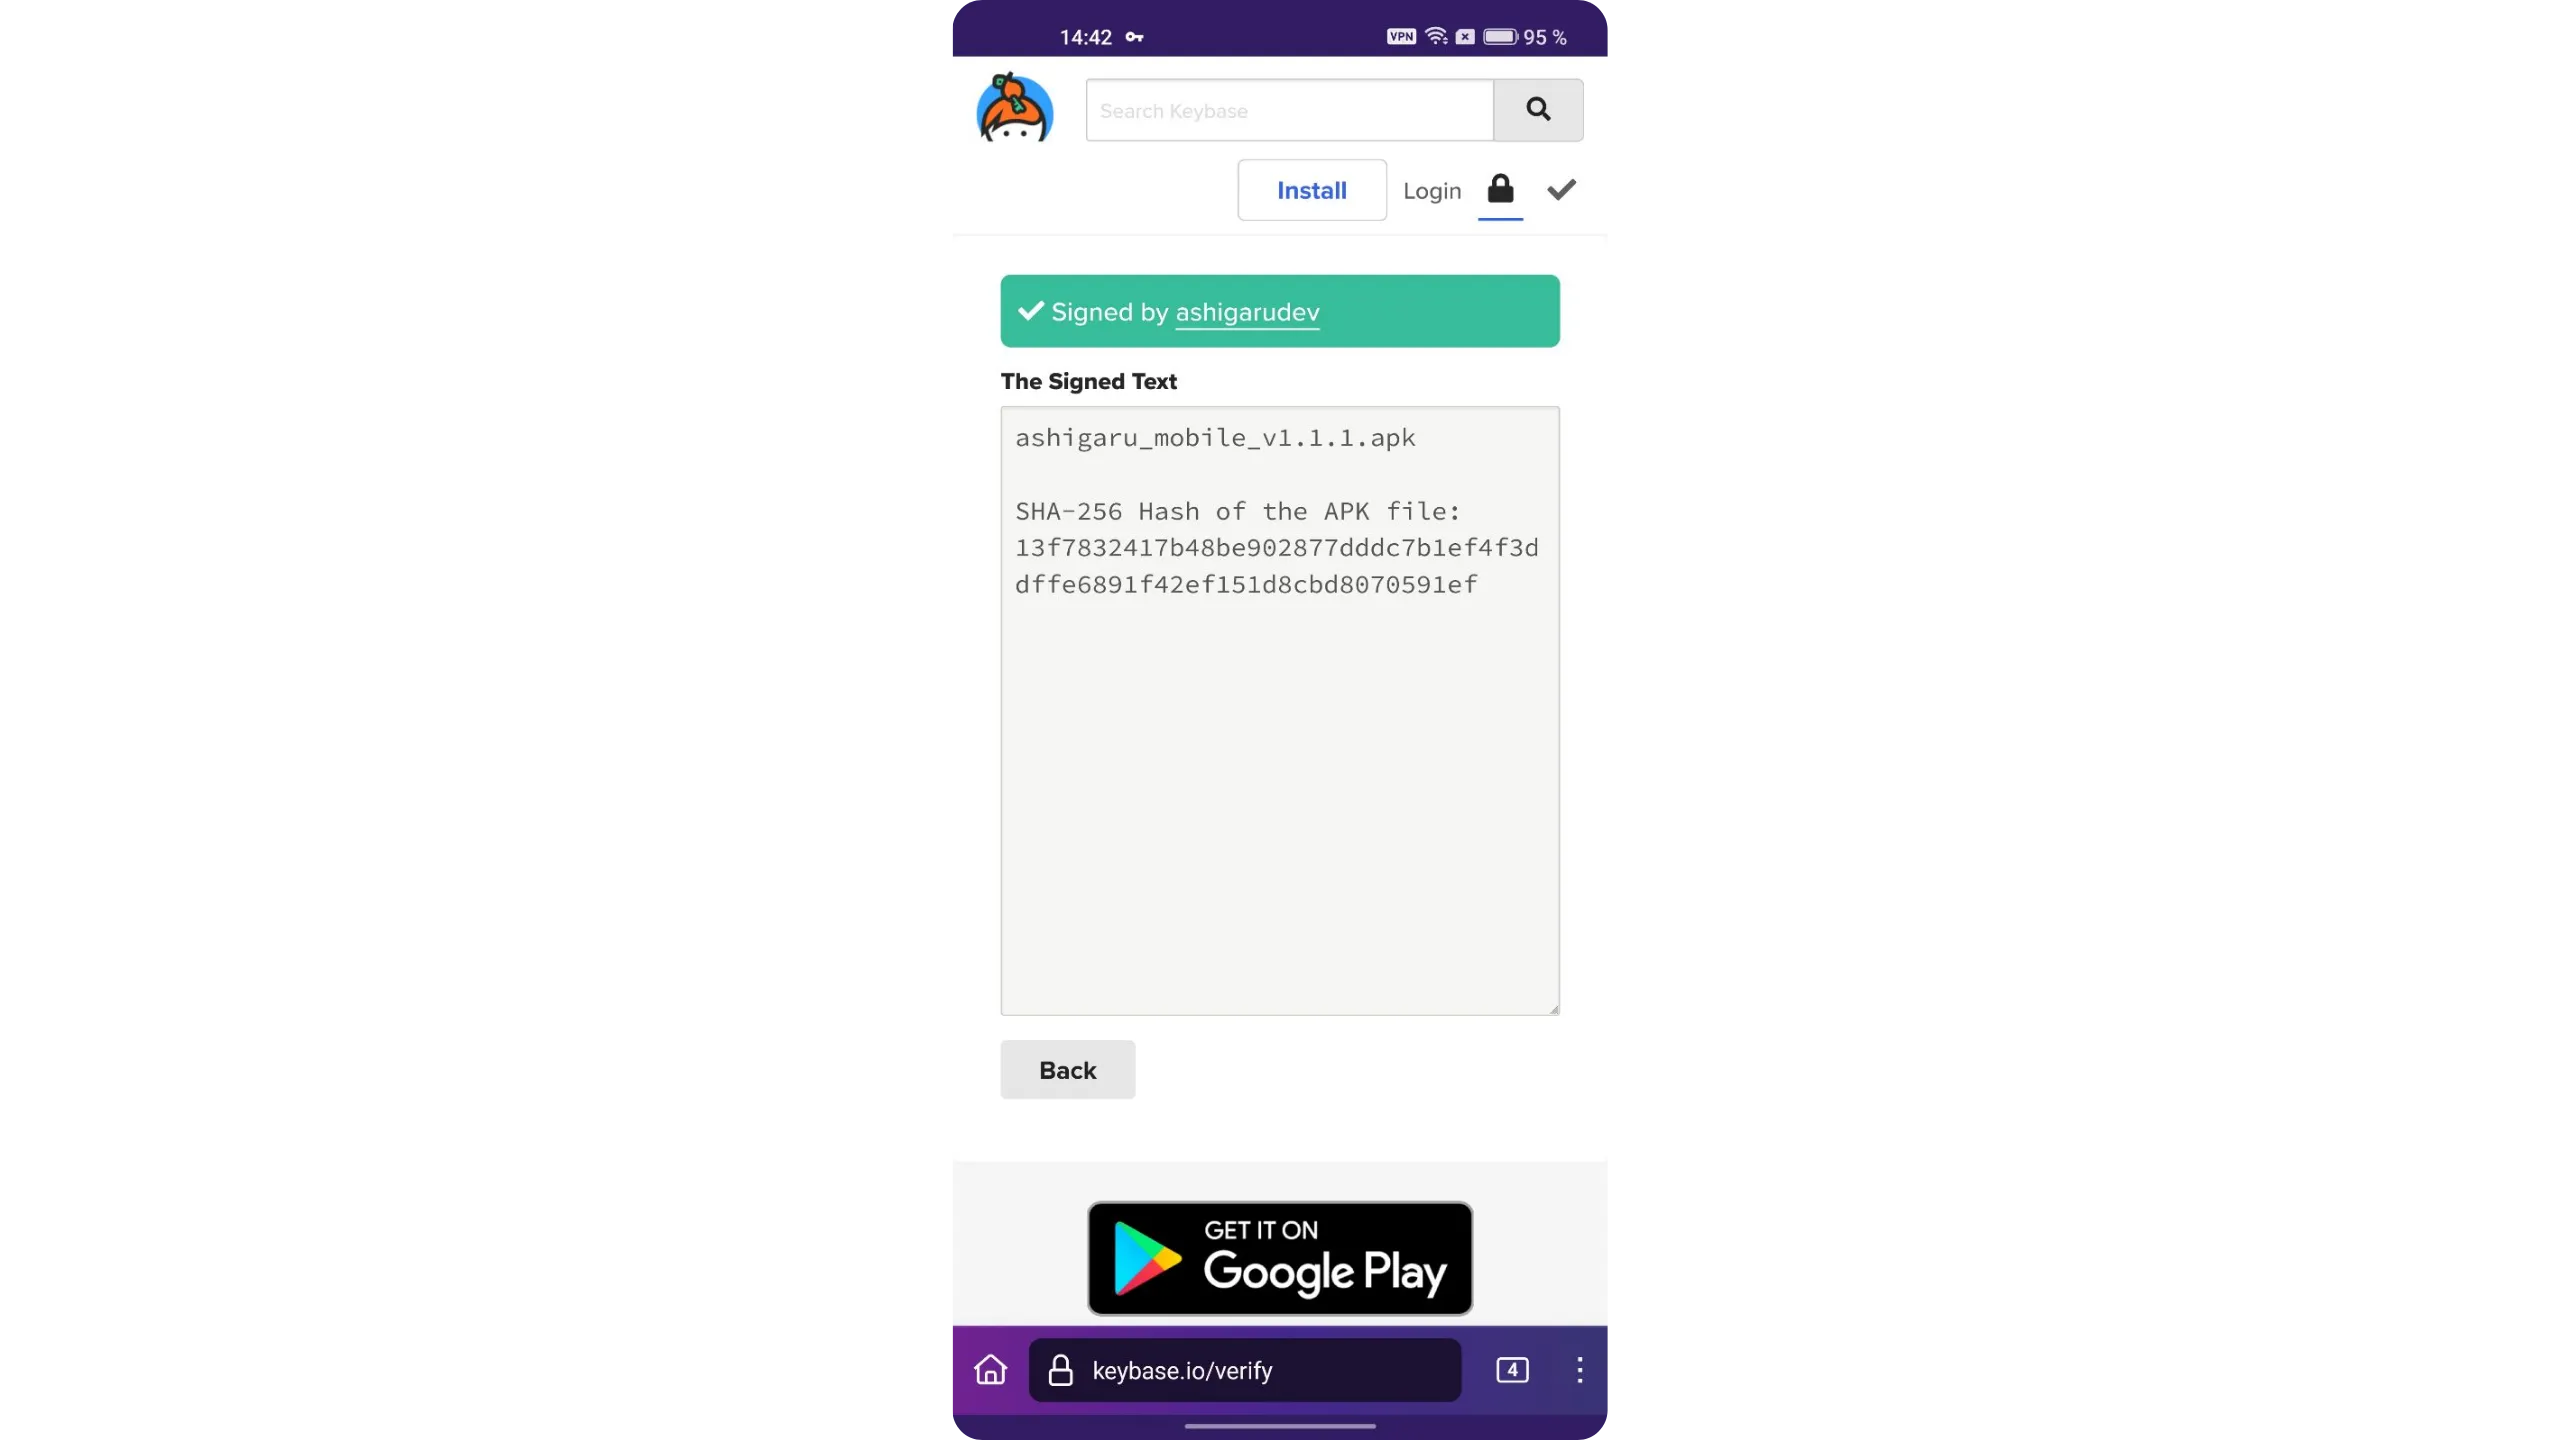
Keybase provided the app’s hash. Next, we’ll verify that the hash of the .apk you downloaded matches the verified value from Keybase. Go to HASH FILE ONLINE.
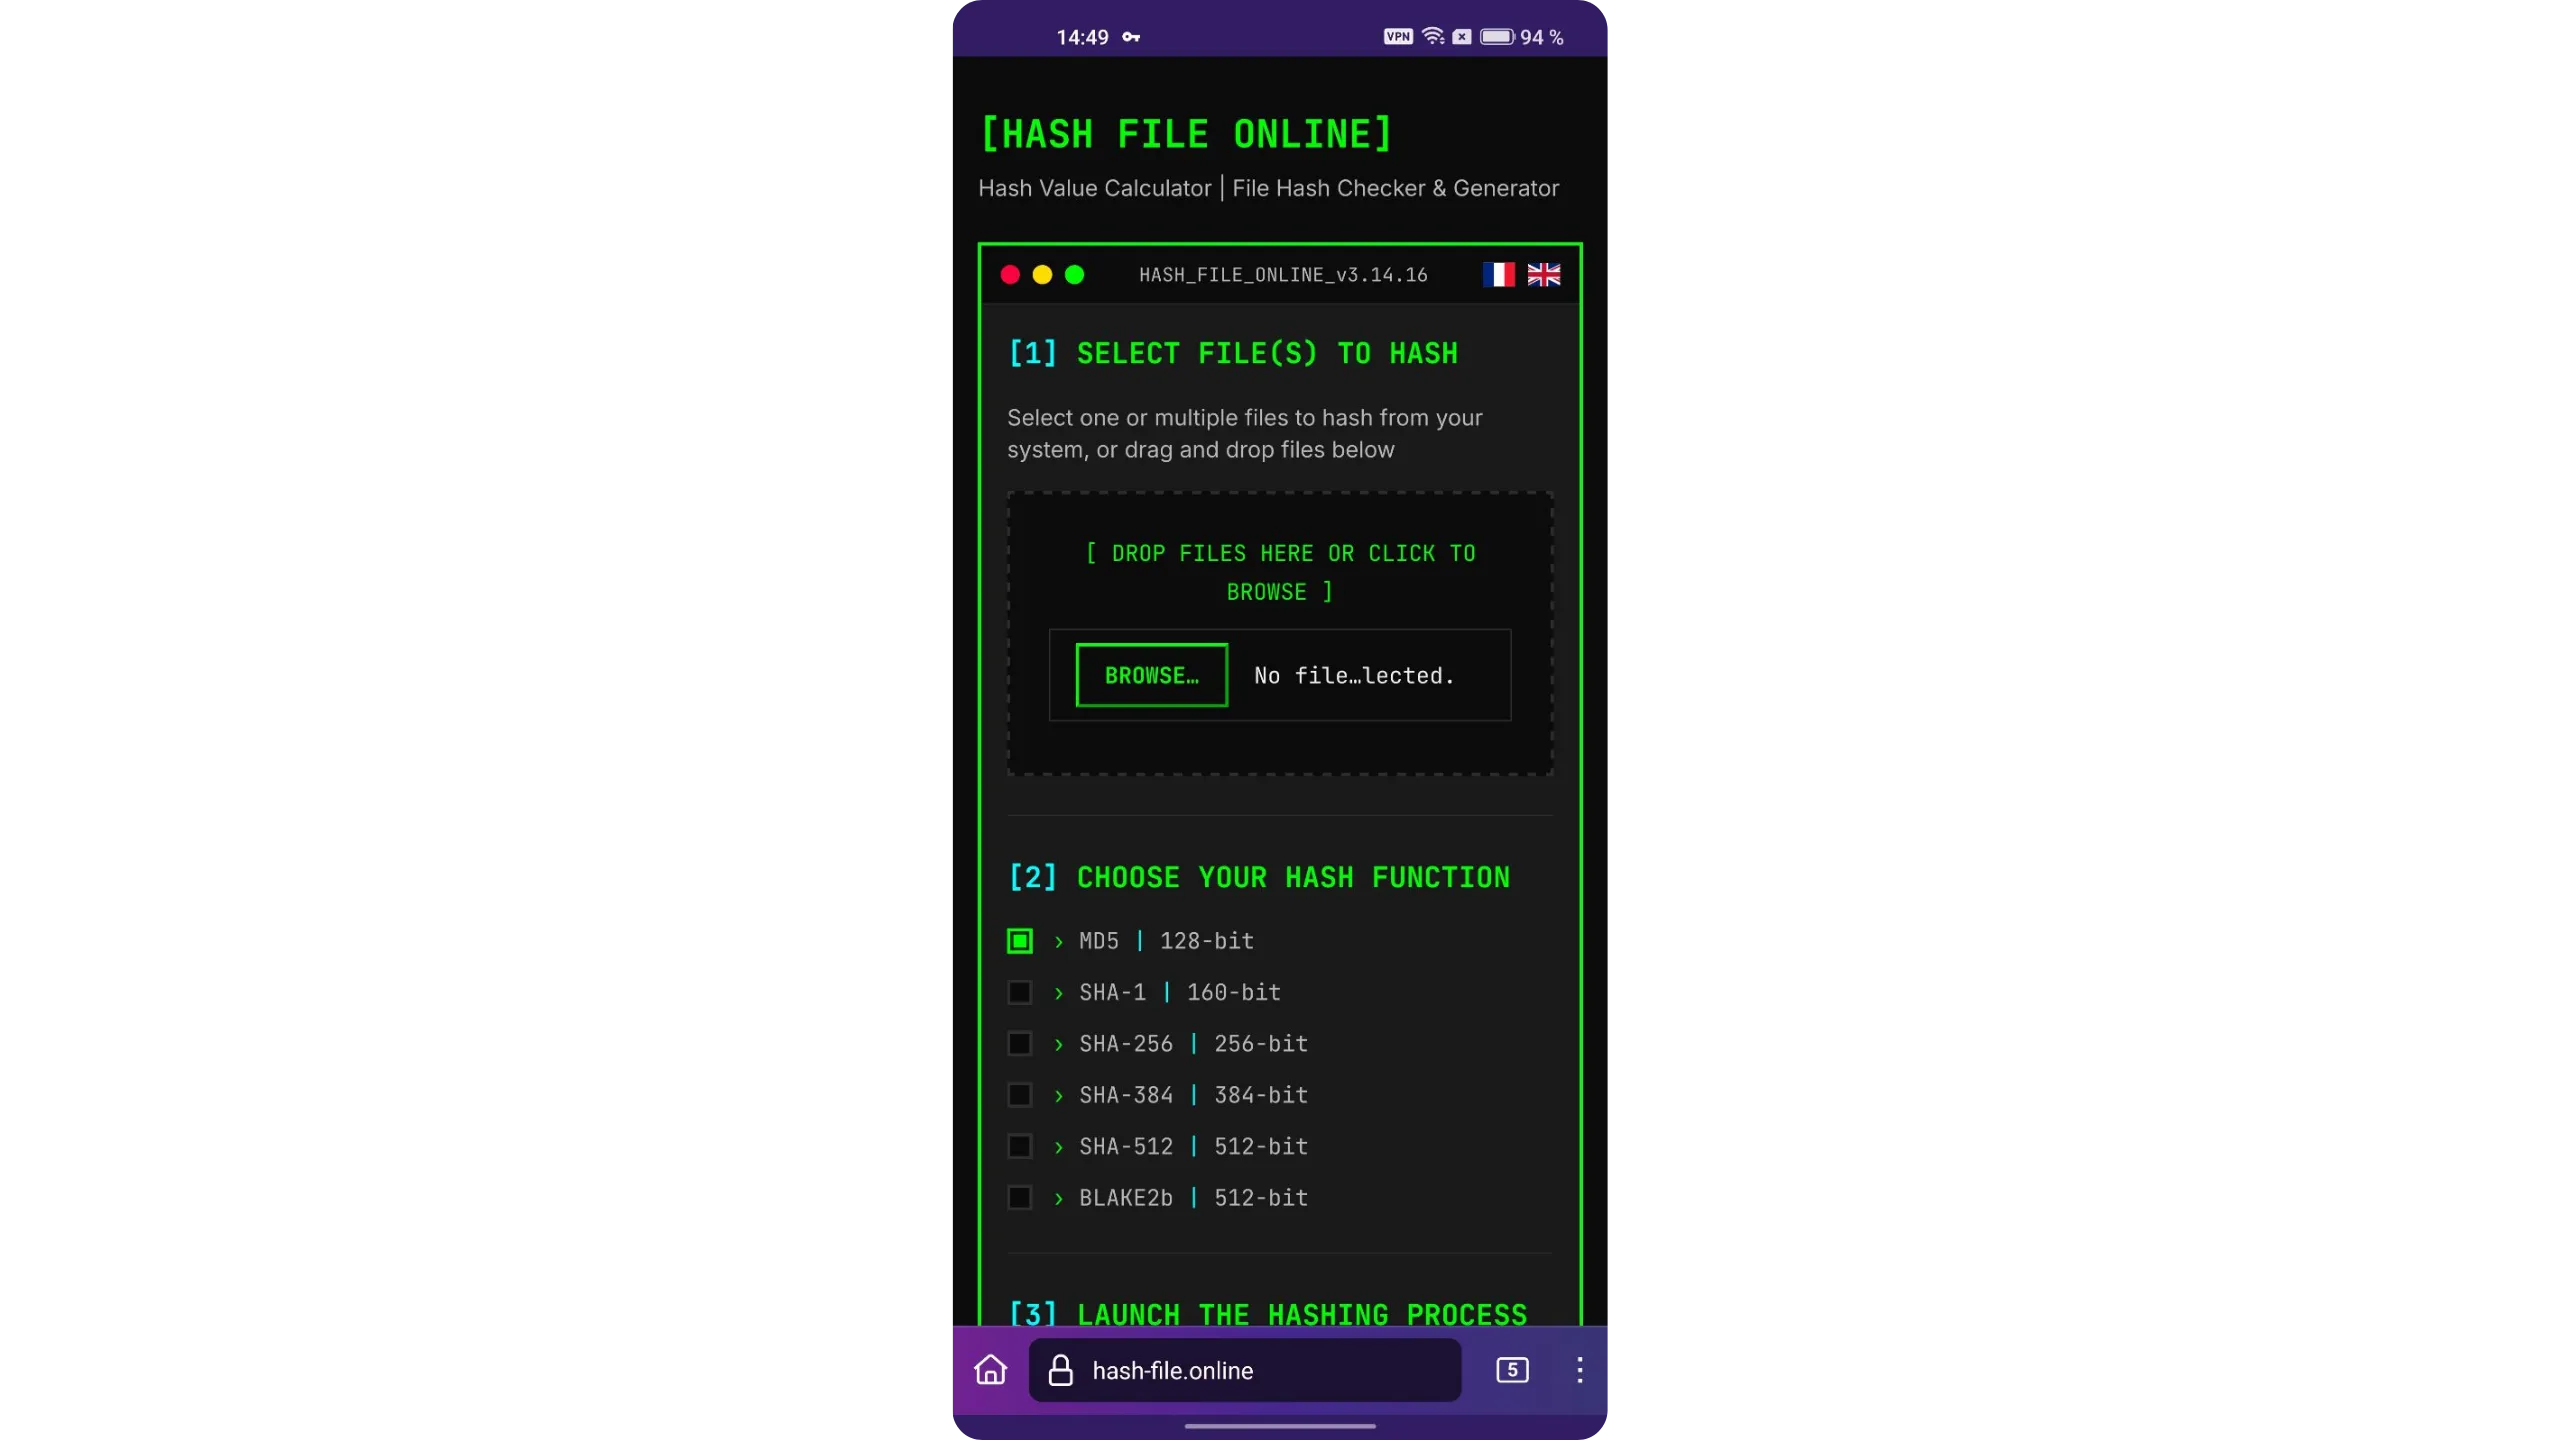
Tap “BROWSE…” and select the .apk file you downloaded in step 2.1. Choose the SHA-256 hashing function, then tap “CALCULATE HASH” to compute your file’s hash.
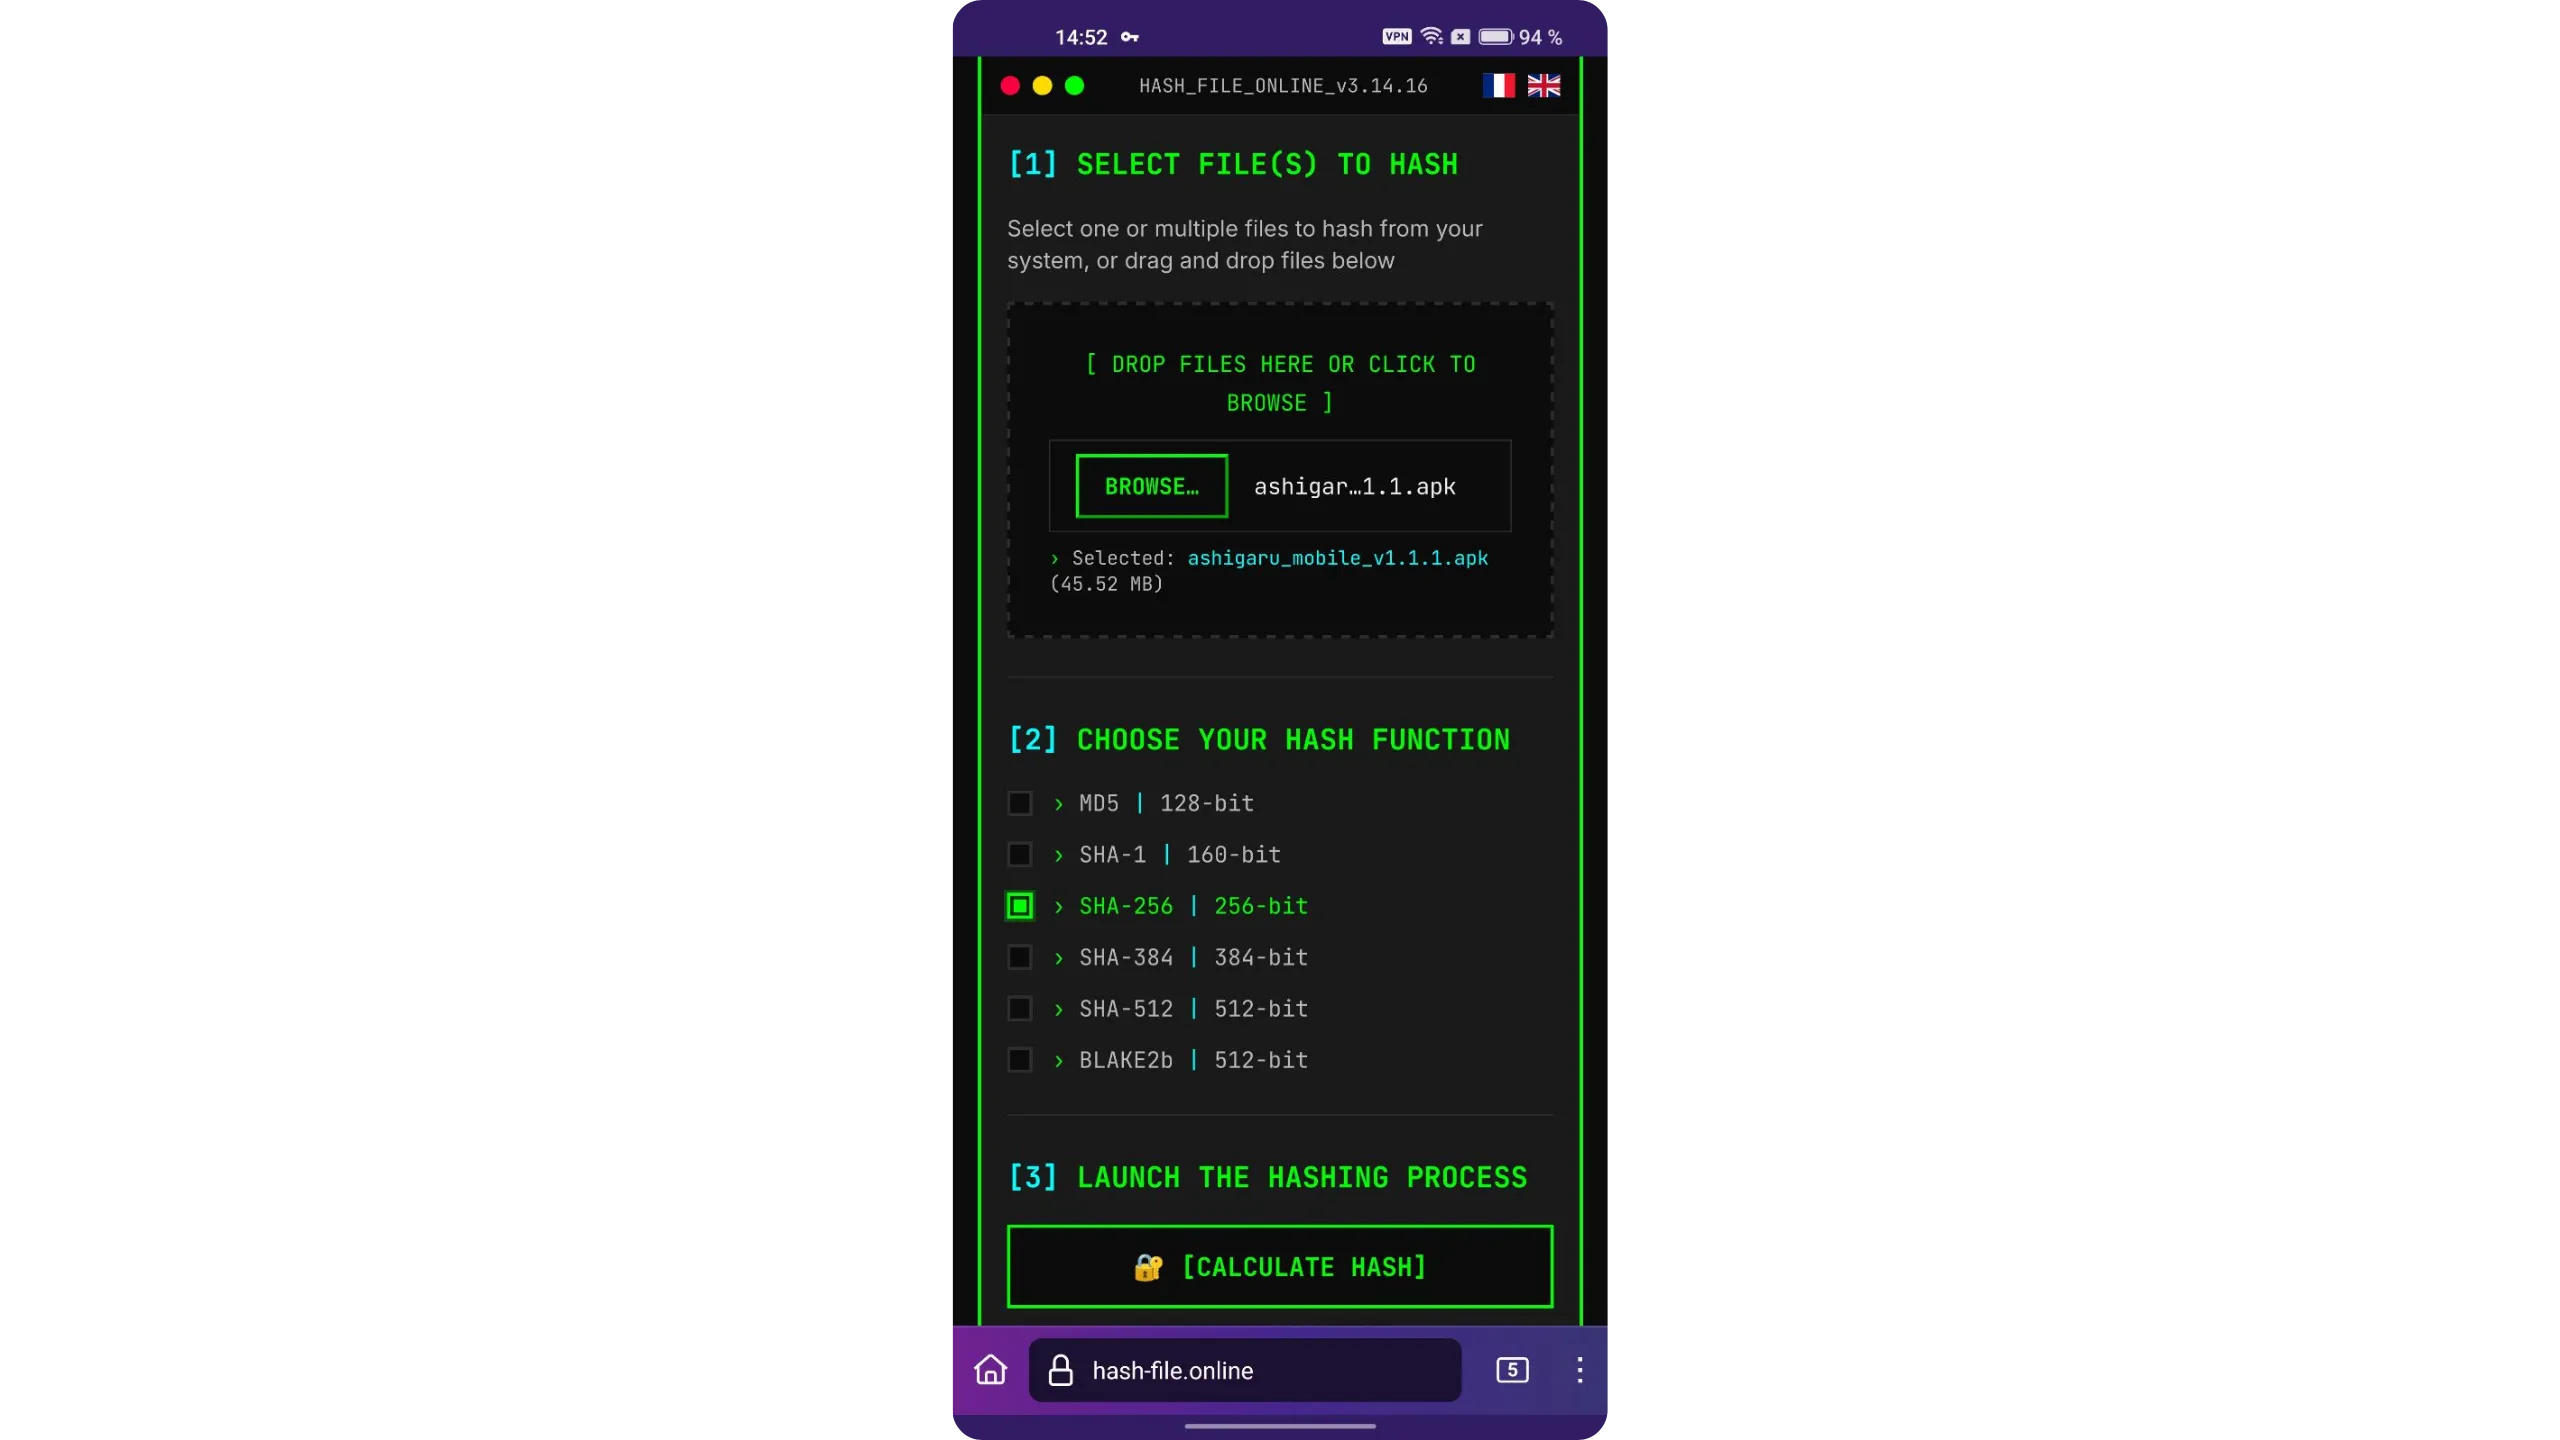
The site will display your .apk file’s hash. Compare it to the value you verified on Keybase.io. If both hashes match exactly, the authenticity and integrity checks are successful. You can now proceed with the installation.

Never install the .apk if the signature check or the hash comparison fails — investigate first.
2.3. Install the Ashigaru app
To install, open your phone’s file manager and go to the downloads folder. Tap the .apk file we just verified, then confirm the installation when prompted.
Ashigaru is now installed on your phone.
3. Initialize the app and create a Bitcoin wallet
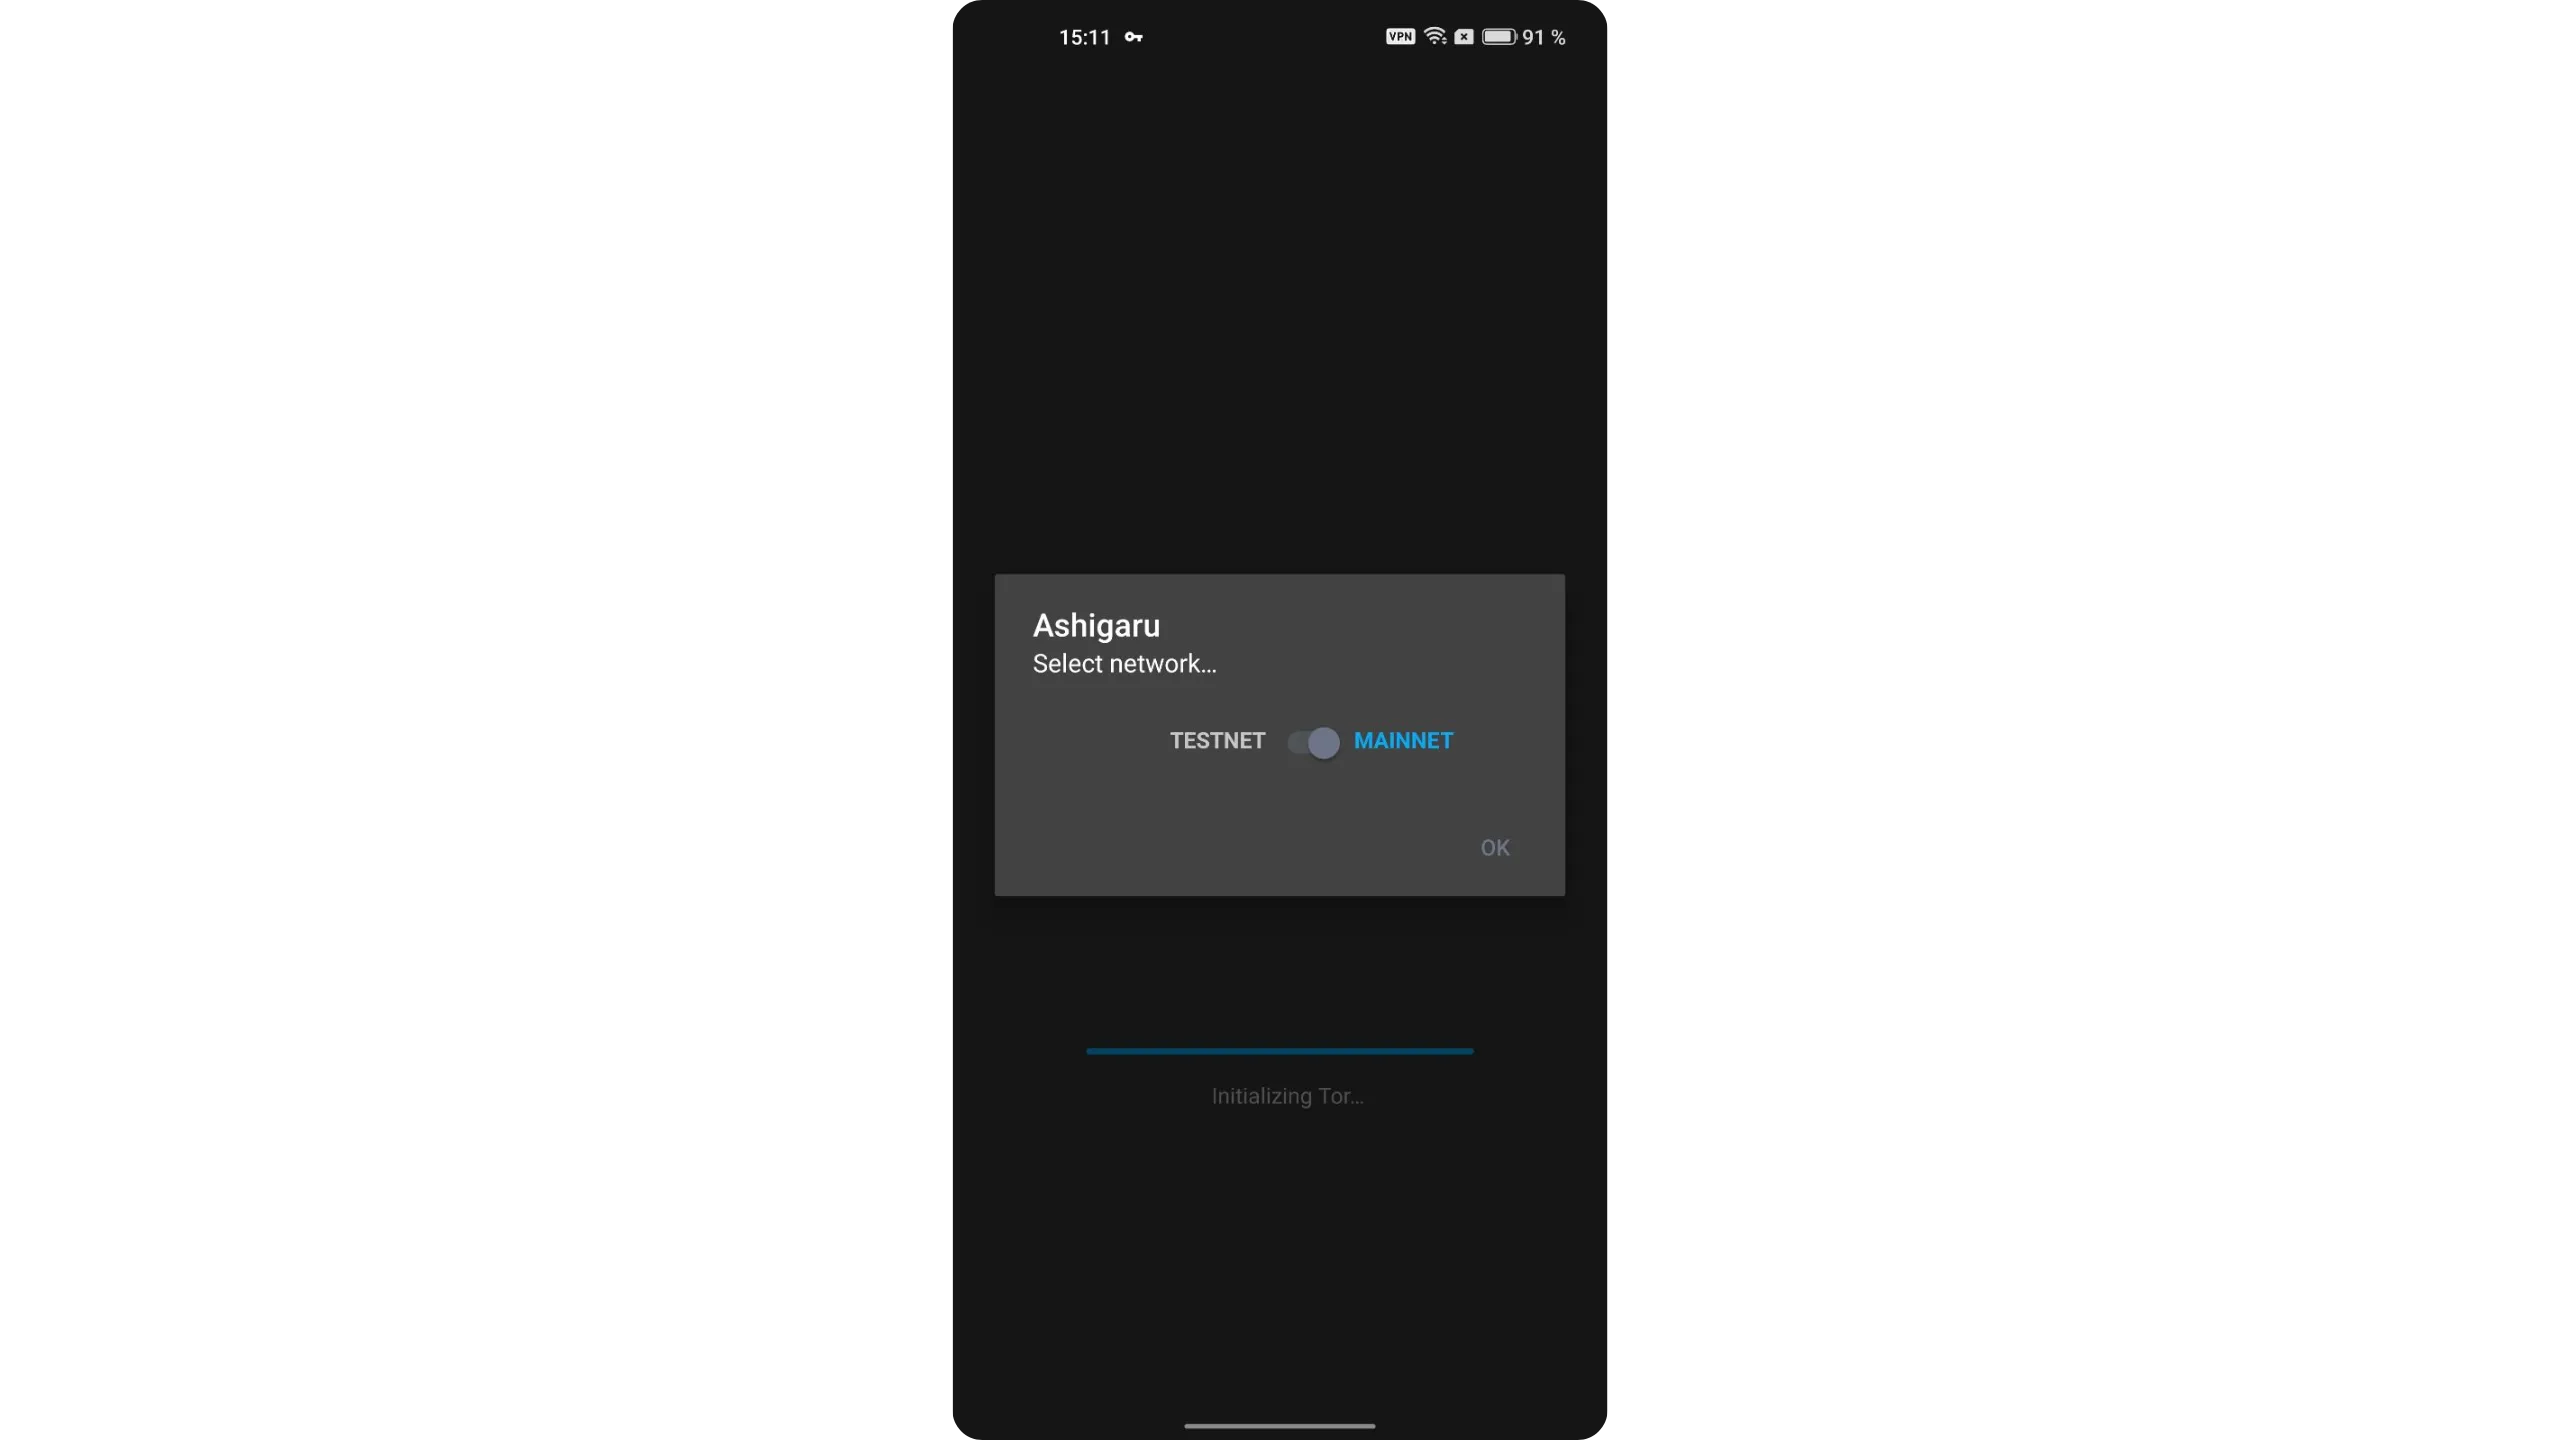
On first launch, select “MAINNET.”
Tap “Get Started.”
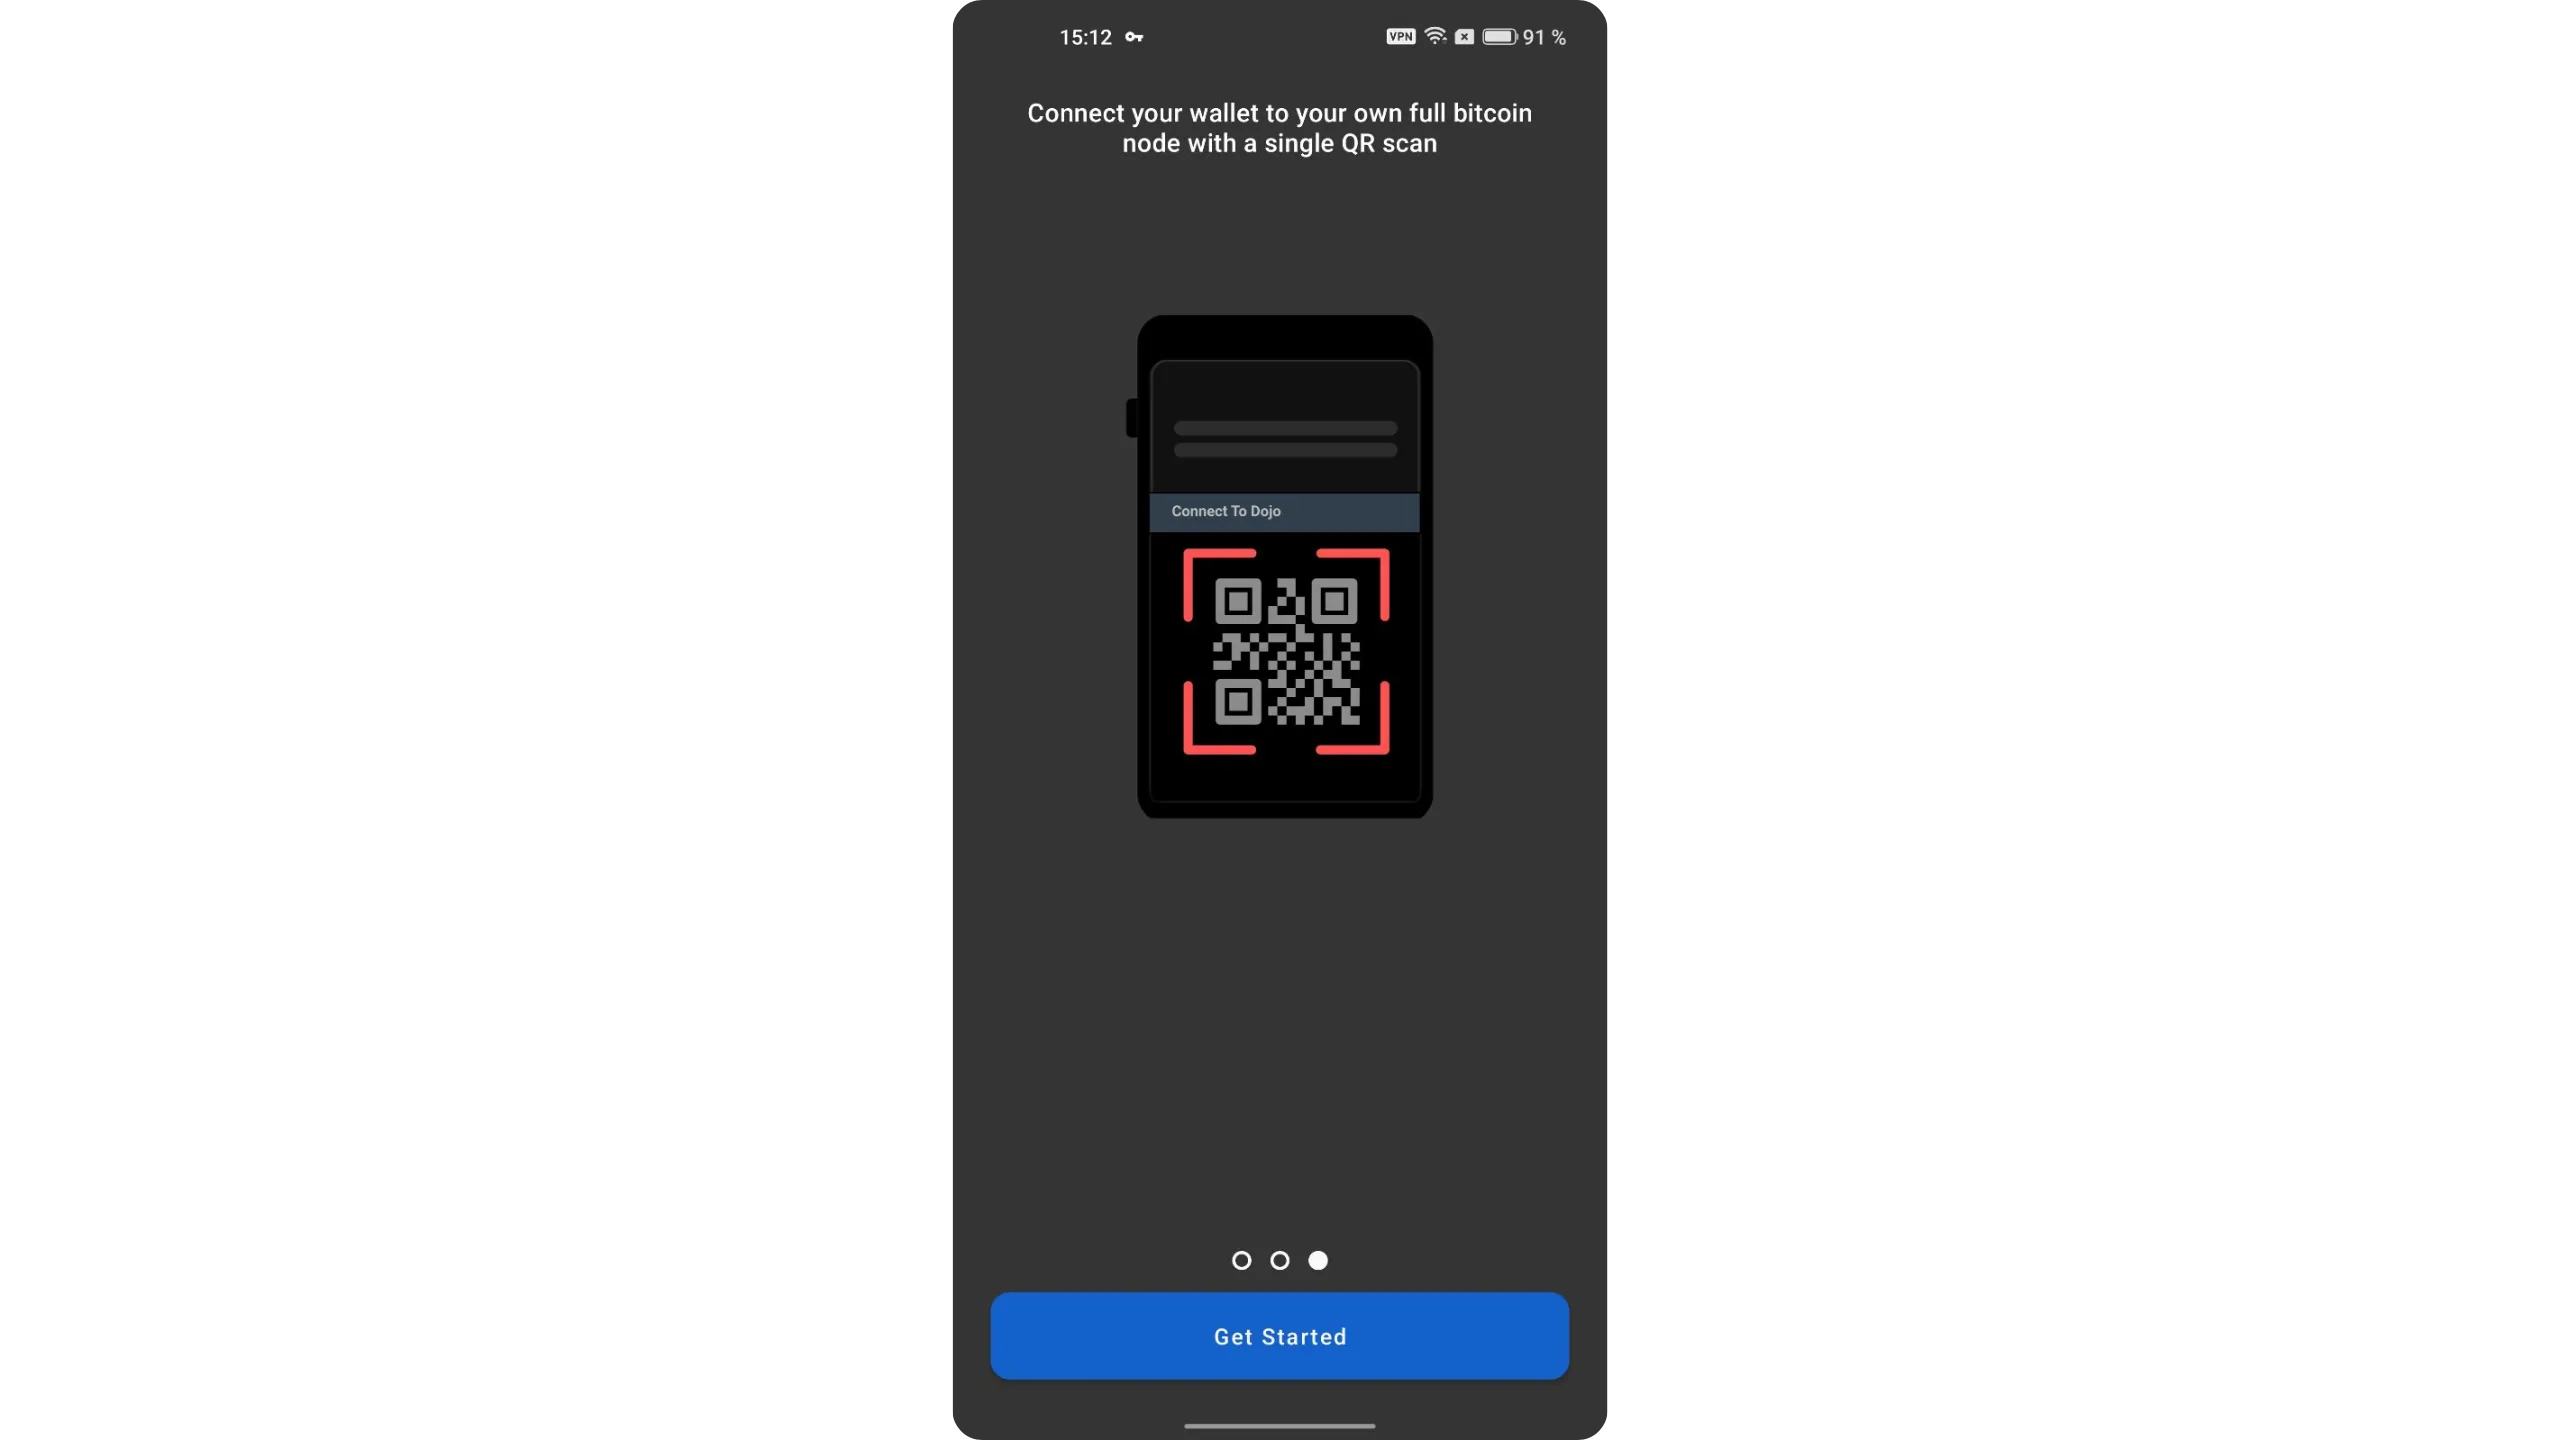
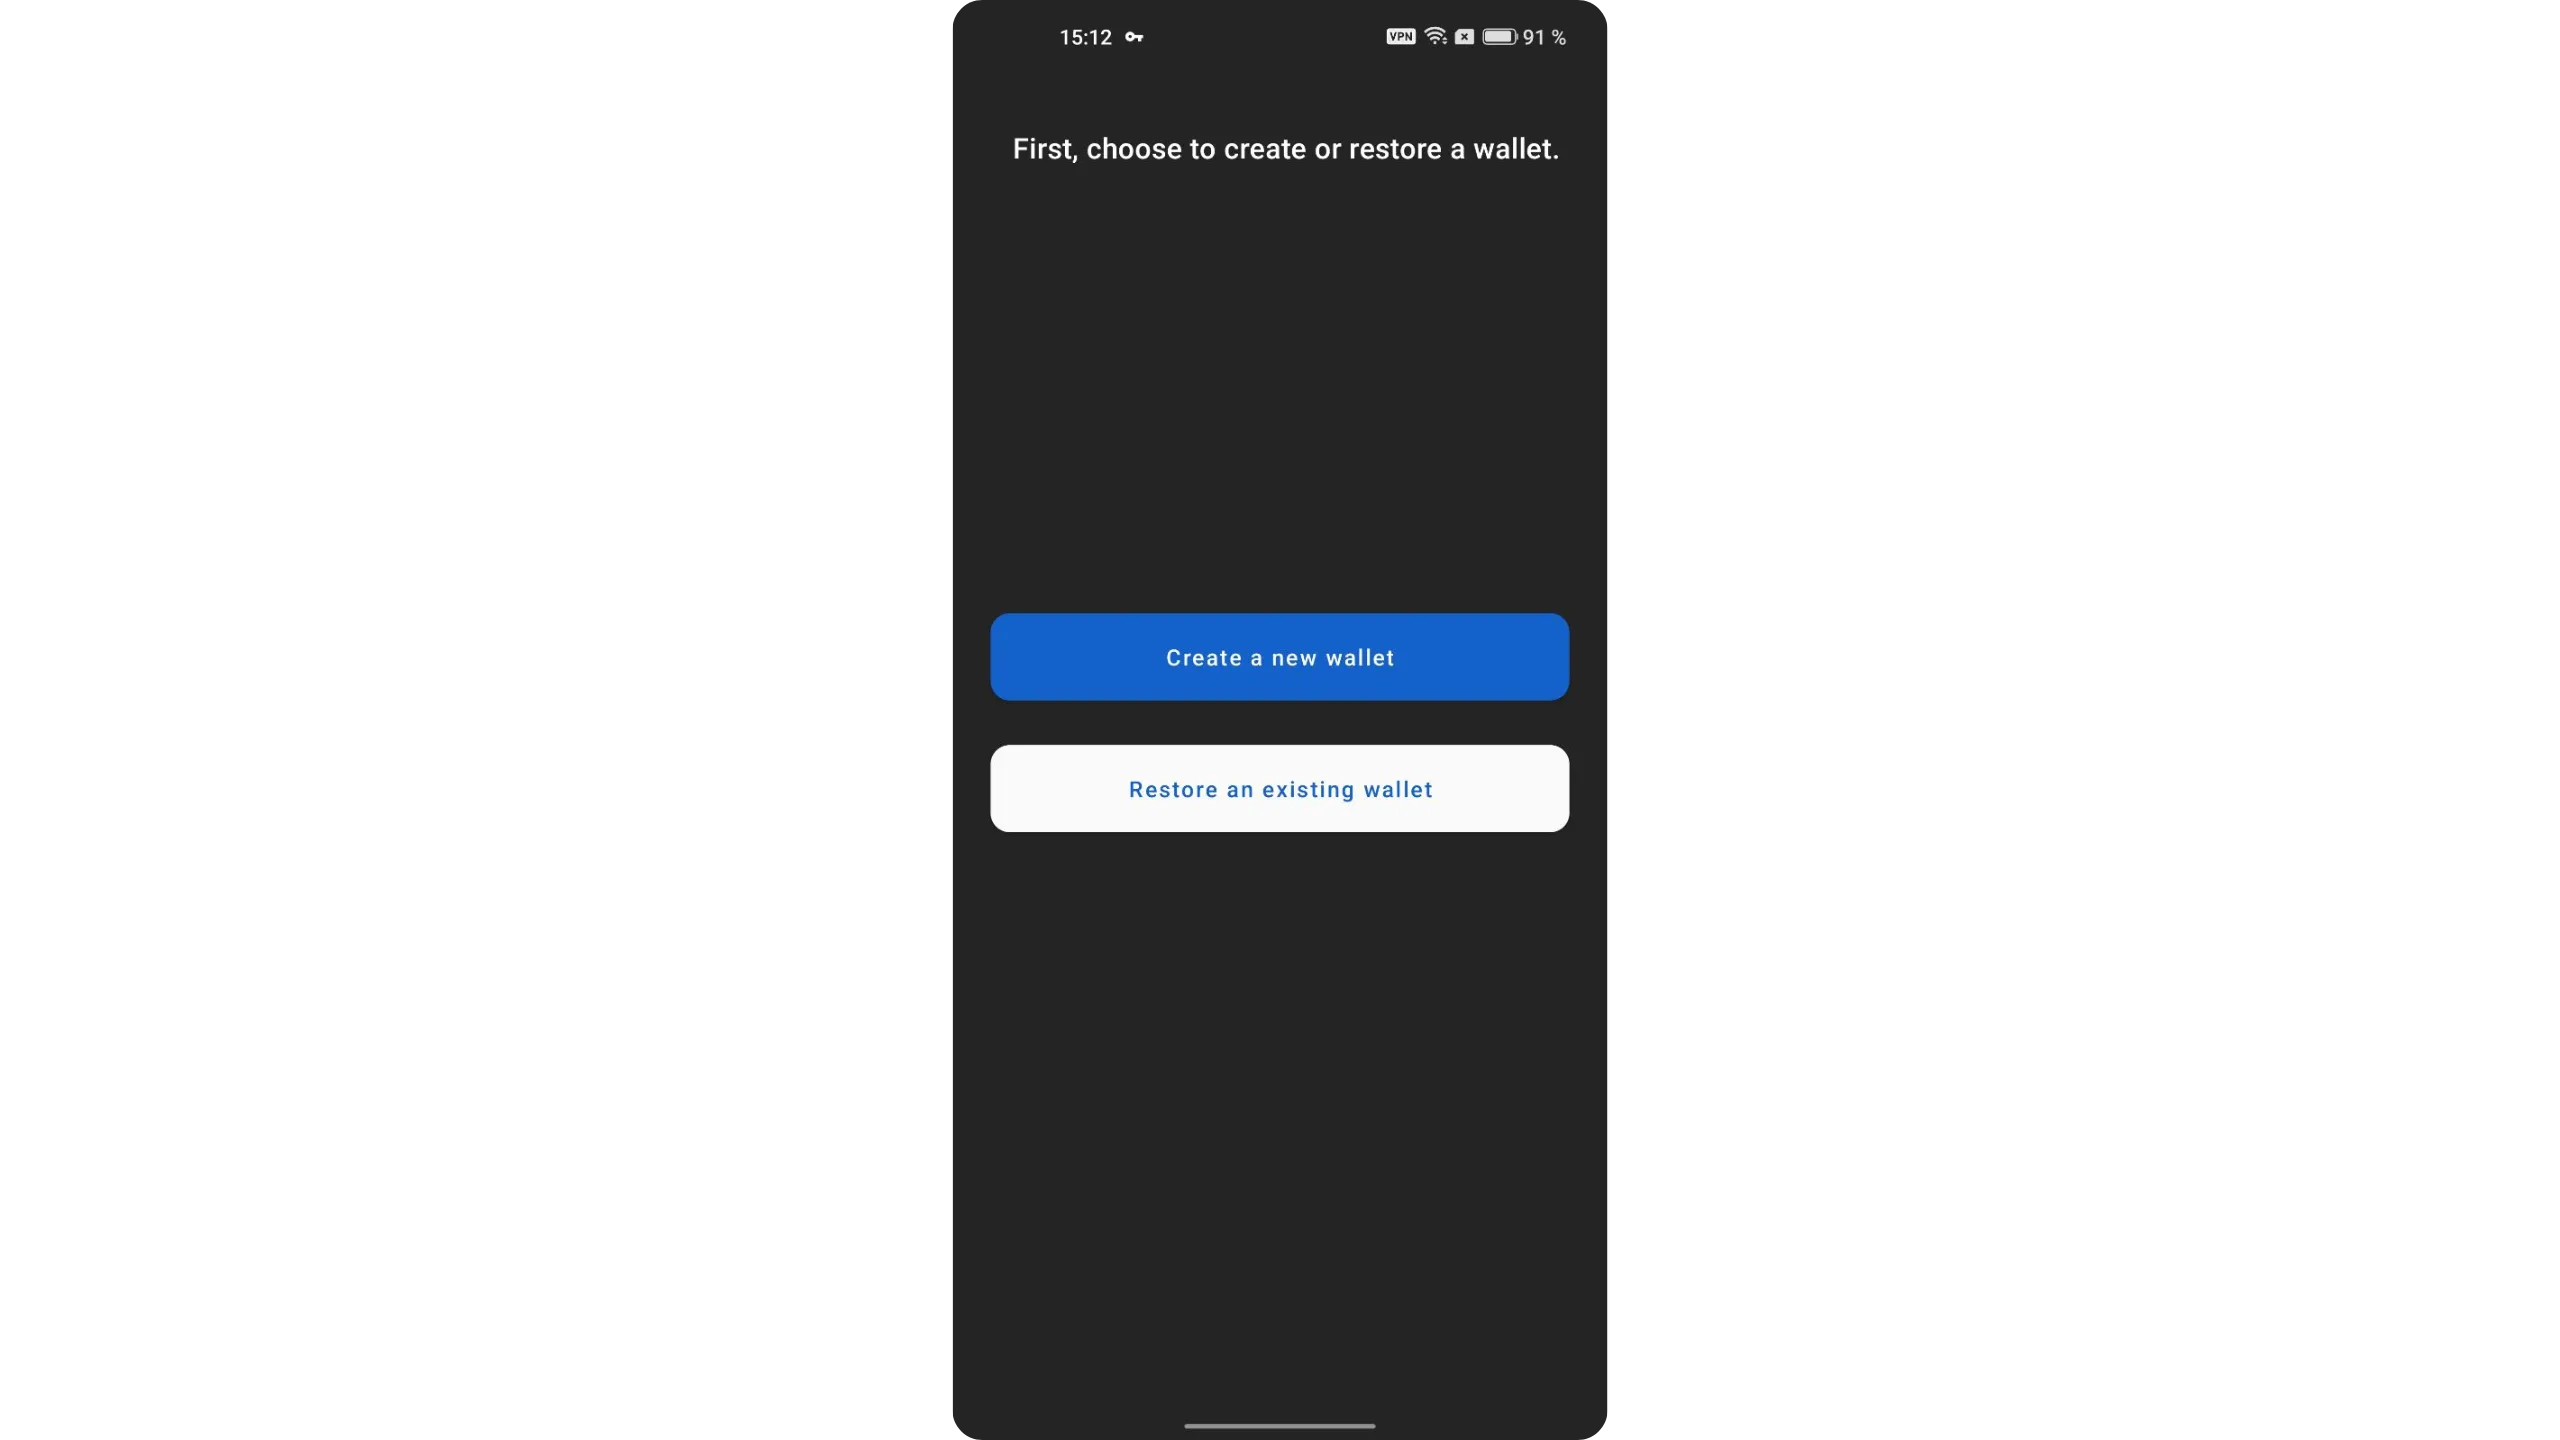
We’ll now create a new Bitcoin wallet. Tap “Create a new wallet.”
3.1. Create a Bitcoin wallet
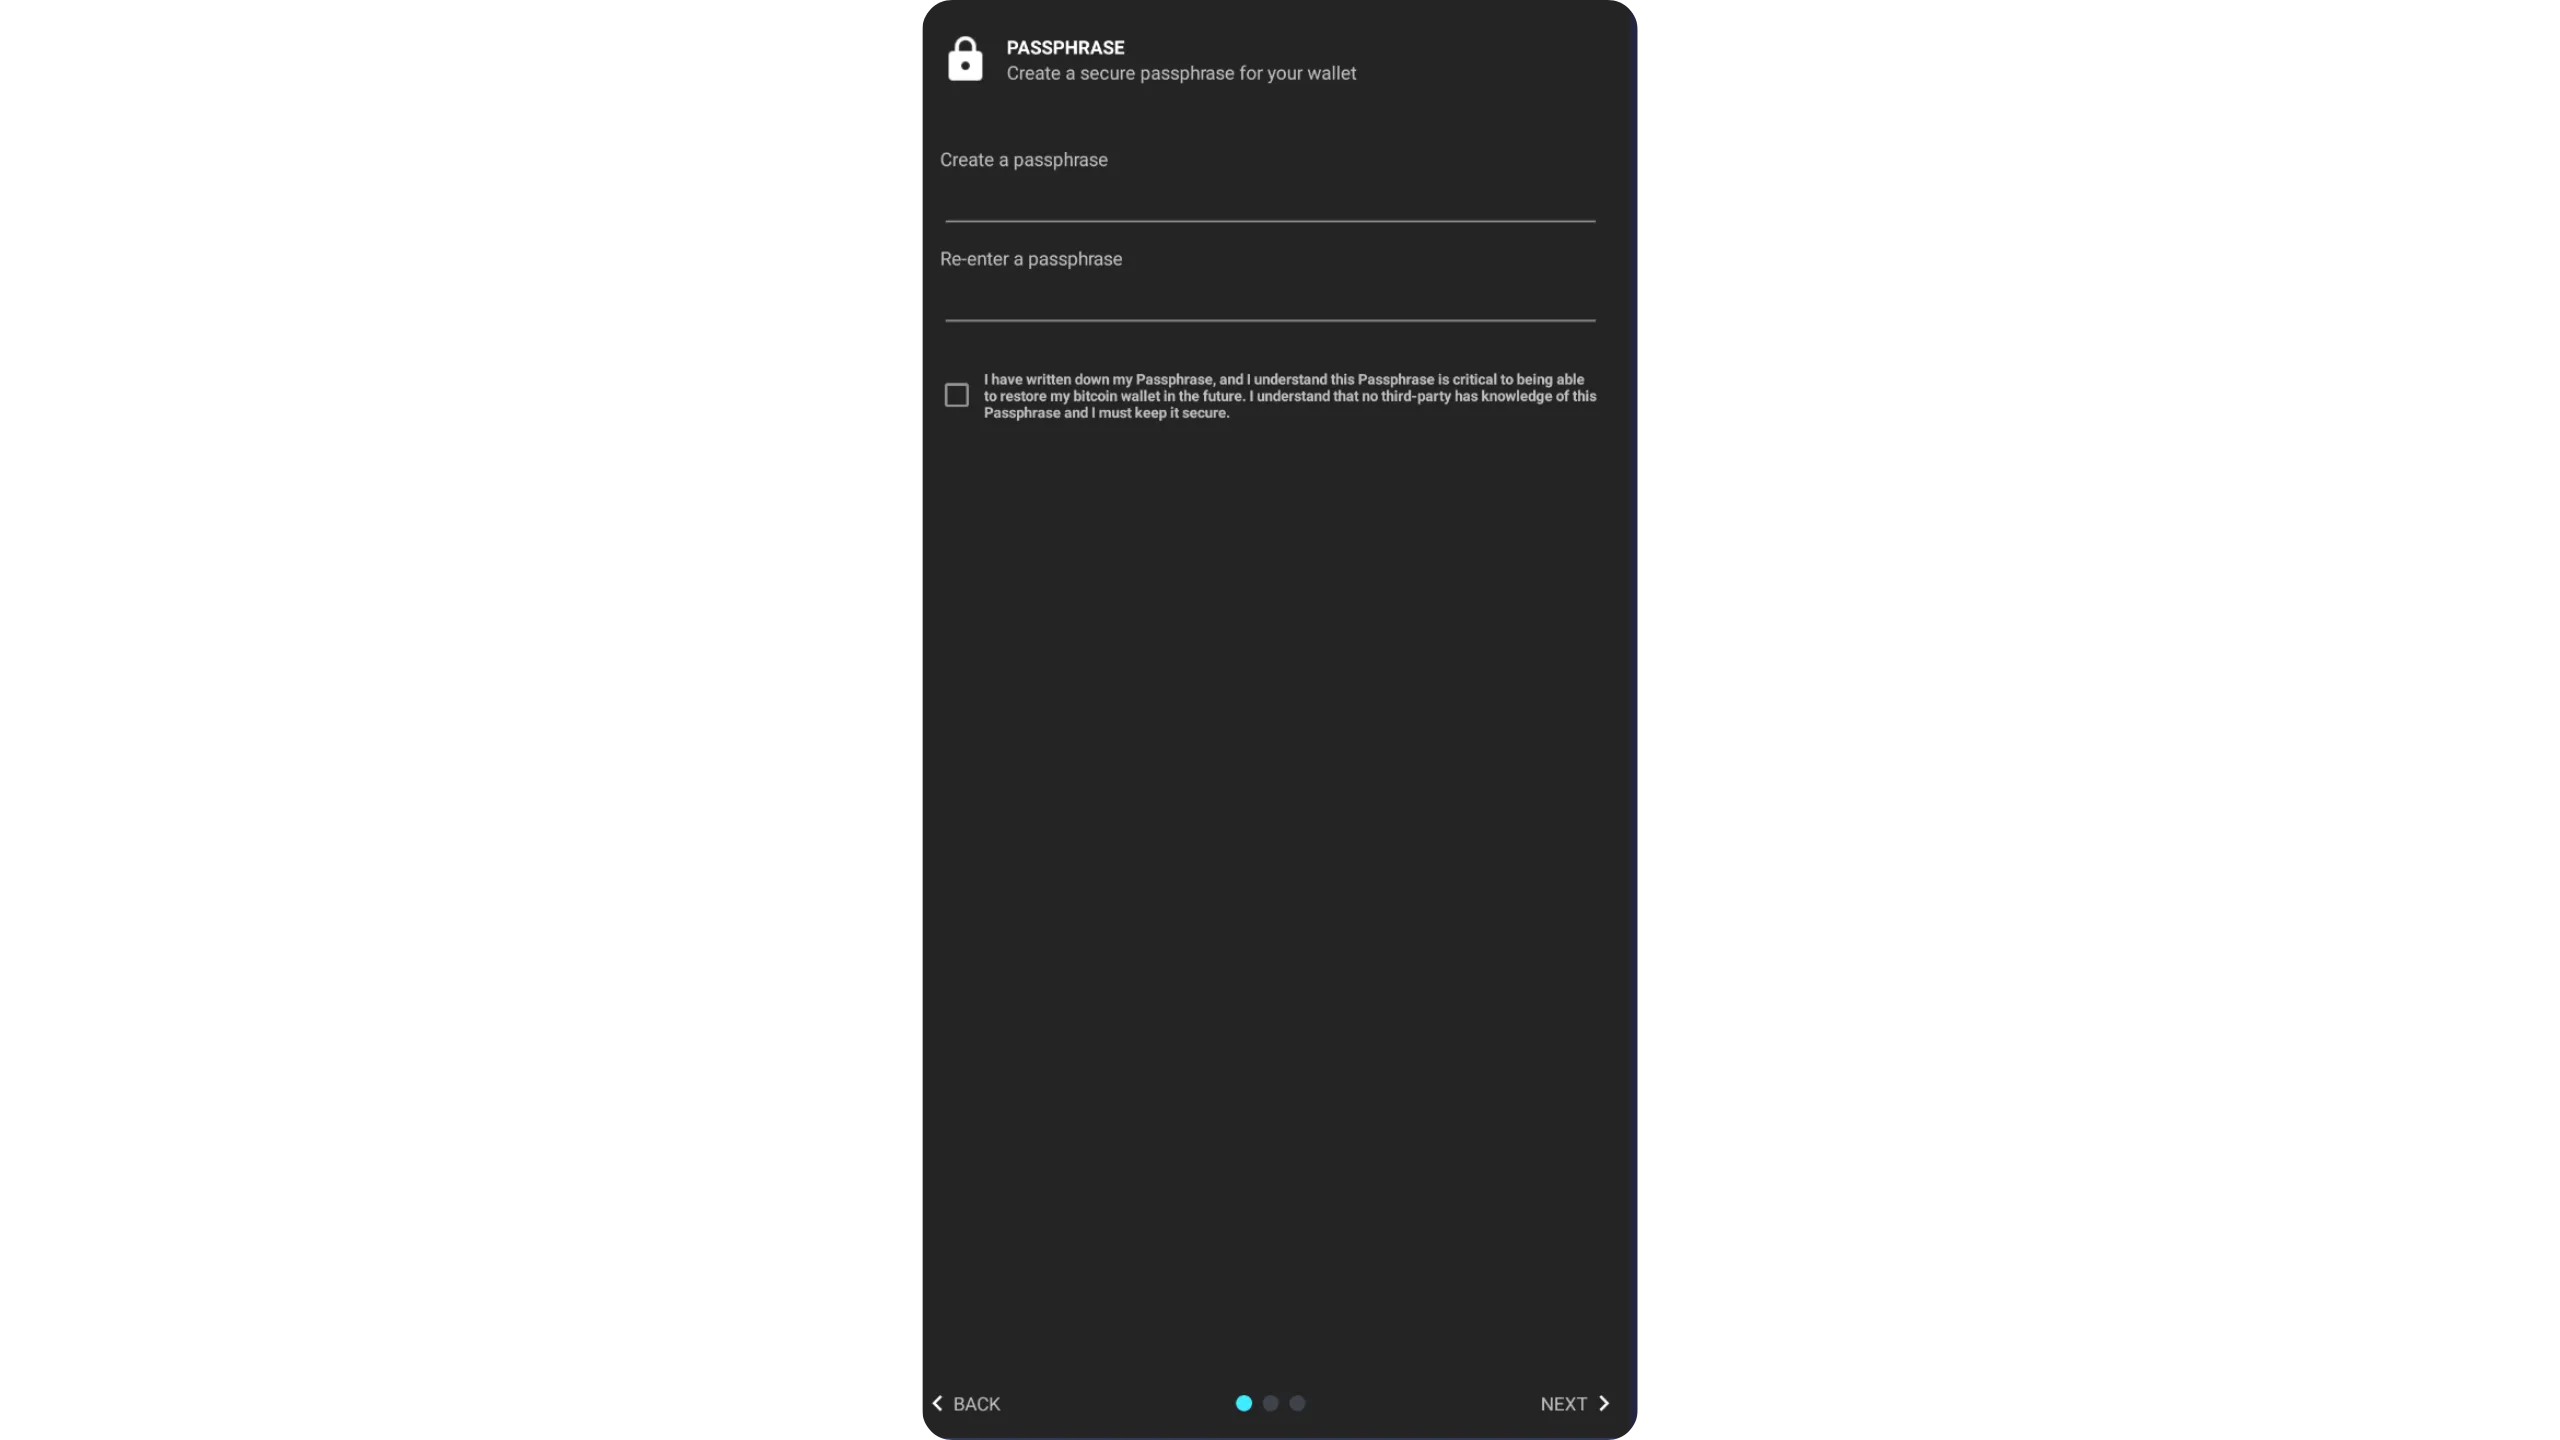
Ashigaru requires a BIP39 passphrase. Choose your passphrase and enter it in the fields. It should be as long and random as possible to resist brute‑force attacks.
Immediately make a physical backup of this passphrase. This step is crucial: if you lose your phone and you no longer have this passphrase, you will not be able to access the bitcoin secured by your Ashigaru wallet. This same passphrase is also used to encrypt the wallet recovery file.
If you don’t fully understand what a passphrase is or how it works, READ this complementary guide first. It’s critical: misunderstanding passphrase usage can cause irreversible loss of funds.
Once entered, tap “NEXT.”
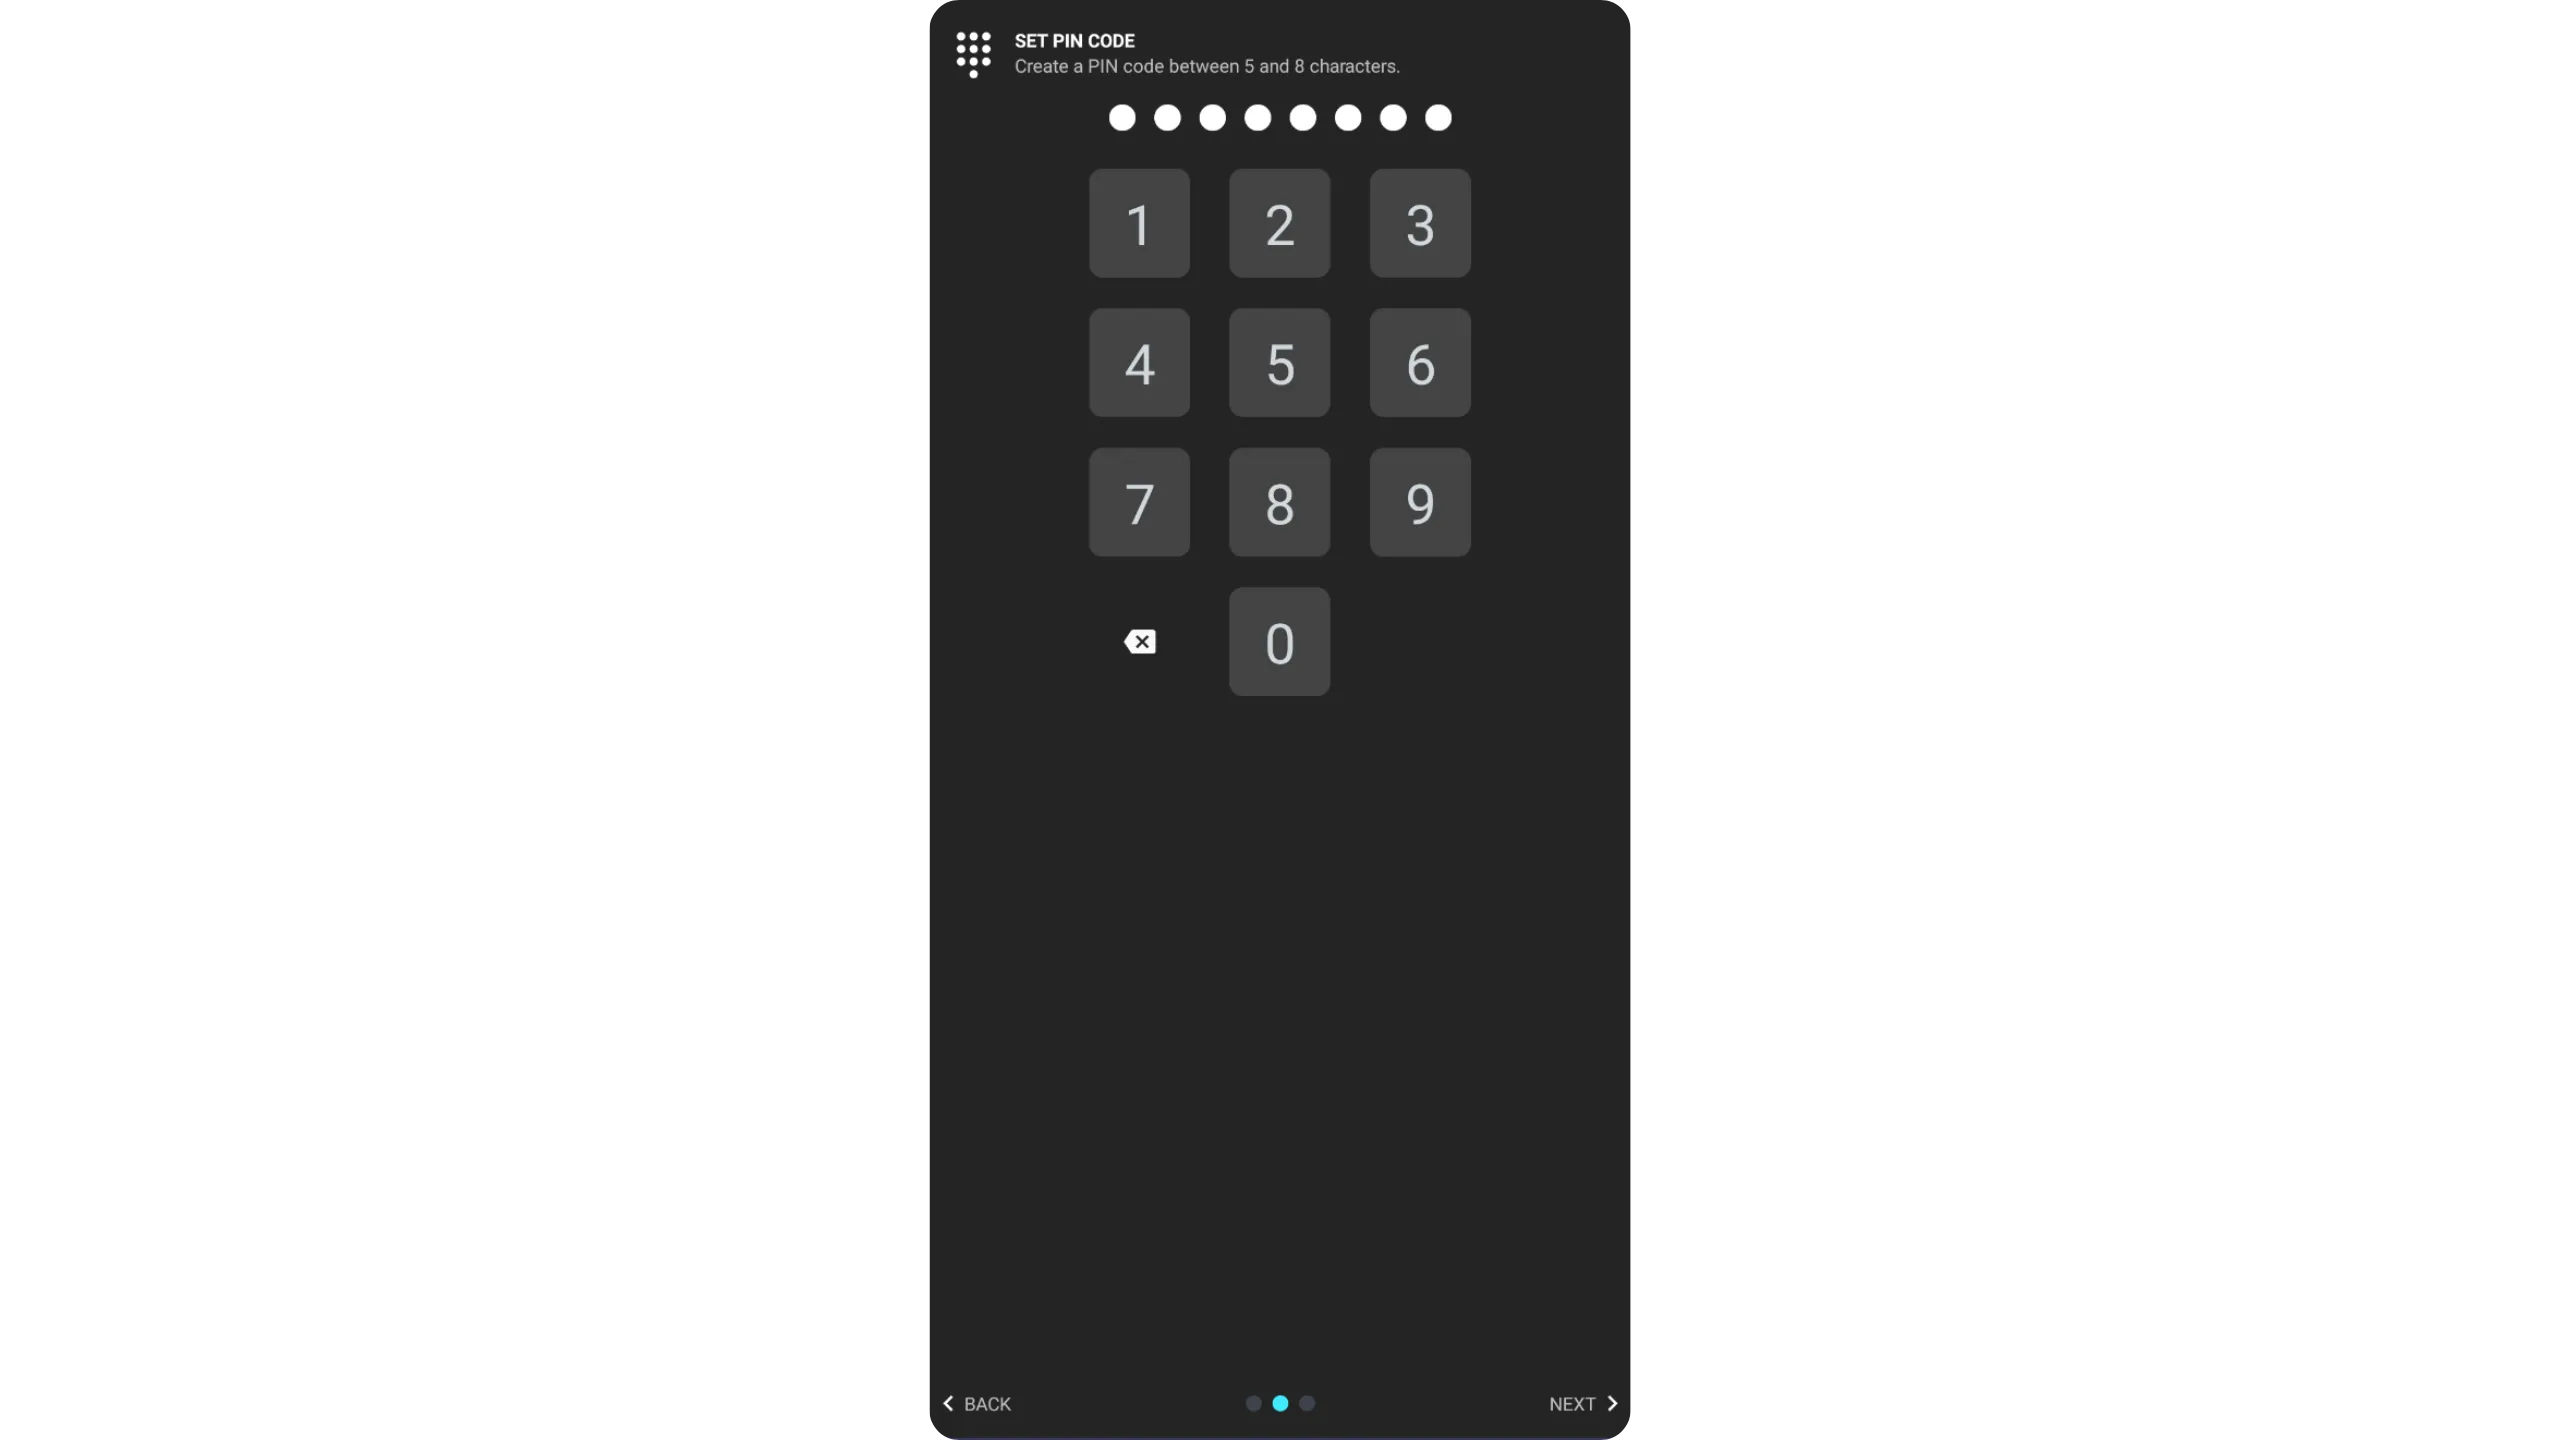
Next, choose a PIN code. This code unlocks your Ashigaru wallet and protects it against unauthorized physical access. It is not part of key derivation for your wallet. This means that even without the PIN, anyone who has your mnemonic and passphrase can regain access to your bitcoin.
Choose a long, random PIN. Keep a backup in a location separate from your phone so they are not compromised together.
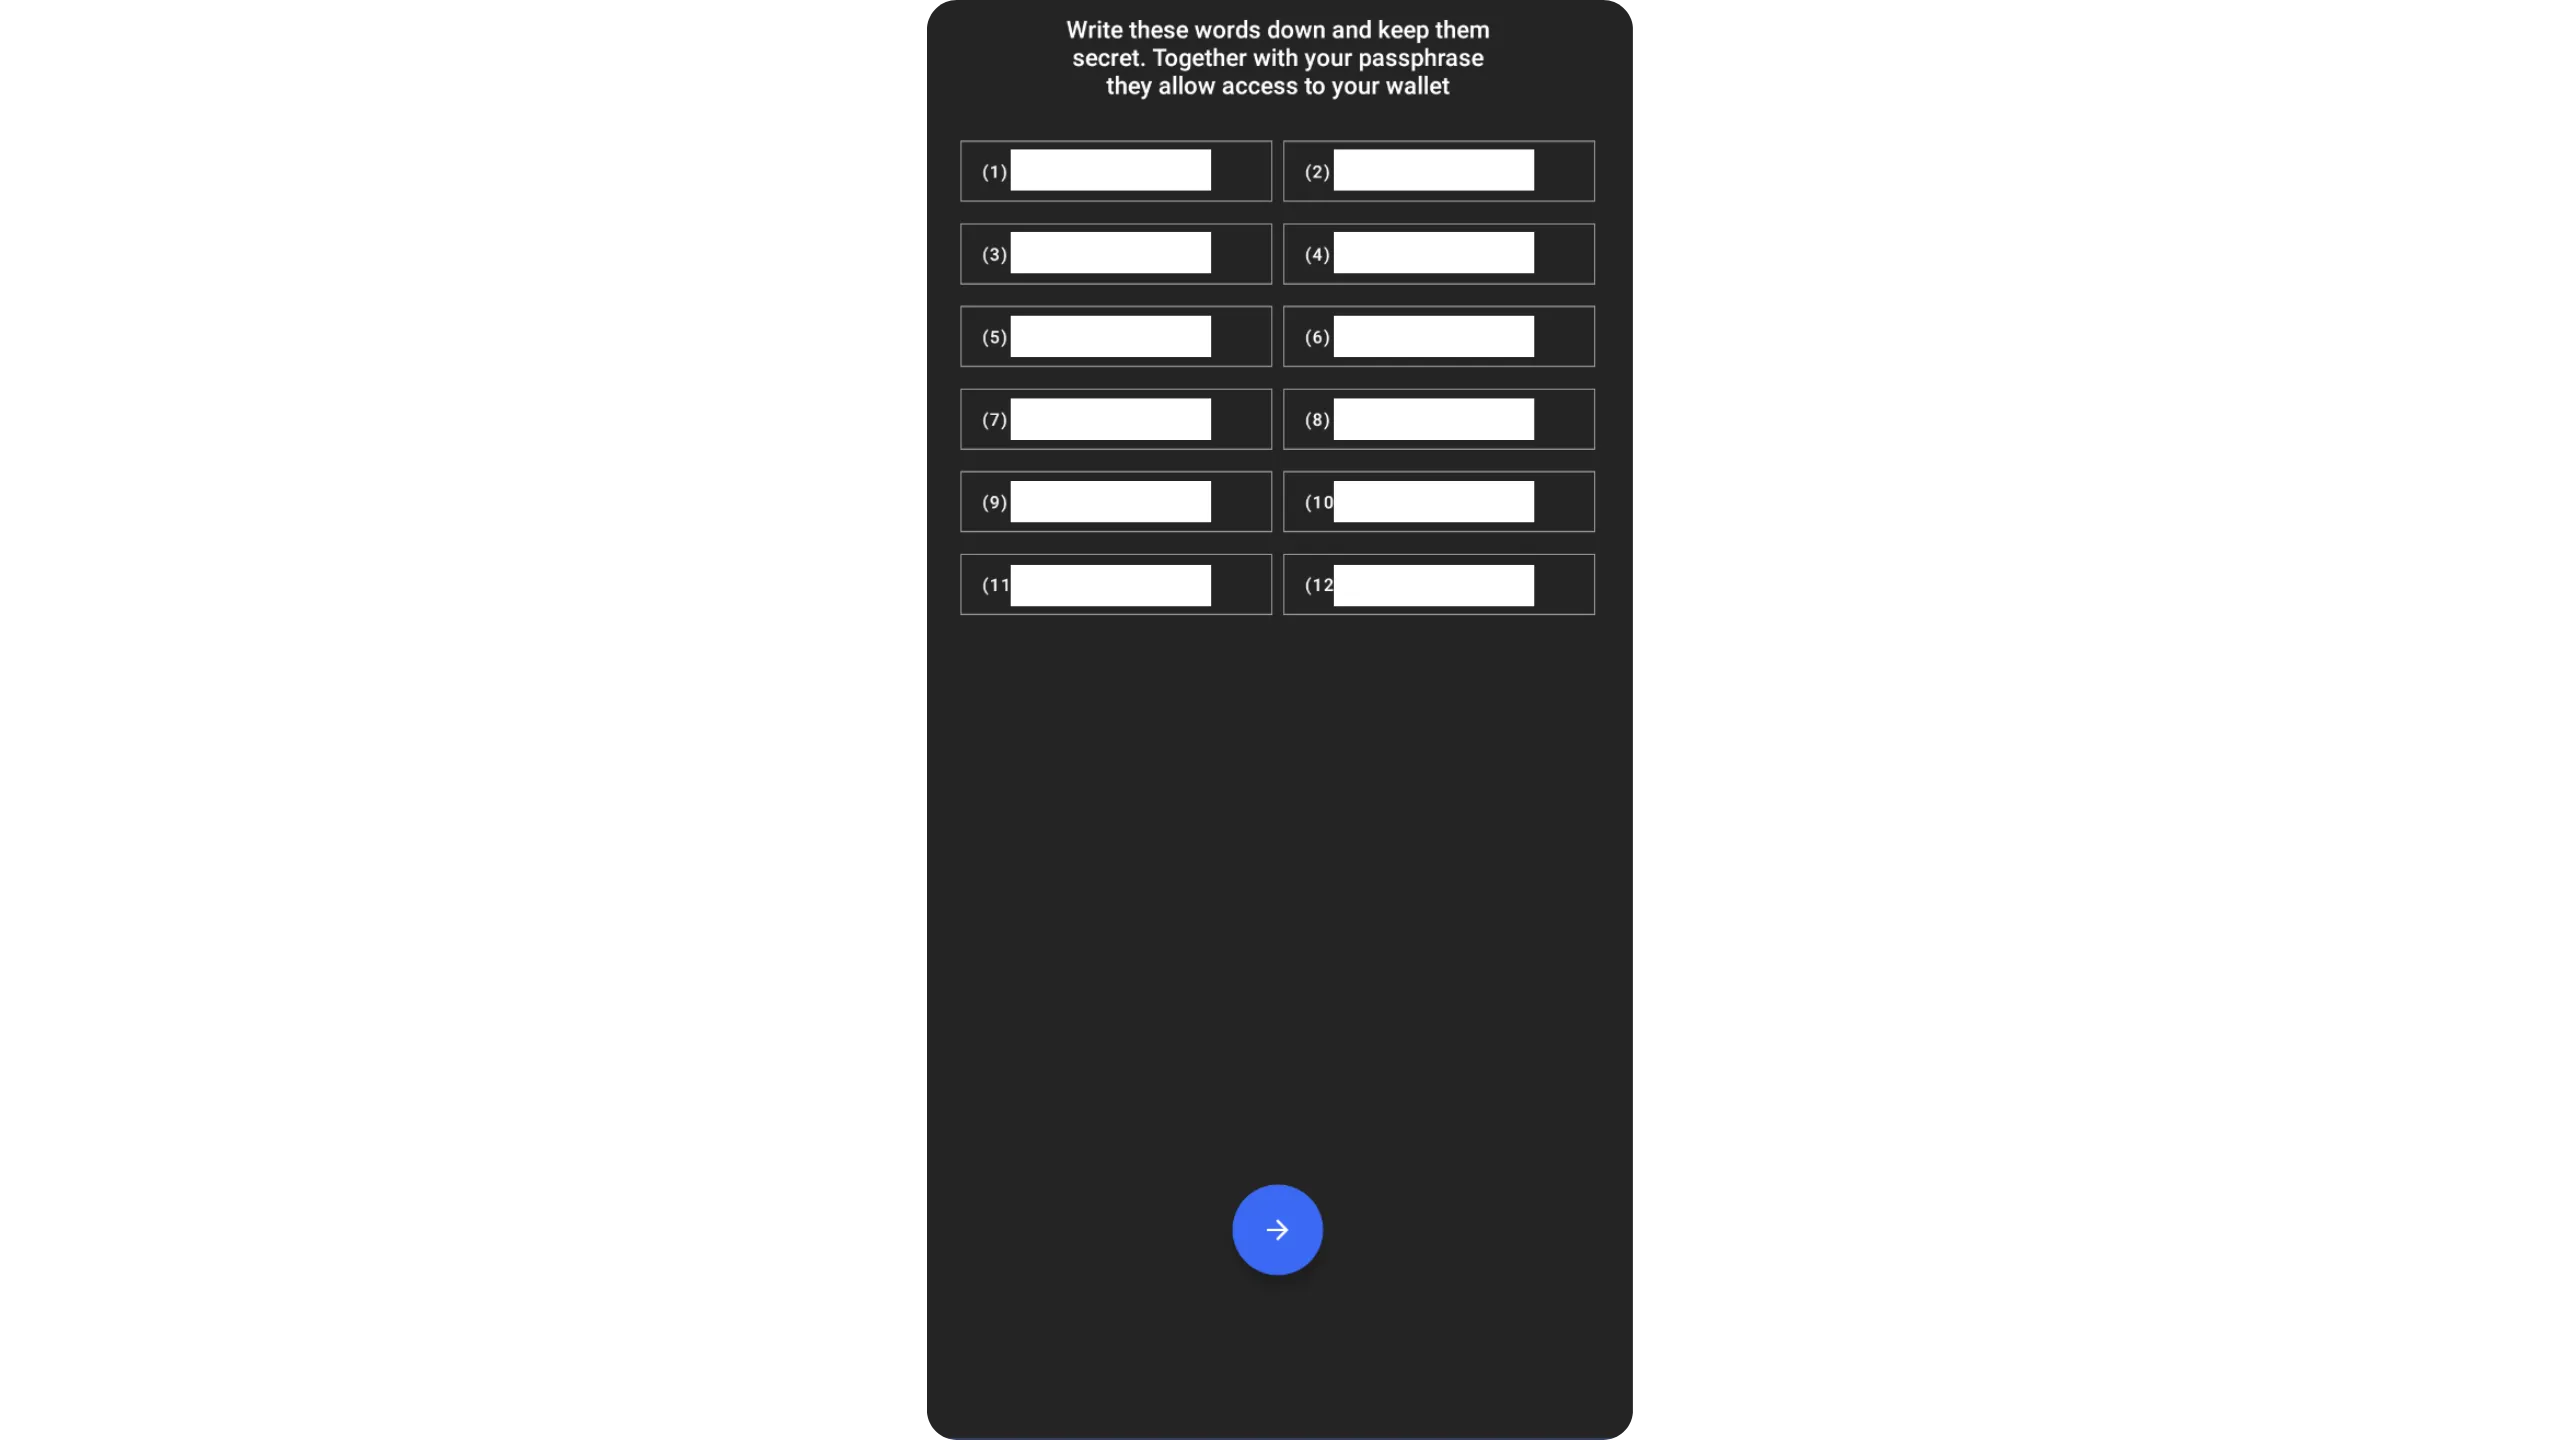
After setting the PIN, Ashigaru displays your wallet’s mnemonic phrase. Warning: this phrase, combined with your passphrase, gives full access to your bitcoin. Anyone with it can steal your funds, even without your phone. This 12‑word list restores your wallet if your phone is lost, stolen, or broken. Back it up carefully on physical media (paper or metal).
Never store this phrase digitally — doing so exposes your funds to theft. Depending on your security model, you can make multiple physical copies, but never split the phrase. Keep the words in order and number them.
Finally, never store the mnemonic phrase and the passphrase in the same place. If both are compromised at once, an attacker can access your wallet.
Ashigaru will then ask you to confirm your passphrase again. Use this step to double‑check your physical backup is accurate.
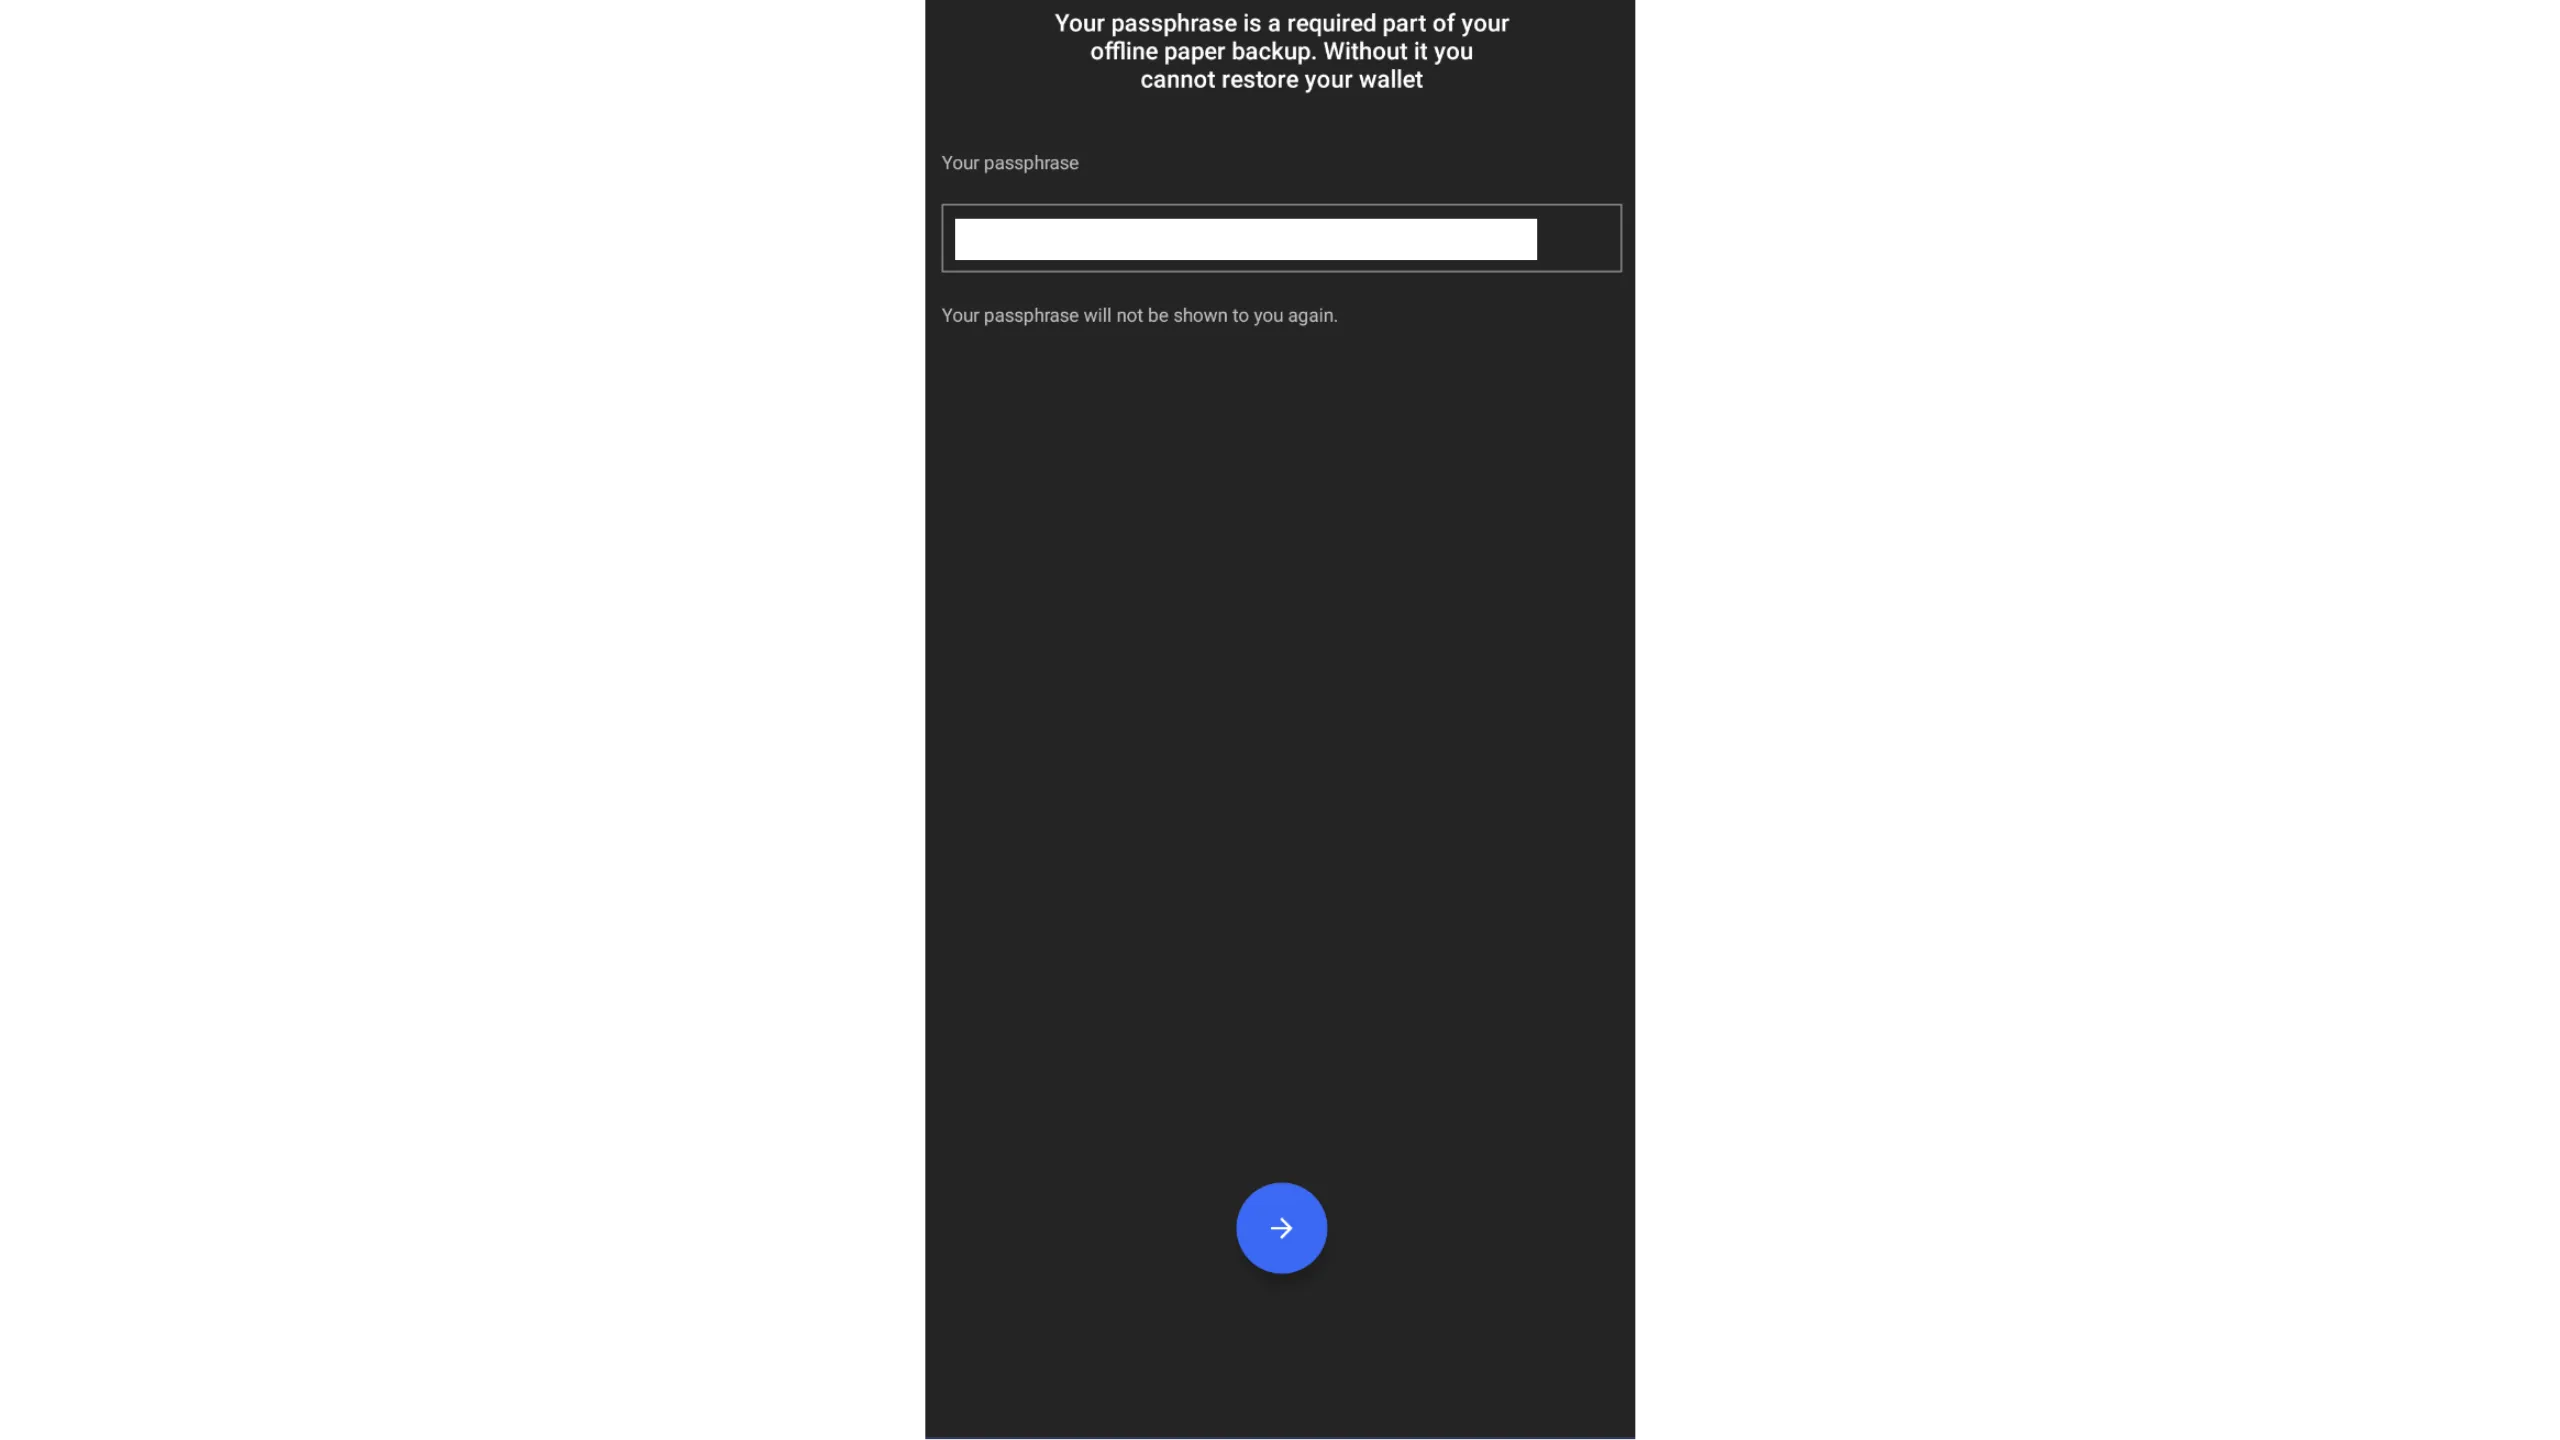
Your mnemonic + passphrase = full wallet access. Treat both with extreme caution — they must be kept private, offline, and never digitized.
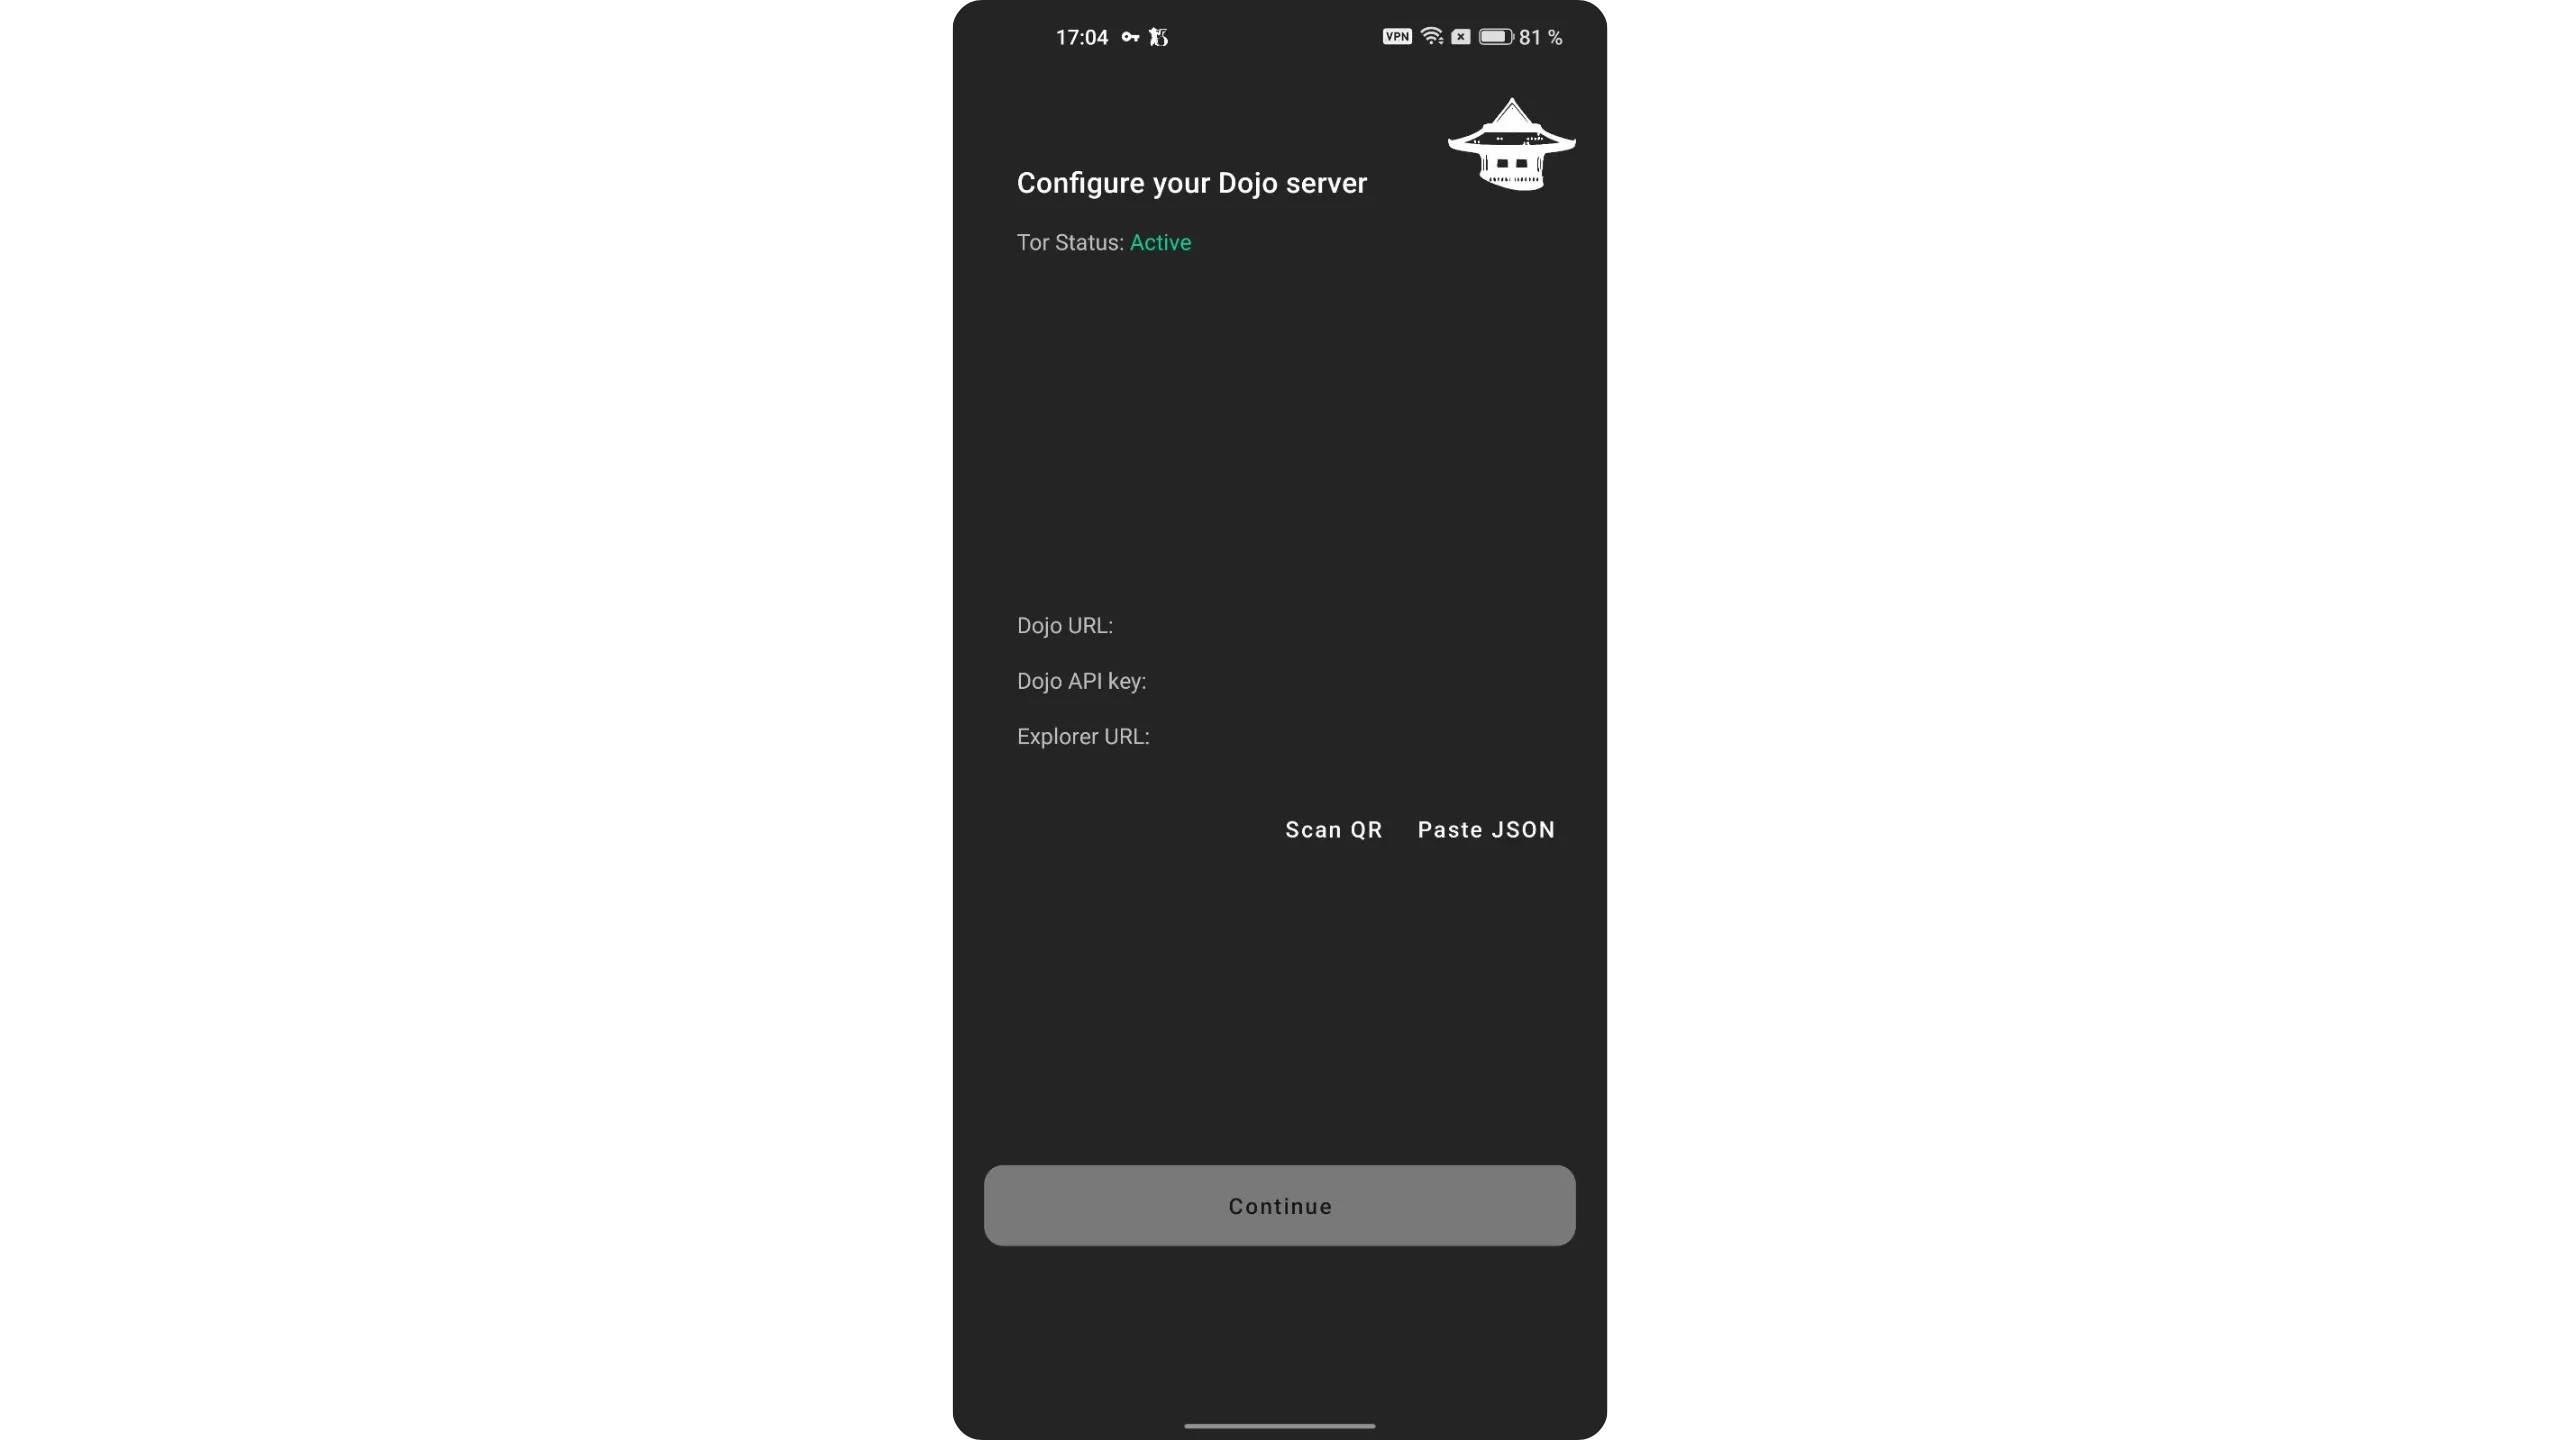
3.2. Connect a Dojo
Next, connect to your Dojo. As explained earlier, Ashigaru requires a Dojo to interact with the Bitcoin network.
Log in to your Dojo’s Maintenance Tool and open the “PAIRING” menu.
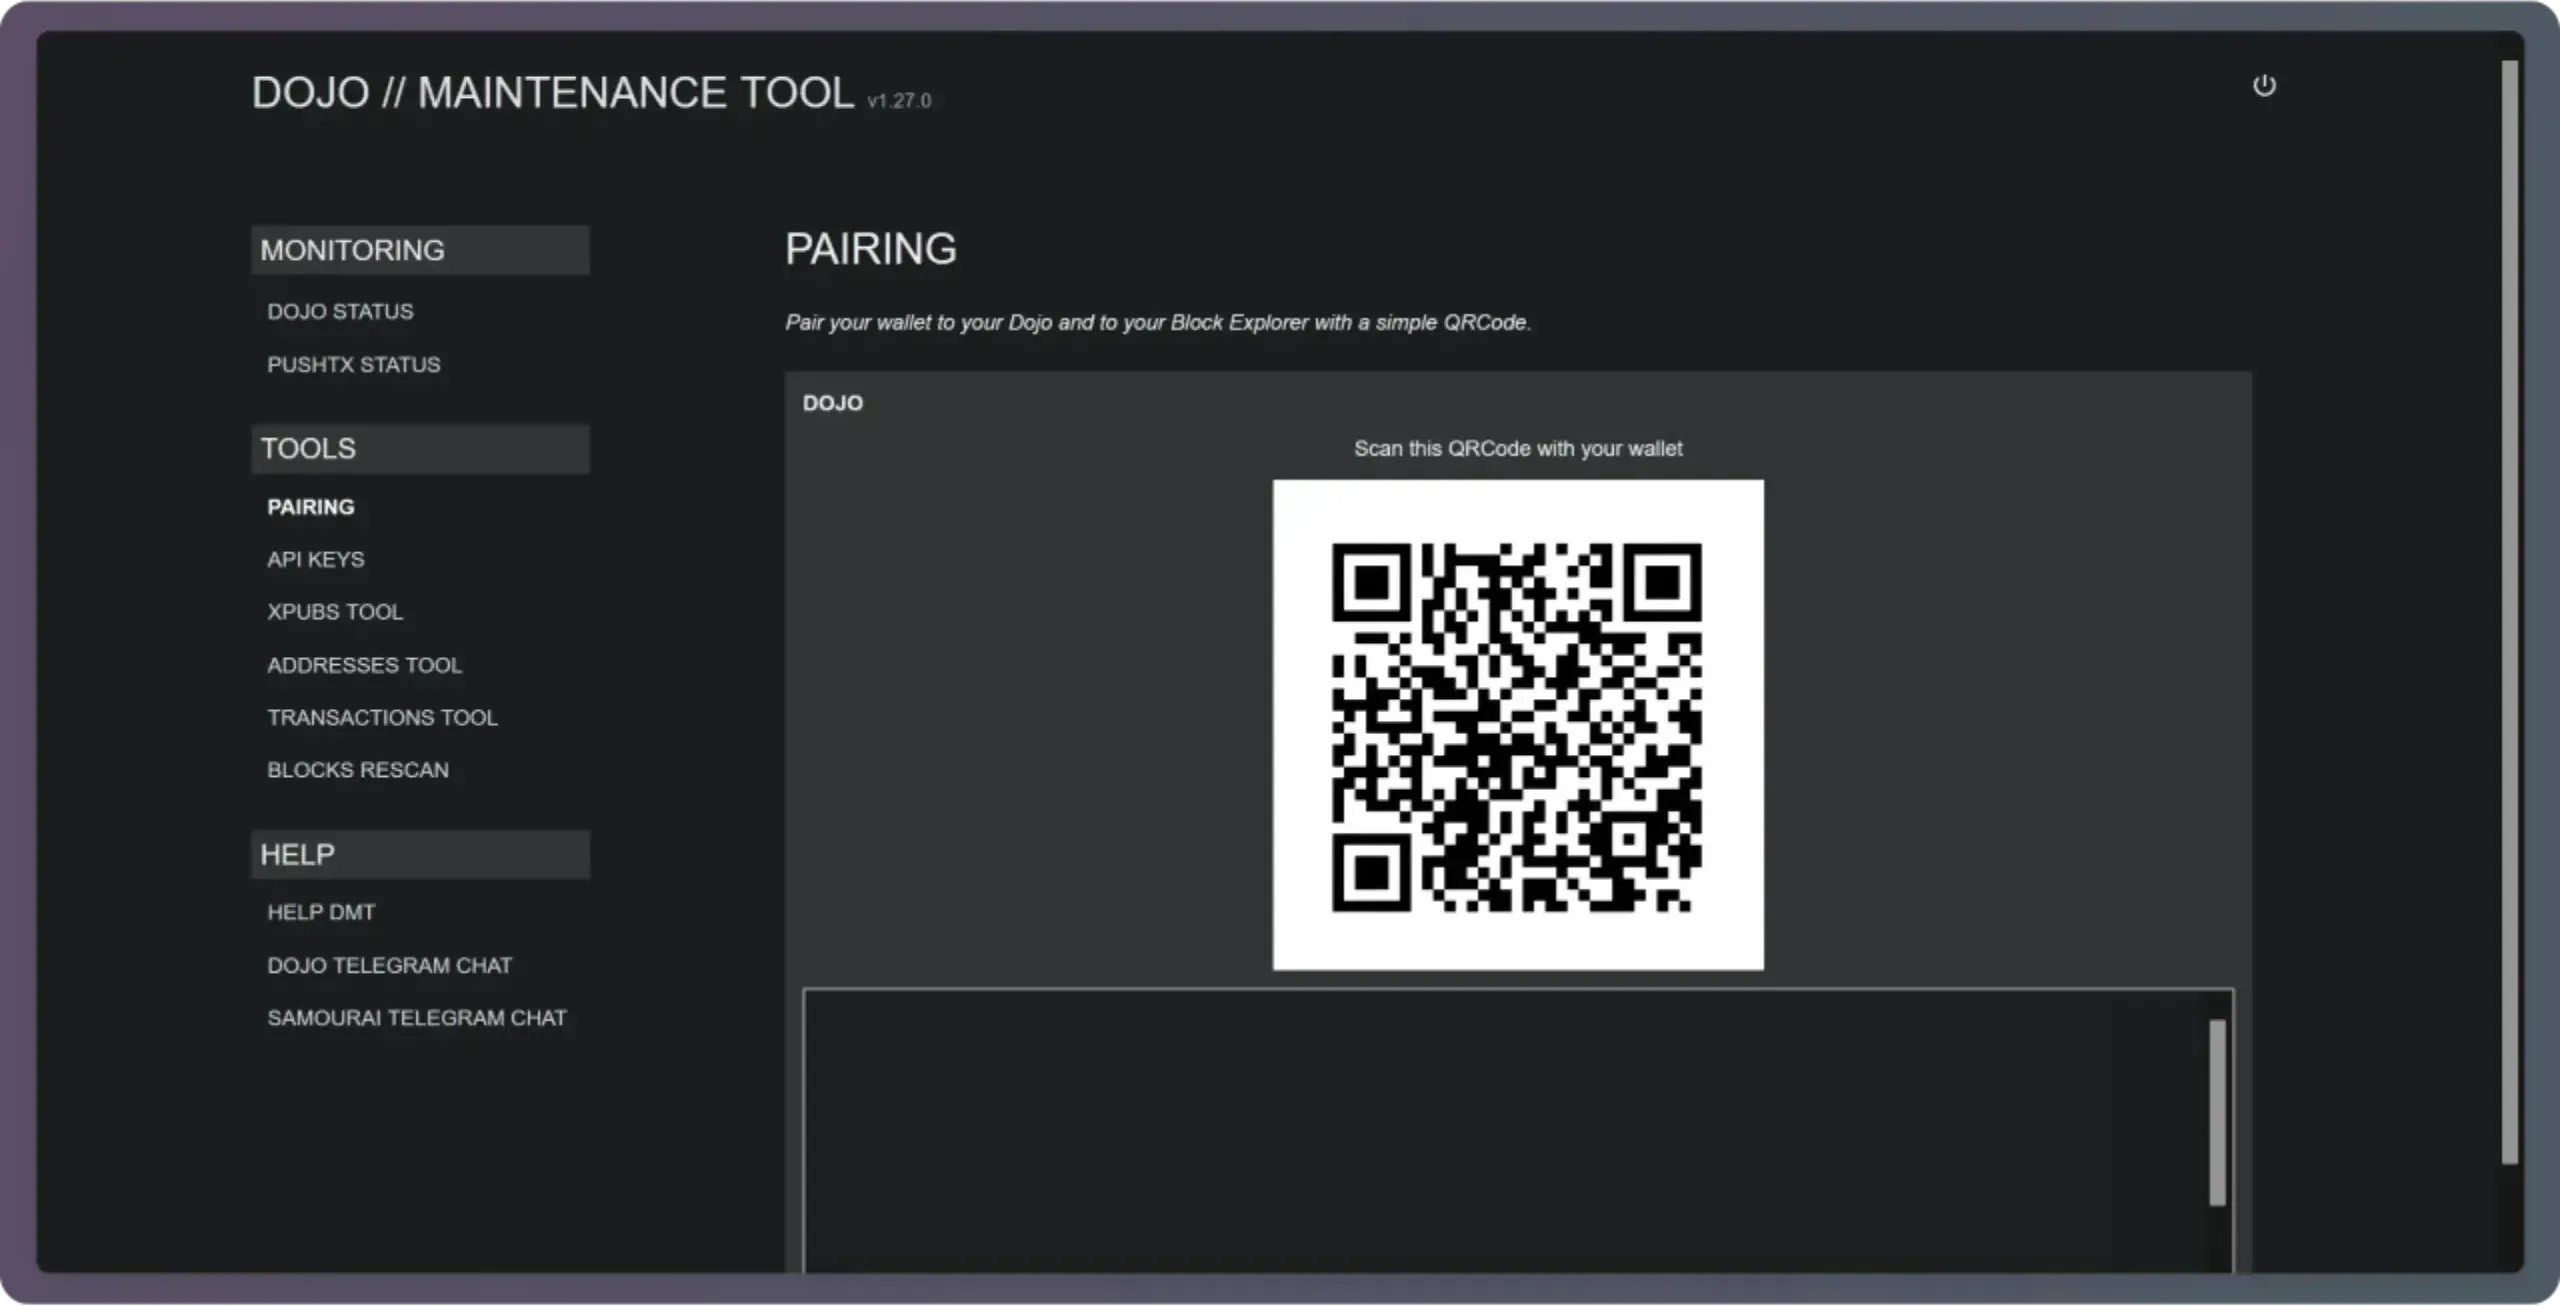
In Ashigaru, tap “Scan QR,” then scan the pairing QR displayed by your DMT. Tap “Continue” to confirm.
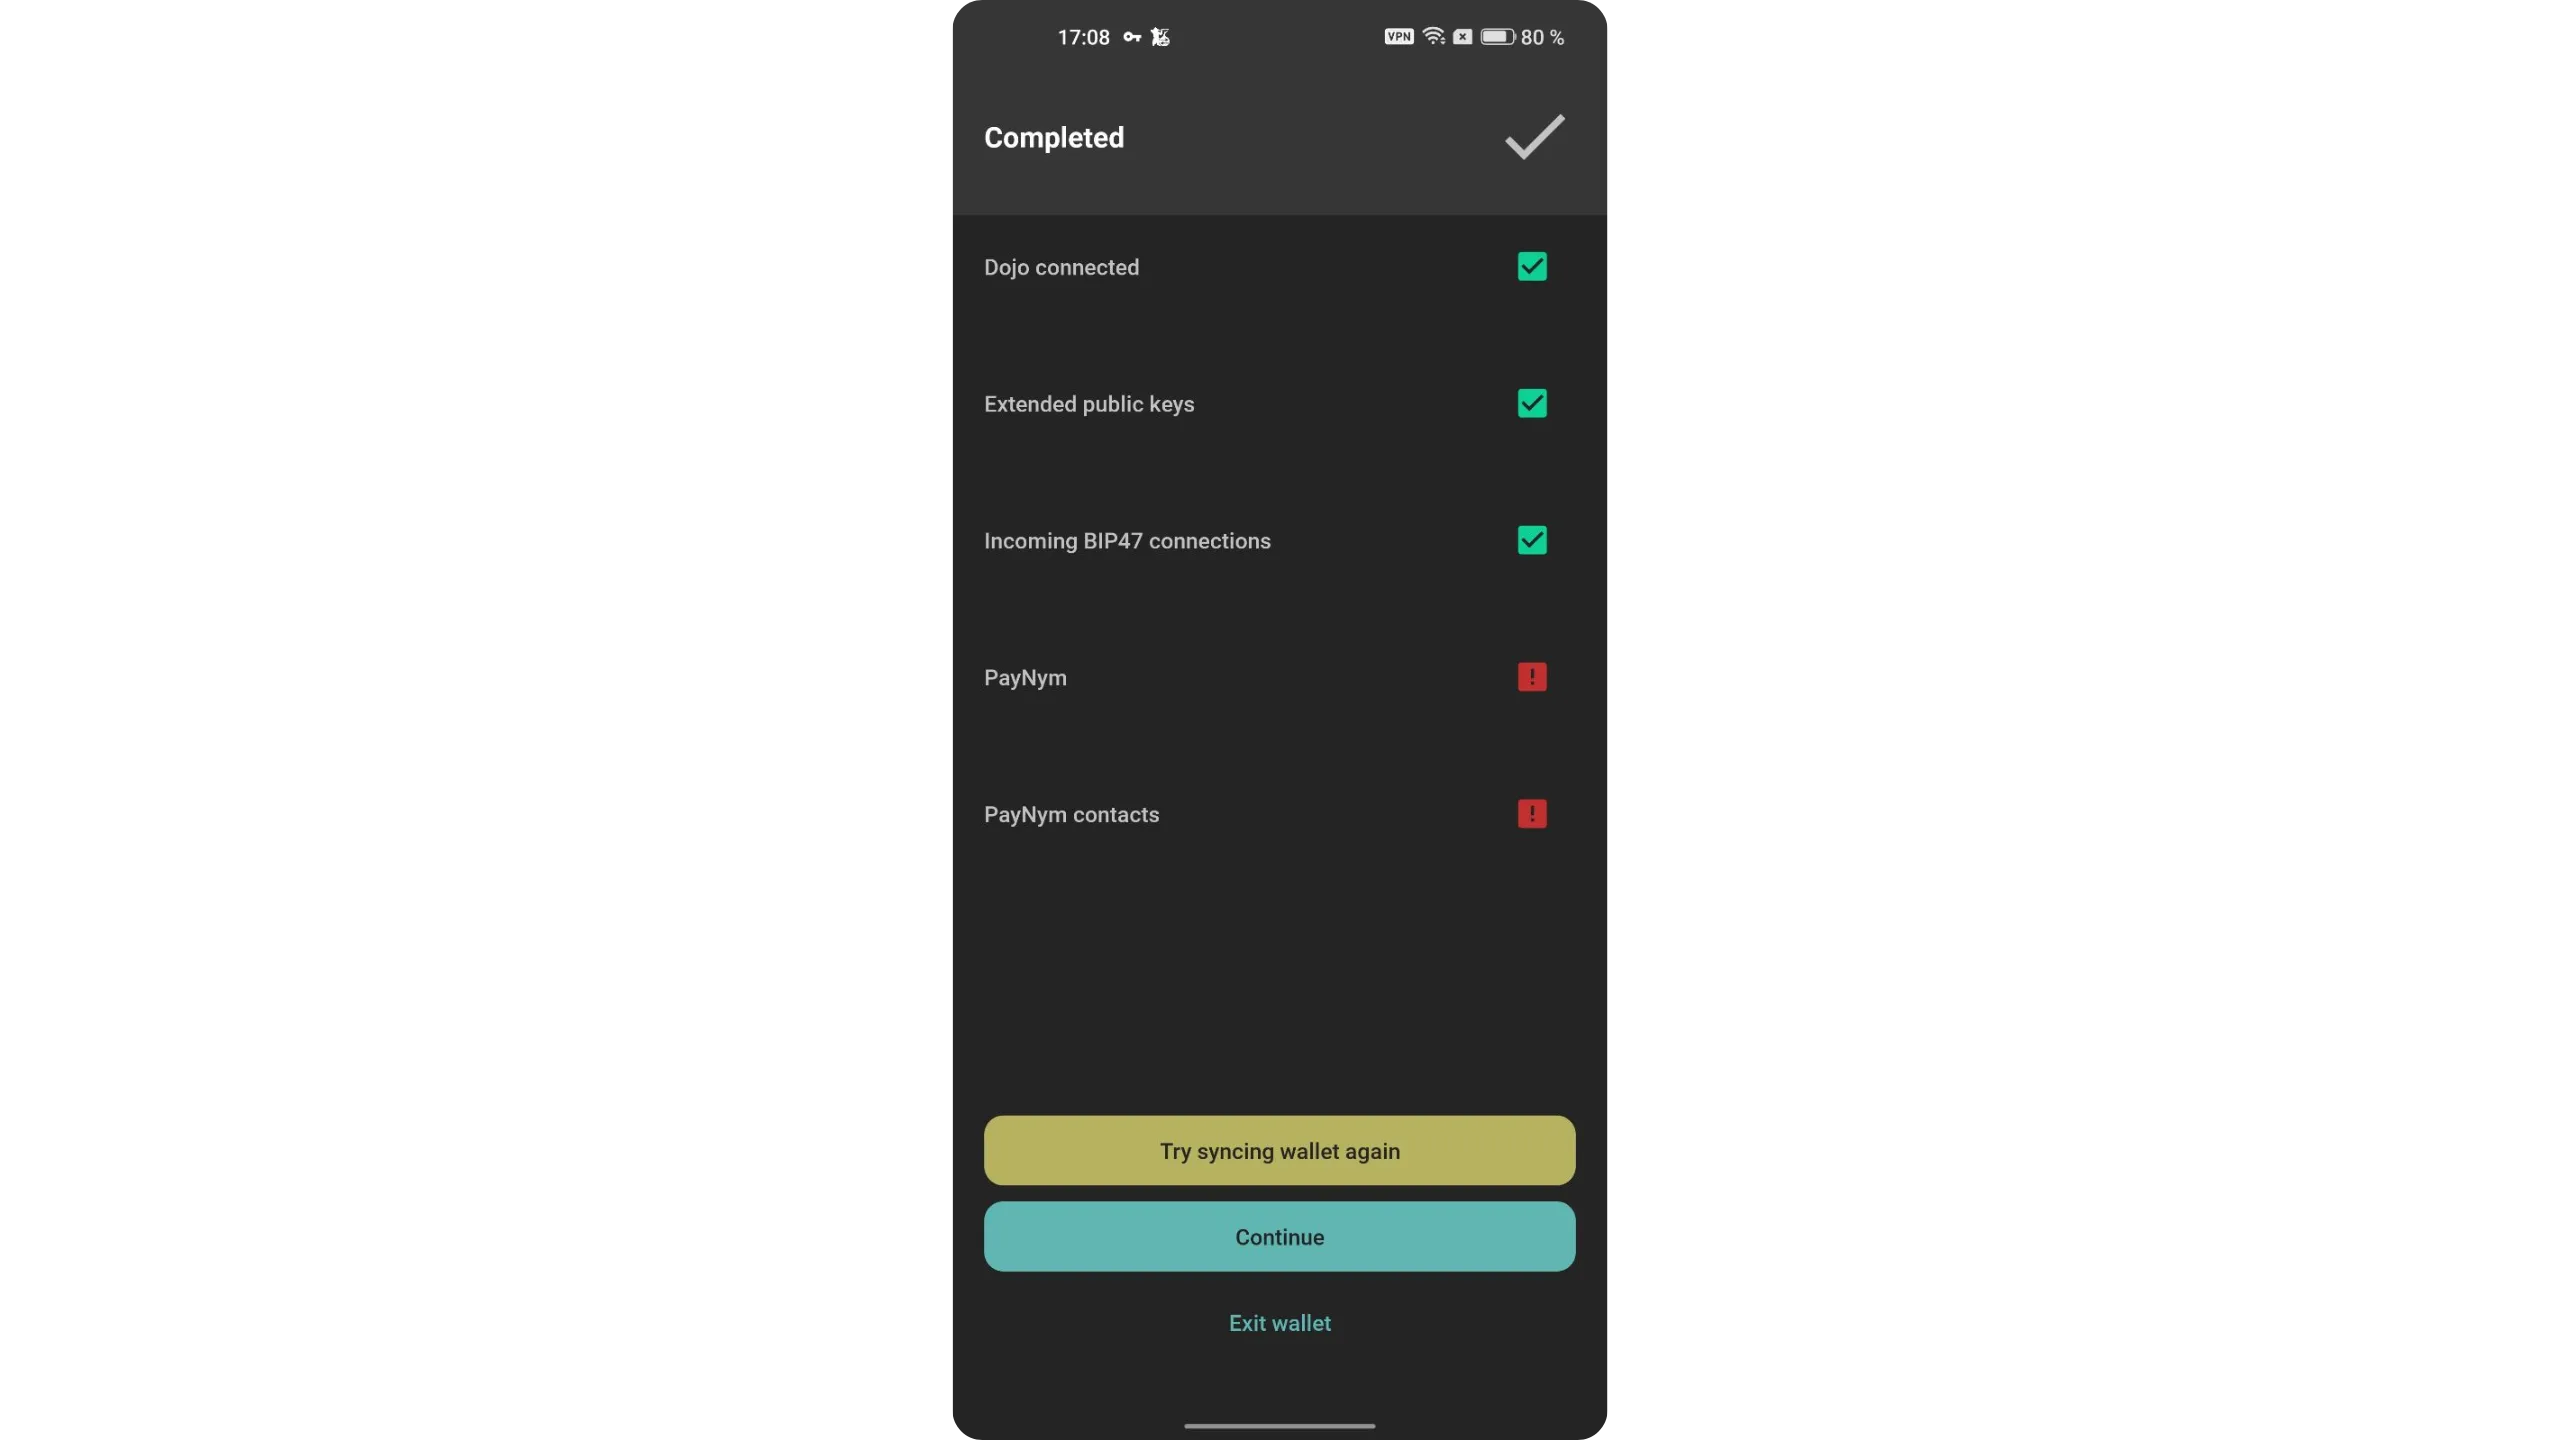
Enter your PIN to unlock the wallet. You’ll see the synchronization screen. It’s normal to see PayNym‑related errors at this stage because the wallet is new. Just tap “Continue.”
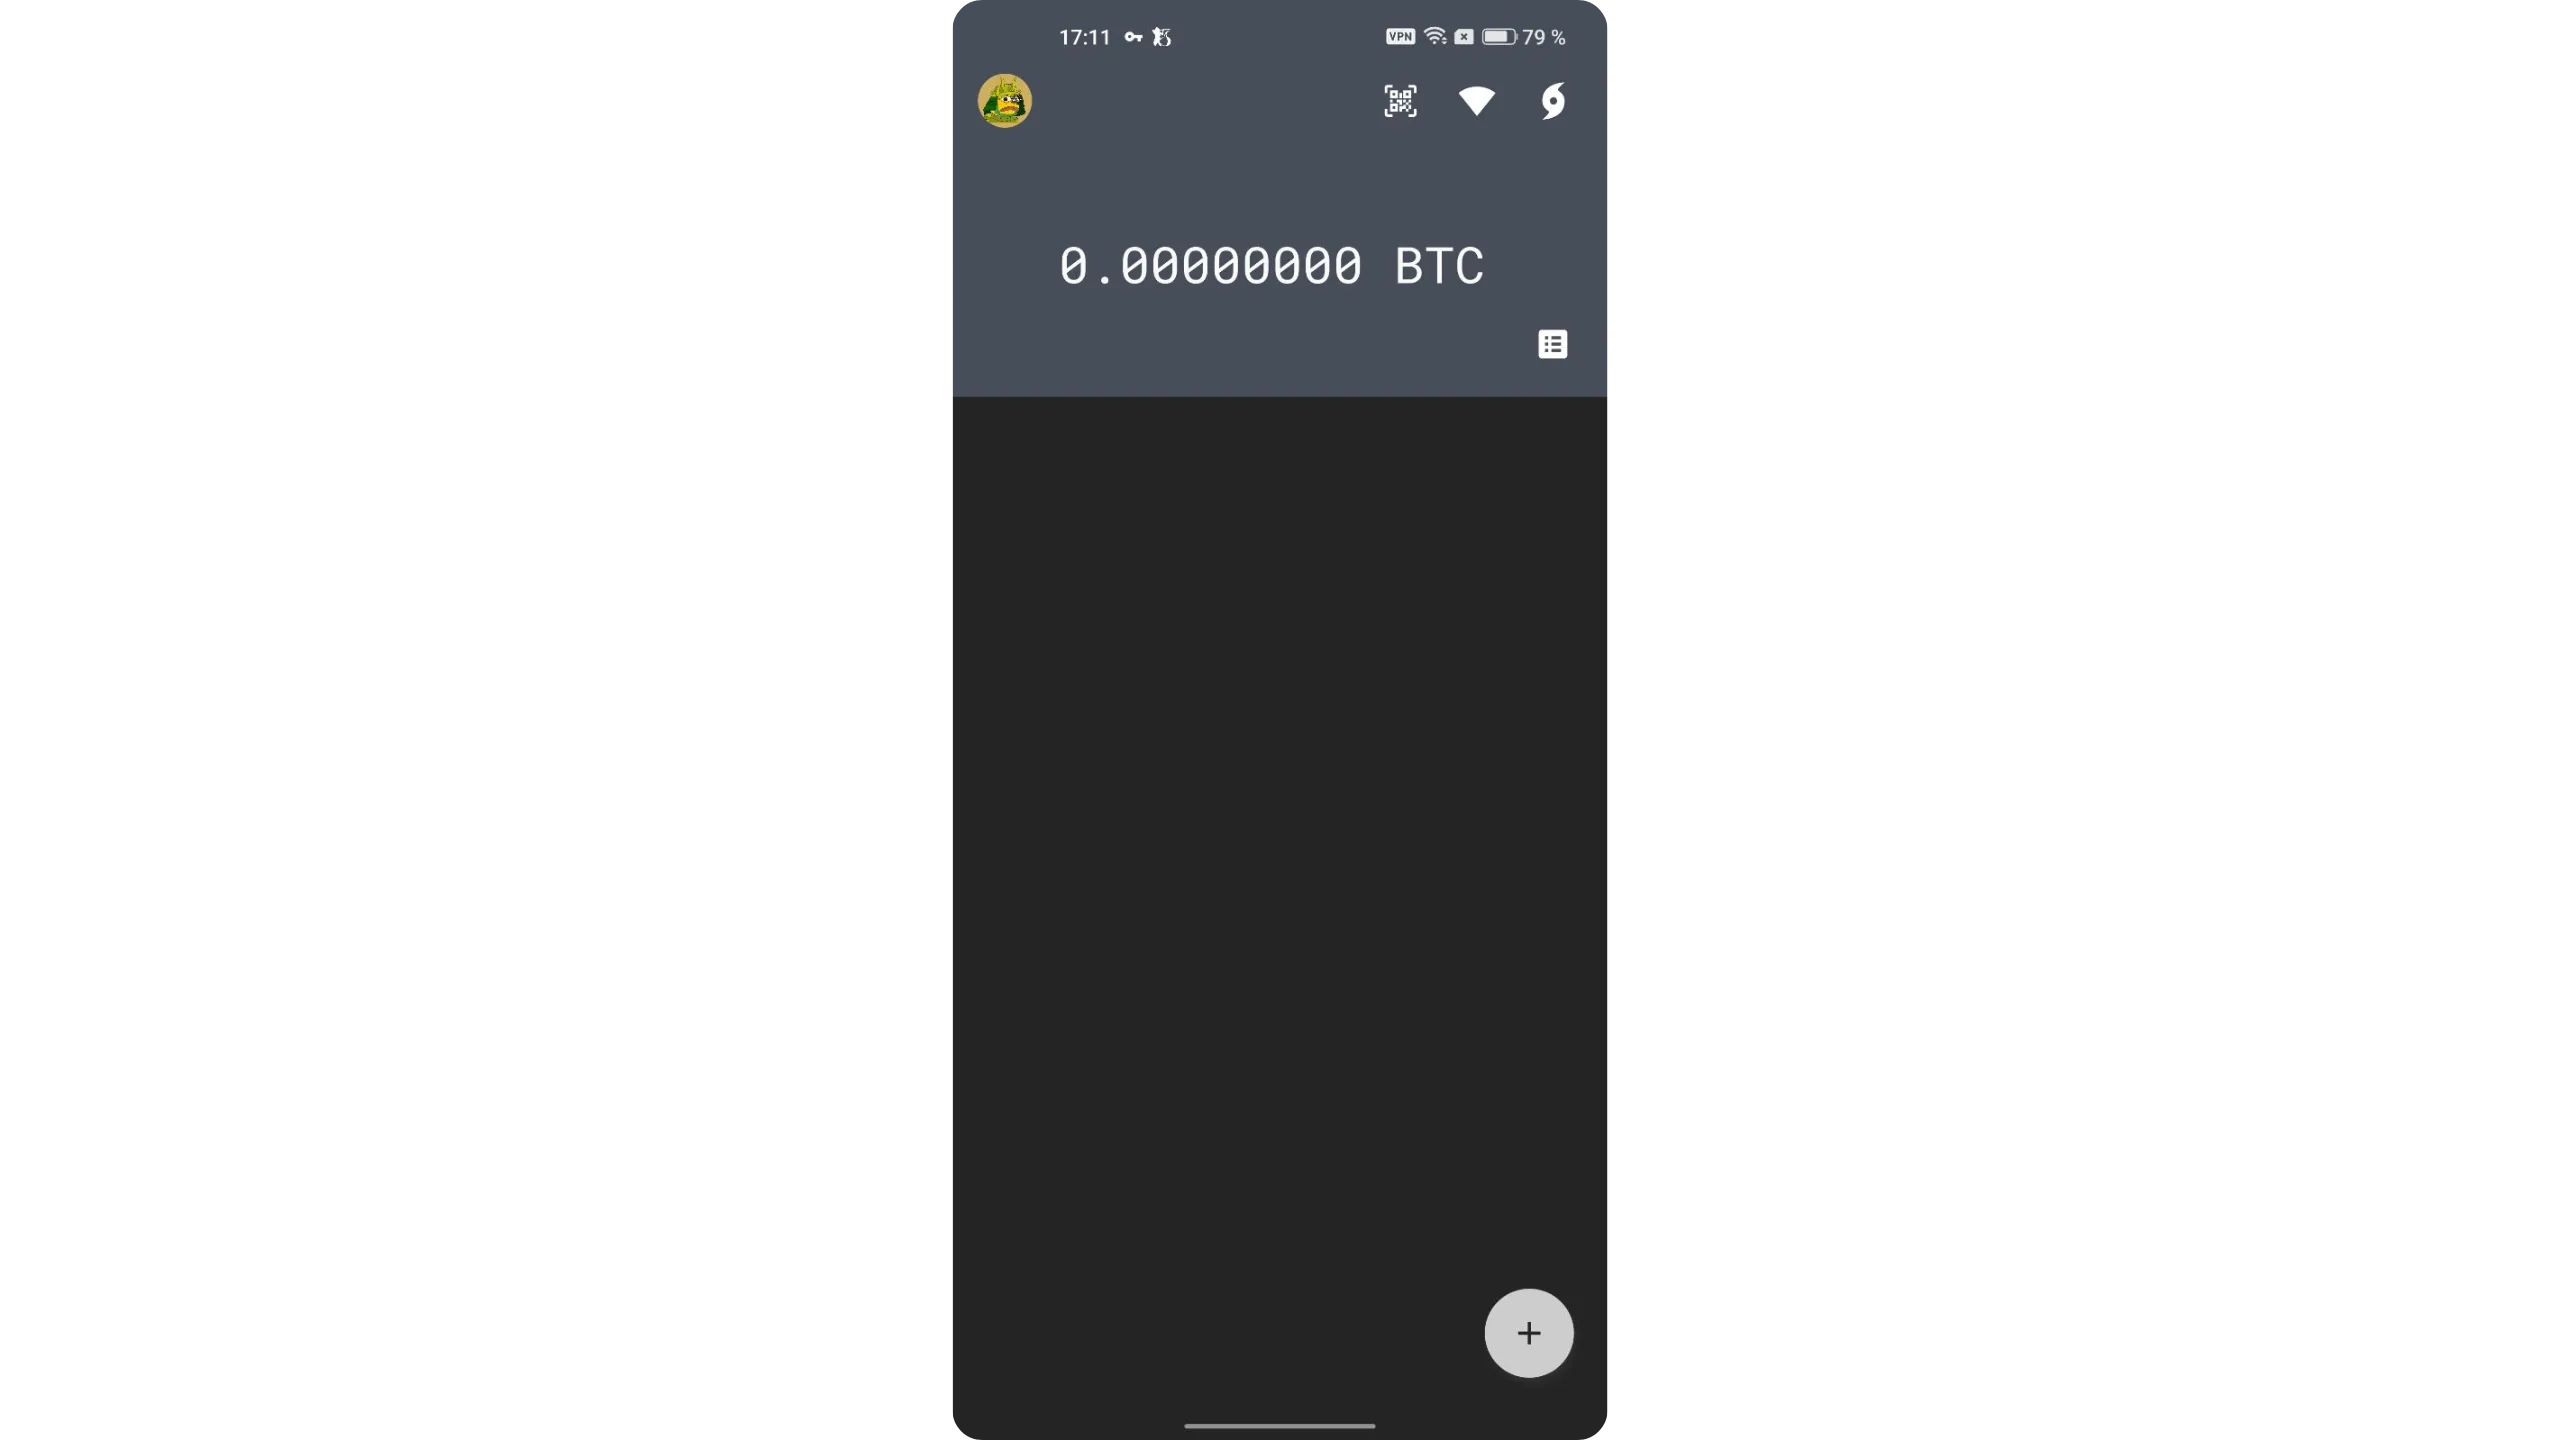
You’ll then arrive at your wallet’s home screen.
4. Configure the Ashigaru app
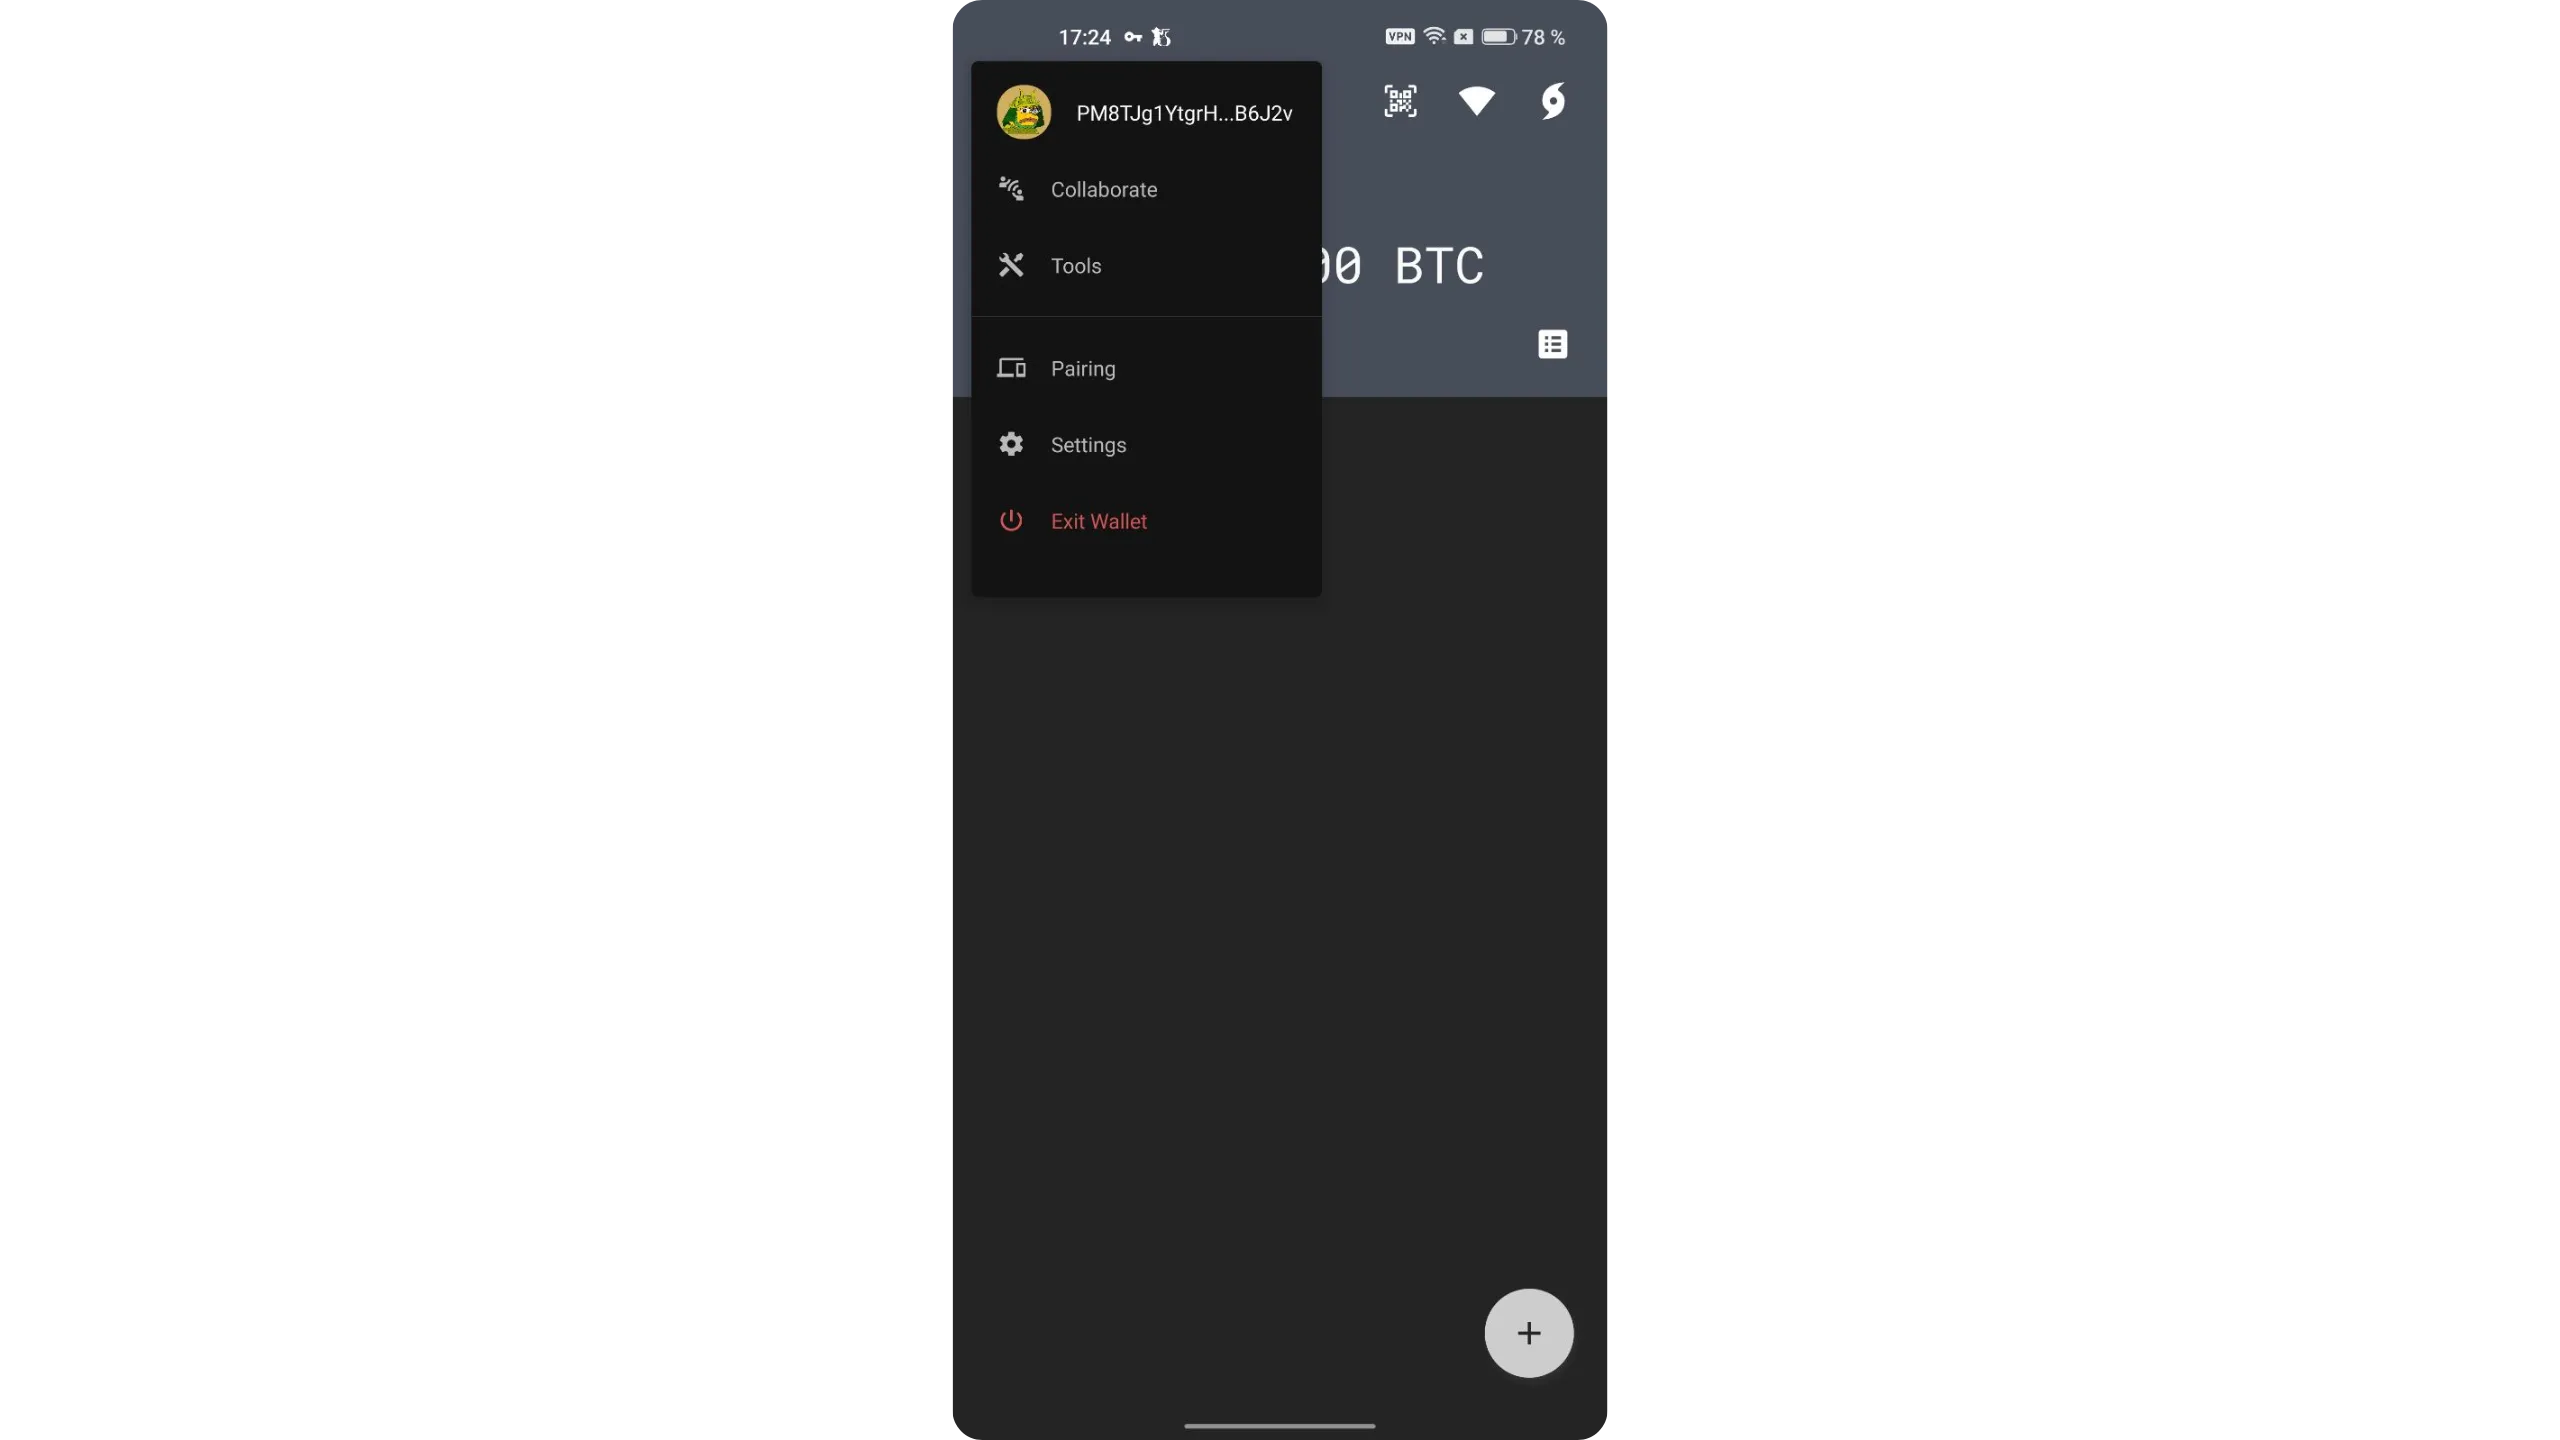
To access app settings, tap your PayNym image at the top left, then select “Settings.”
You’ll find several options to tailor Ashigaru to your needs. Two settings are especially important to enable early on.
First, open “Security > Stealth mode,” then enable it if you need it. Stealth Mode hides Ashigaru behind a normal‑looking app on your phone. The goal is to prevent anyone from identifying Ashigaru during a physical inspection of your phone.
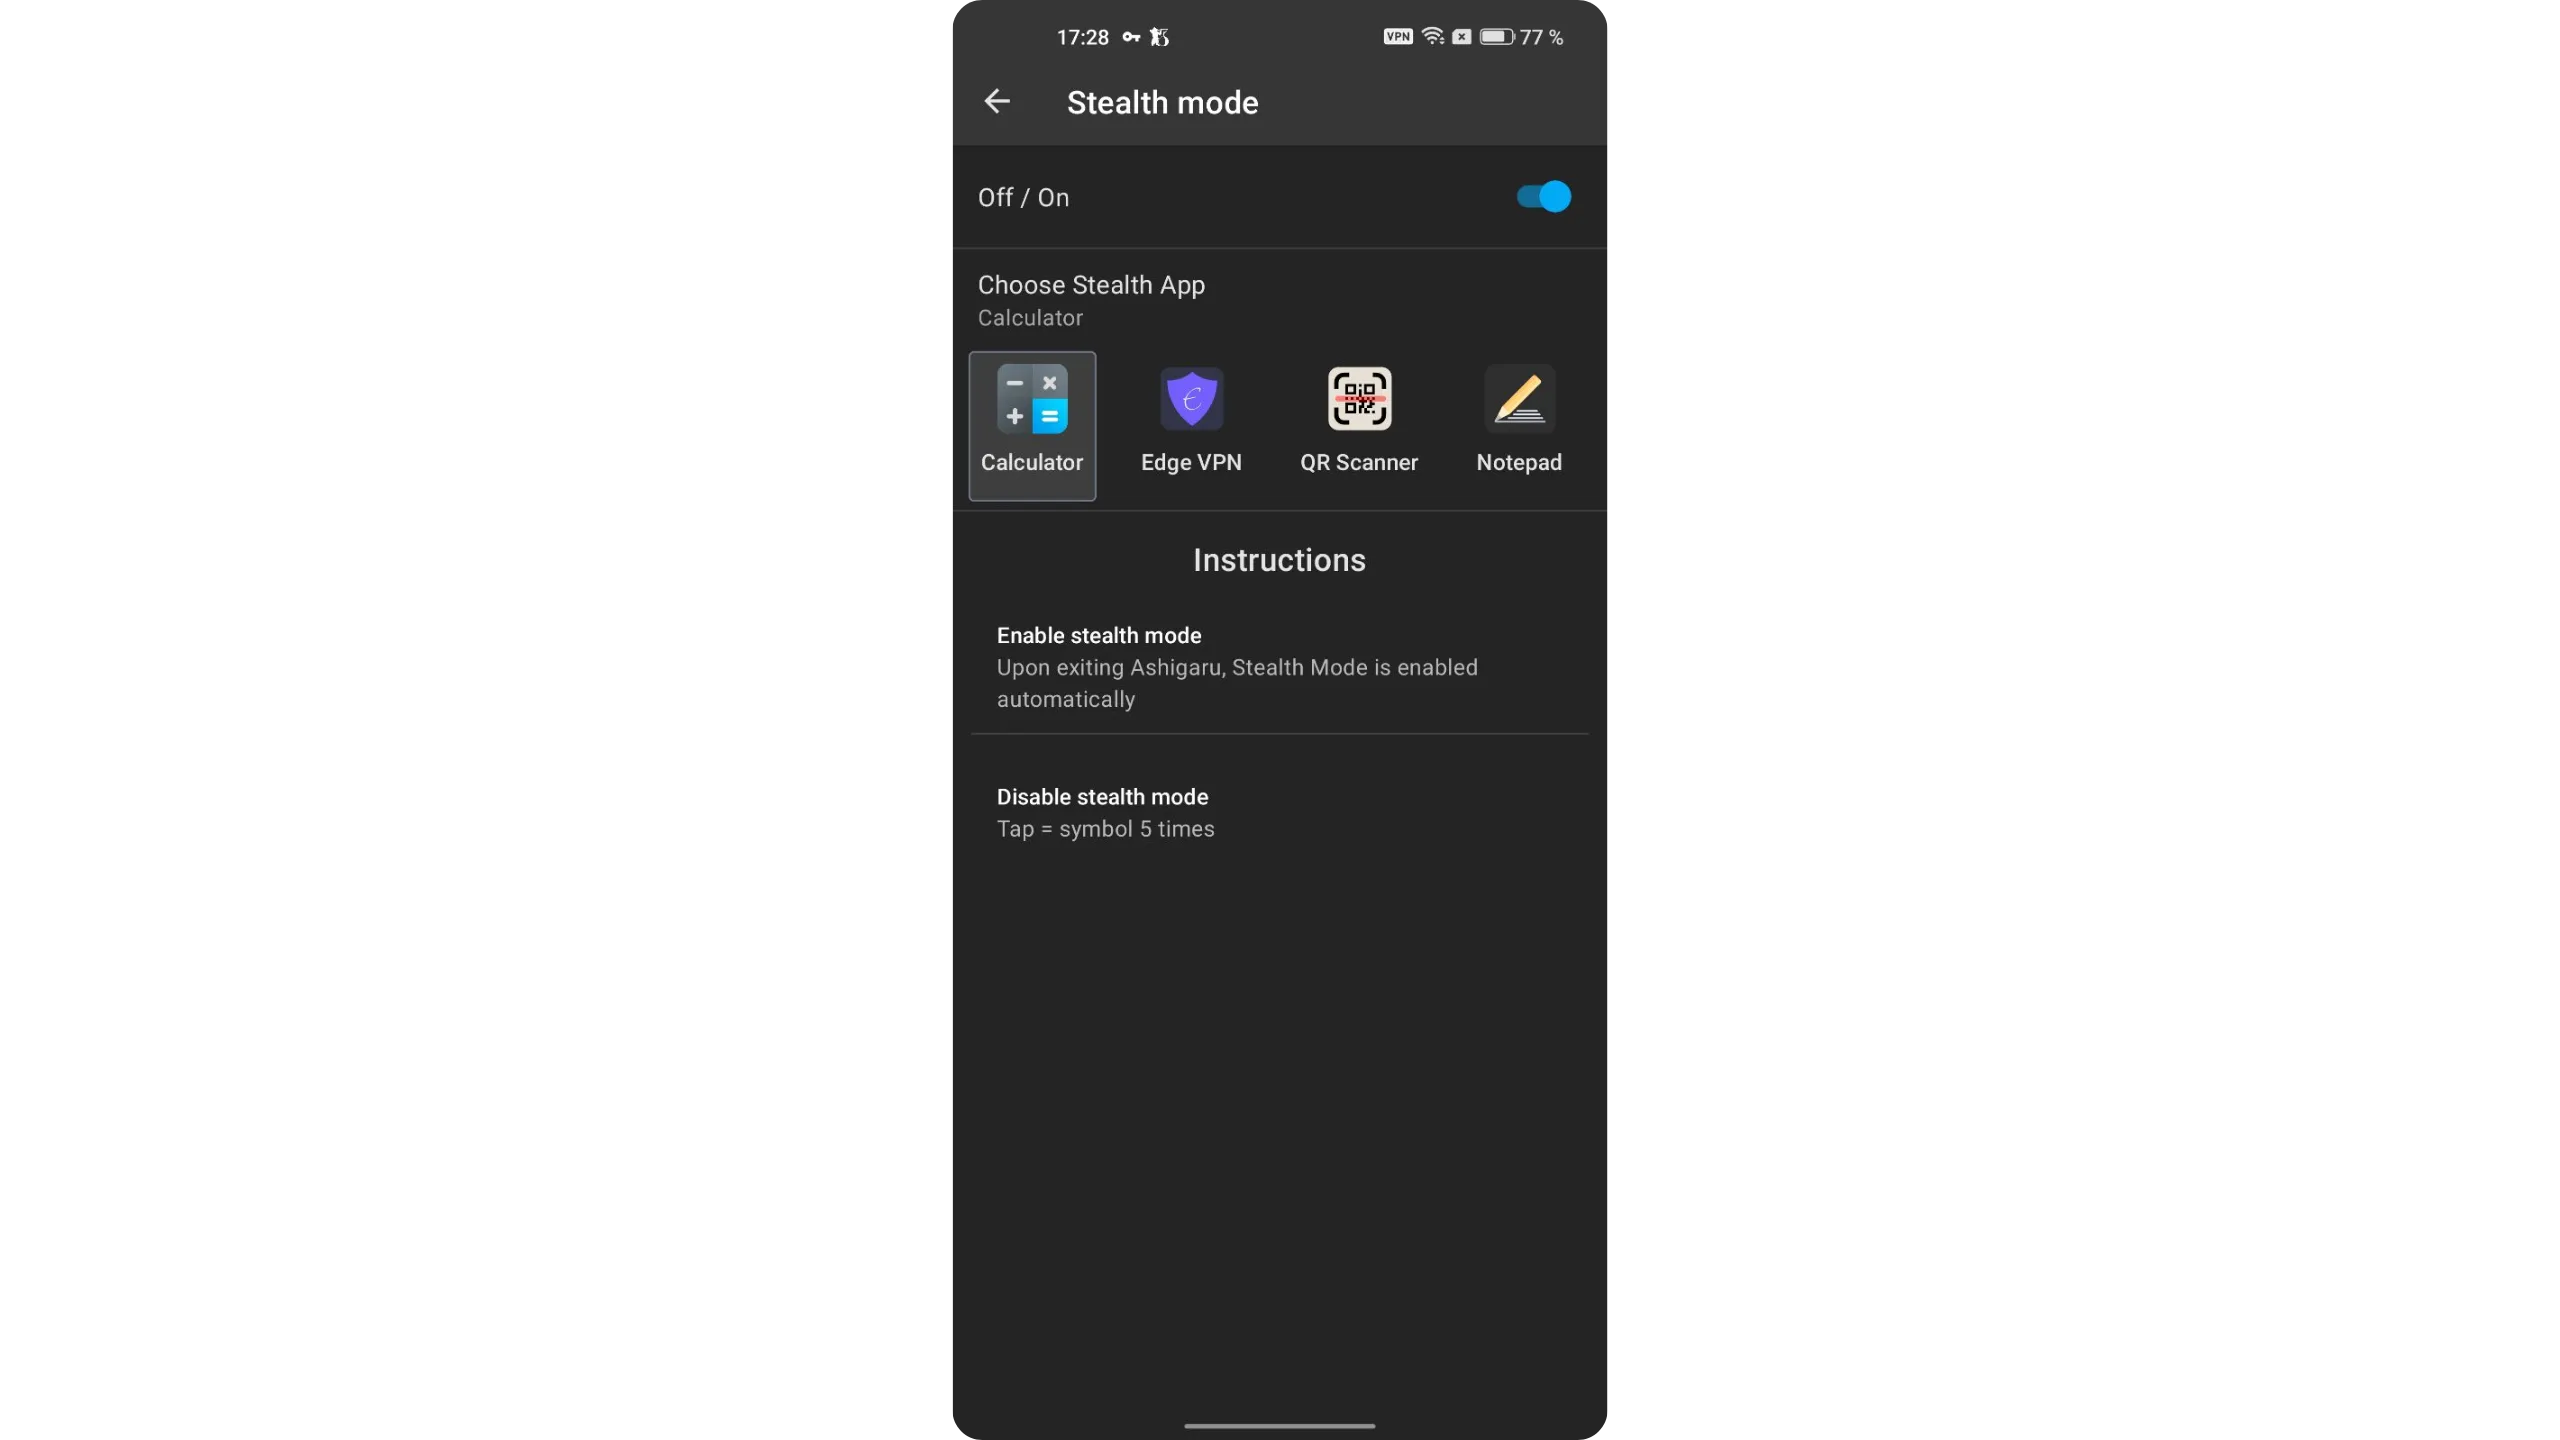
Each decoy app has a specific method to unlock Ashigaru’s real interface. For example, if you choose the calculator, the Ashigaru icon disappears from your home screen and is replaced by a fake calculator. When opened, it works like a regular calculator, but to access Ashigaru, tap the “=” symbol five times quickly.
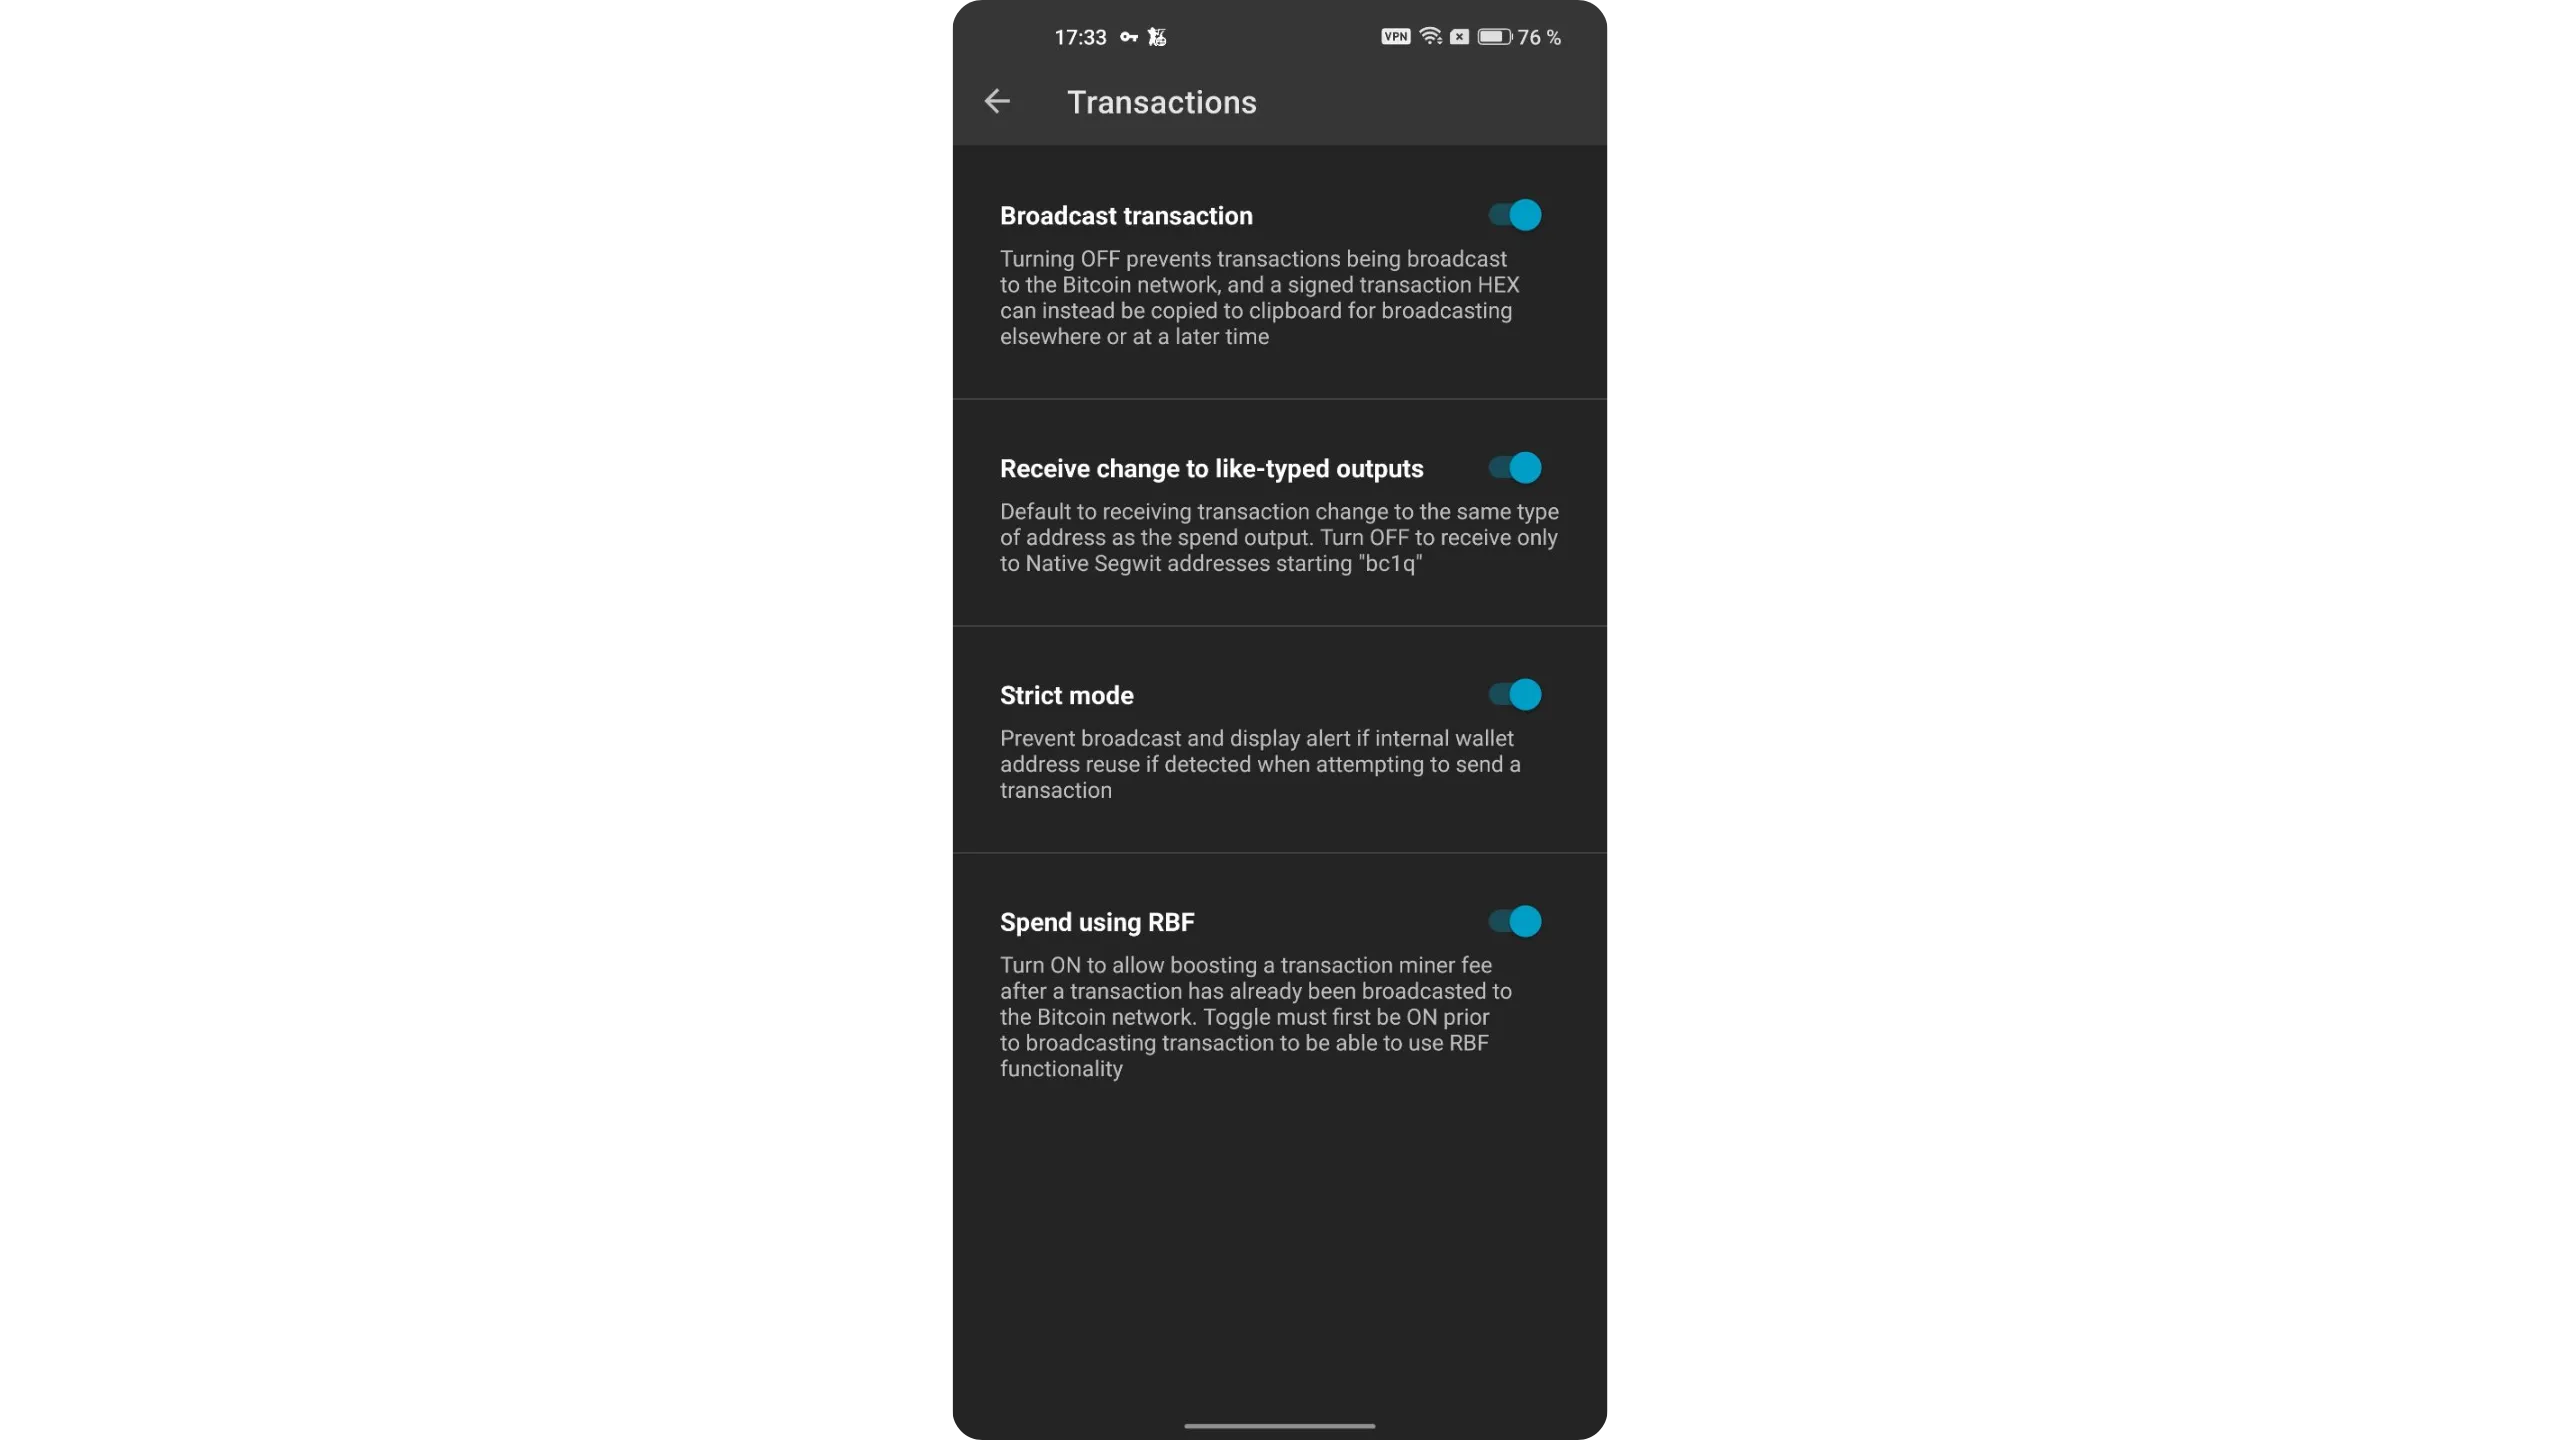
The second key setting is RBF (Replace‑by‑Fee). This lets you bump transaction fees if a transaction is stuck in mempools due to low fees. Enable it in “Transactions > Spend using RBF.”
Tip: You can toggle the wallet display unit between BTC and sats by tapping the total balance on the home screen.
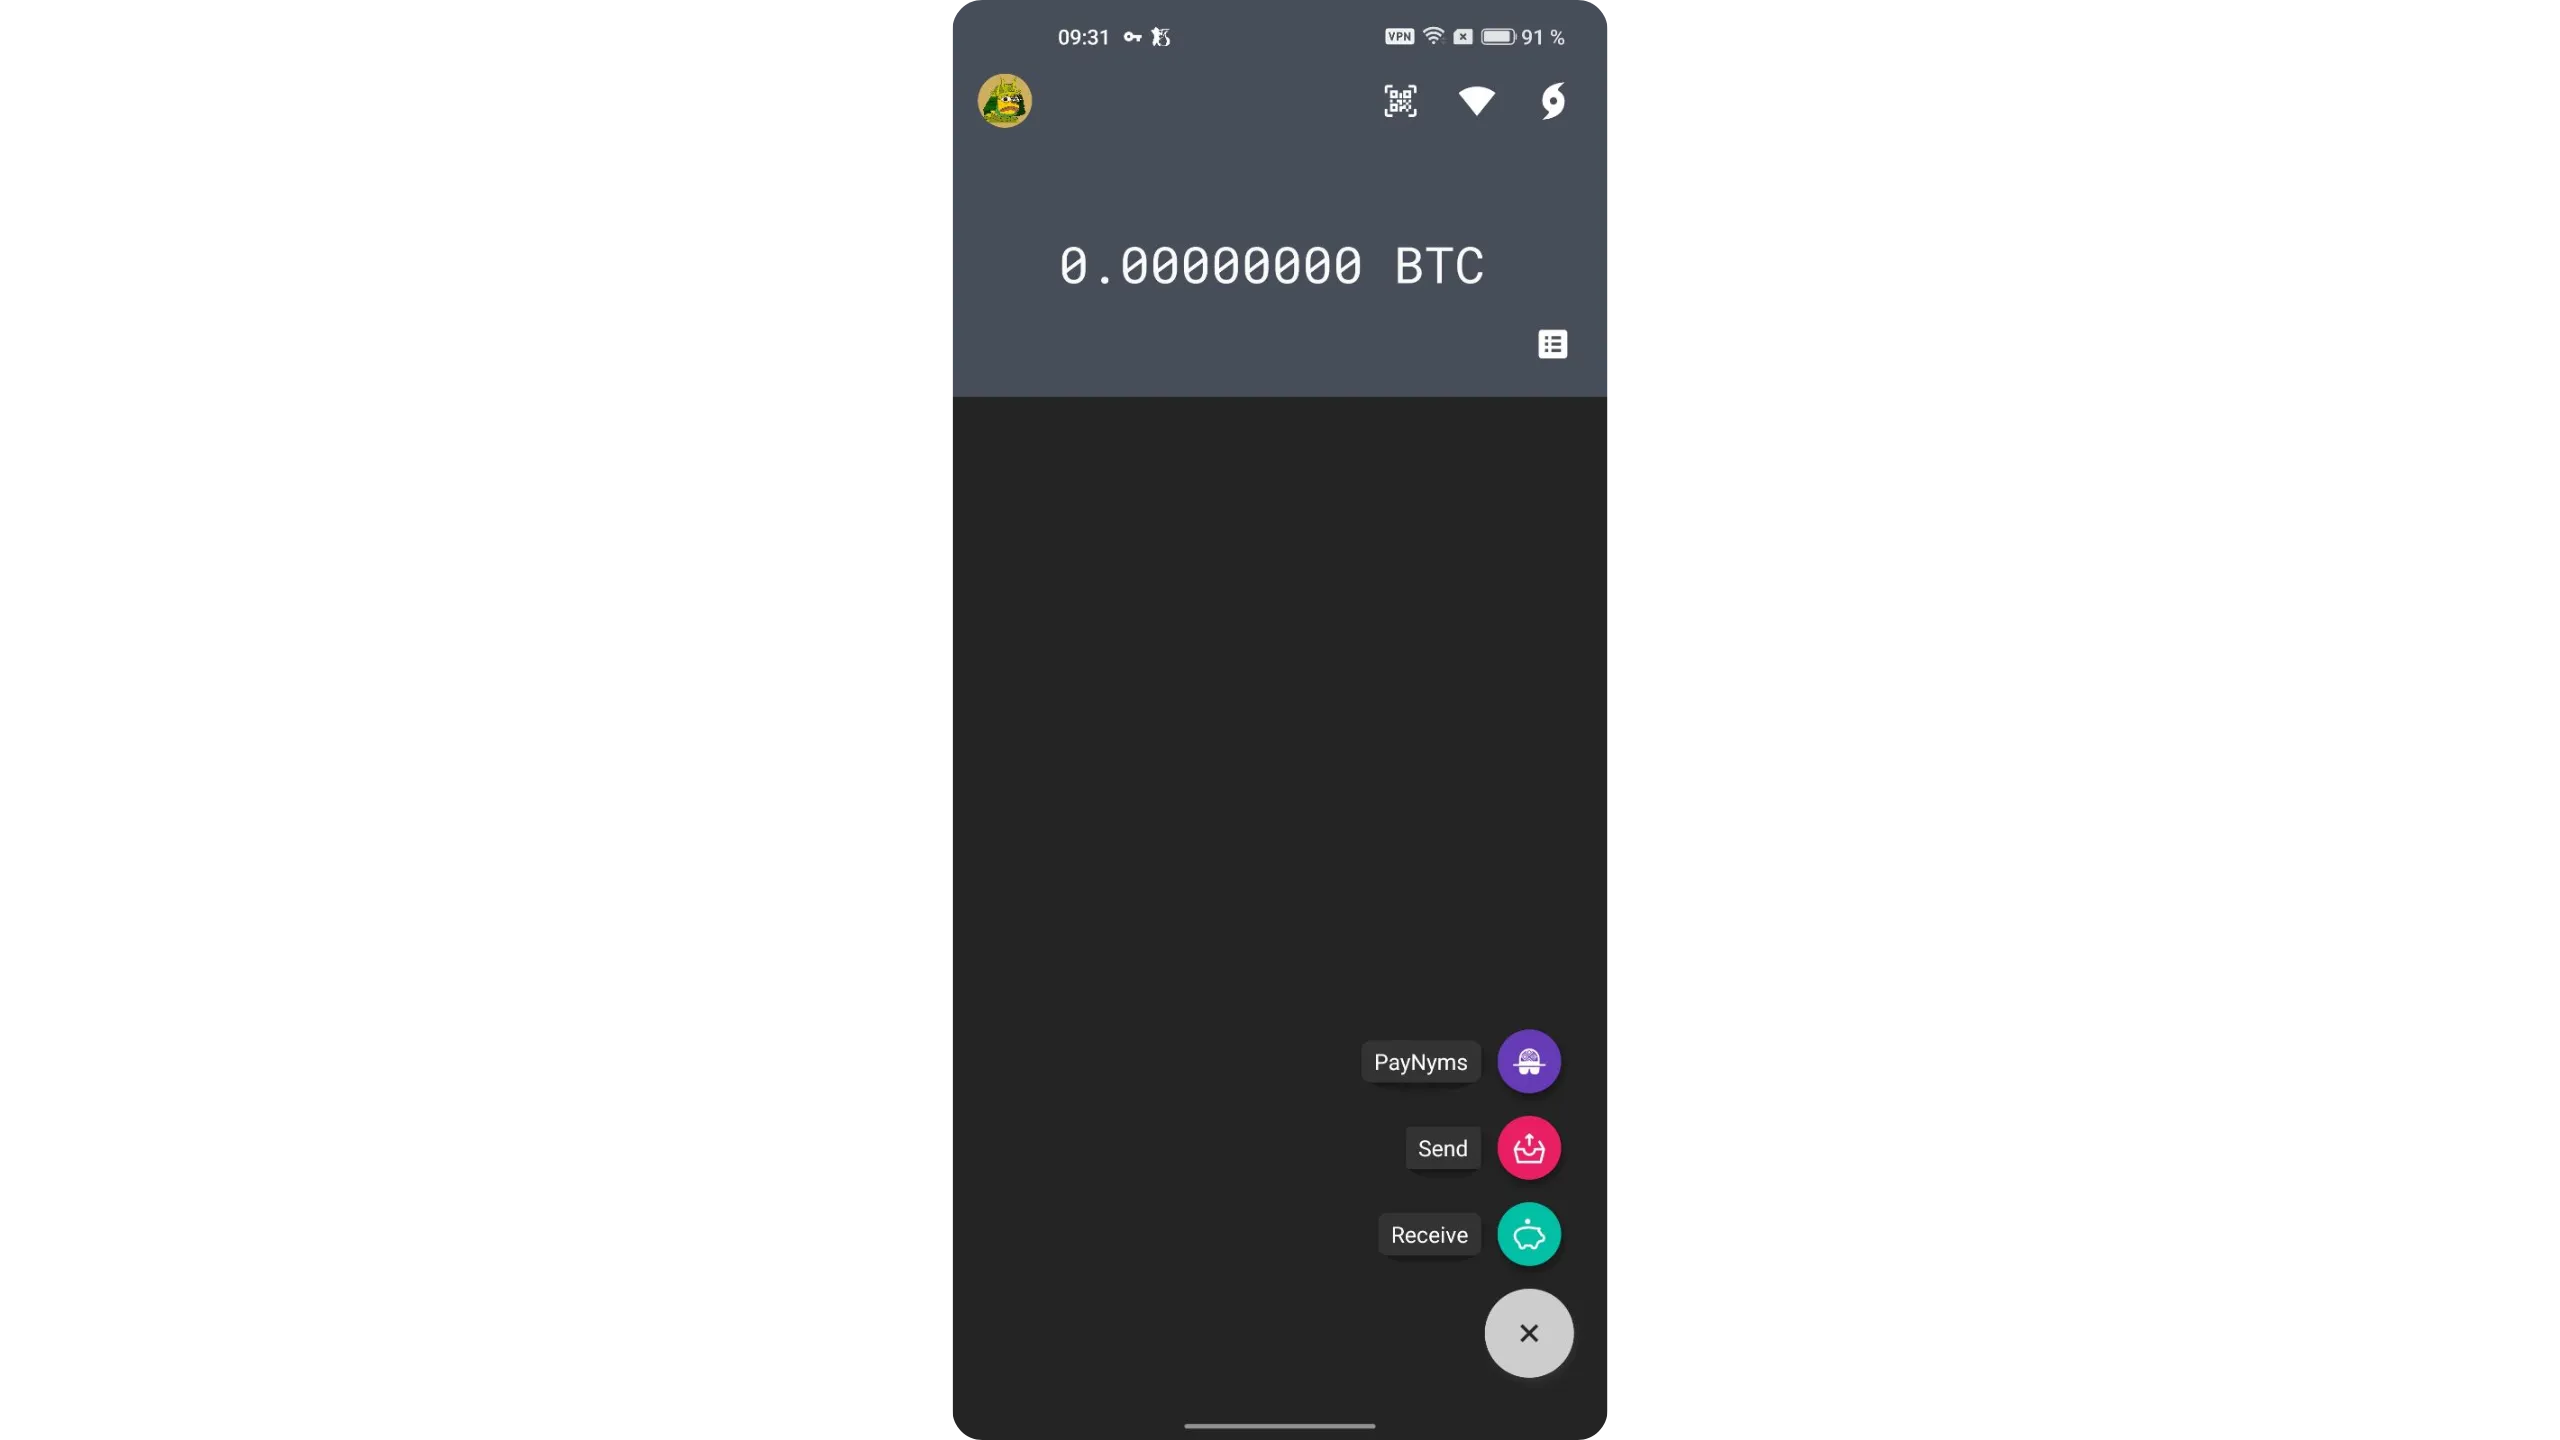
5. Receive bitcoin in Ashigaru
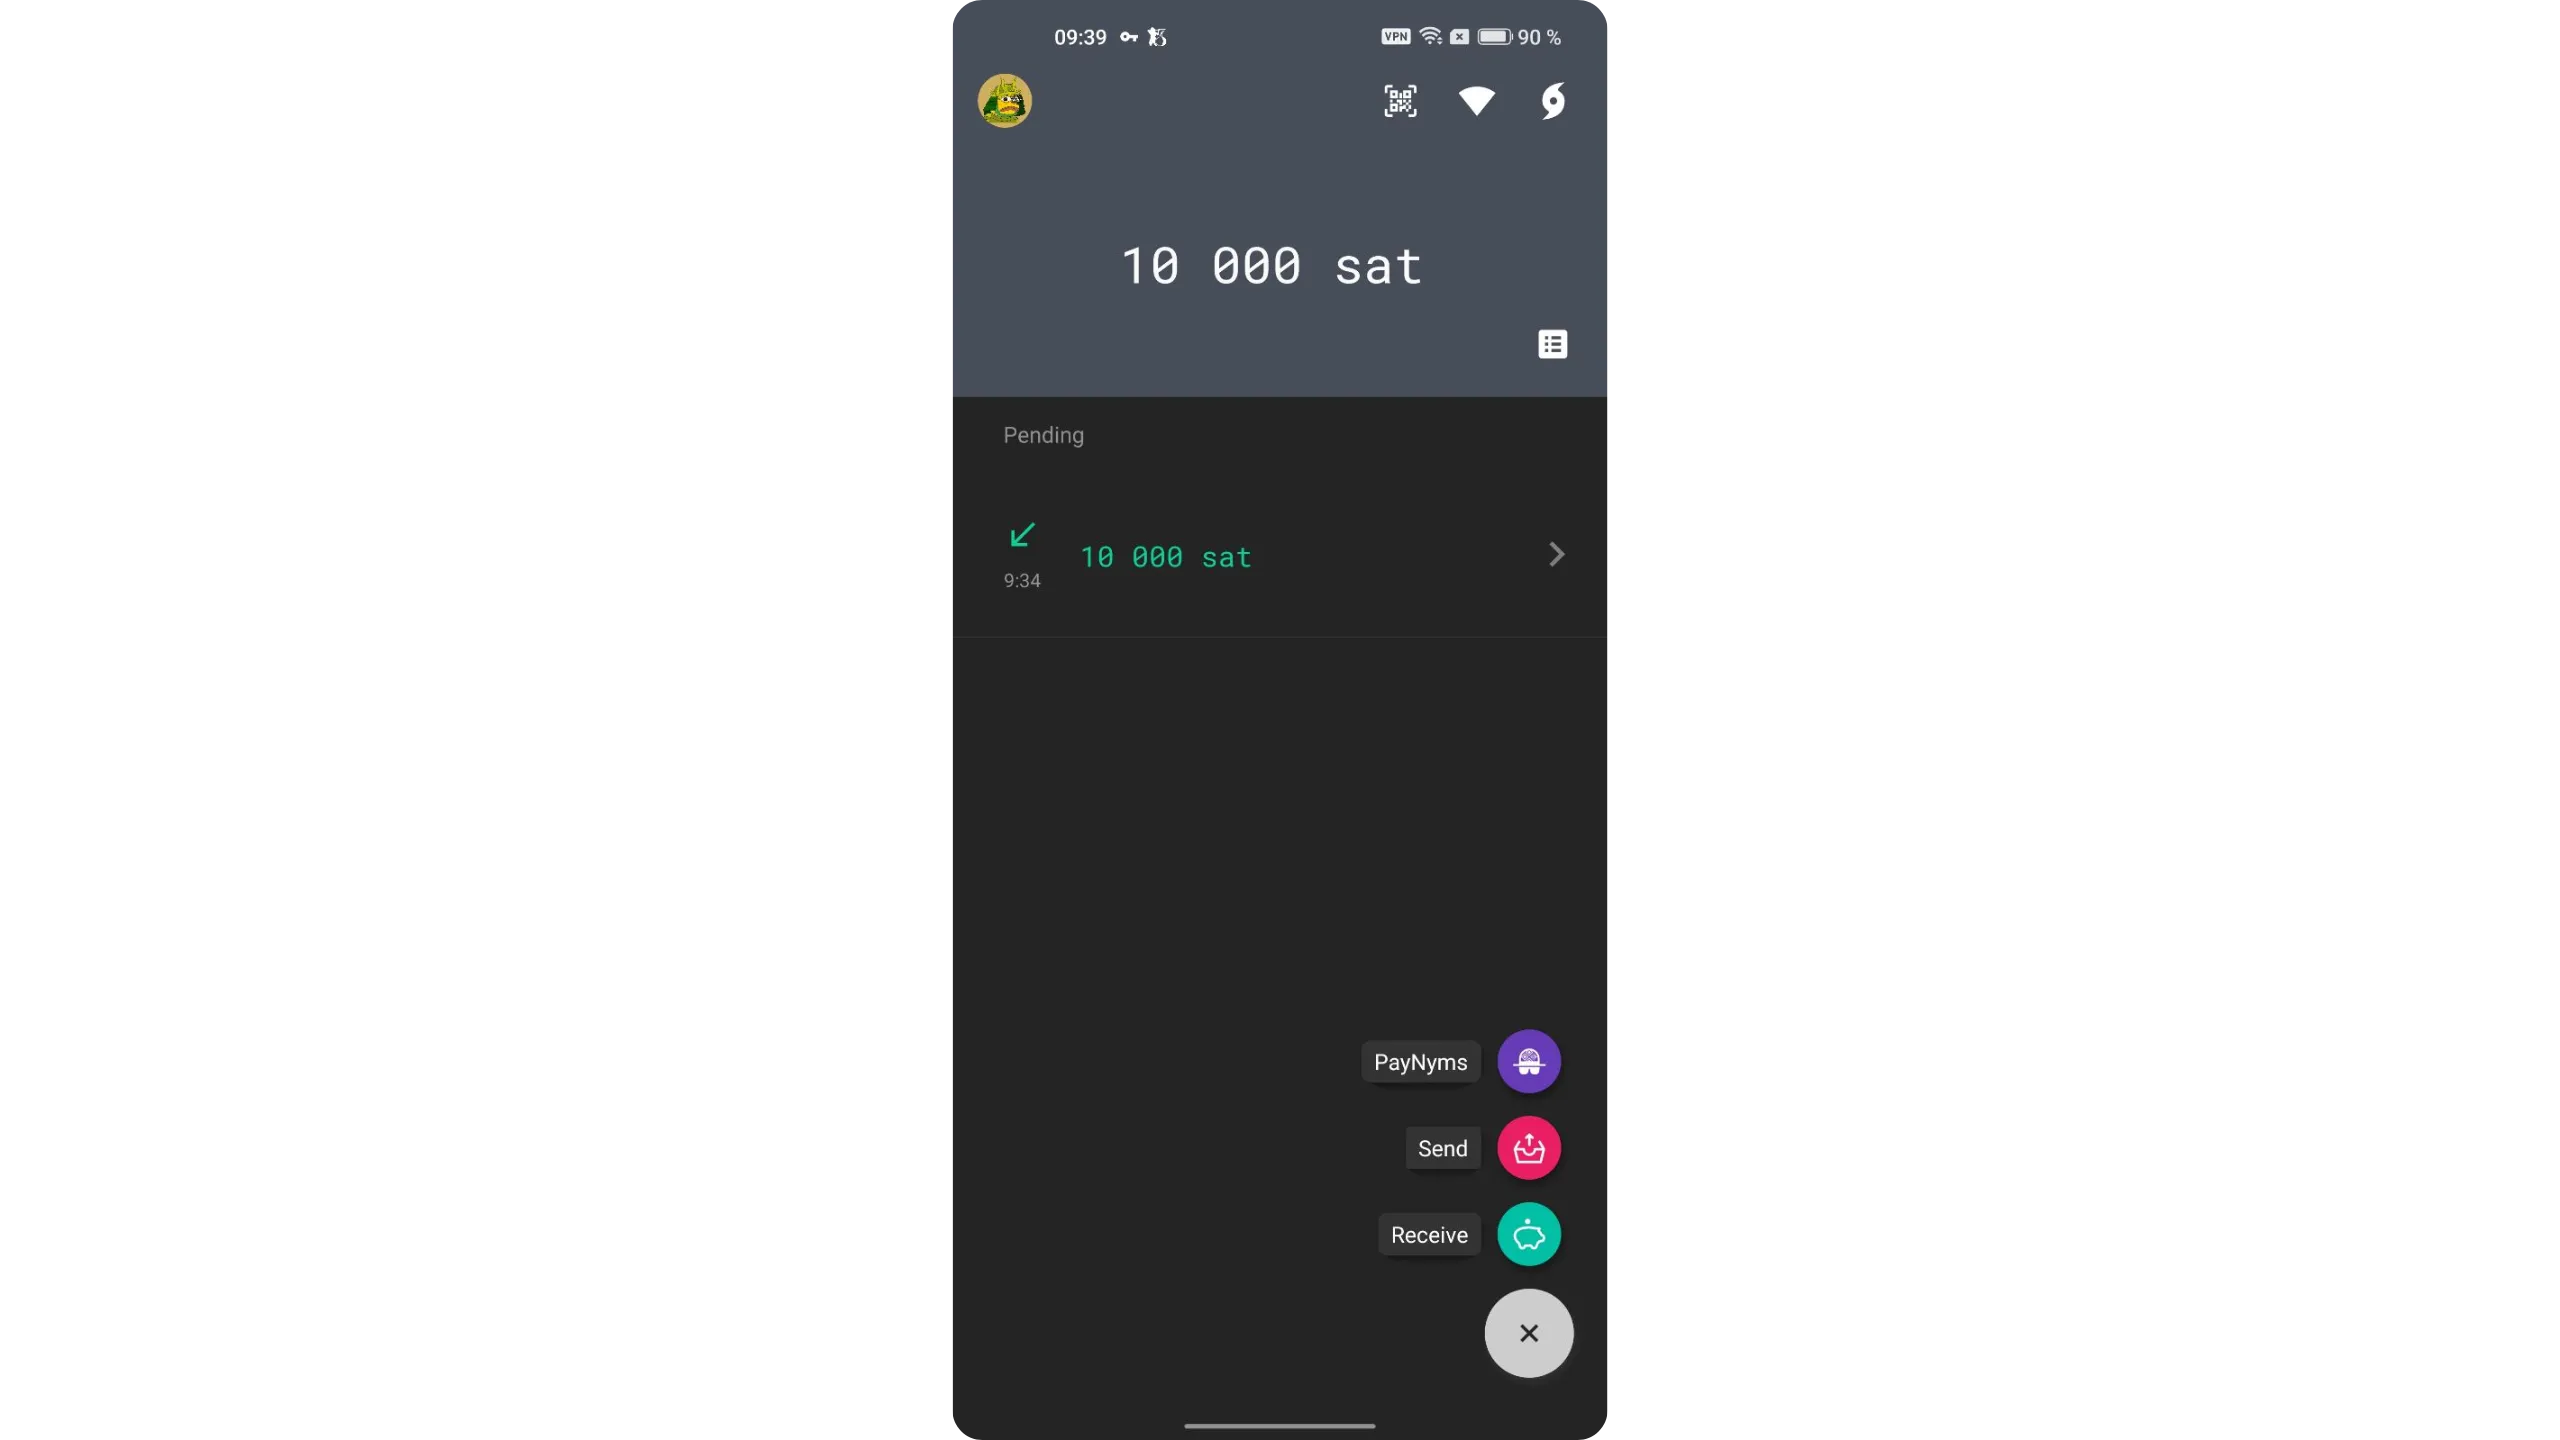
Once your wallet is ready, you can receive sats. Tap the “+” button in the bottom‑right corner, then tap the green “Receive” button.
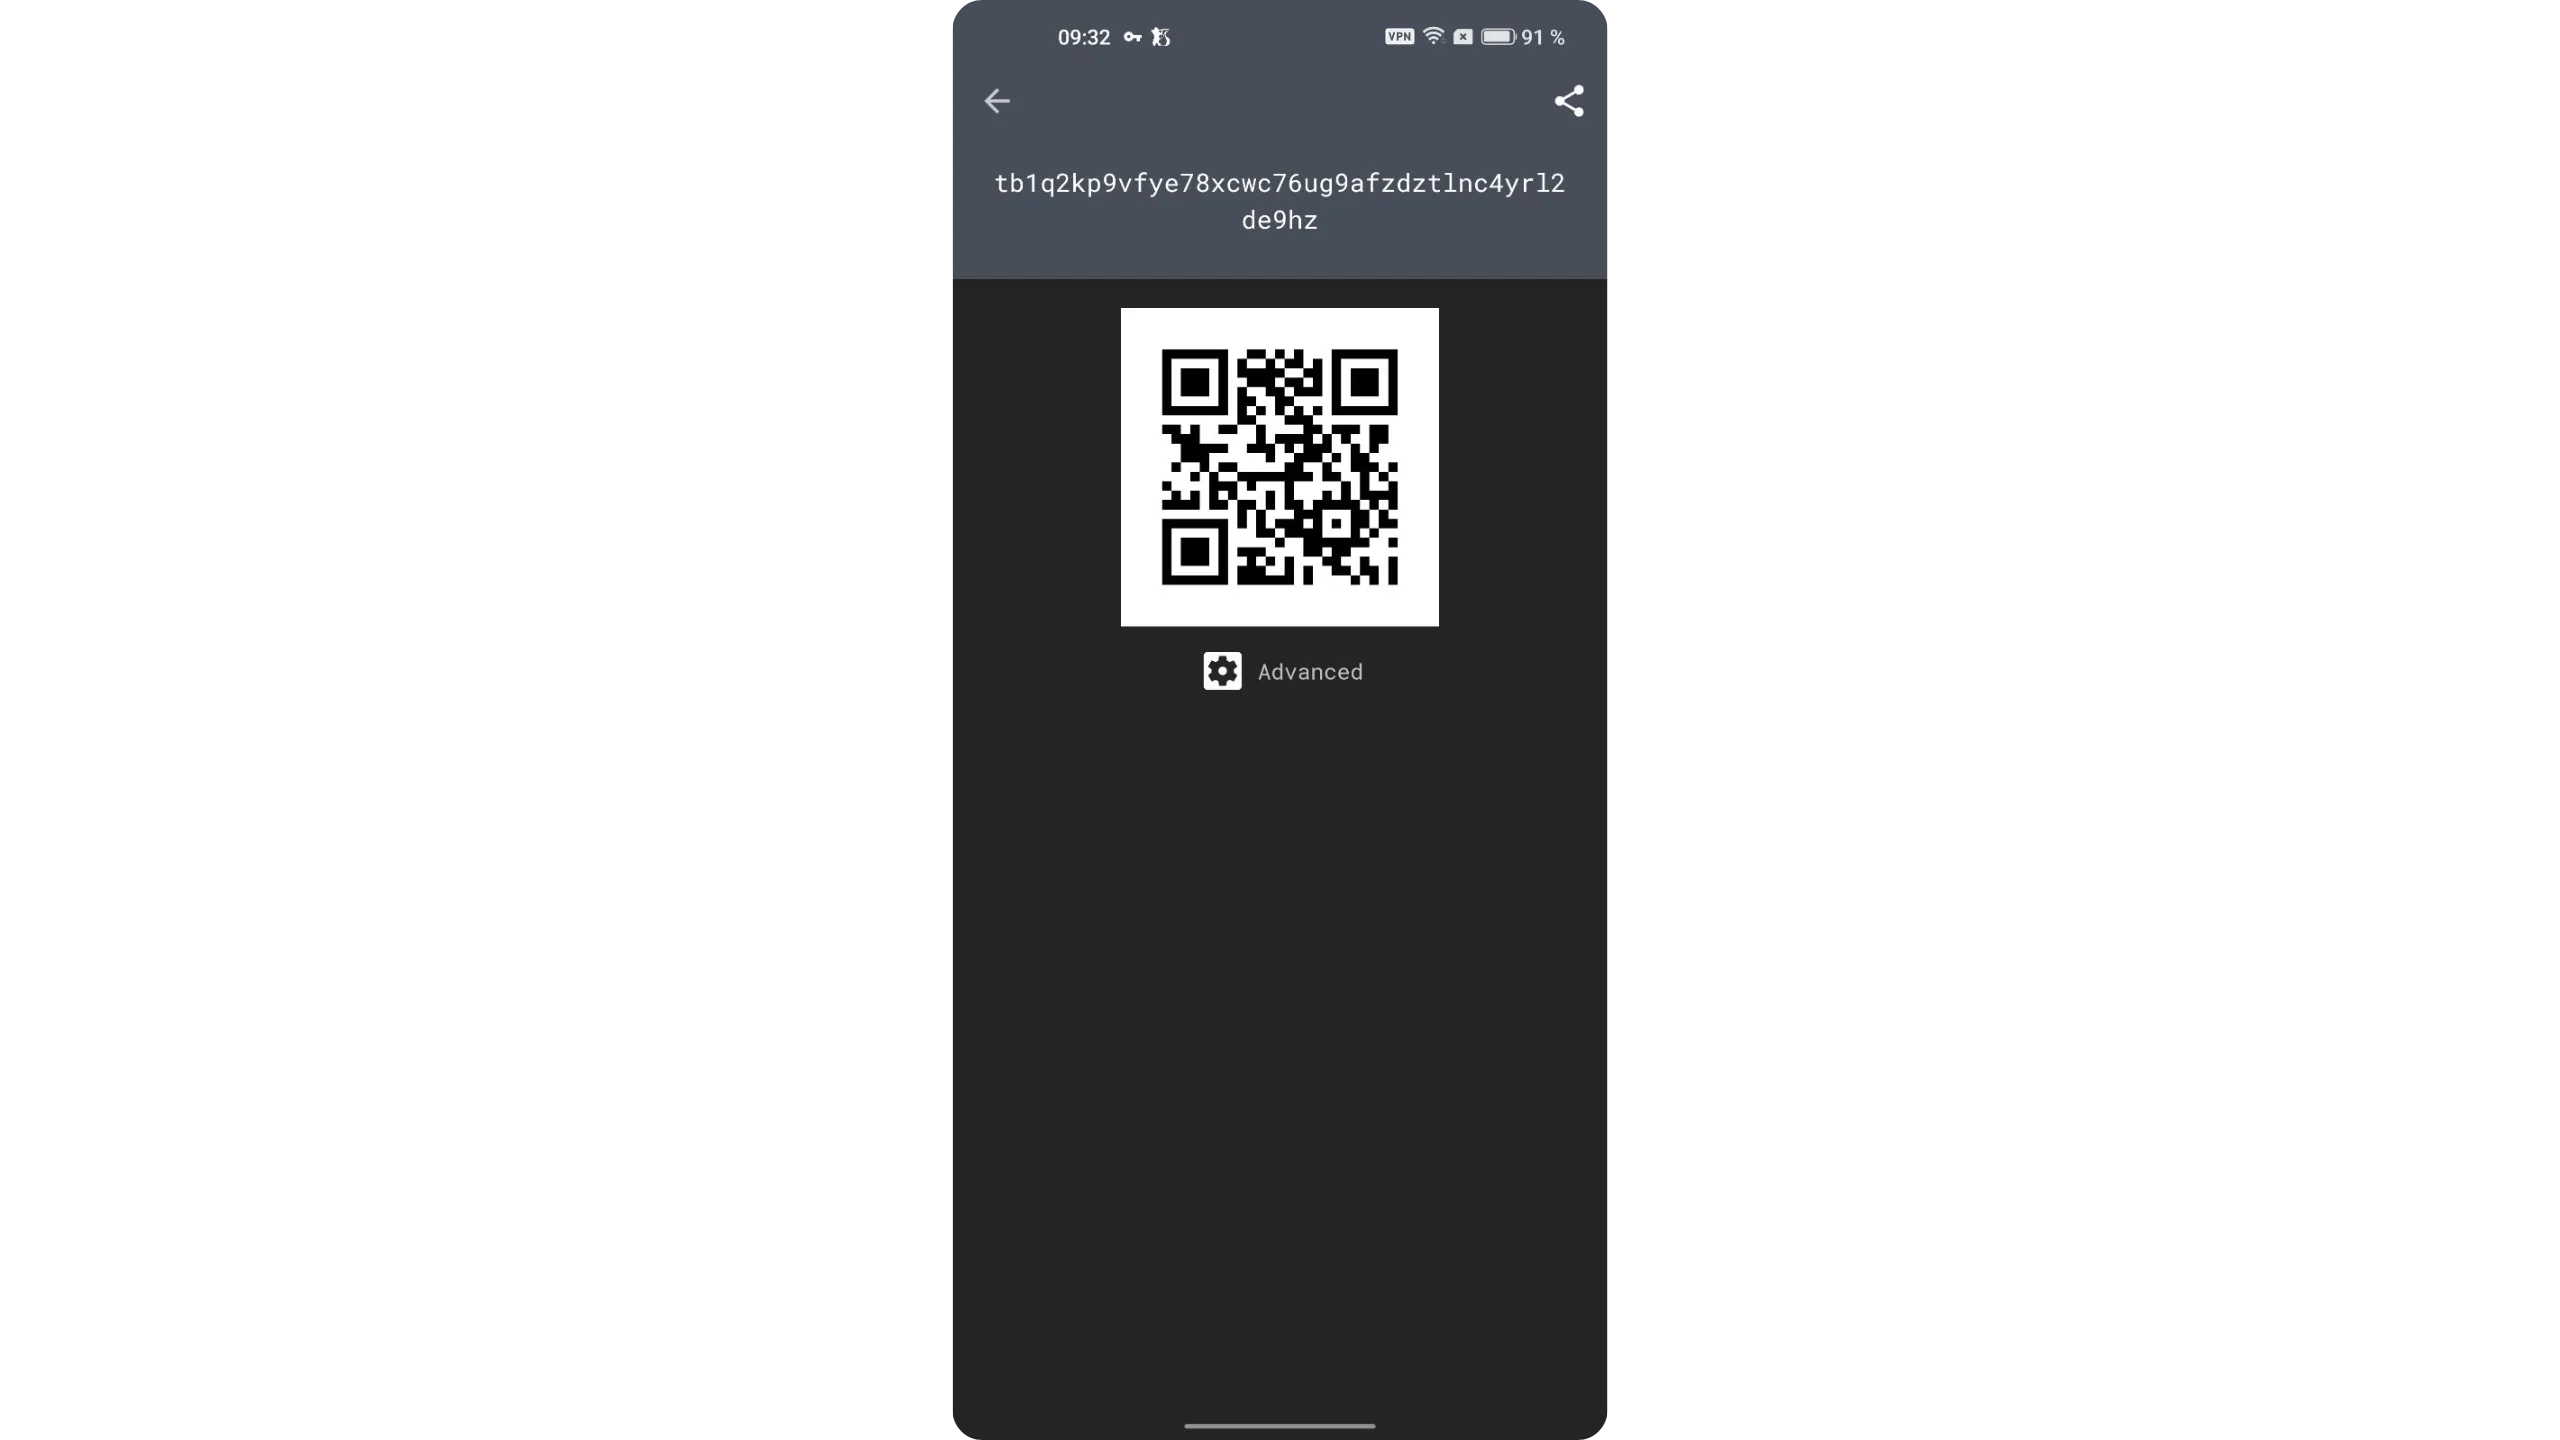
Ashigaru shows you the first unused receiving address to avoid address reuse (which is very harmful to privacy). Share this address with the individual or service sending you bitcoin.
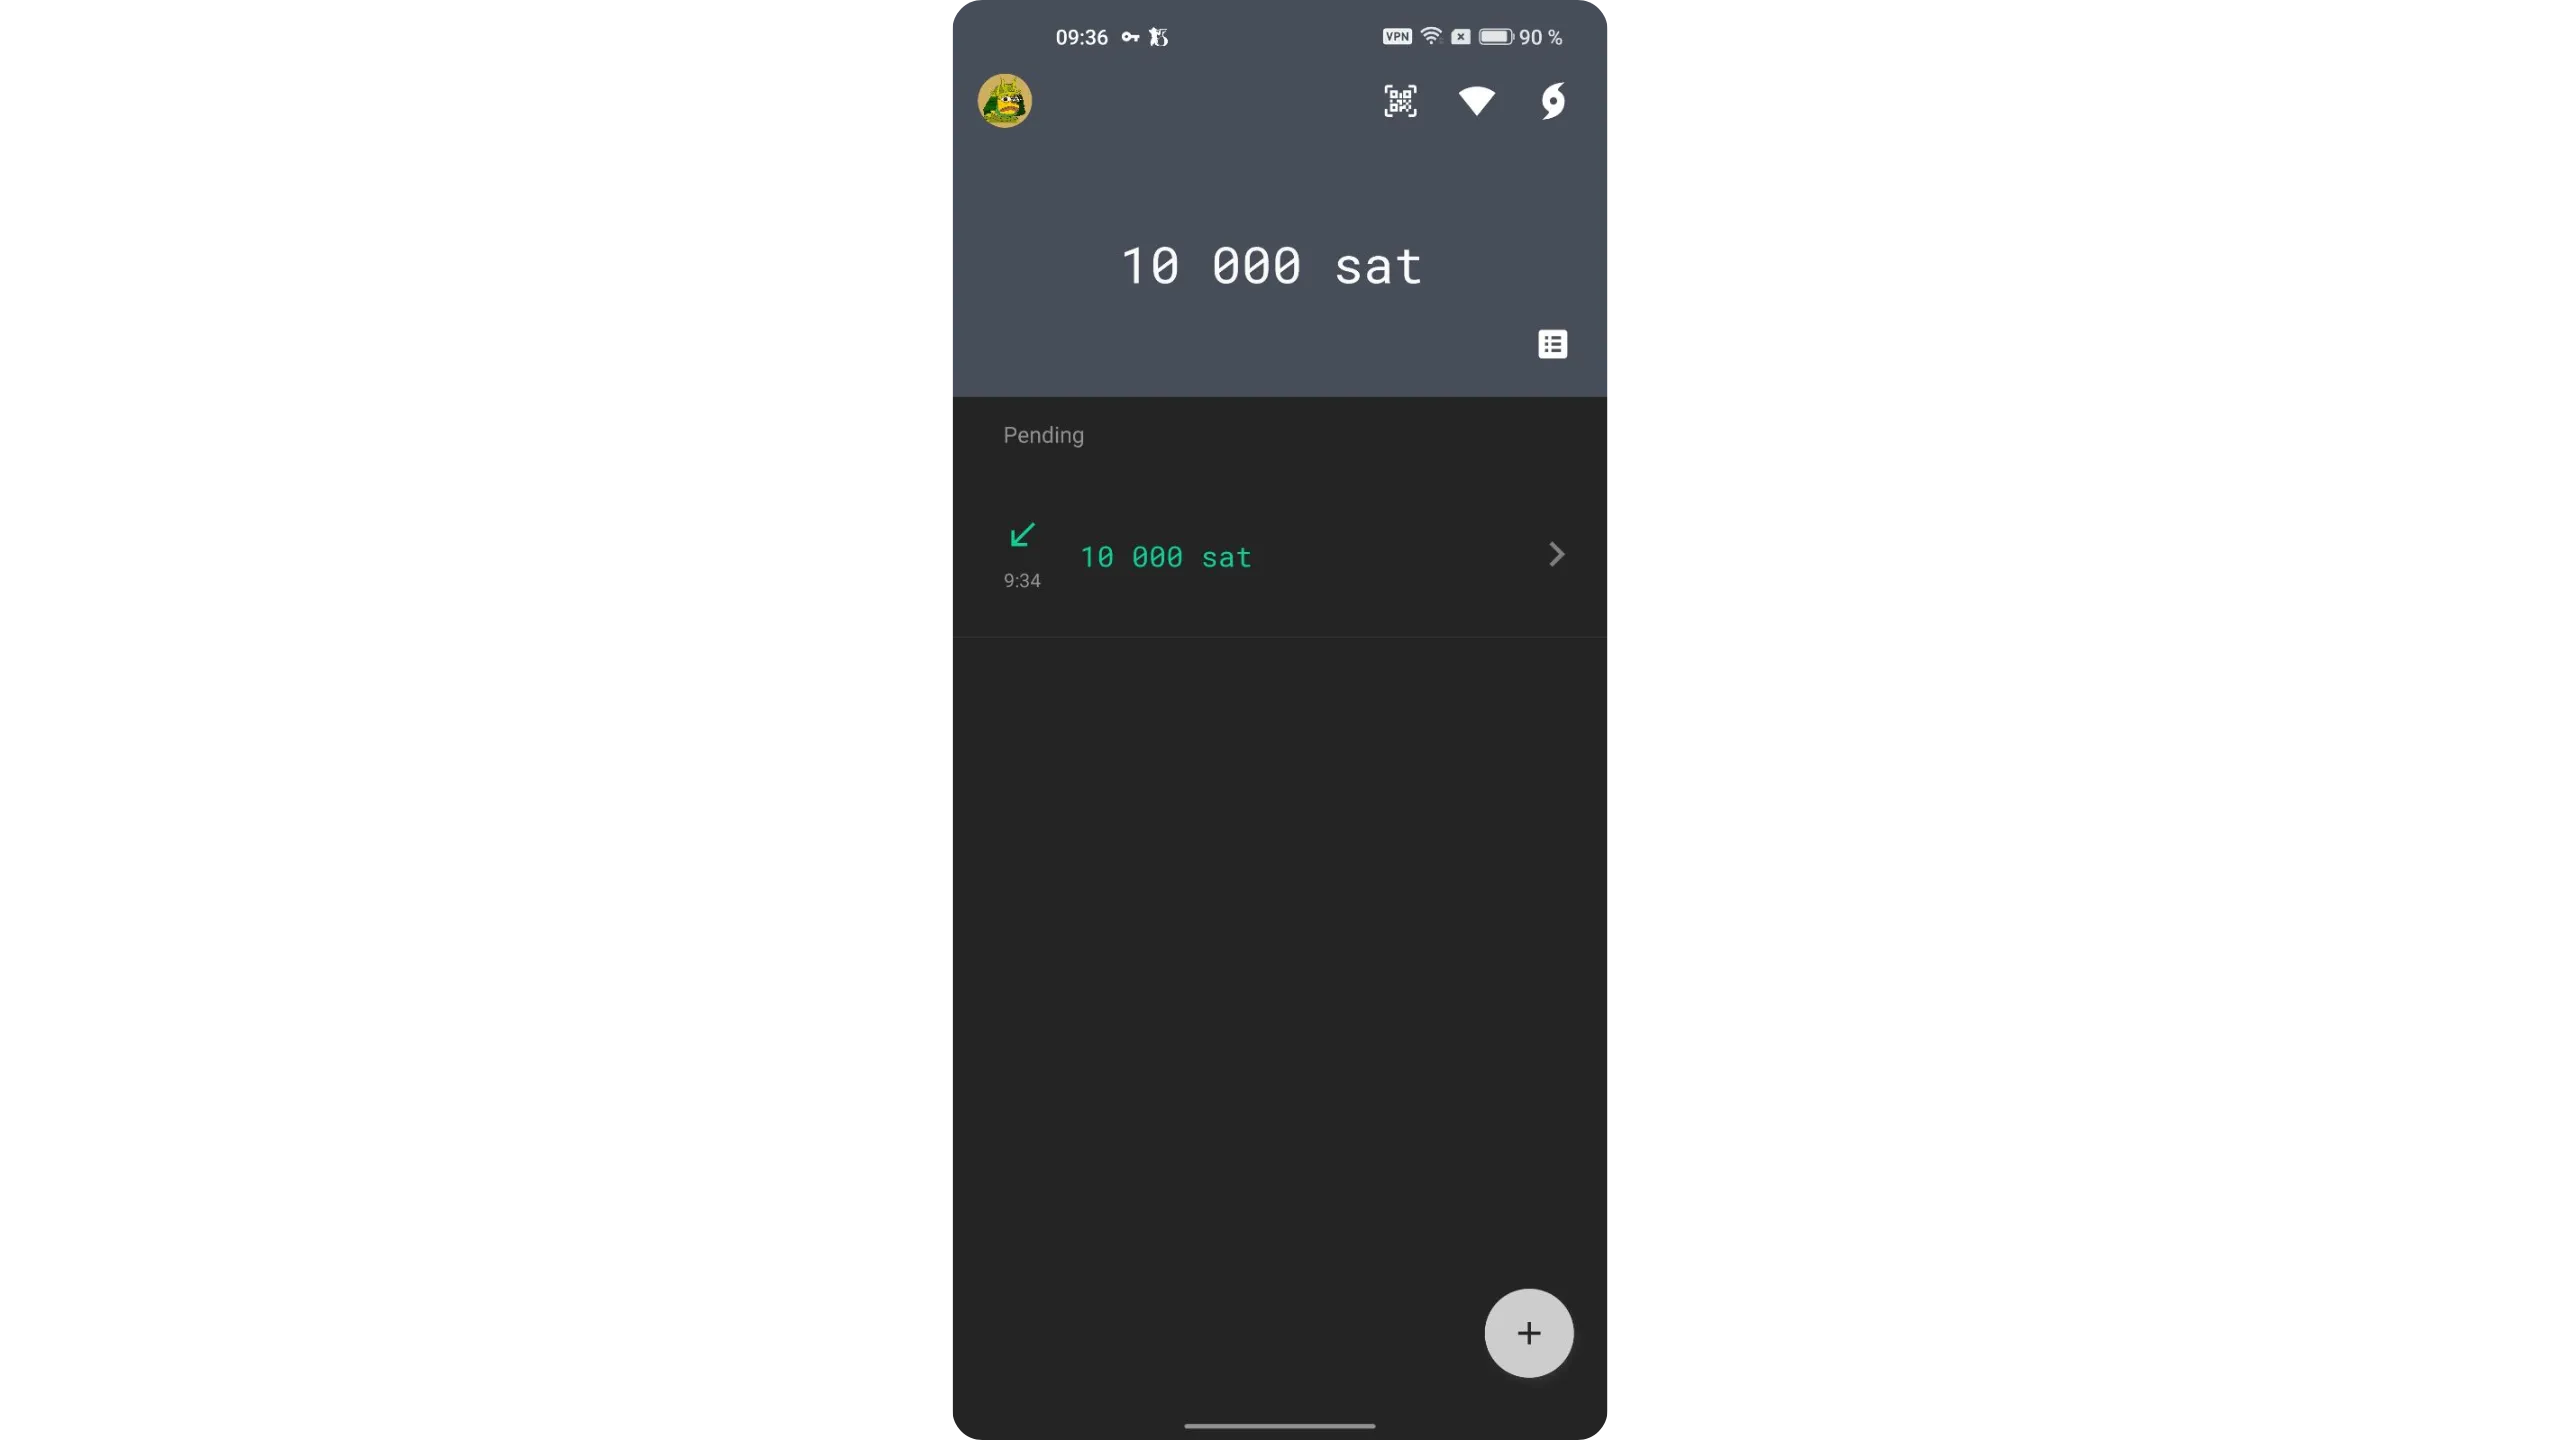
Once the transaction is broadcast, it will automatically appear on the app’s home screen.
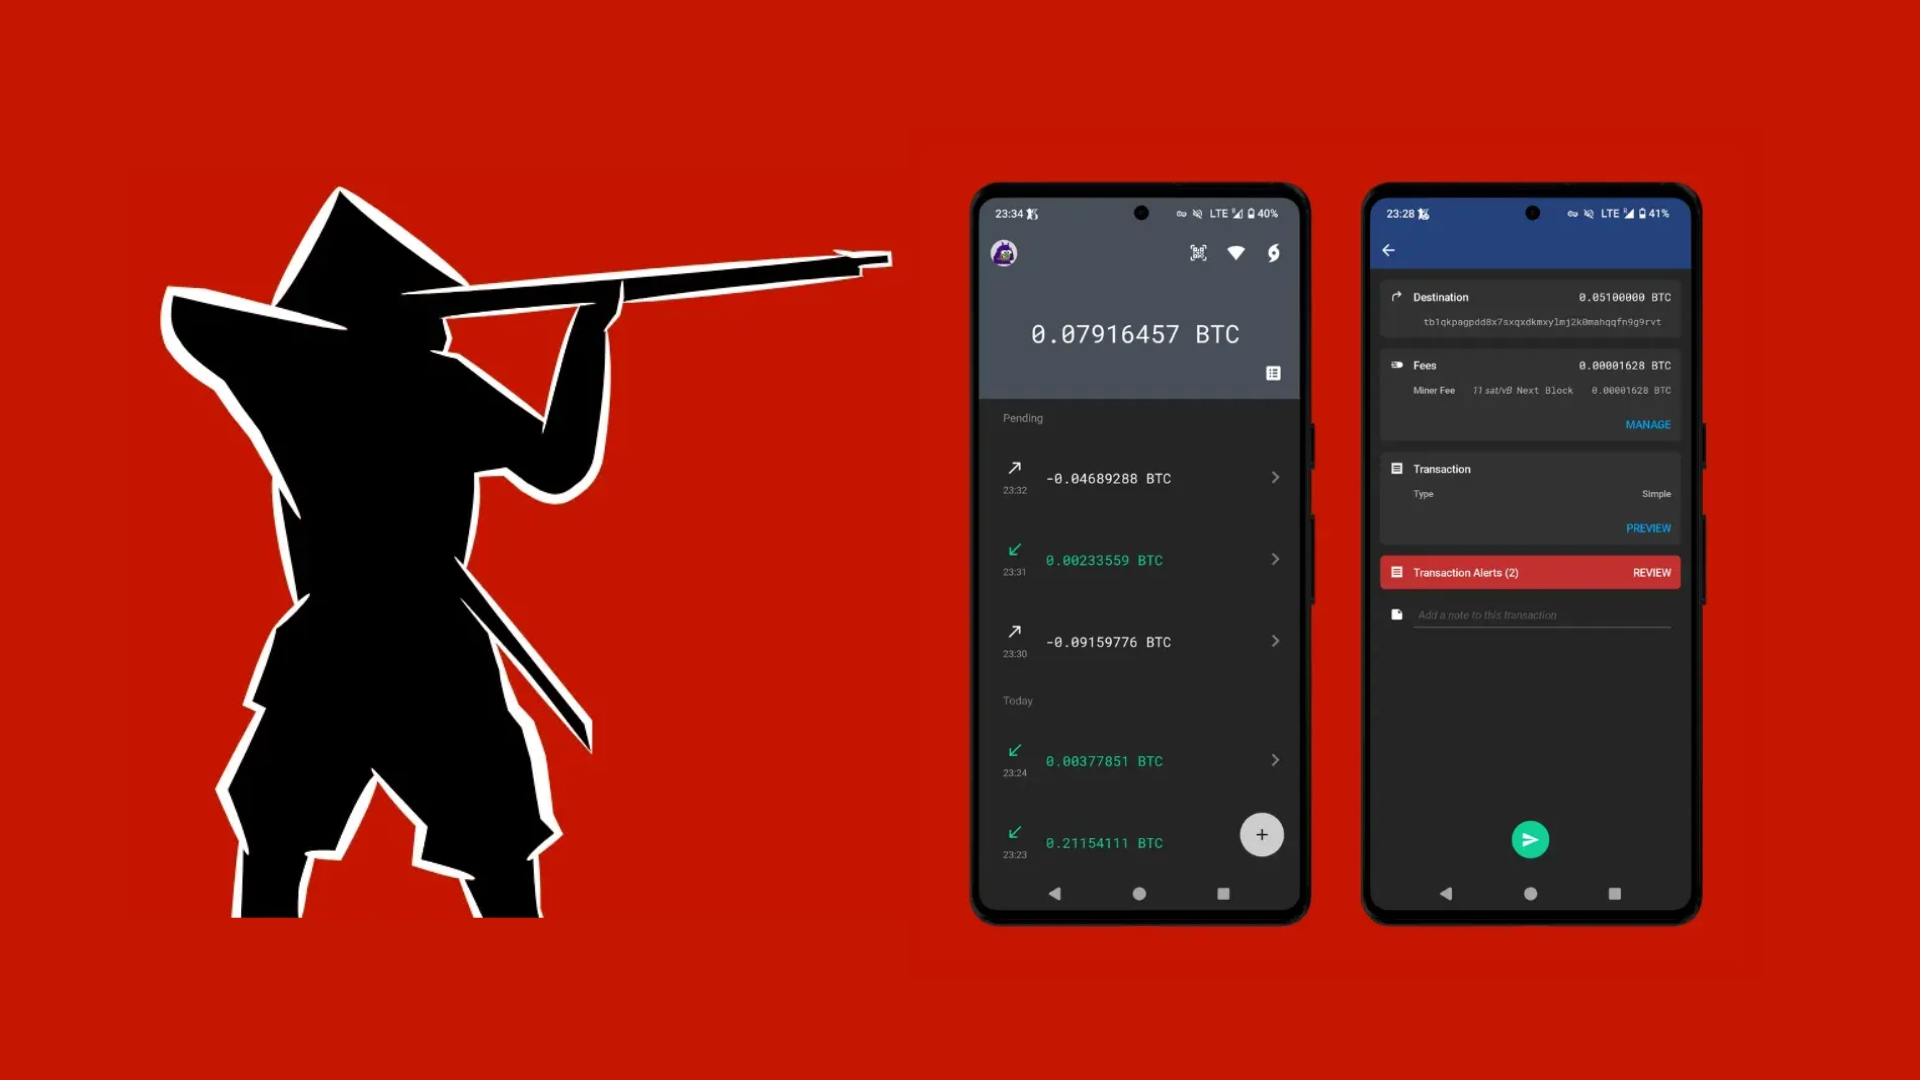
6. Send bitcoin with Ashigaru
Once you have funds in Ashigaru, you can send them. Tap the “+” button at the bottom right, then select the red “Send” button.
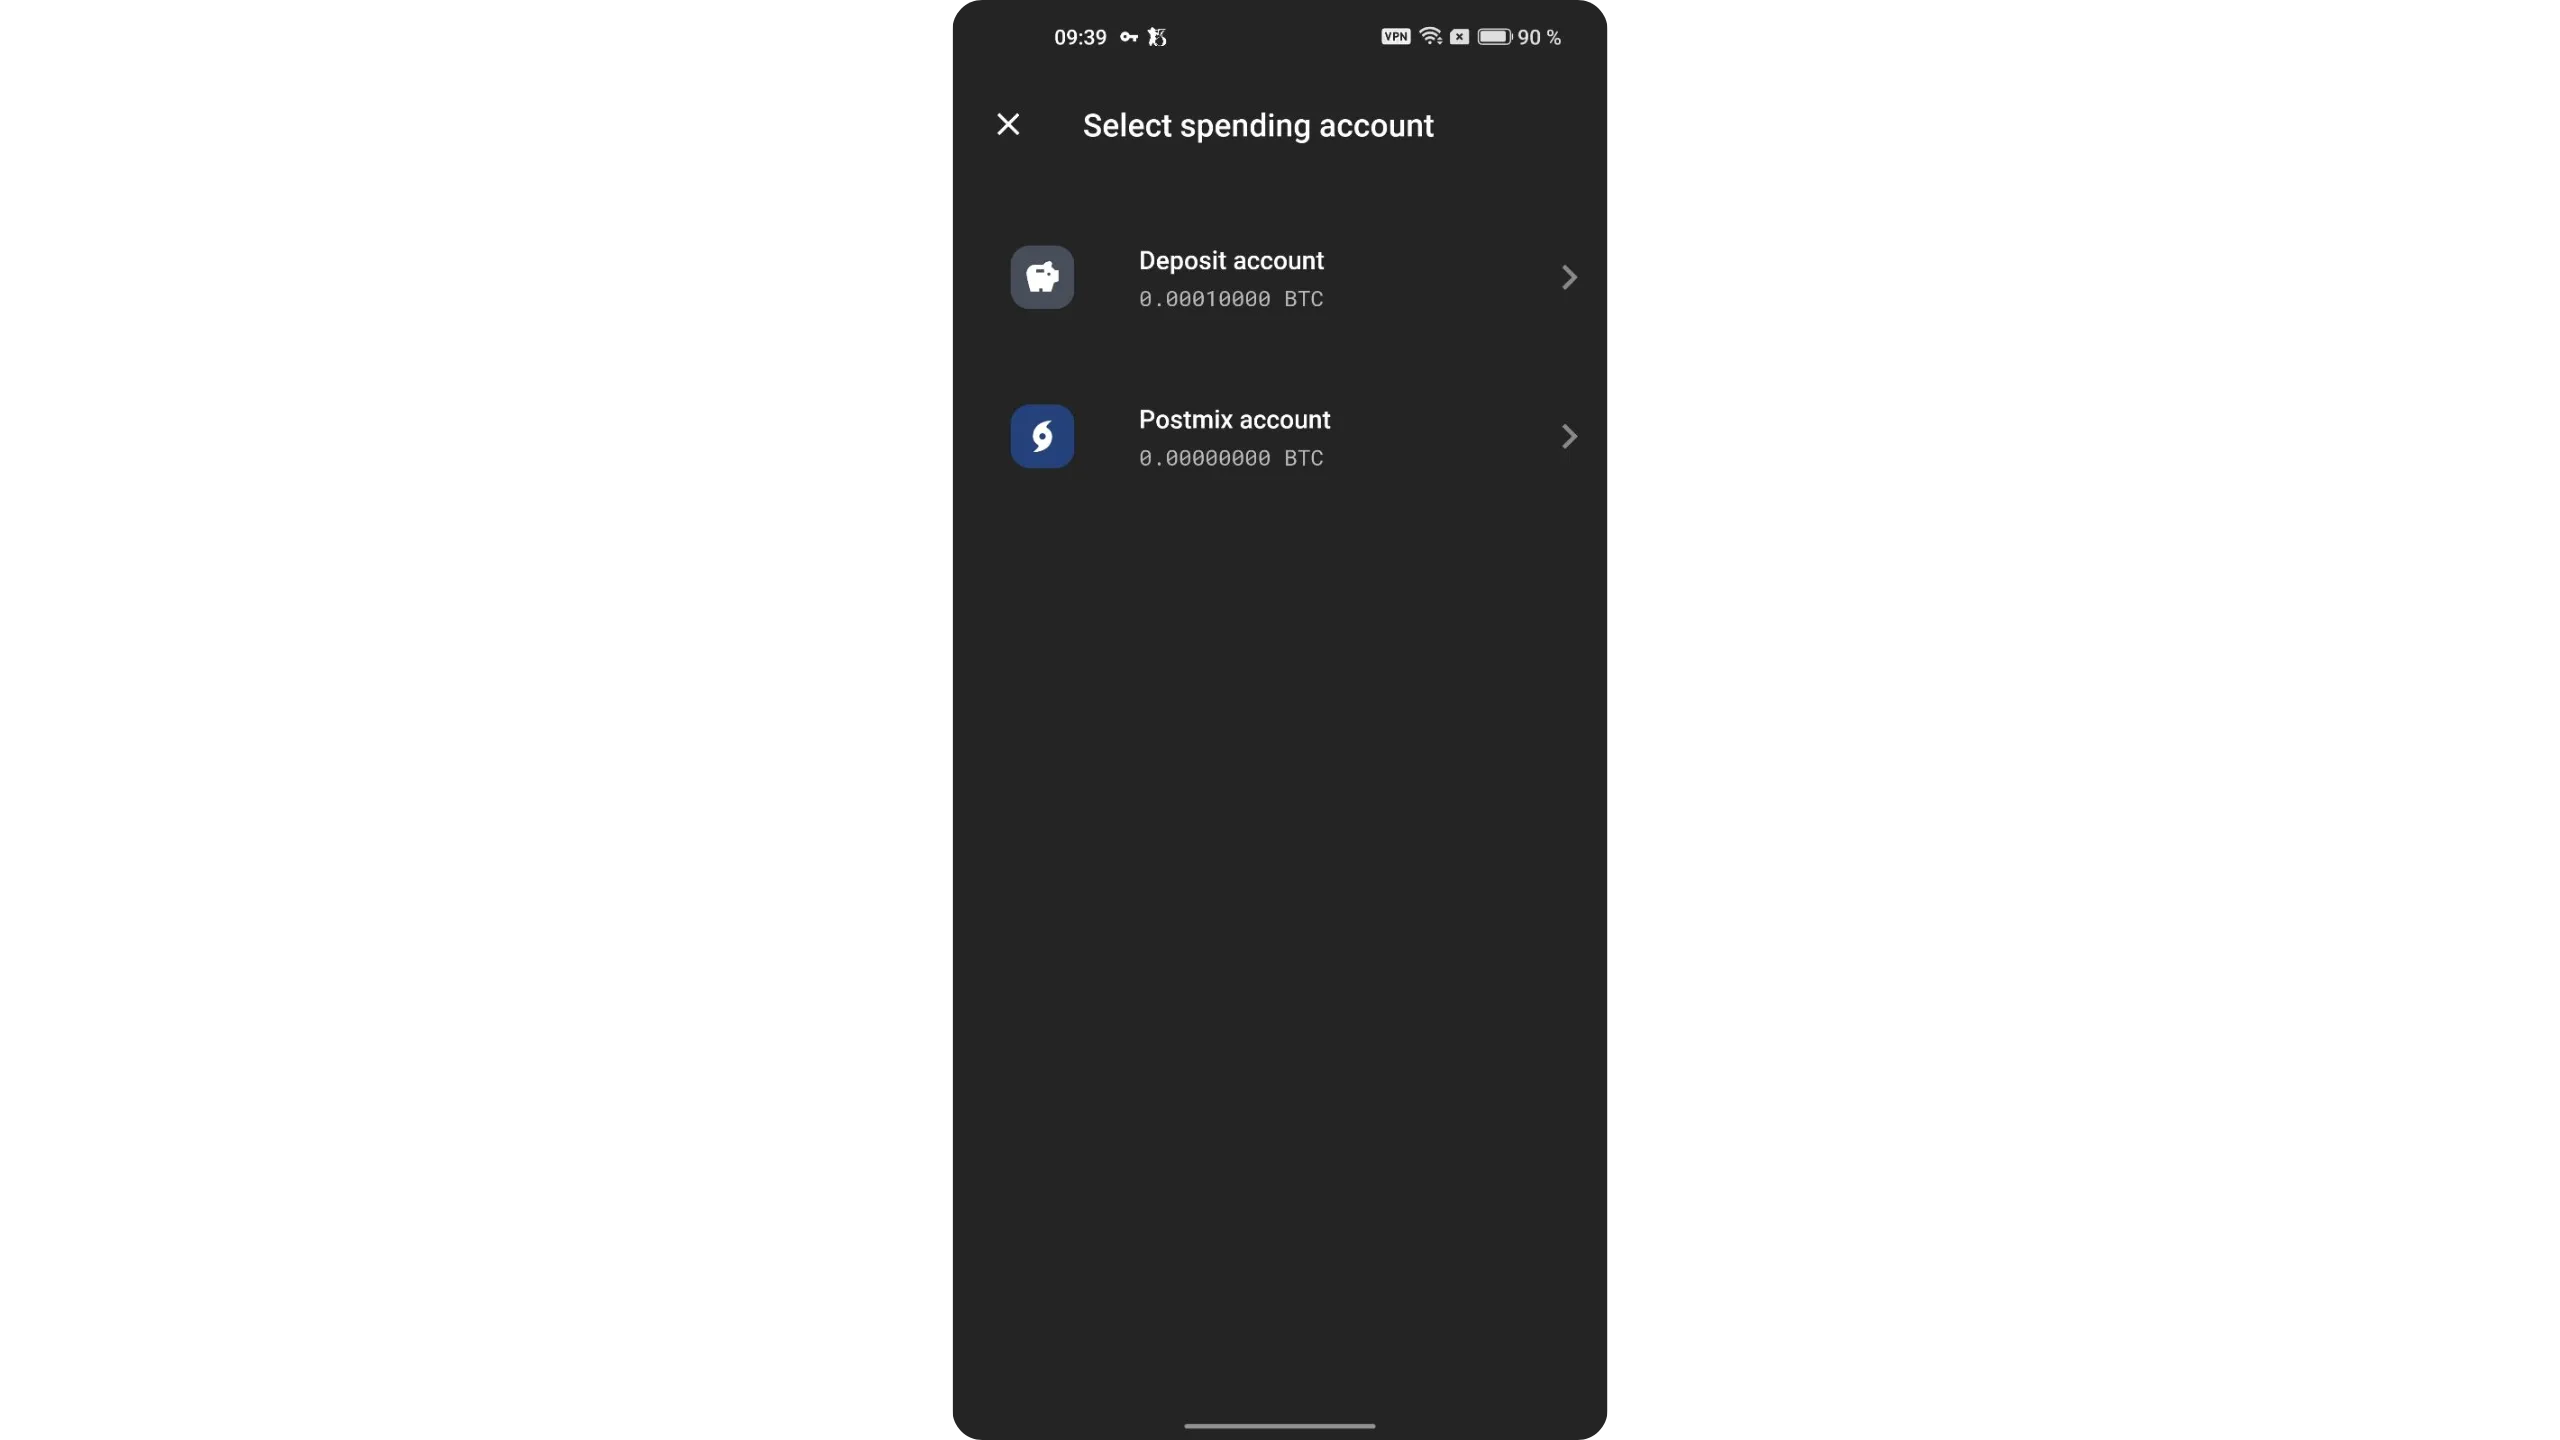
Choose the account to spend from. For now, we haven’t covered the “Postmix” account (used for coinjoins and covered in another tutorial). We’ll send from the main deposit account.
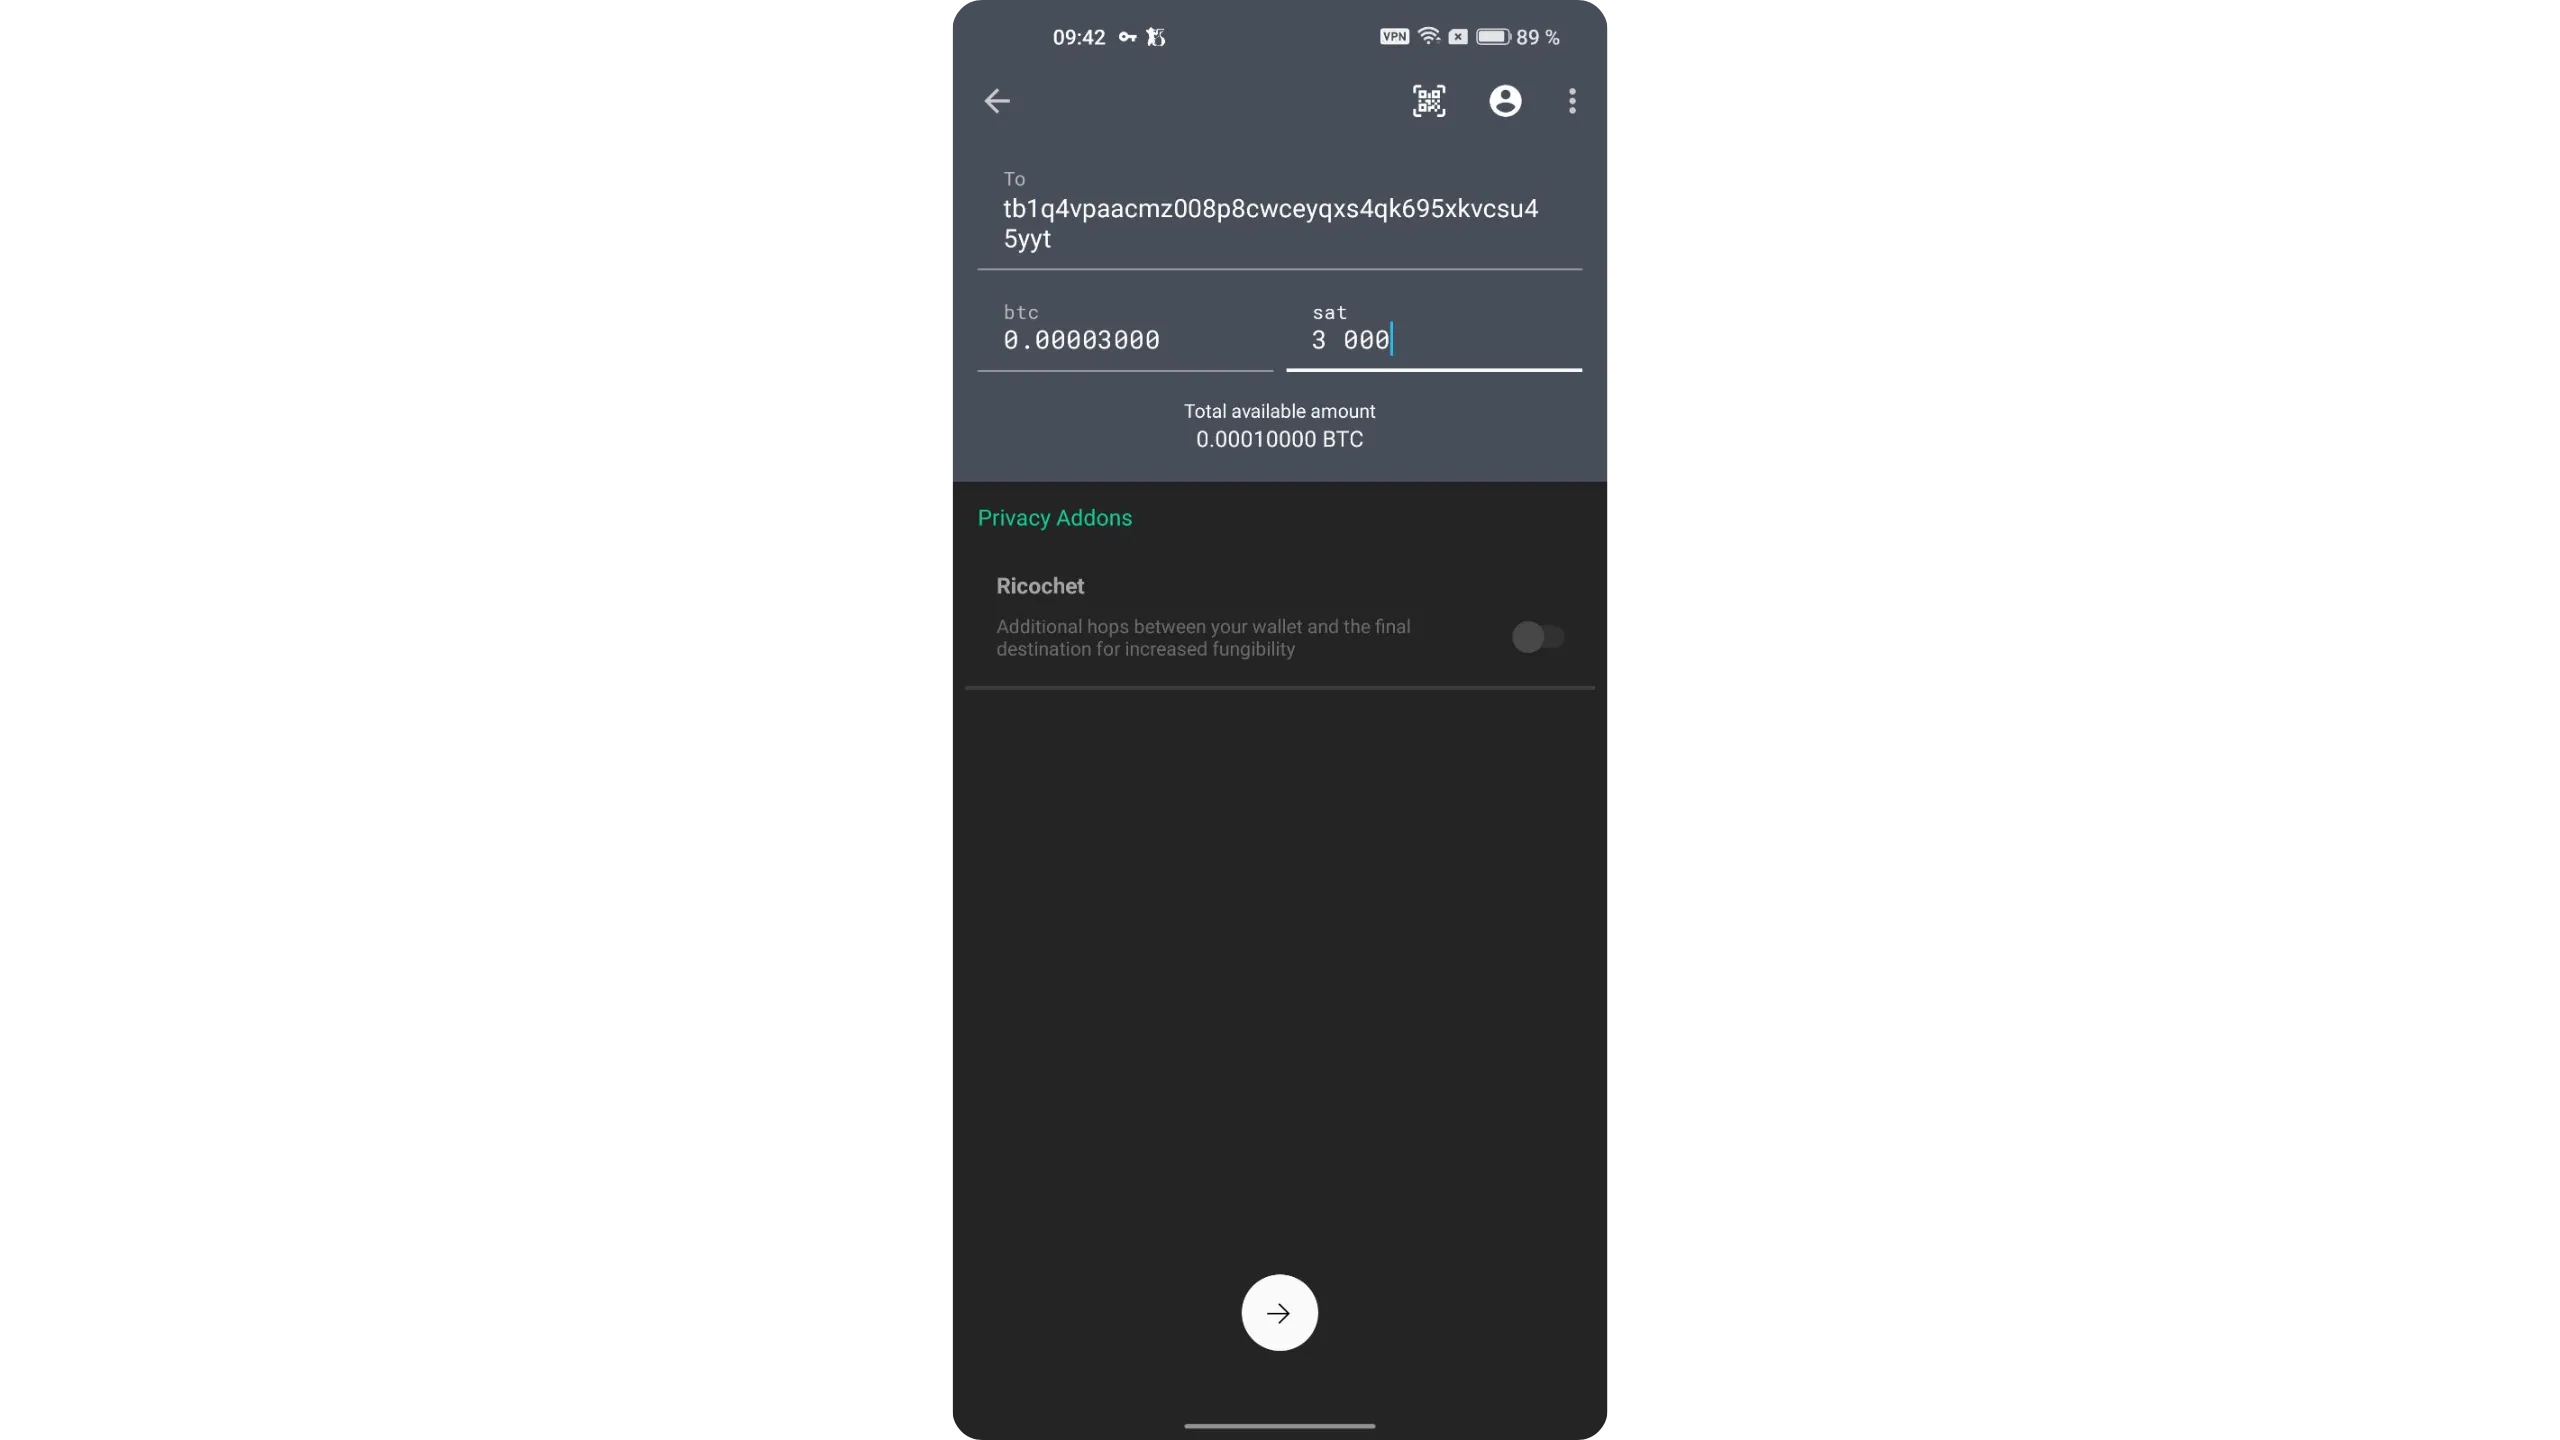
Enter the transaction details: amount to send and the recipient’s Bitcoin address.
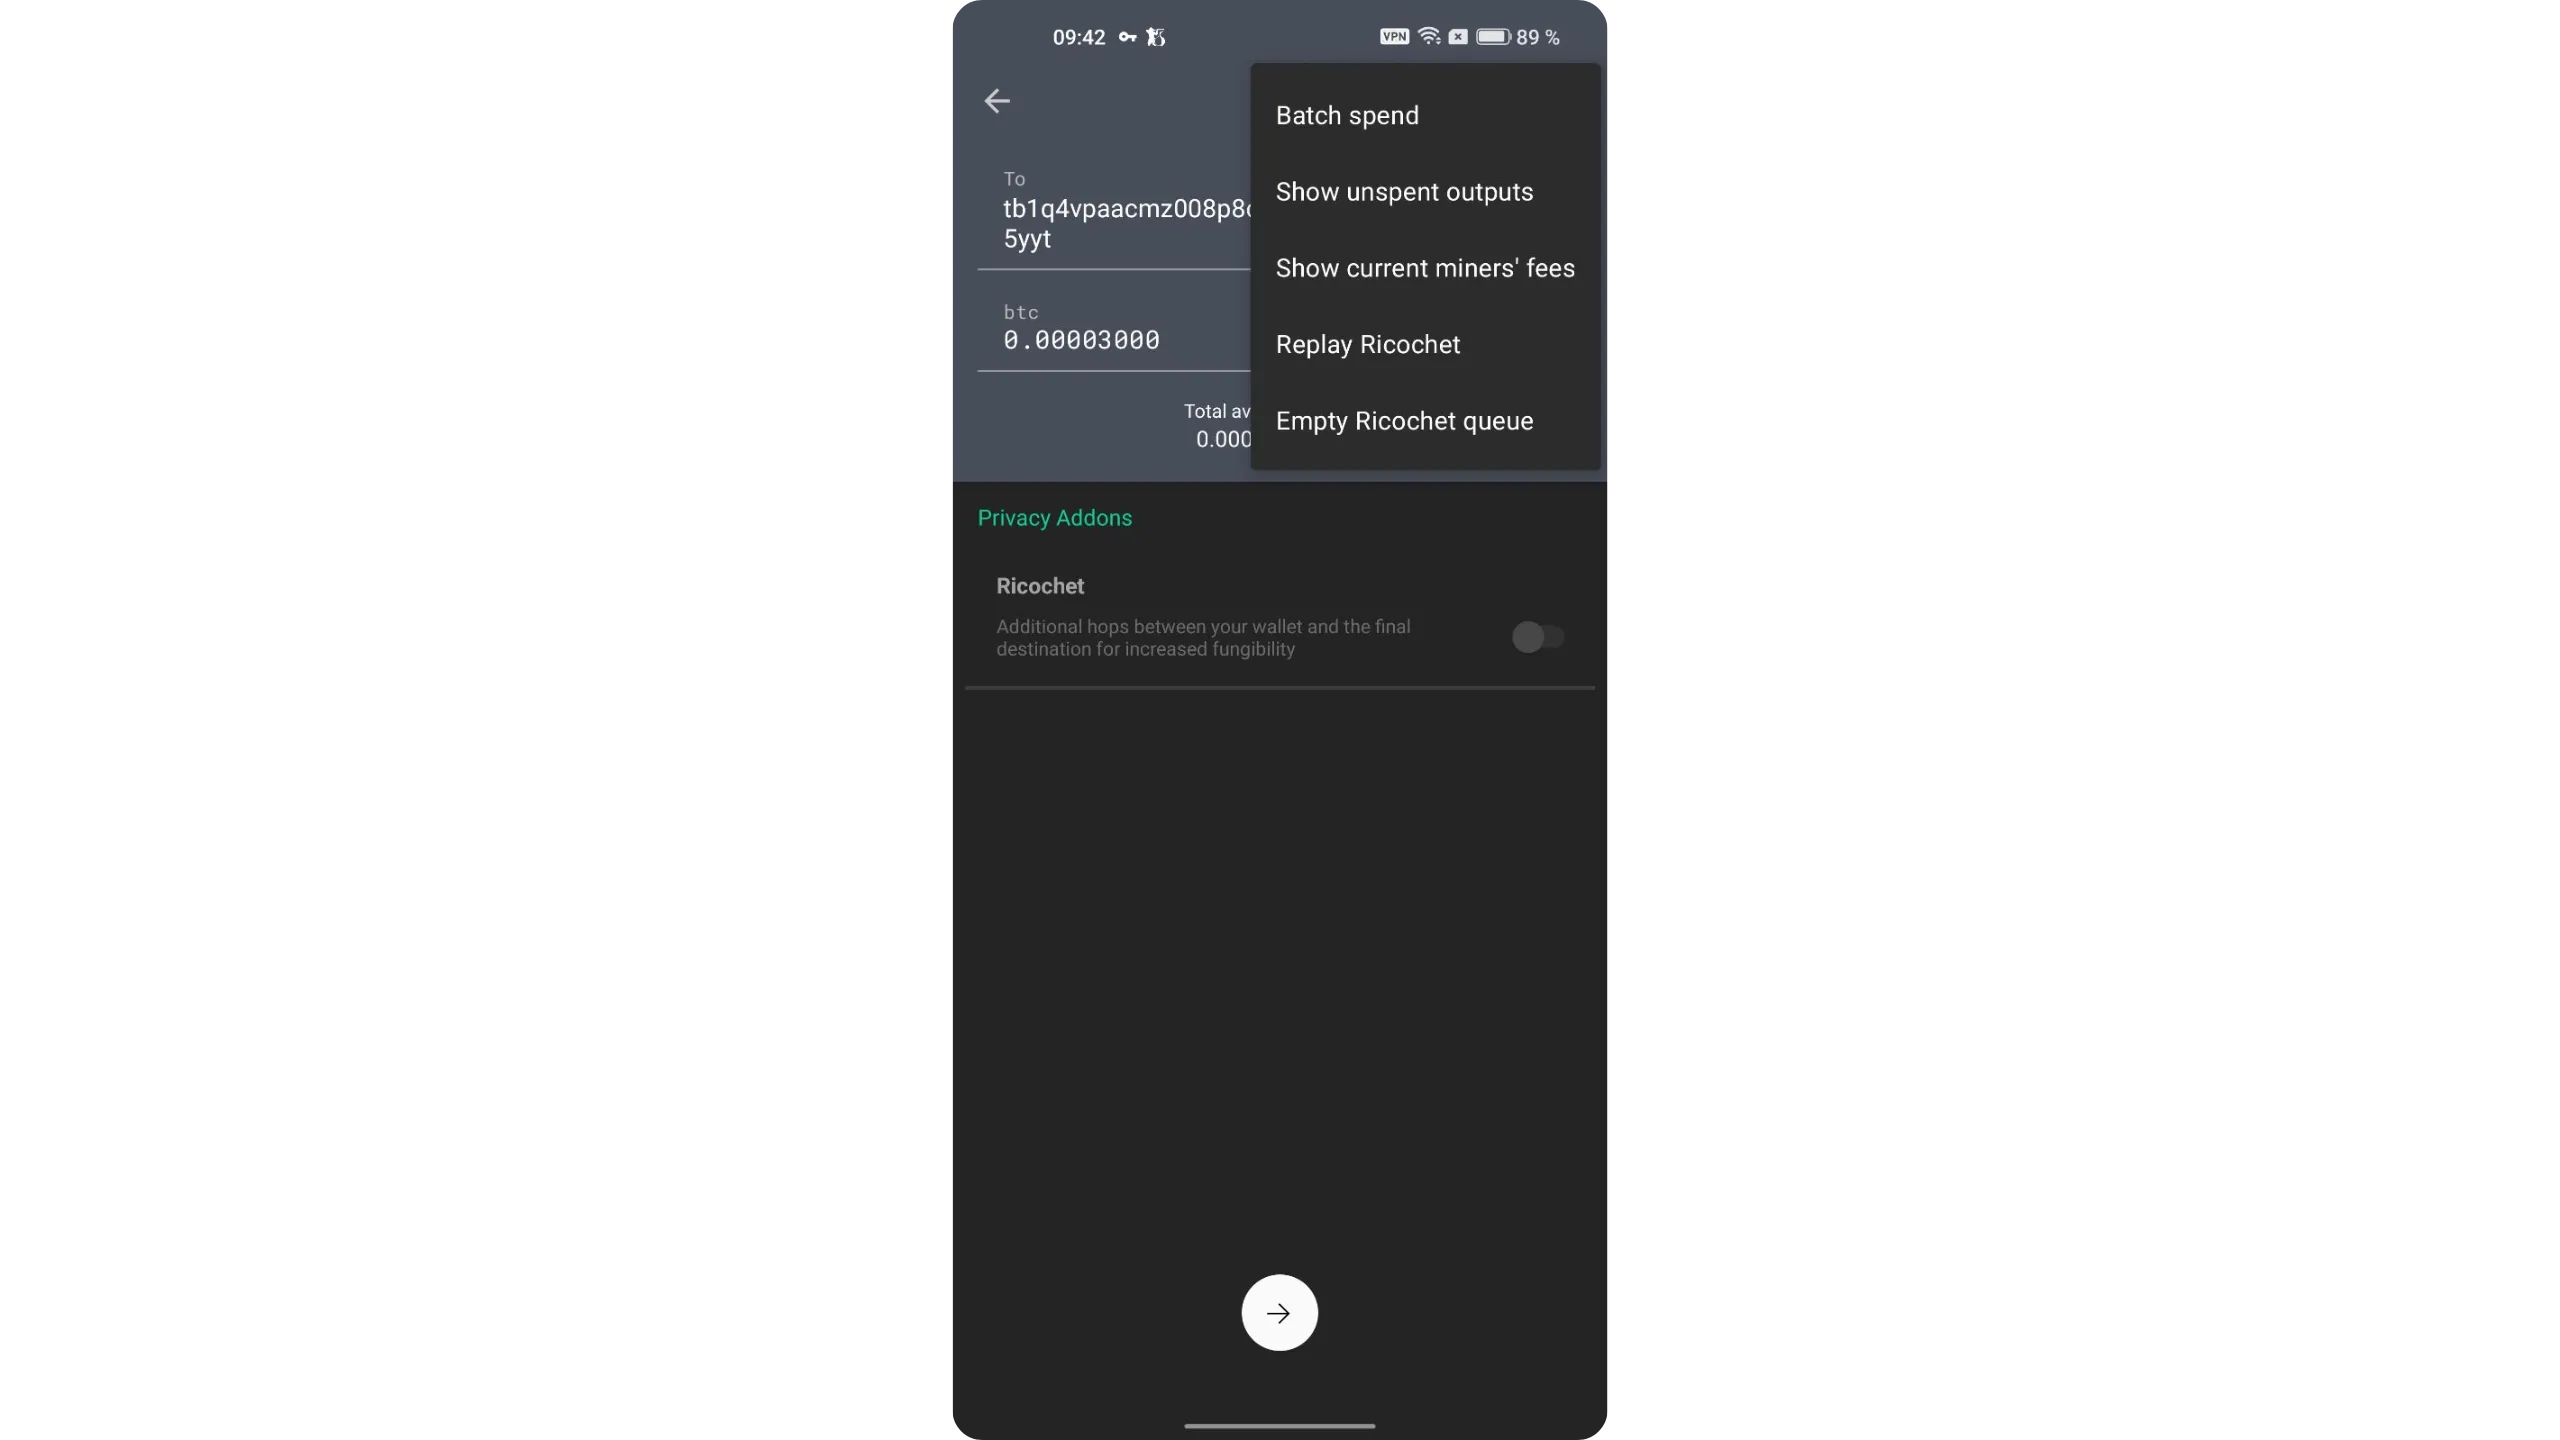
By tapping the three dots in the top‑right, then “Show unspent outputs,” you can precisely select which UTXOs to spend to improve your privacy.
When everything is set, tap the white arrow at the bottom to continue.
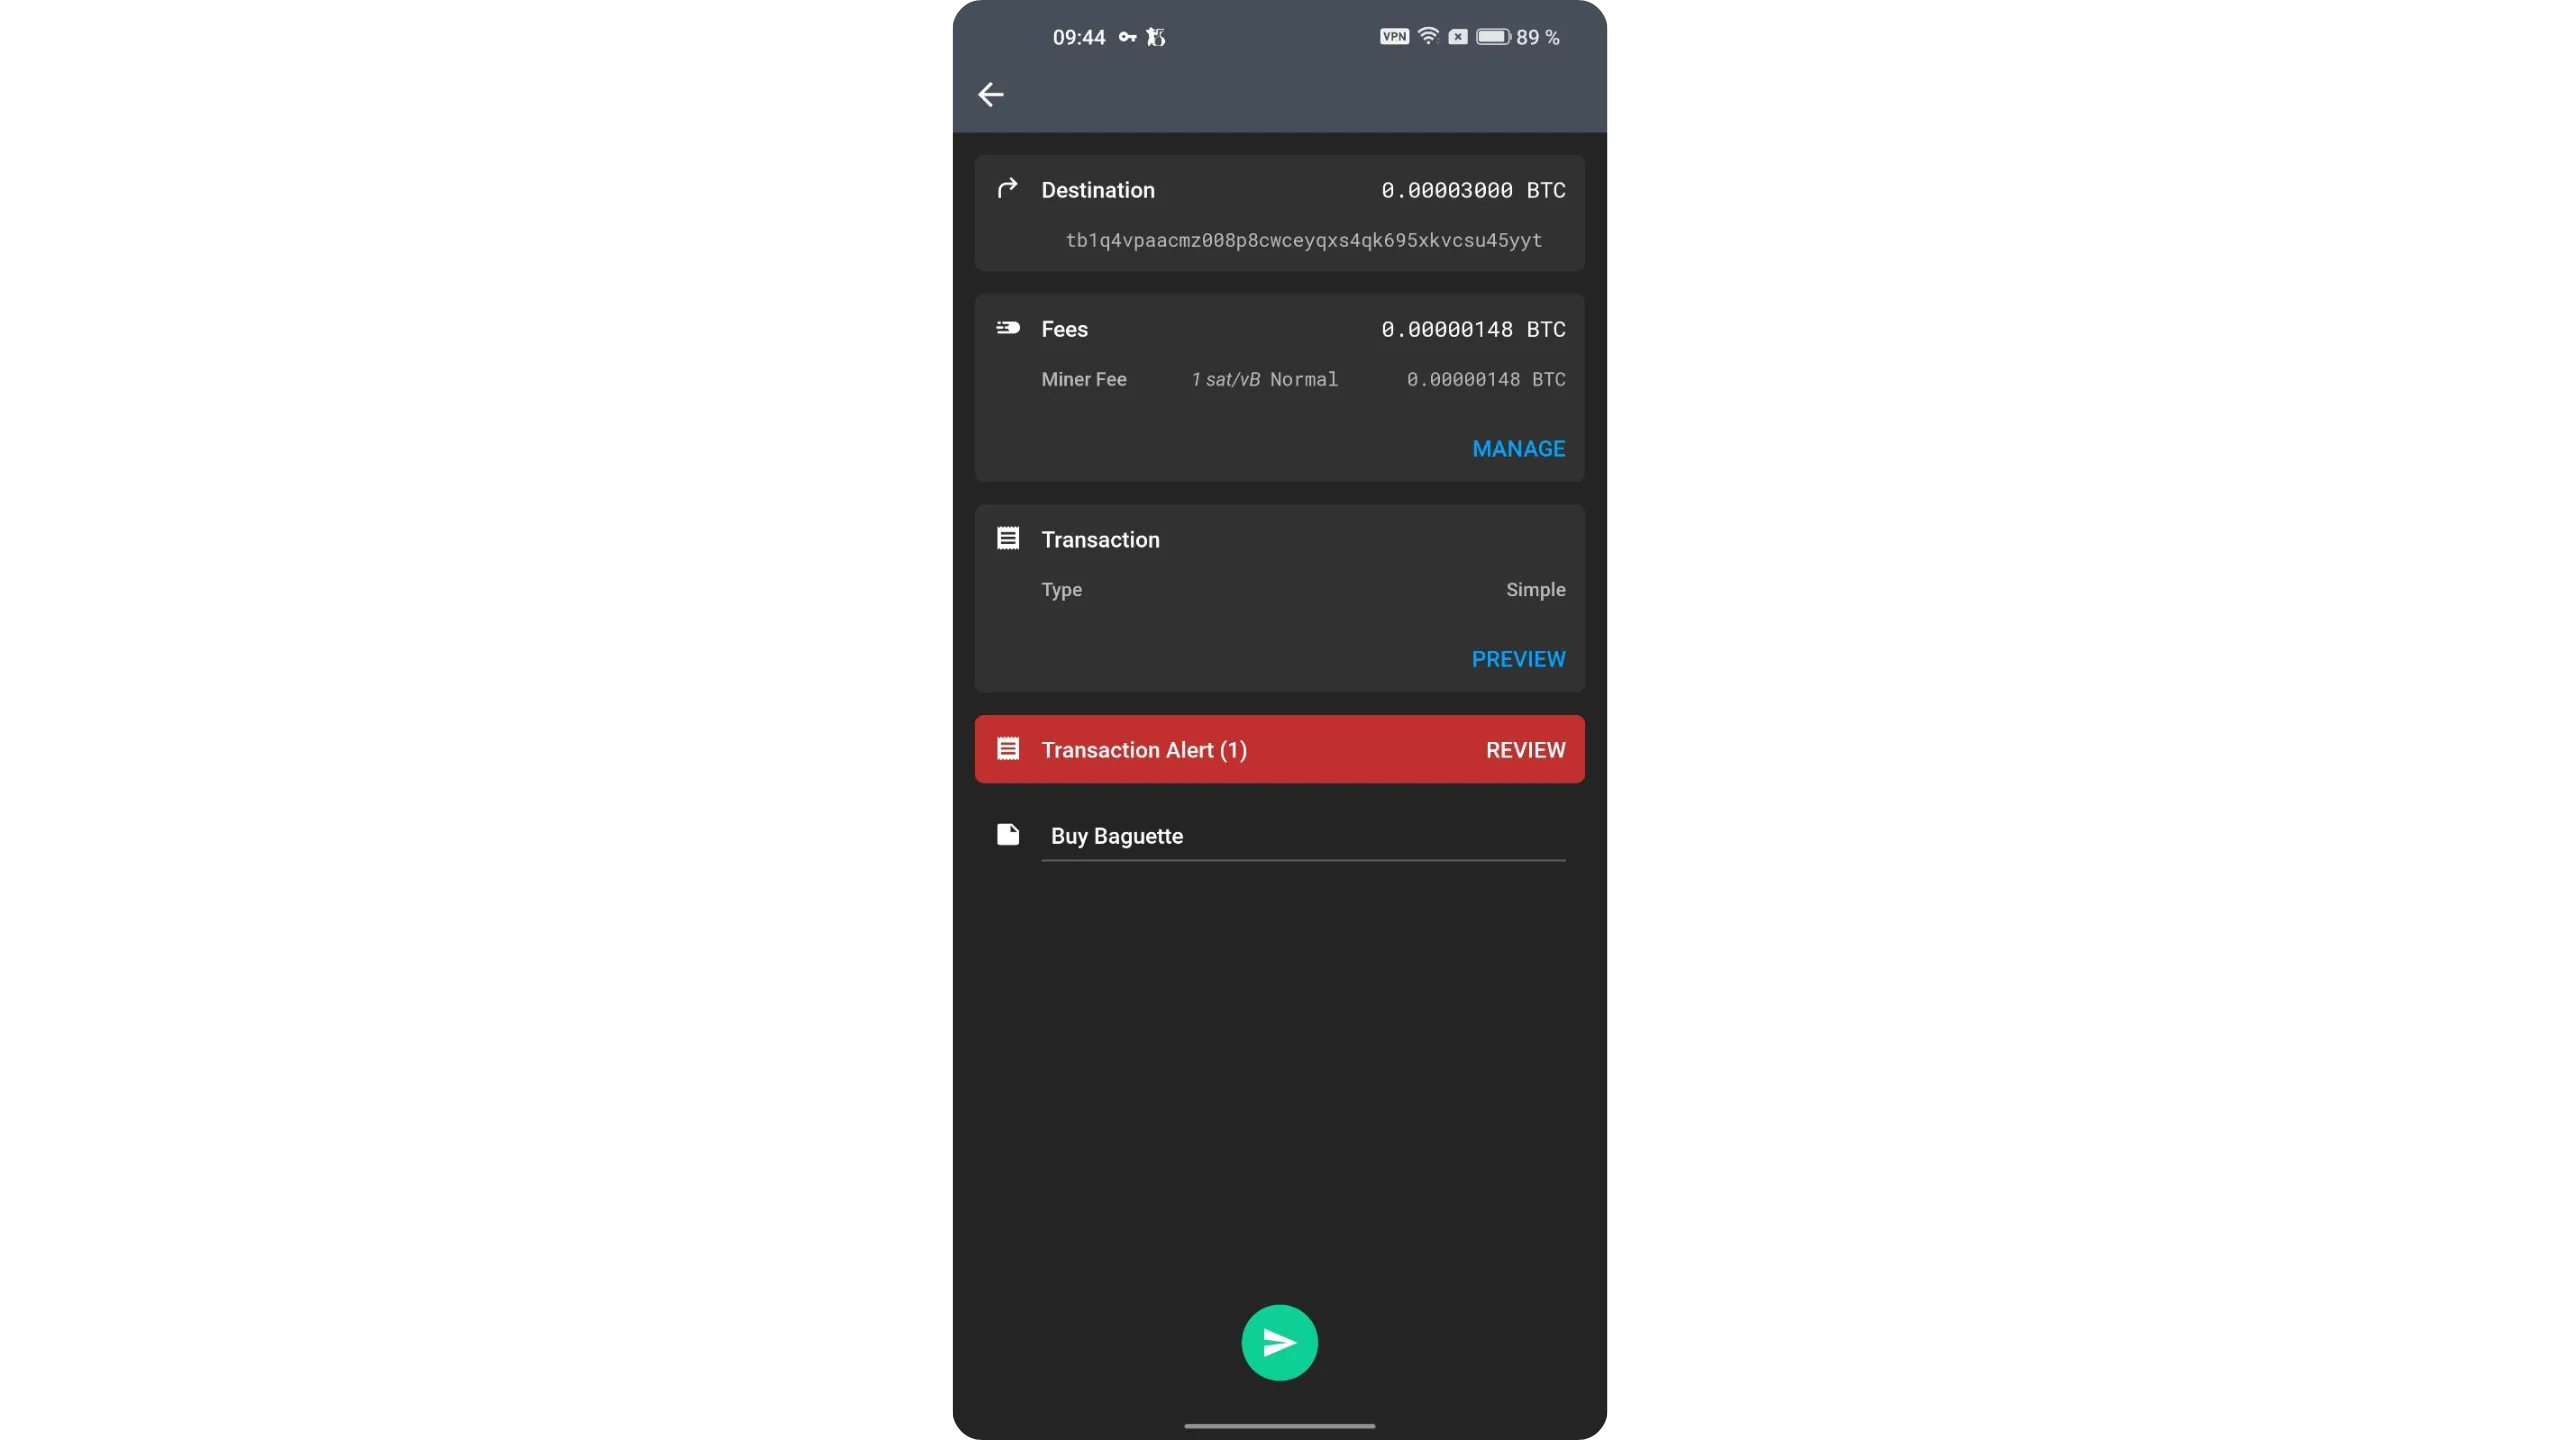
You’ll see a summary page with all transaction details:
- Destination: double‑check the recipient address and amount.
- Fees: review the fee rate automatically selected by Ashigaru; adjust via “MANAGE” if needed.
- Transaction: shows the transaction type (simple here); Ashigaru also supports other privacy‑optimized spending types (covered in another tutorial).
- Transaction Alert (red): flags patterns recognized by chain‑analysis heuristics that may degrade privacy. Tap to see details. For example, if your amount is a round number (e.g., “3000 sats”), it may reveal which output is the spend and which is the change.
- Label: you can add a label to remember the transaction’s purpose.
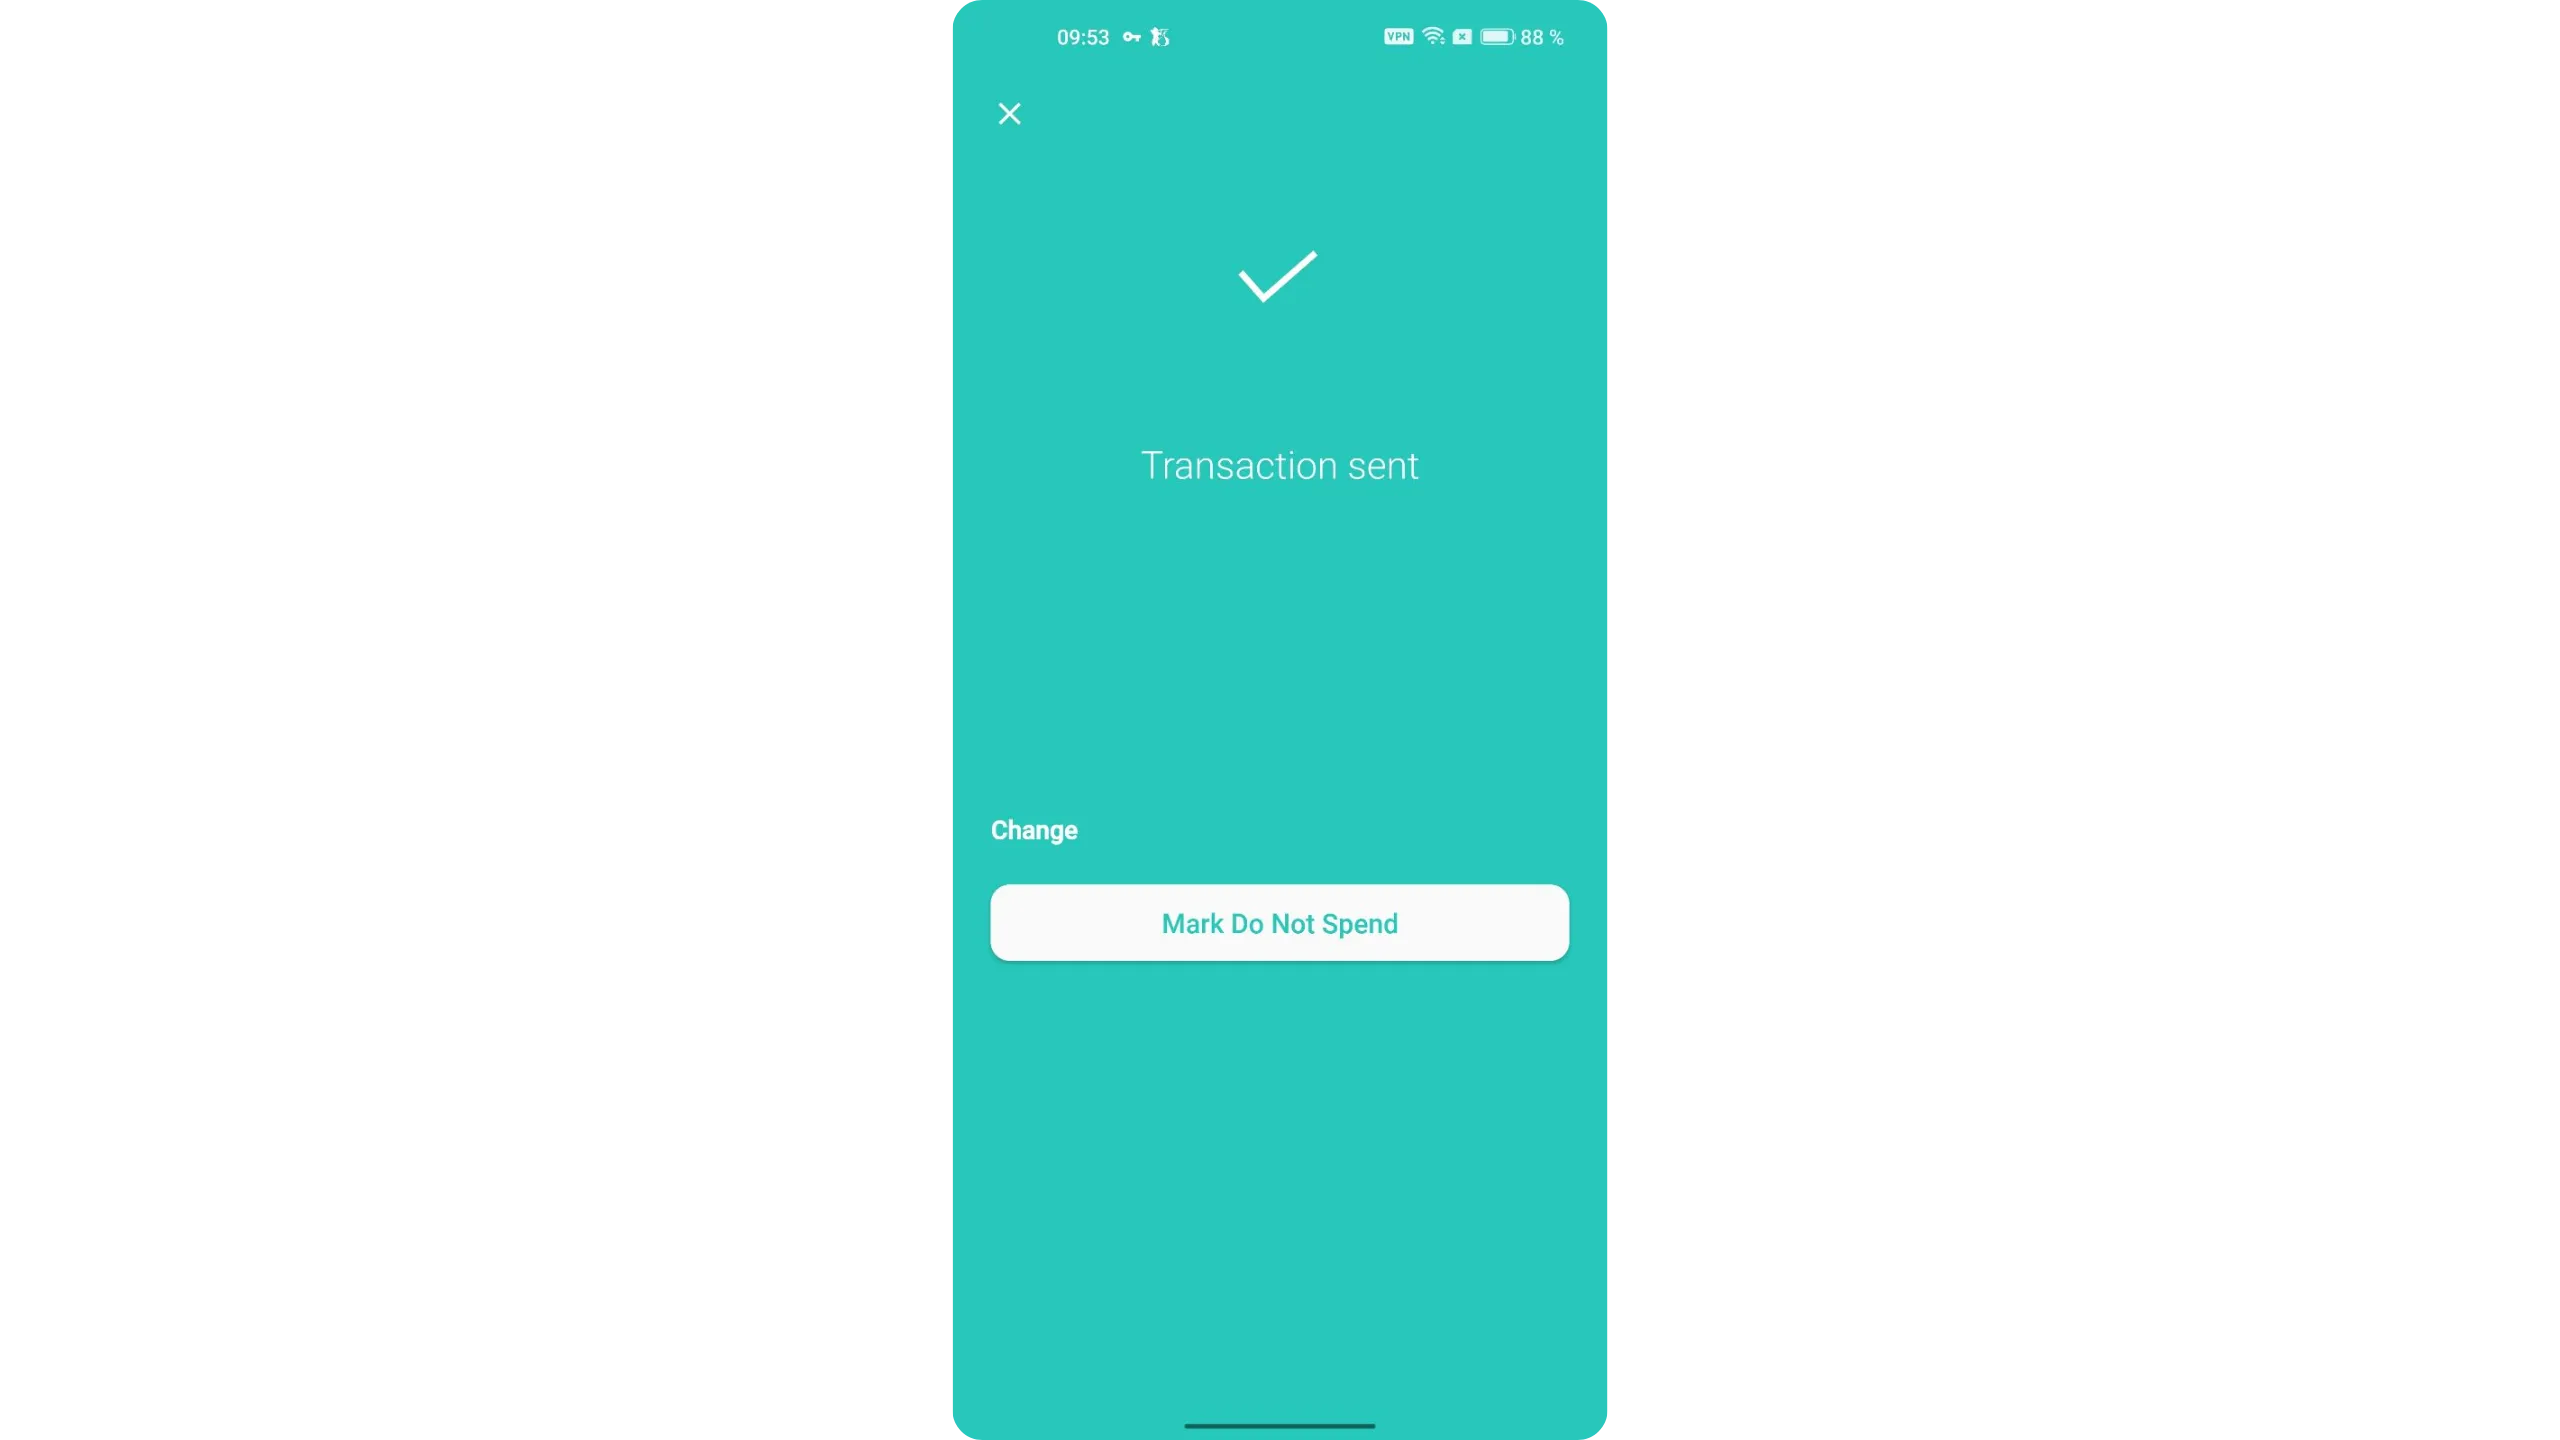
Once everything is correct, use the green arrow to send. Press and hold the arrow, then slide it to the right to confirm.
Your transaction is now broadcast on the Bitcoin network.
7. Recover your Ashigaru wallet
Ashigaru wallet recovery differs slightly from a standard Bitcoin wallet, as it inherits Samourai Wallet’s methods. If you lose access to your wallet (PIN forgotten, app uninstalled, or phone lost), you have several options to recover your funds.
If you still have access to your phone or you backed up the file, the simplest method is using the backup file “ashigaru.txt.” This file contains everything needed to restore your wallet on a new Ashigaru instance (or in Sparrow Wallet), but it is encrypted with the passphrase you set in step 3.1. You must have both the “ashigaru.txt” file and your passphrase to use this method.
With these two items, you can, for example, restore your wallet in Sparrow Wallet.
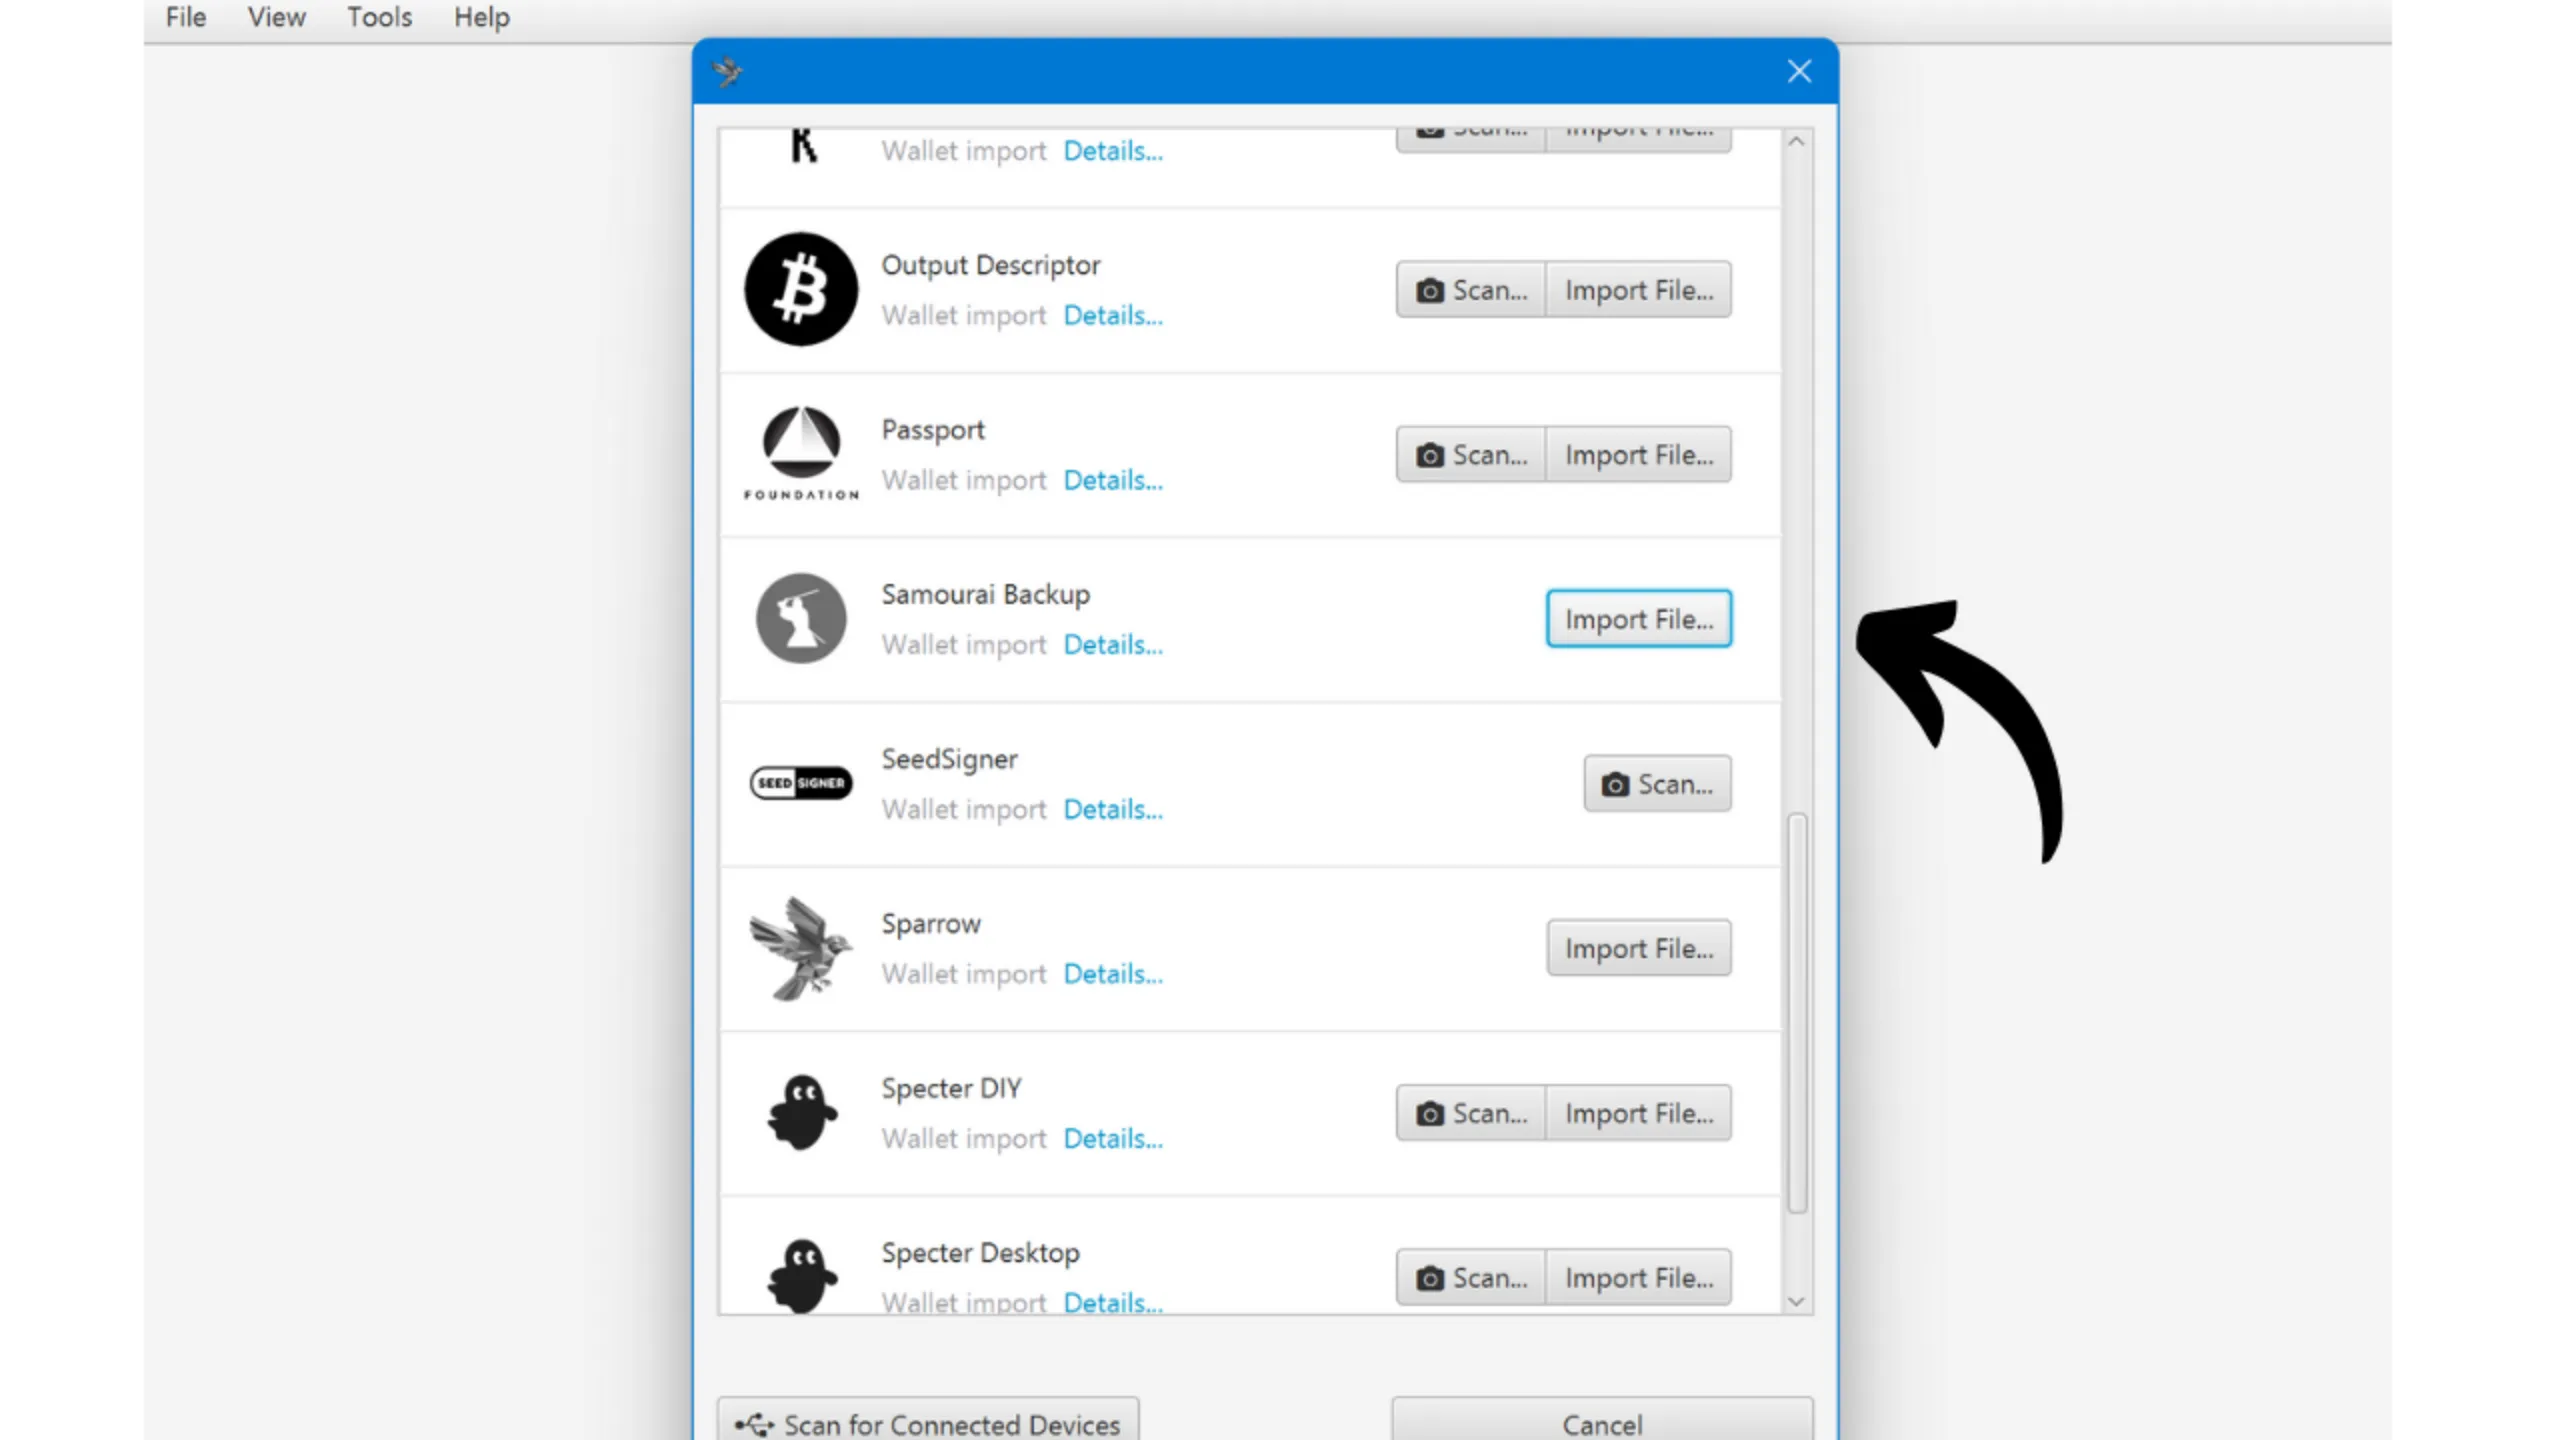
If you don’t have the “ashigaru.txt” file, you can still access your funds using your mnemonic phrase and passphrase, like any other BIP39 wallet. It’s recommended to recover either in a new Ashigaru instance or directly in Sparrow Wallet, which simplifies retrieving Whirlpool derivation paths (if you used it). Otherwise, you can import into any BIP39‑compatible software by entering derivation paths manually.
As you’ve seen, regardless of the recovery method, the passphrase is indispensable. Make sure it is securely backed up. You can keep multiple copies depending on your security model.
The passphrase is critical for recovery. Without it, even a correct mnemonic won’t unlock your wallet.
8. Update the app
To update Ashigaru (since it was installed via .apk rather than the Play Store), you’ll need to download the new .apk for the updated version and install it manually.
Repeat the steps from section 2 of this tutorial. The only difference is that when you tap the .apk to start installation, your Android phone should offer “Update” and not “Install.”

This is very important: if Android shows “Install” instead of “Update,” you’re likely installing a fraudulent version. Stop immediately.
As with the initial install, carefully verify the .apk’s authenticity and integrity before proceeding.
To know when a new version is available, check the official Ashigaru site occasionally. Ashigaru is a stable, mature app inherited from Samourai Wallet, so updates are relatively less frequent than in newer projects.
Always verify signatures and hashes for each new .apk prior to updating.
9. Donate to the Ashigaru project
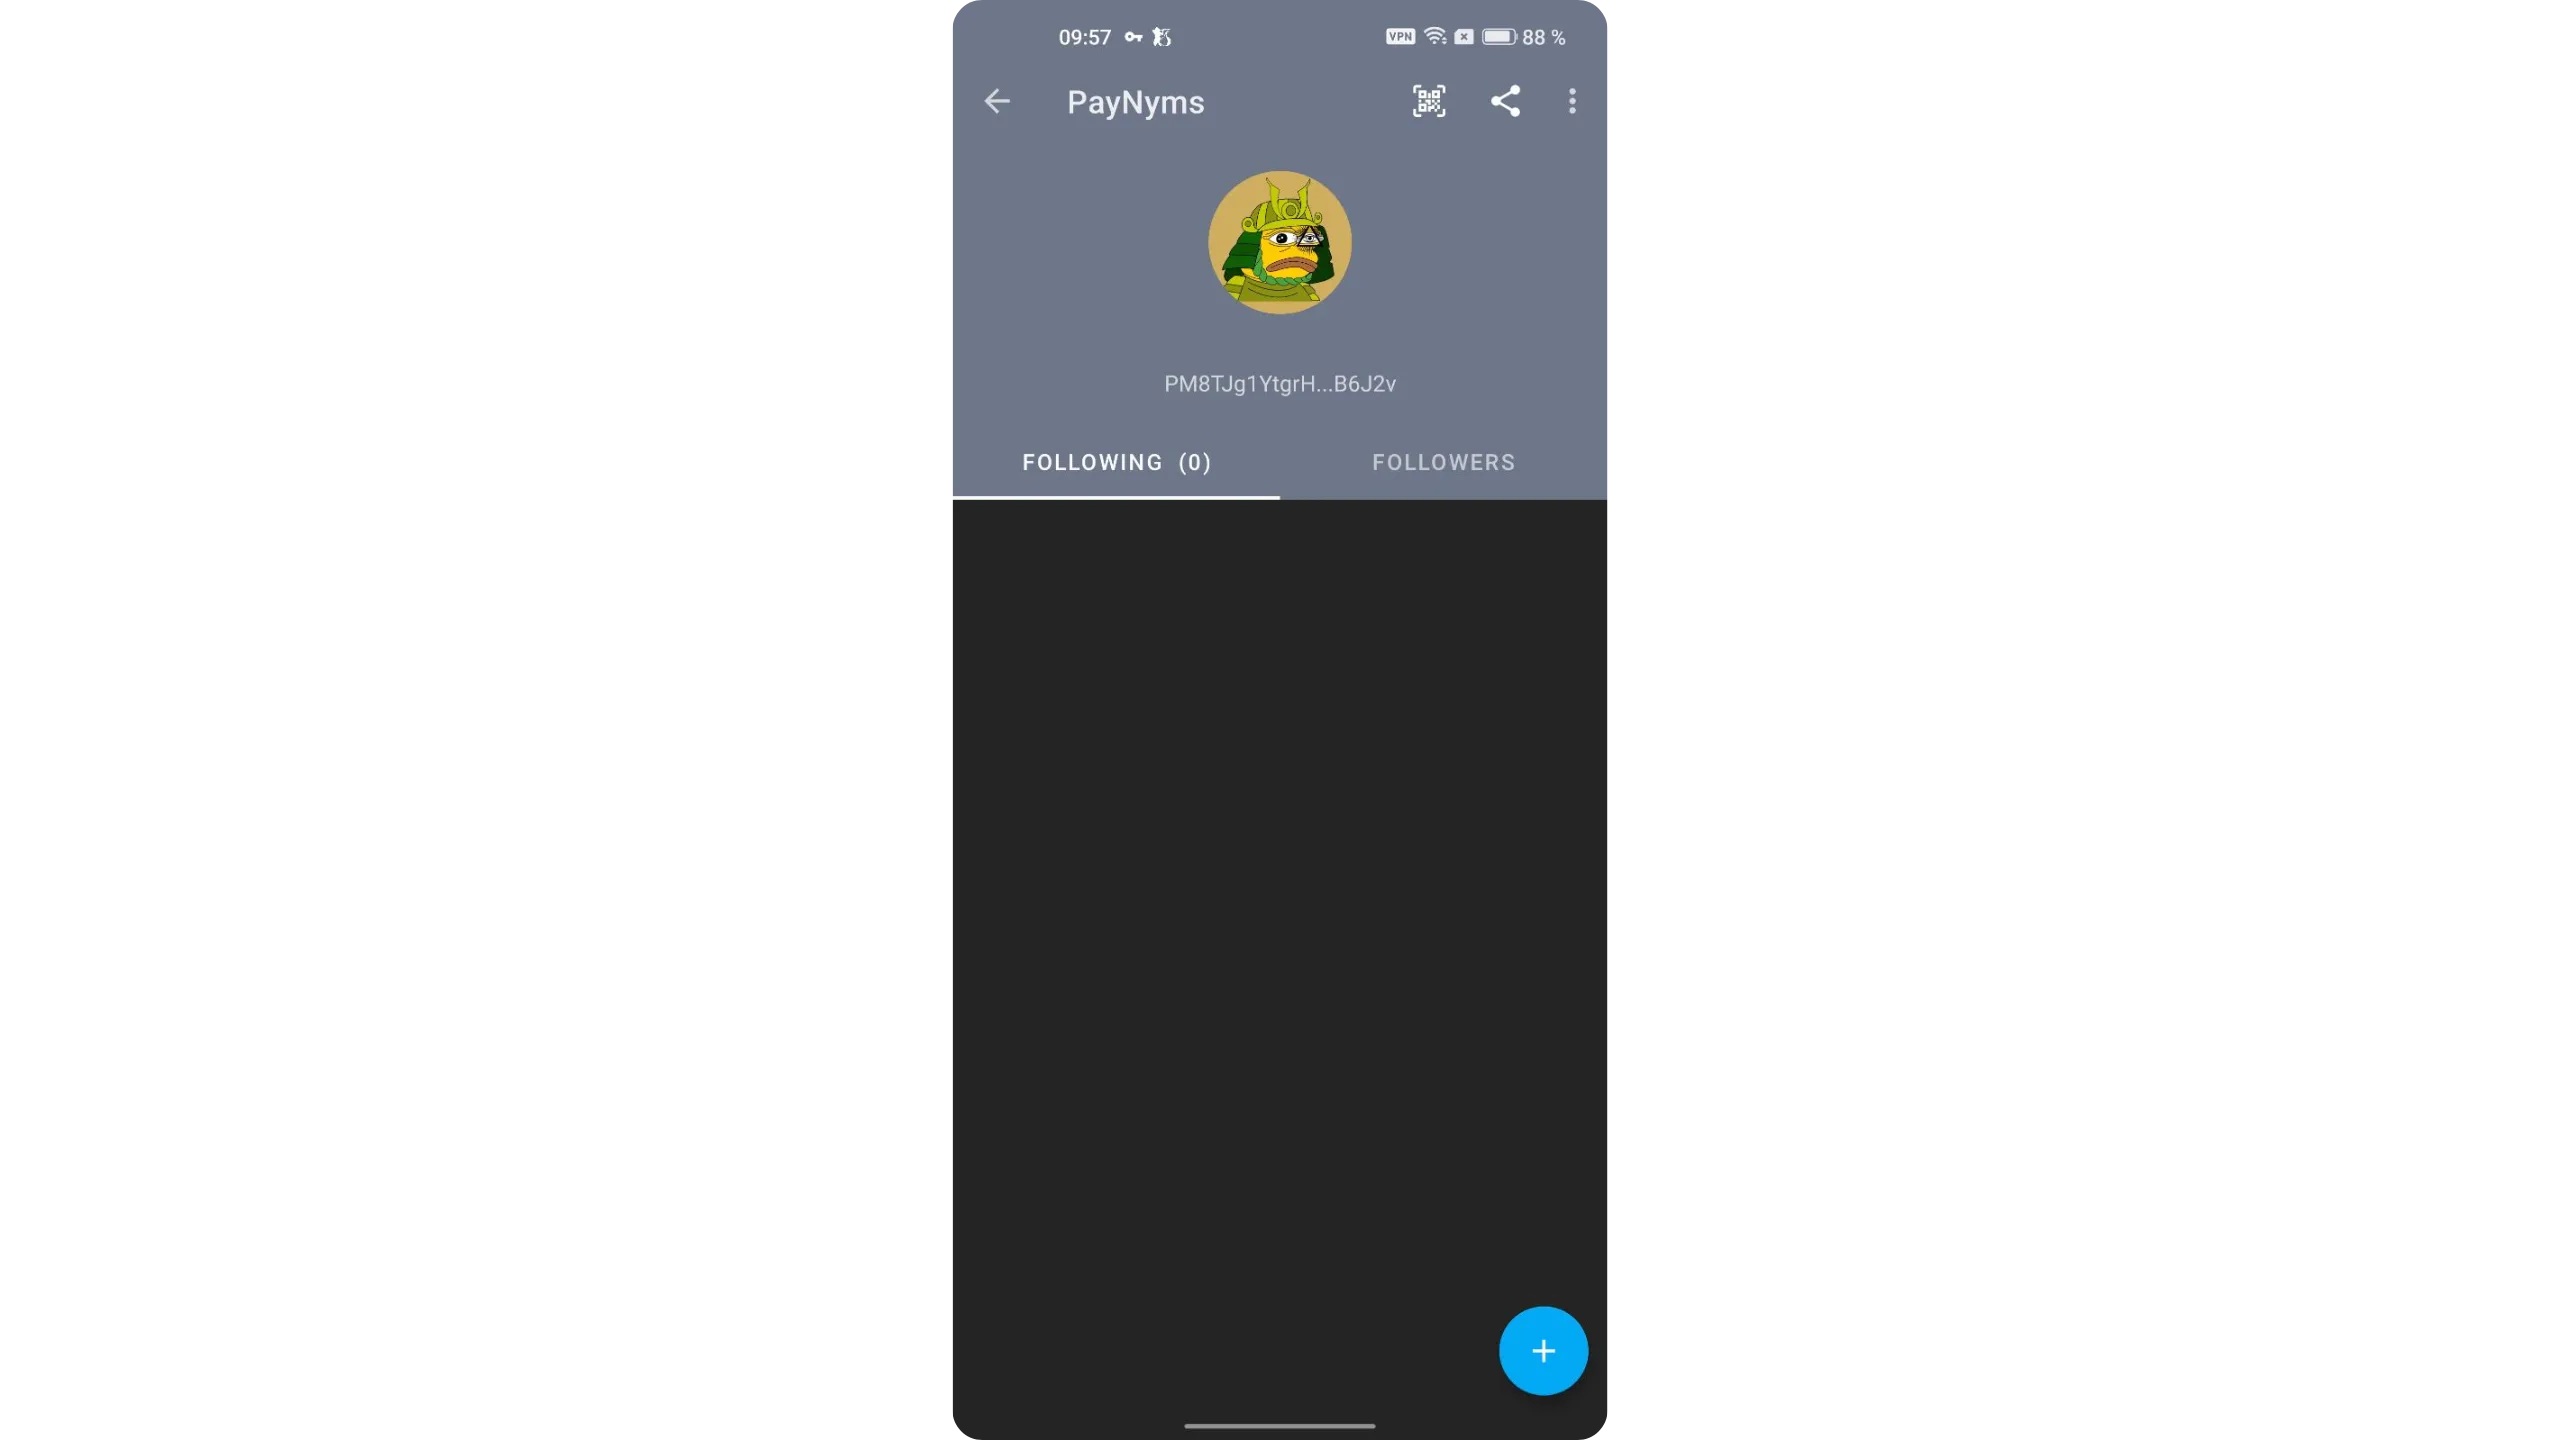
Ashigaru is open source. To support development, you can donate directly from the app via PayNym.
Tap your PayNym at the top‑right of the interface, then select your payment code starting with “PM…”.

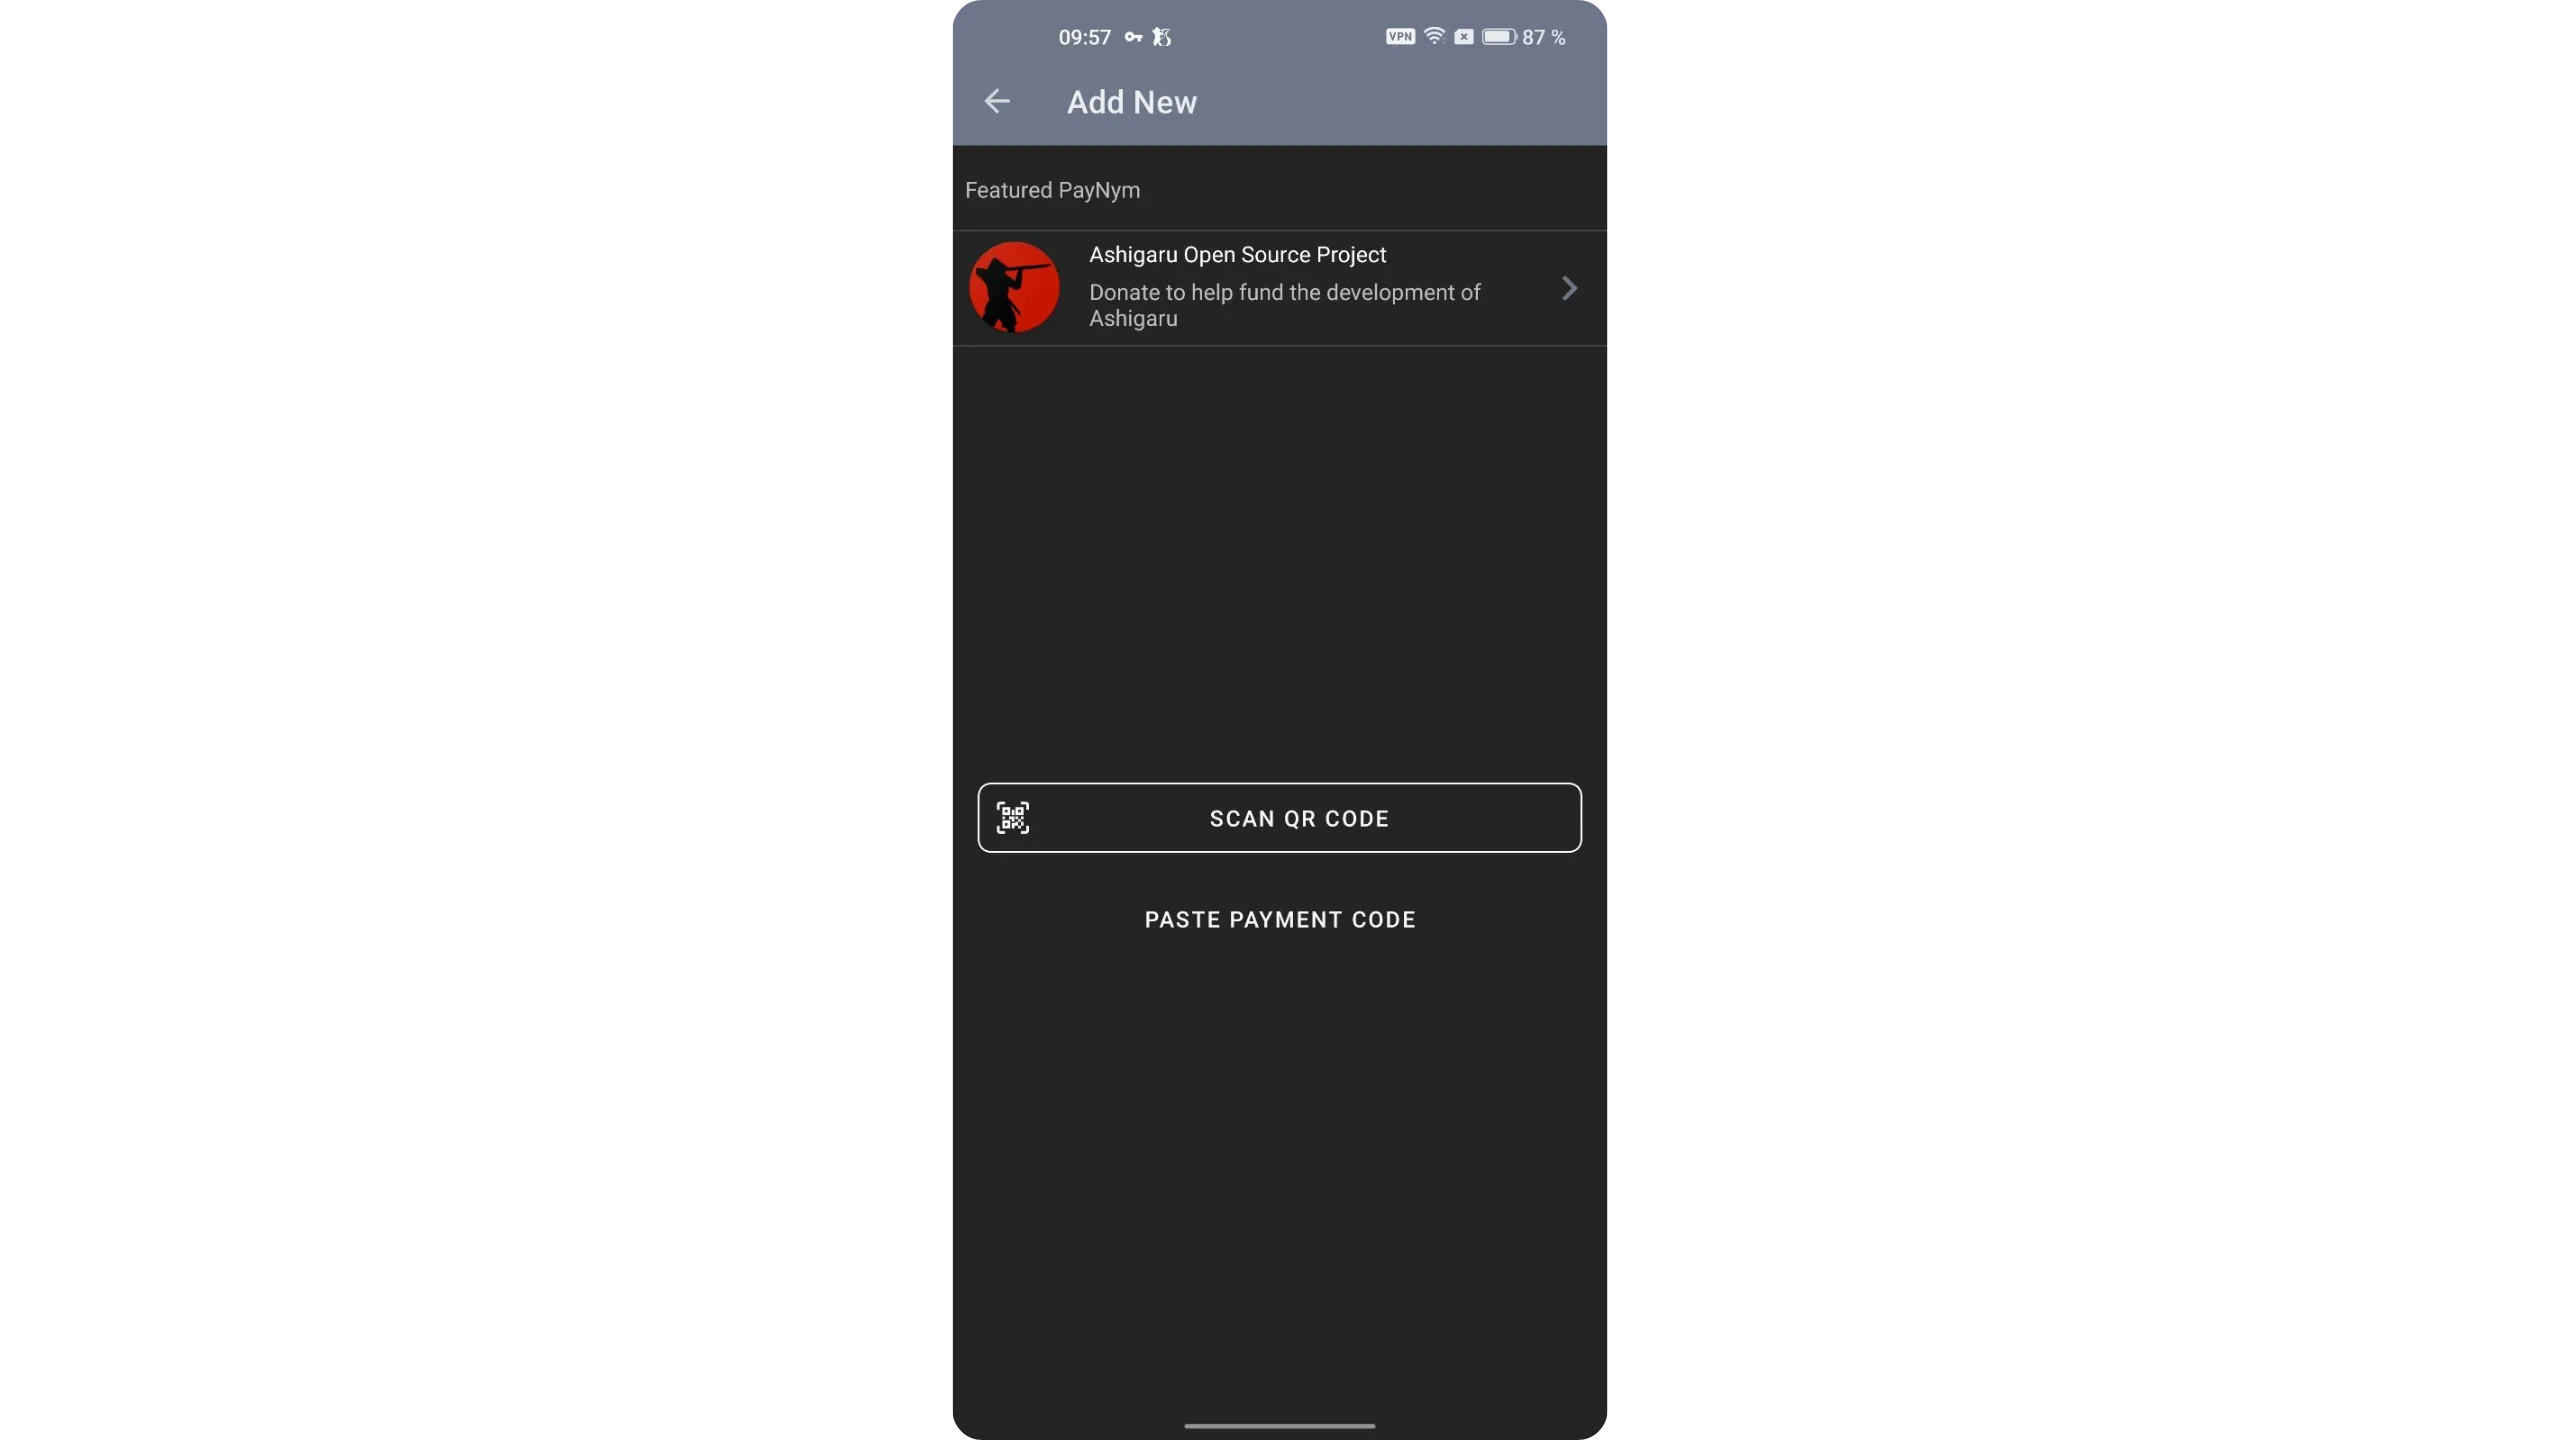
Tap the “+” button at the bottom‑right.
Choose “Ashigaru Open Source Project” as the recipient.
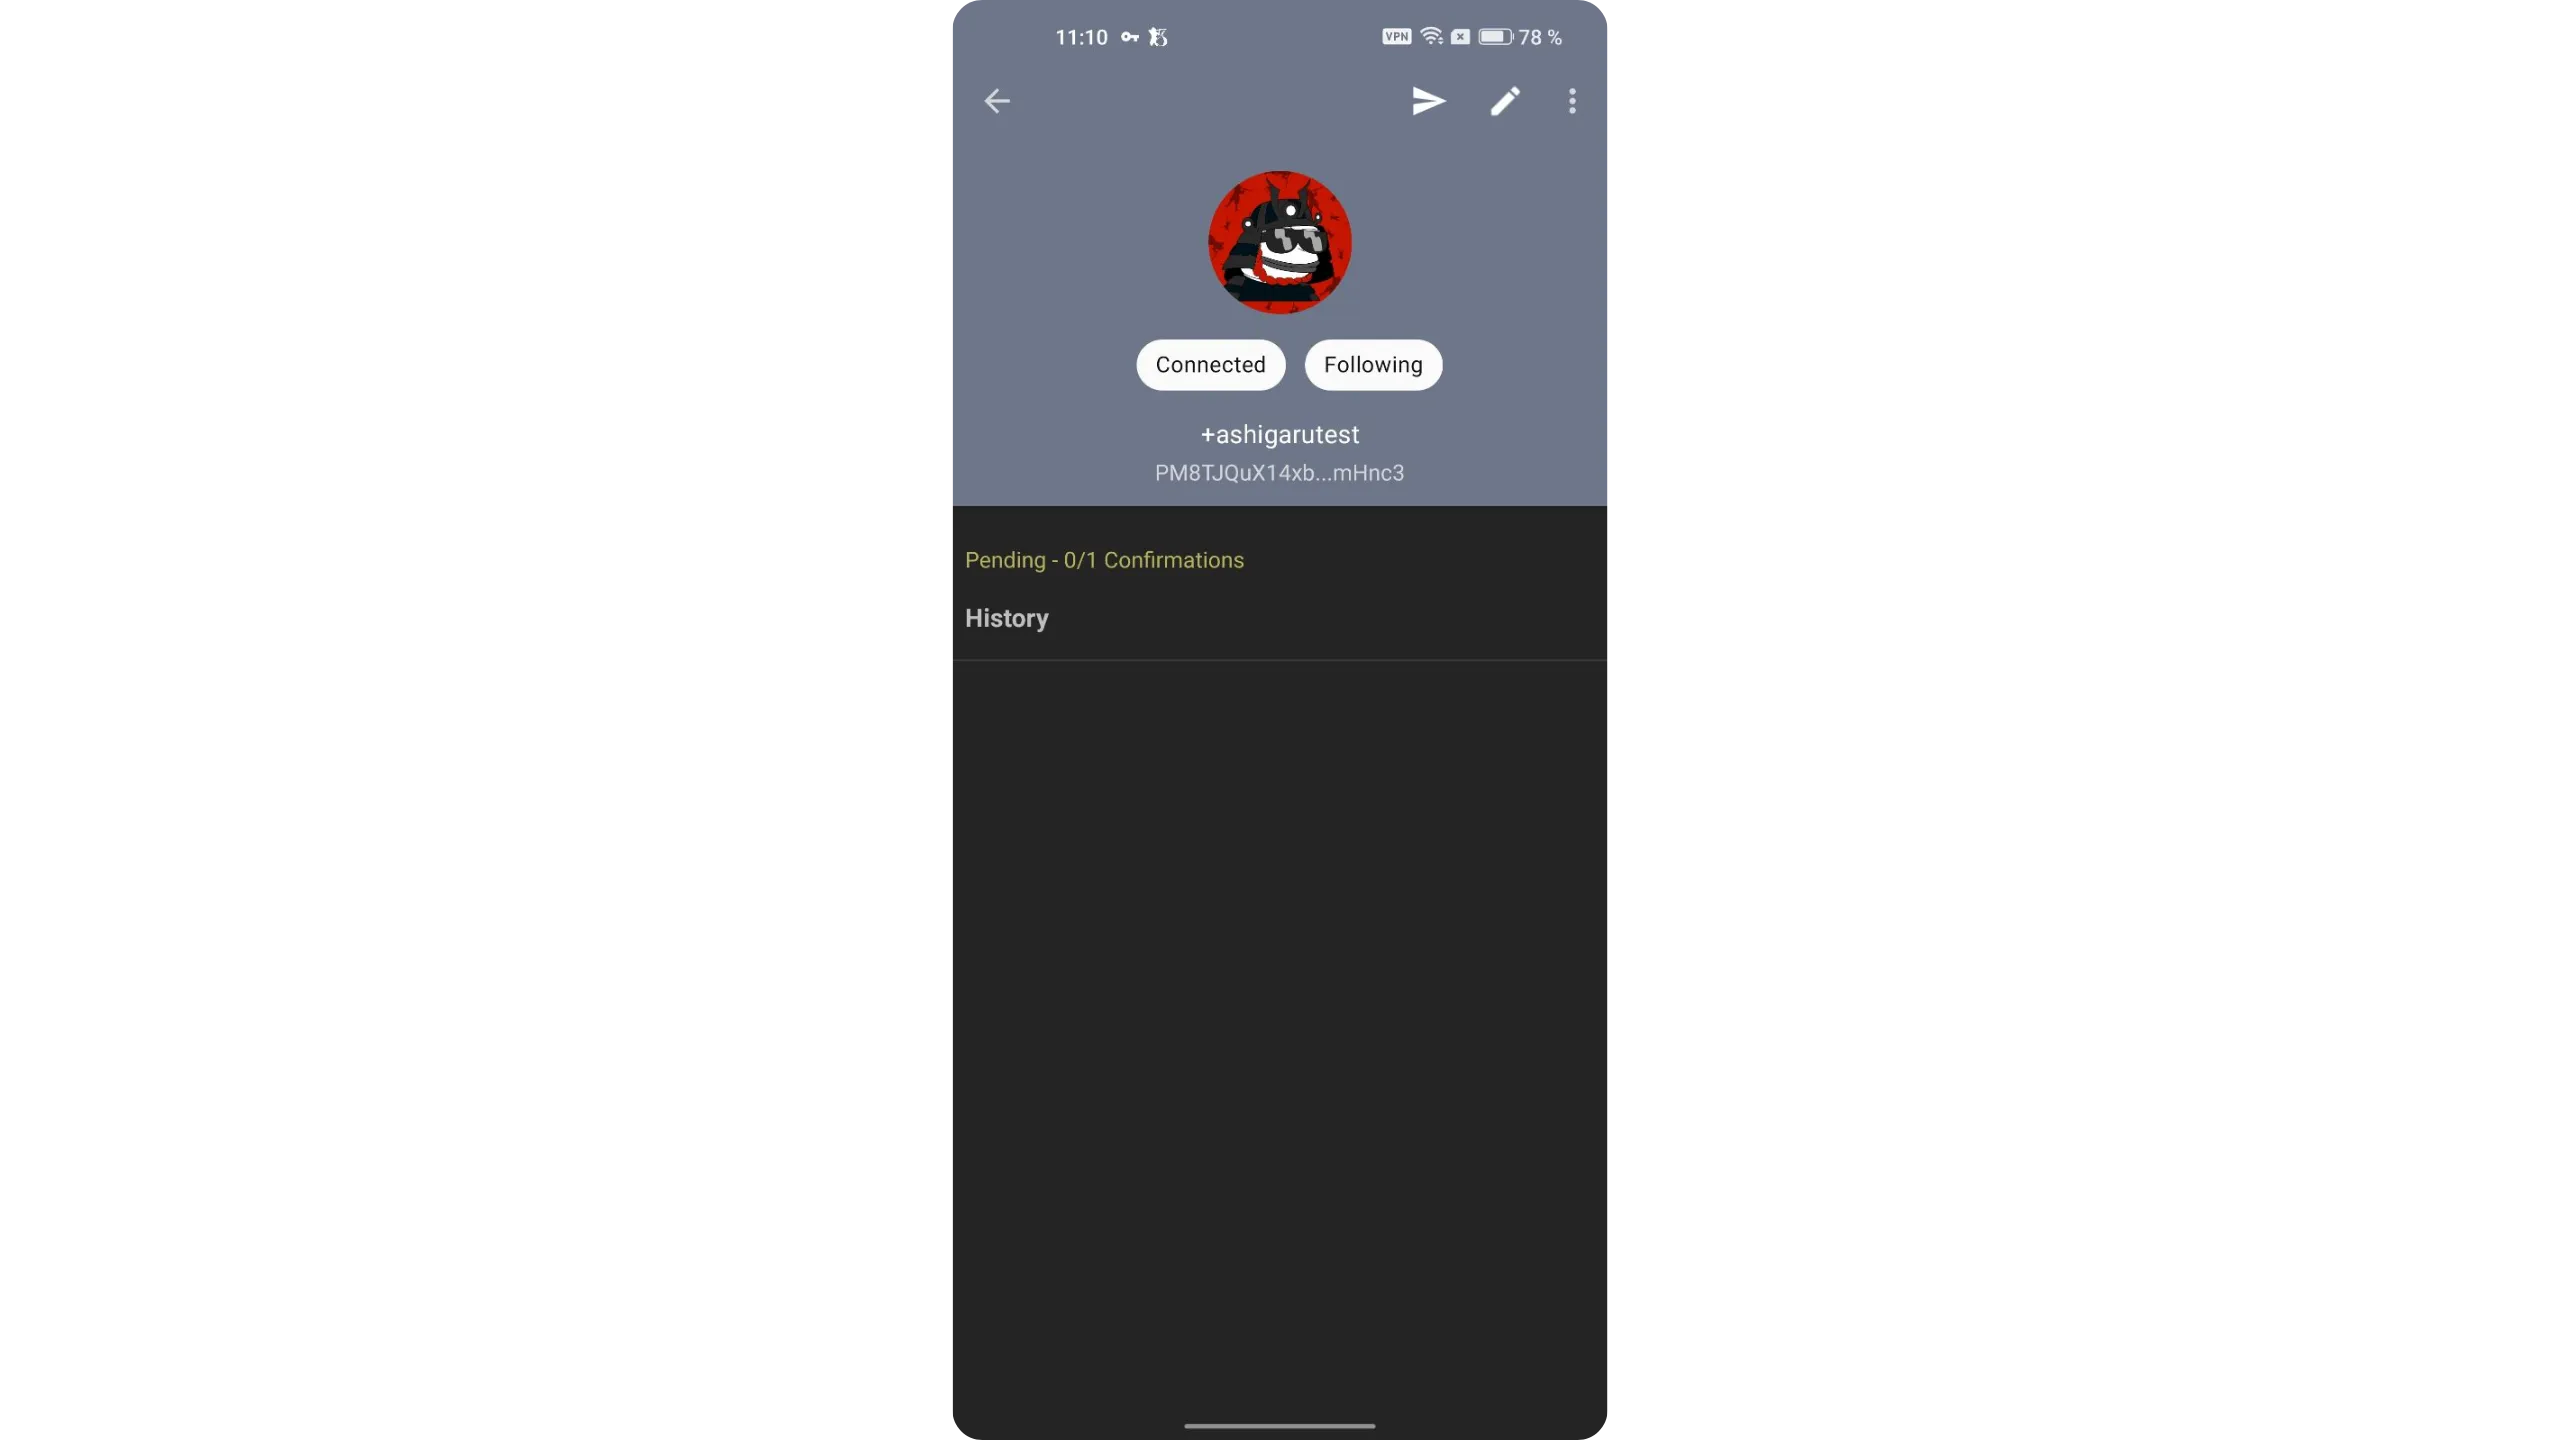
Tap “CONNECT” to establish the BIP47 (PayNym) communication channel.
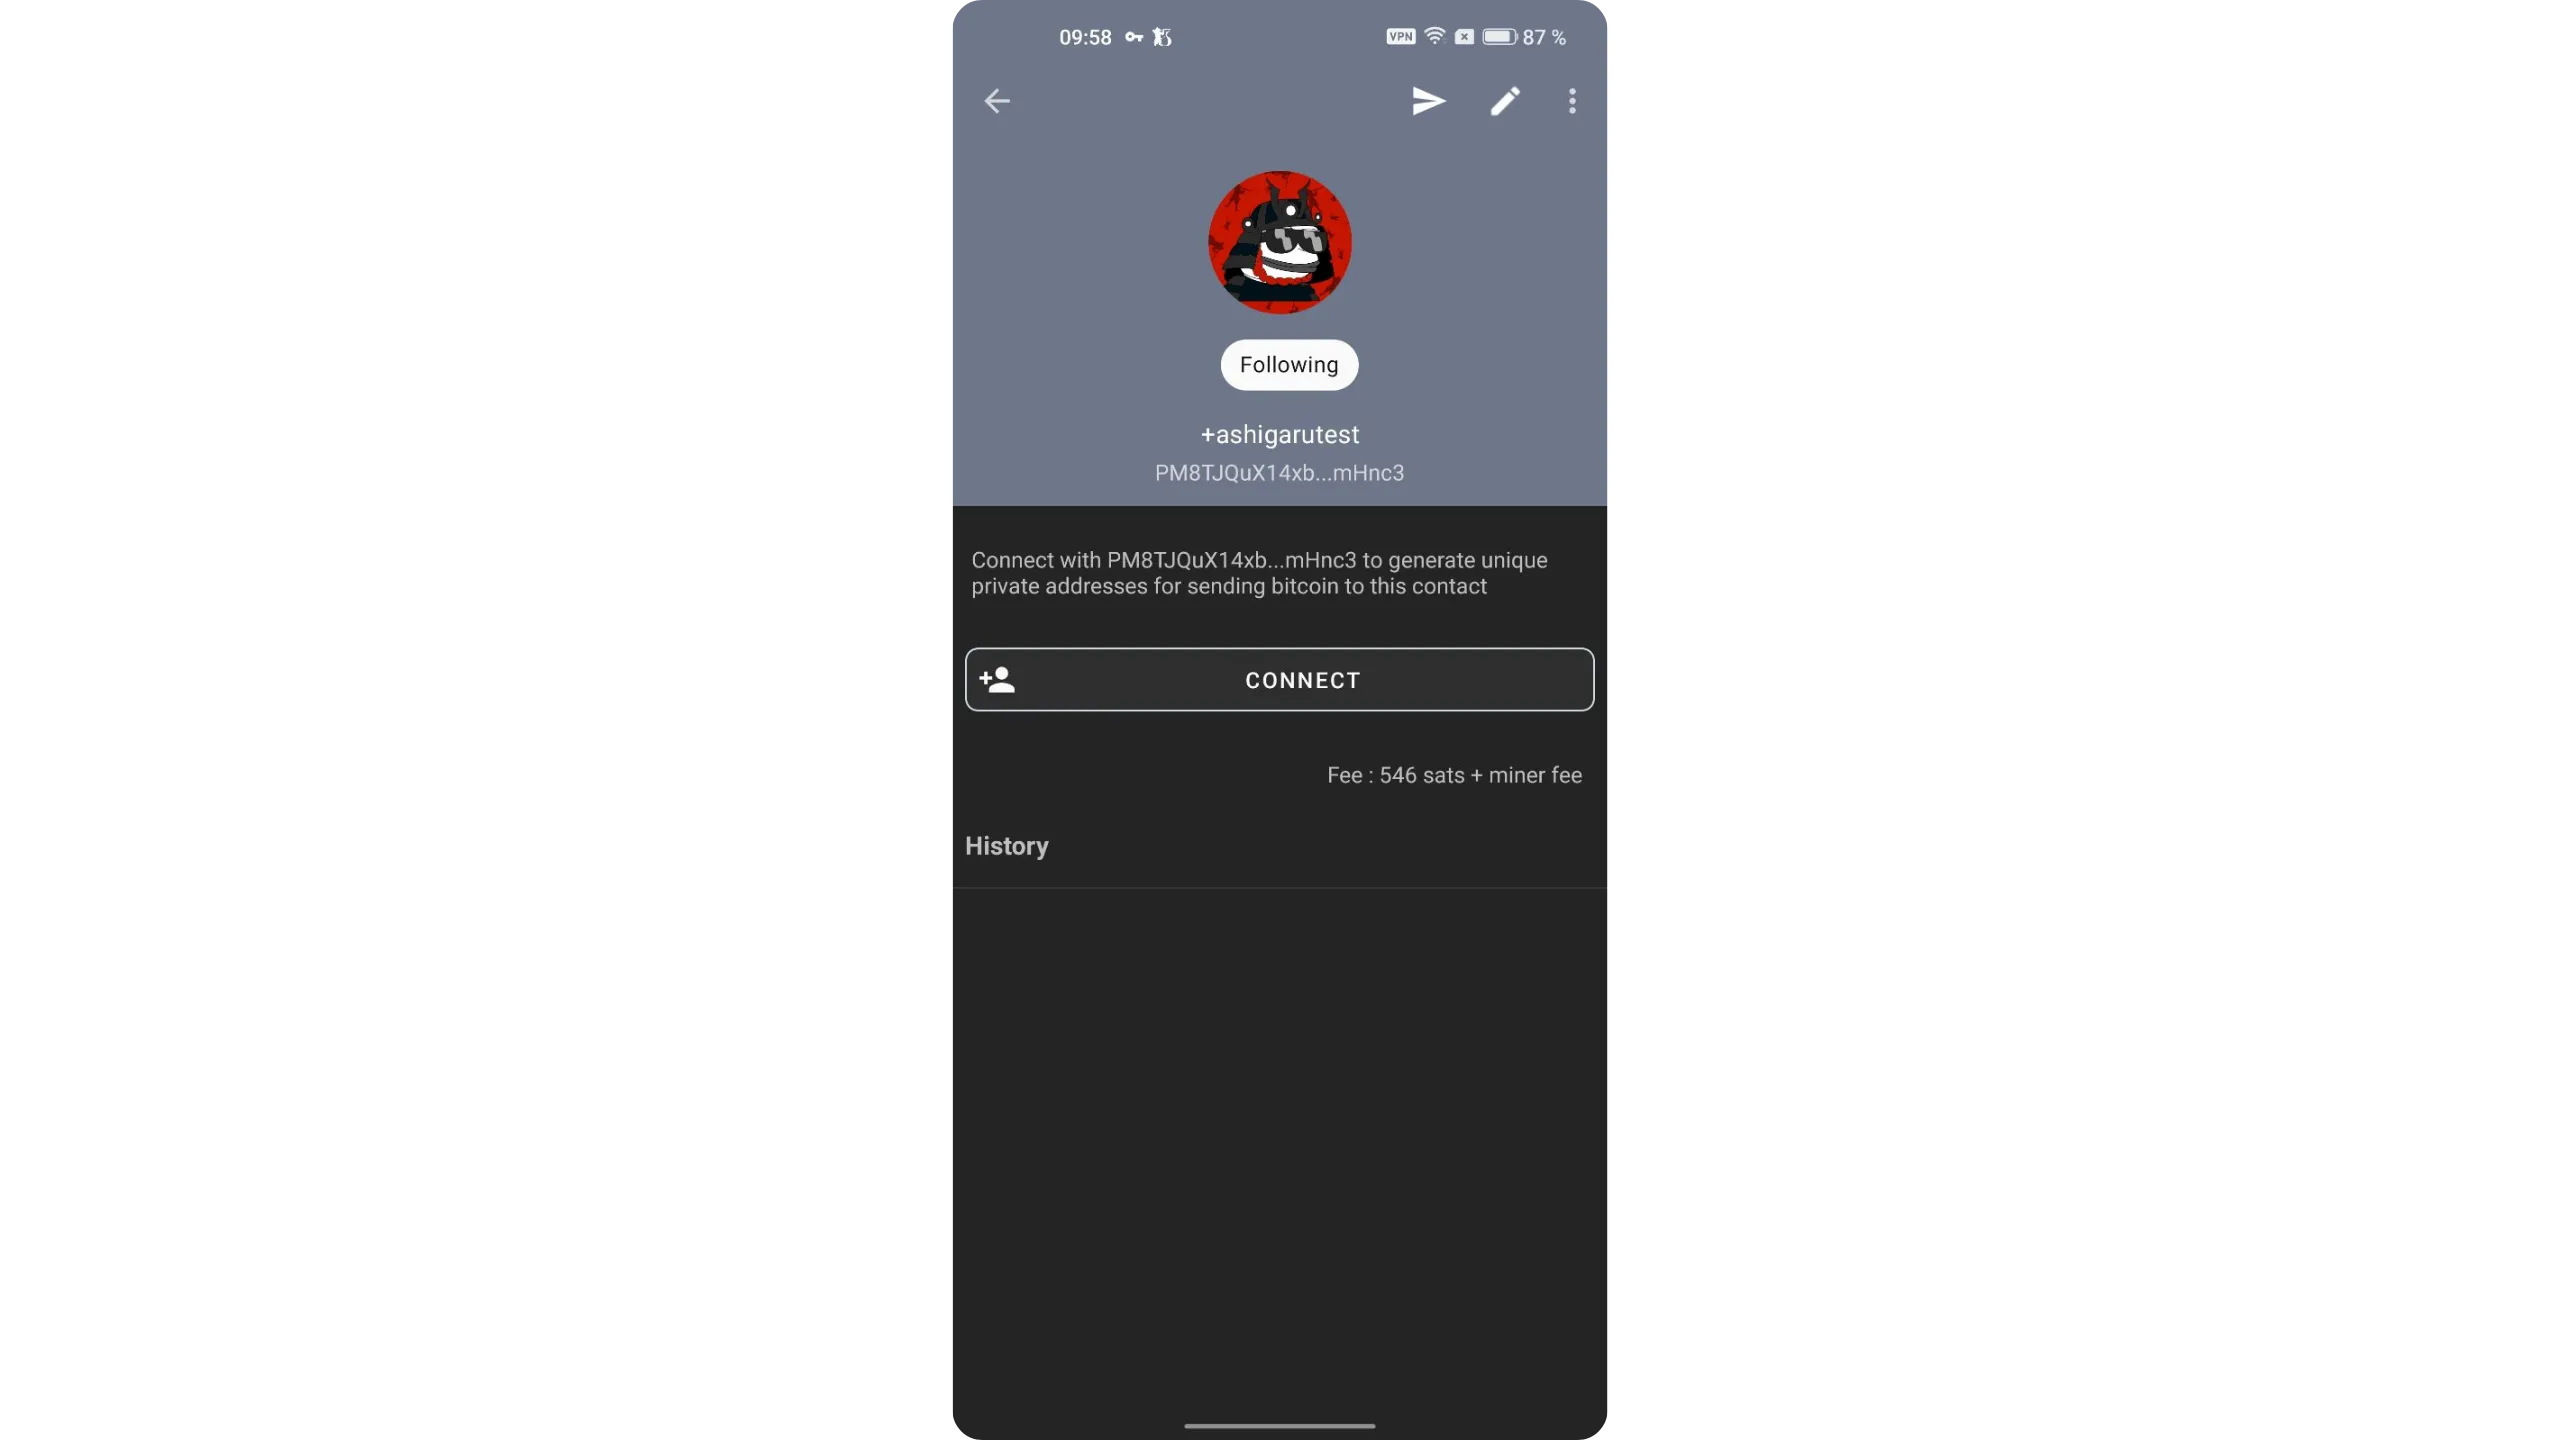
Once the notification transaction confirms, you can send donations to the project by tapping the small white arrow at the top‑right of the interface.
You now know how to use Ashigaru’s core features. In the next guide, we explore advanced spending types and Whirlpool — the coinjoin implementation inherited from Samourai Wallet.