Ashigaru Terminal Setup Guide
How to Use Ashigaru on desktop to perform Whirlpool coinjoins

Ashigaru Terminal is Ashigaru’s adaptation of Sparrow Server that implements the Whirlpool coinjoin protocol. It continues the work started by Samourai Wallet, especially around Whirlpool GUI, keeping the core principles of self‑custody and privacy preservation.
This software is a fork of Sparrow Server, modified and optimized for full integration with the Whirlpool ecosystem — the ZeroLink coinjoin protocol originally developed by the Samourai team.
Ashigaru Terminal runs in a minimalist TUI interface and can be deployed on a personal computer or a dedicated server. It lets you interact directly with Whirlpool to initiate Tx0 transactions, manage the Deposit, Premix, Postmix, and Badbank accounts, and perform automatic remixing to strengthen the privacy of your coins.
In short, Ashigaru Terminal is particularly useful if you want to perform coinjoins via Whirlpool.
In this first tutorial, we’ll handle installation and the basics of Ashigaru Terminal. A second, more advanced tutorial will then cover performing coinjoins in practice.
Proper coinjoins improve privacy by breaking deterministic links between inputs and outputs.
1. Install Ashigaru Terminal
To install Ashigaru Terminal, you’ll need Tor Browser because binaries are distributed only over the Tor network. If you haven’t already, install Tor Browser on your machine.
1.1. Download Ashigaru Terminal
From Tor Browser, go to the releases page of the Git repository and download the latest version for your operating system:
Onion link - http://ashicodepbnpvslzsl2bz7l2pwrjvajgumgac423pp3y2deprbnzz7id.onion/Ashigaru/Ashigaru-Terminal/releases/
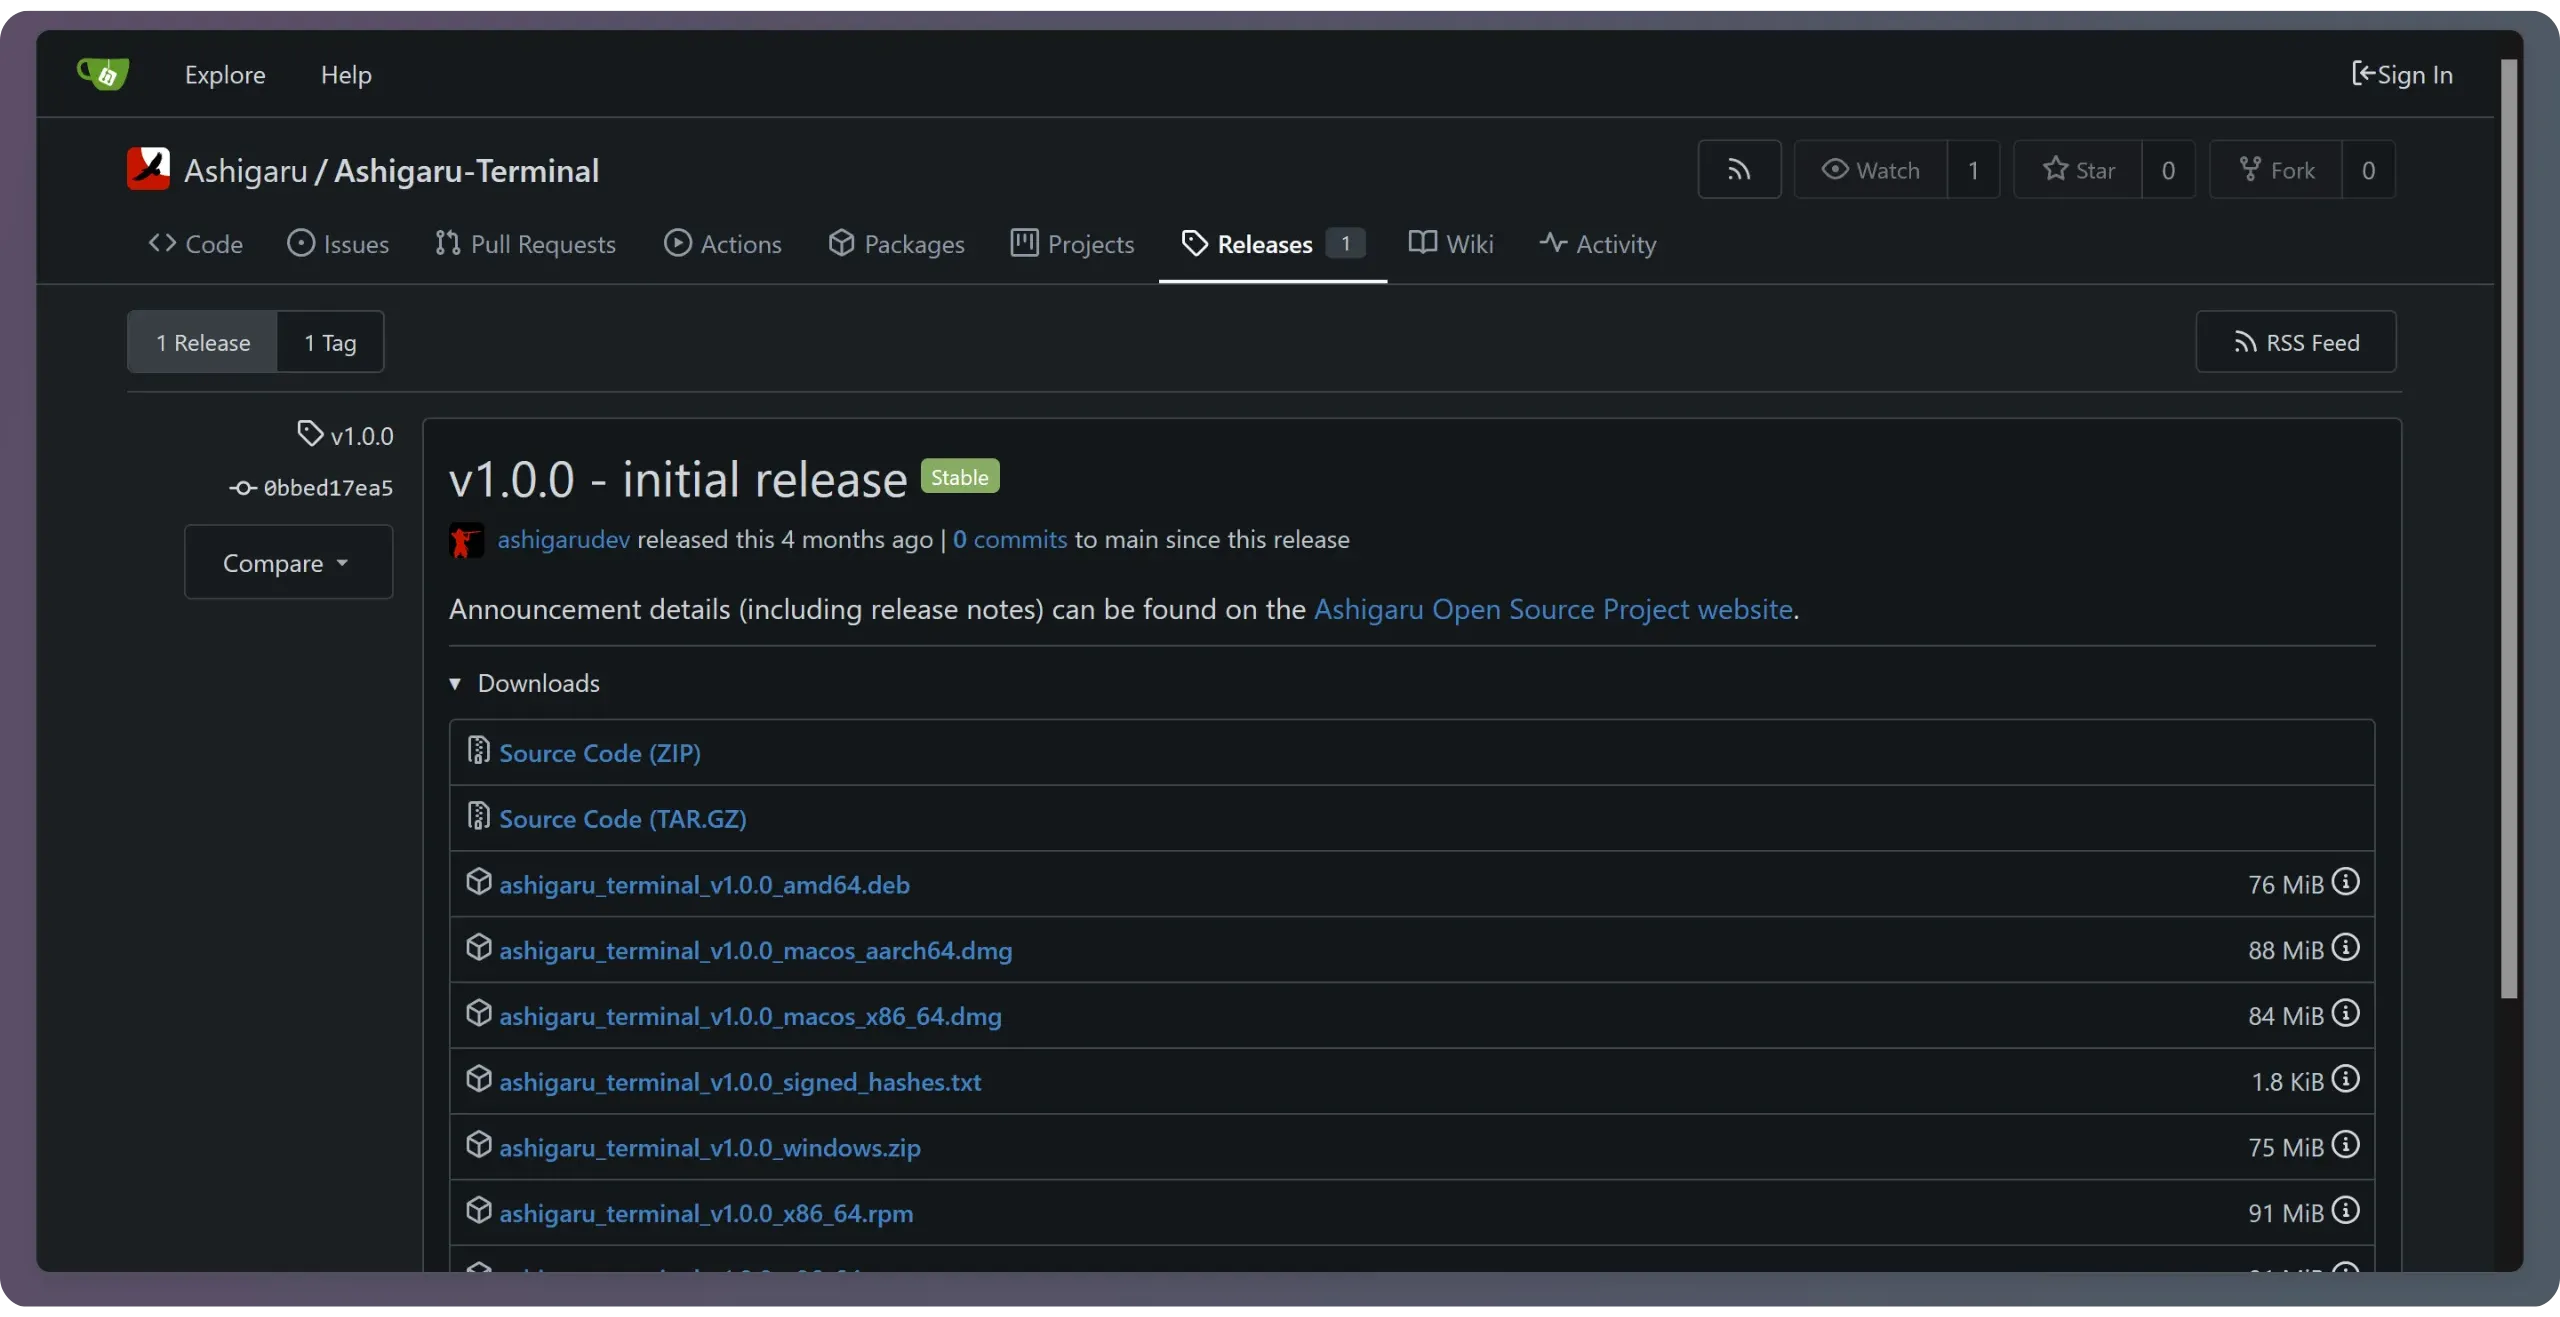
Download the two files that match your operating system:
- The binary (for example:
ashigaru_terminal_v1.0.0_amd64.debfor Debian/Ubuntu,.dmgfor macOS, or.zipfor Windows) - The signed hashes file:
ashigaru_terminal_v1.0.0_signed_hashes.txt
Always download both the binary and the signed hashes file — you’ll need the latter to verify authenticity and integrity before running anything.
1.2. Verify Ashigaru Terminal
Before running the software, verify its authenticity and integrity. This step helps you avoid installing a tampered version that could compromise your bitcoin or infect your machine.
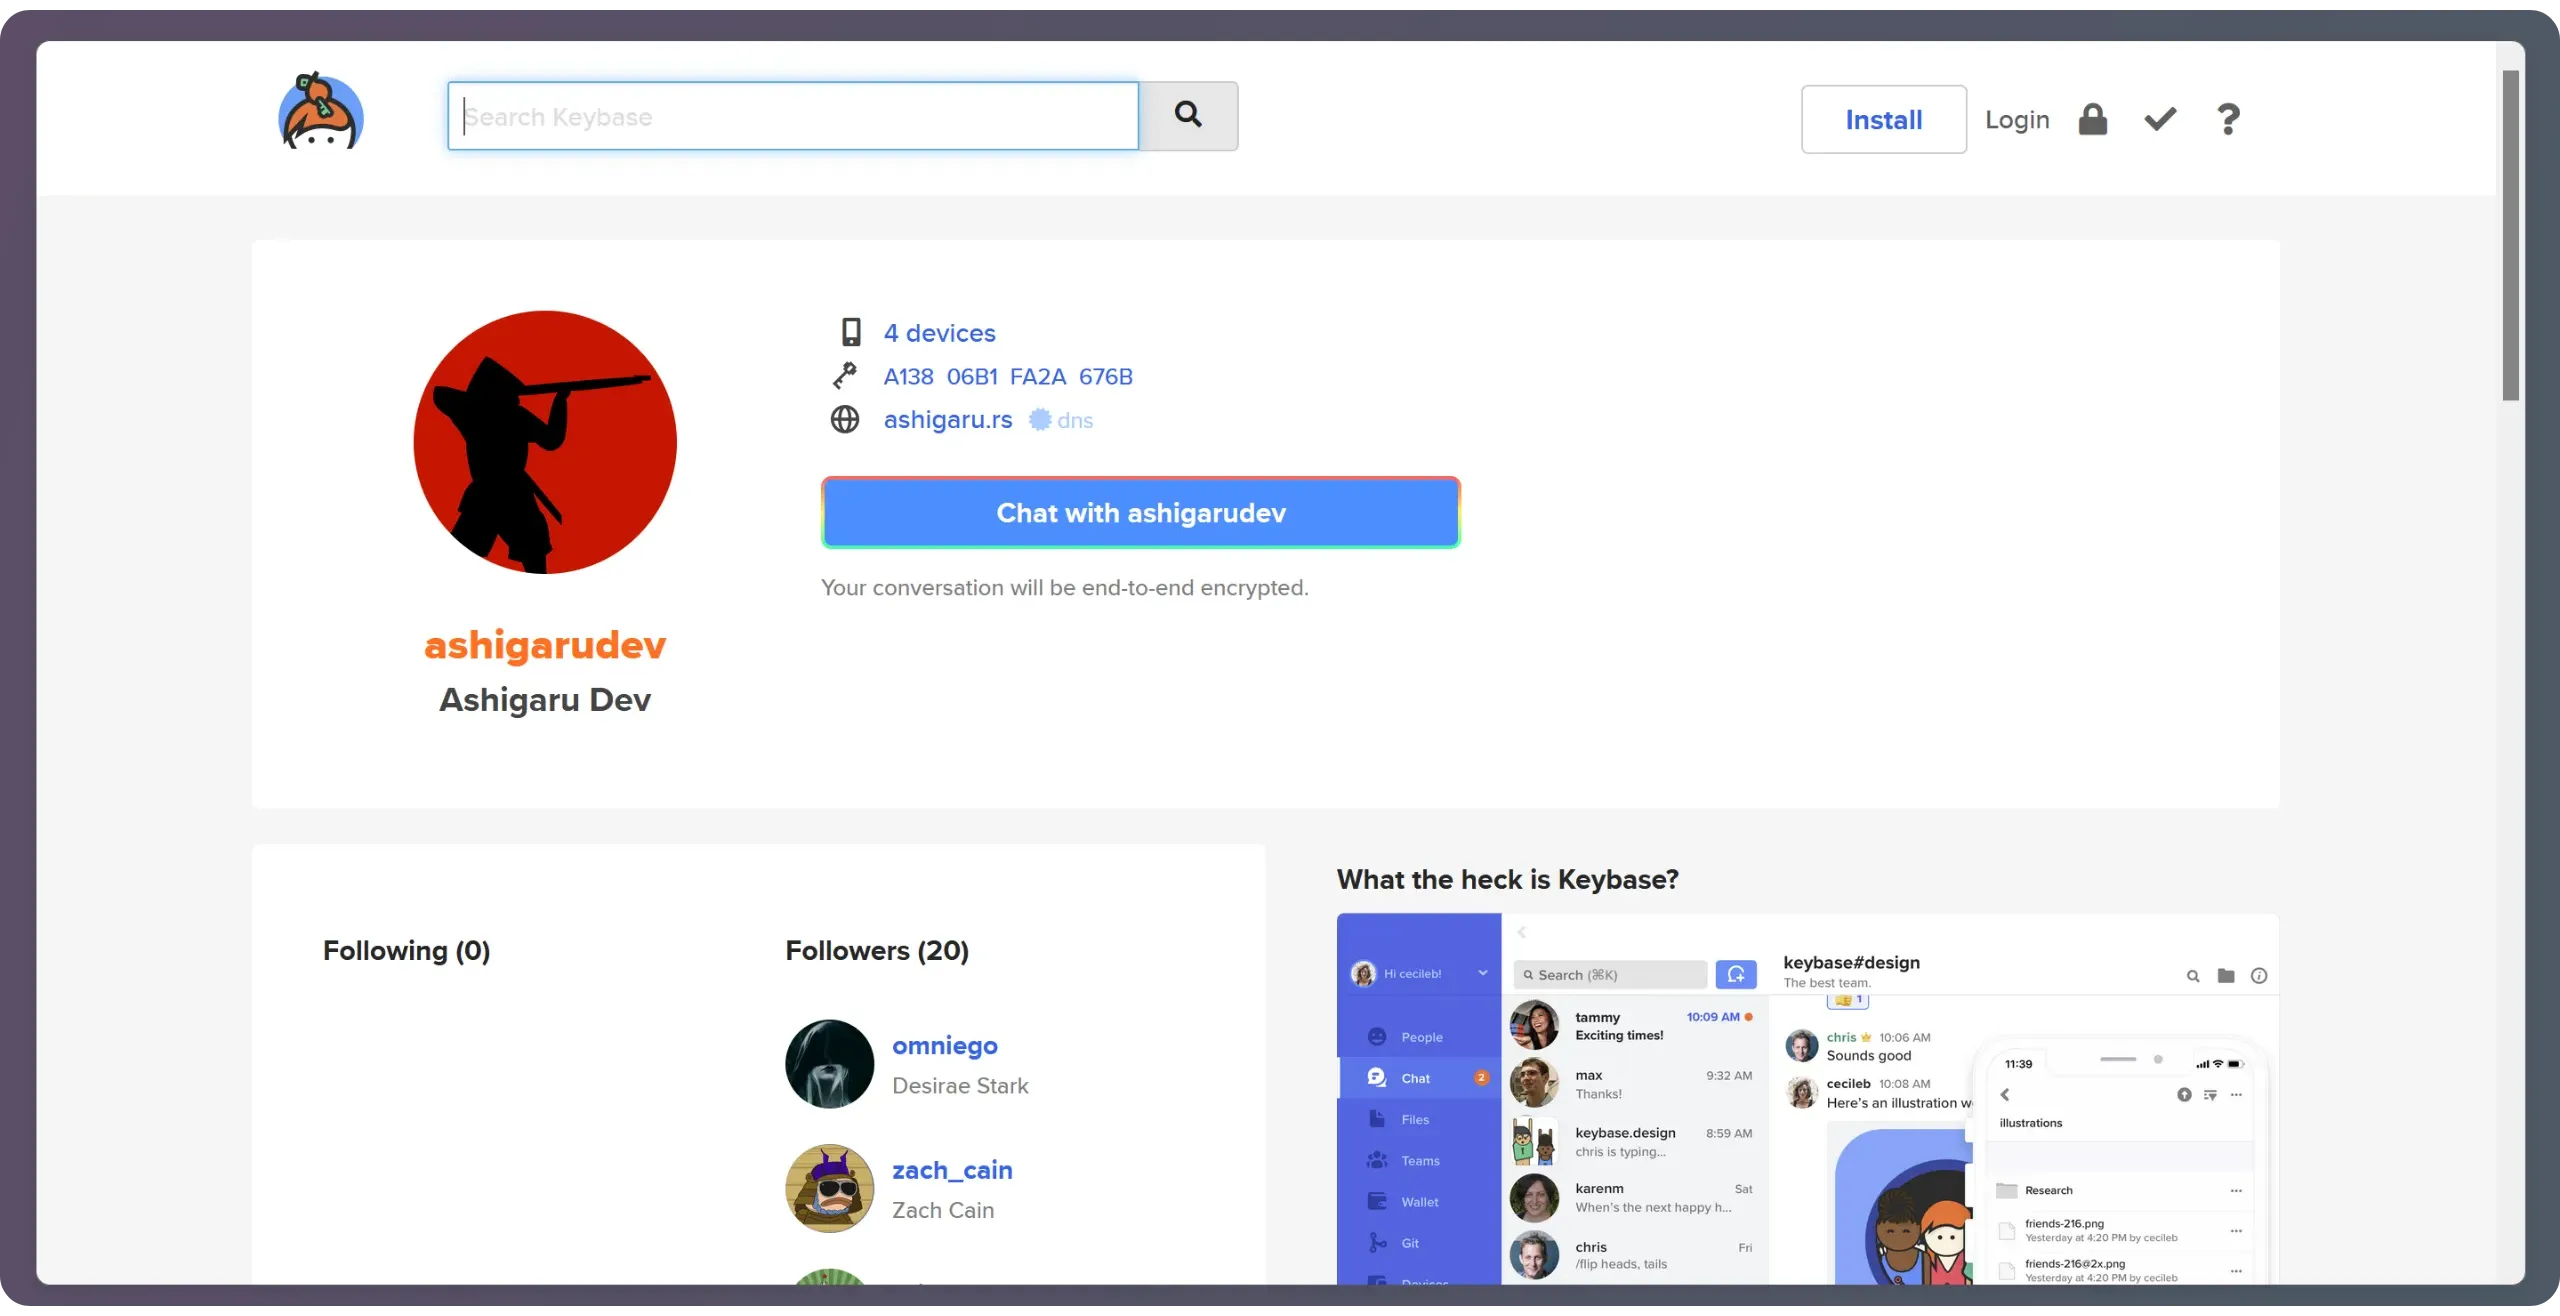
Open a new tab and go to the Keybase verification tool. Paste the content of the.txt signed hashes file into the field, then click “Verify.”
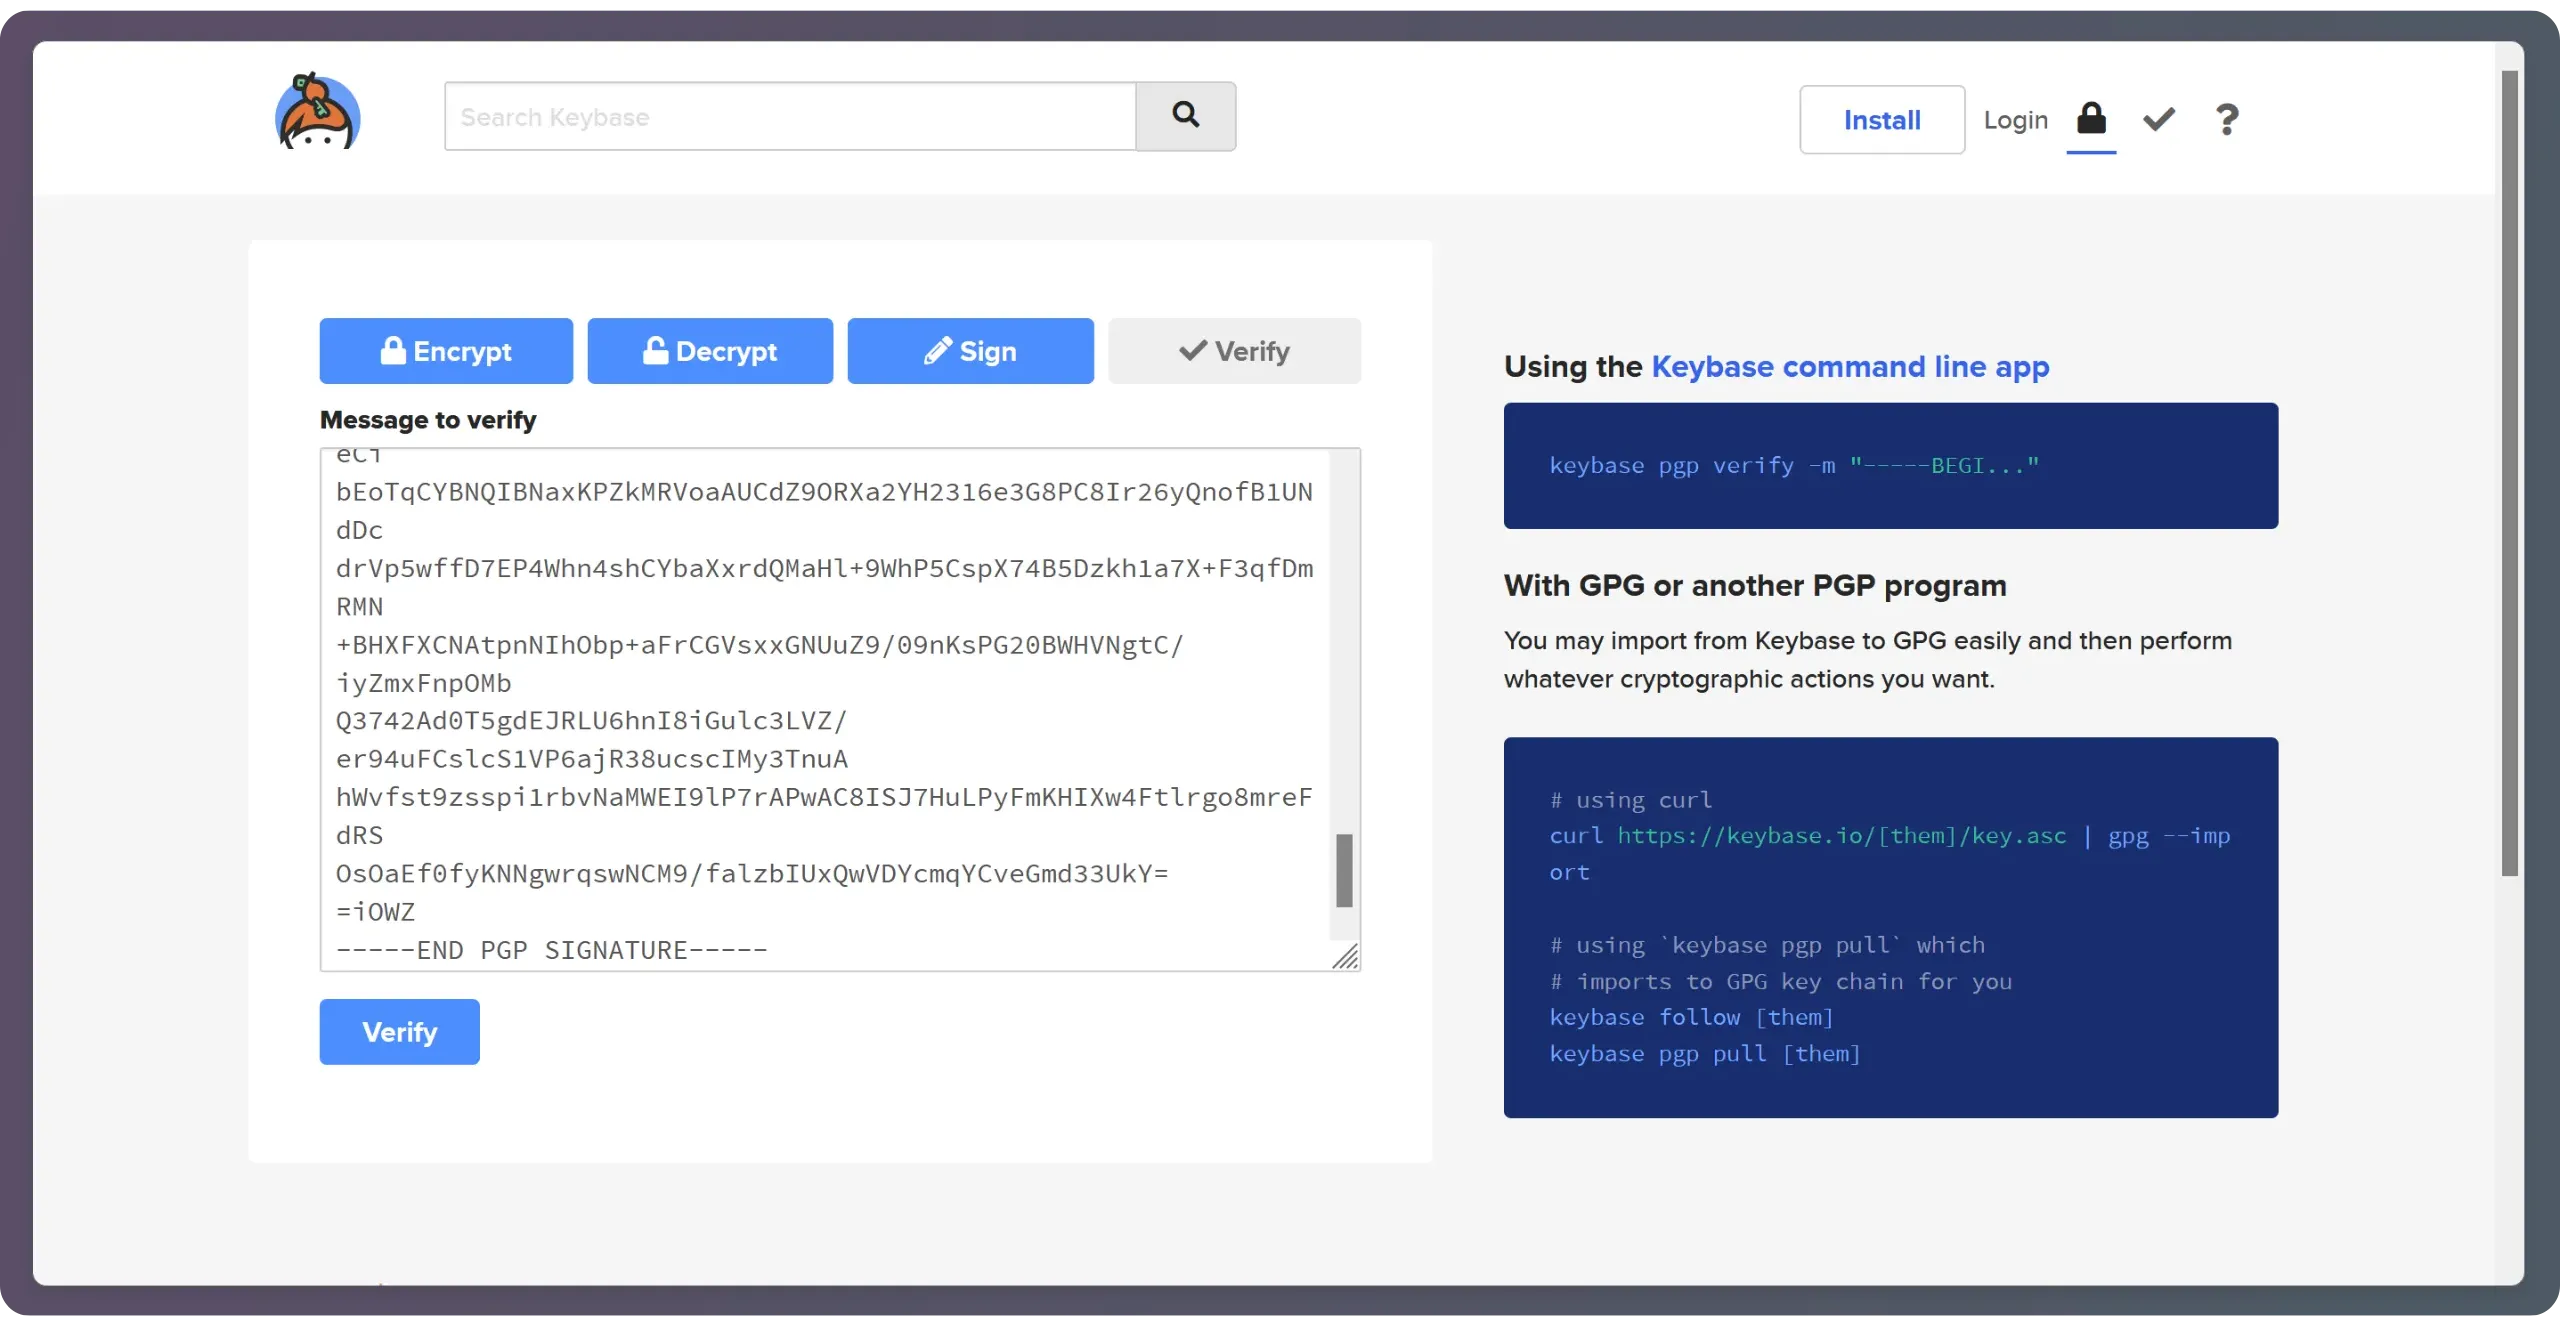
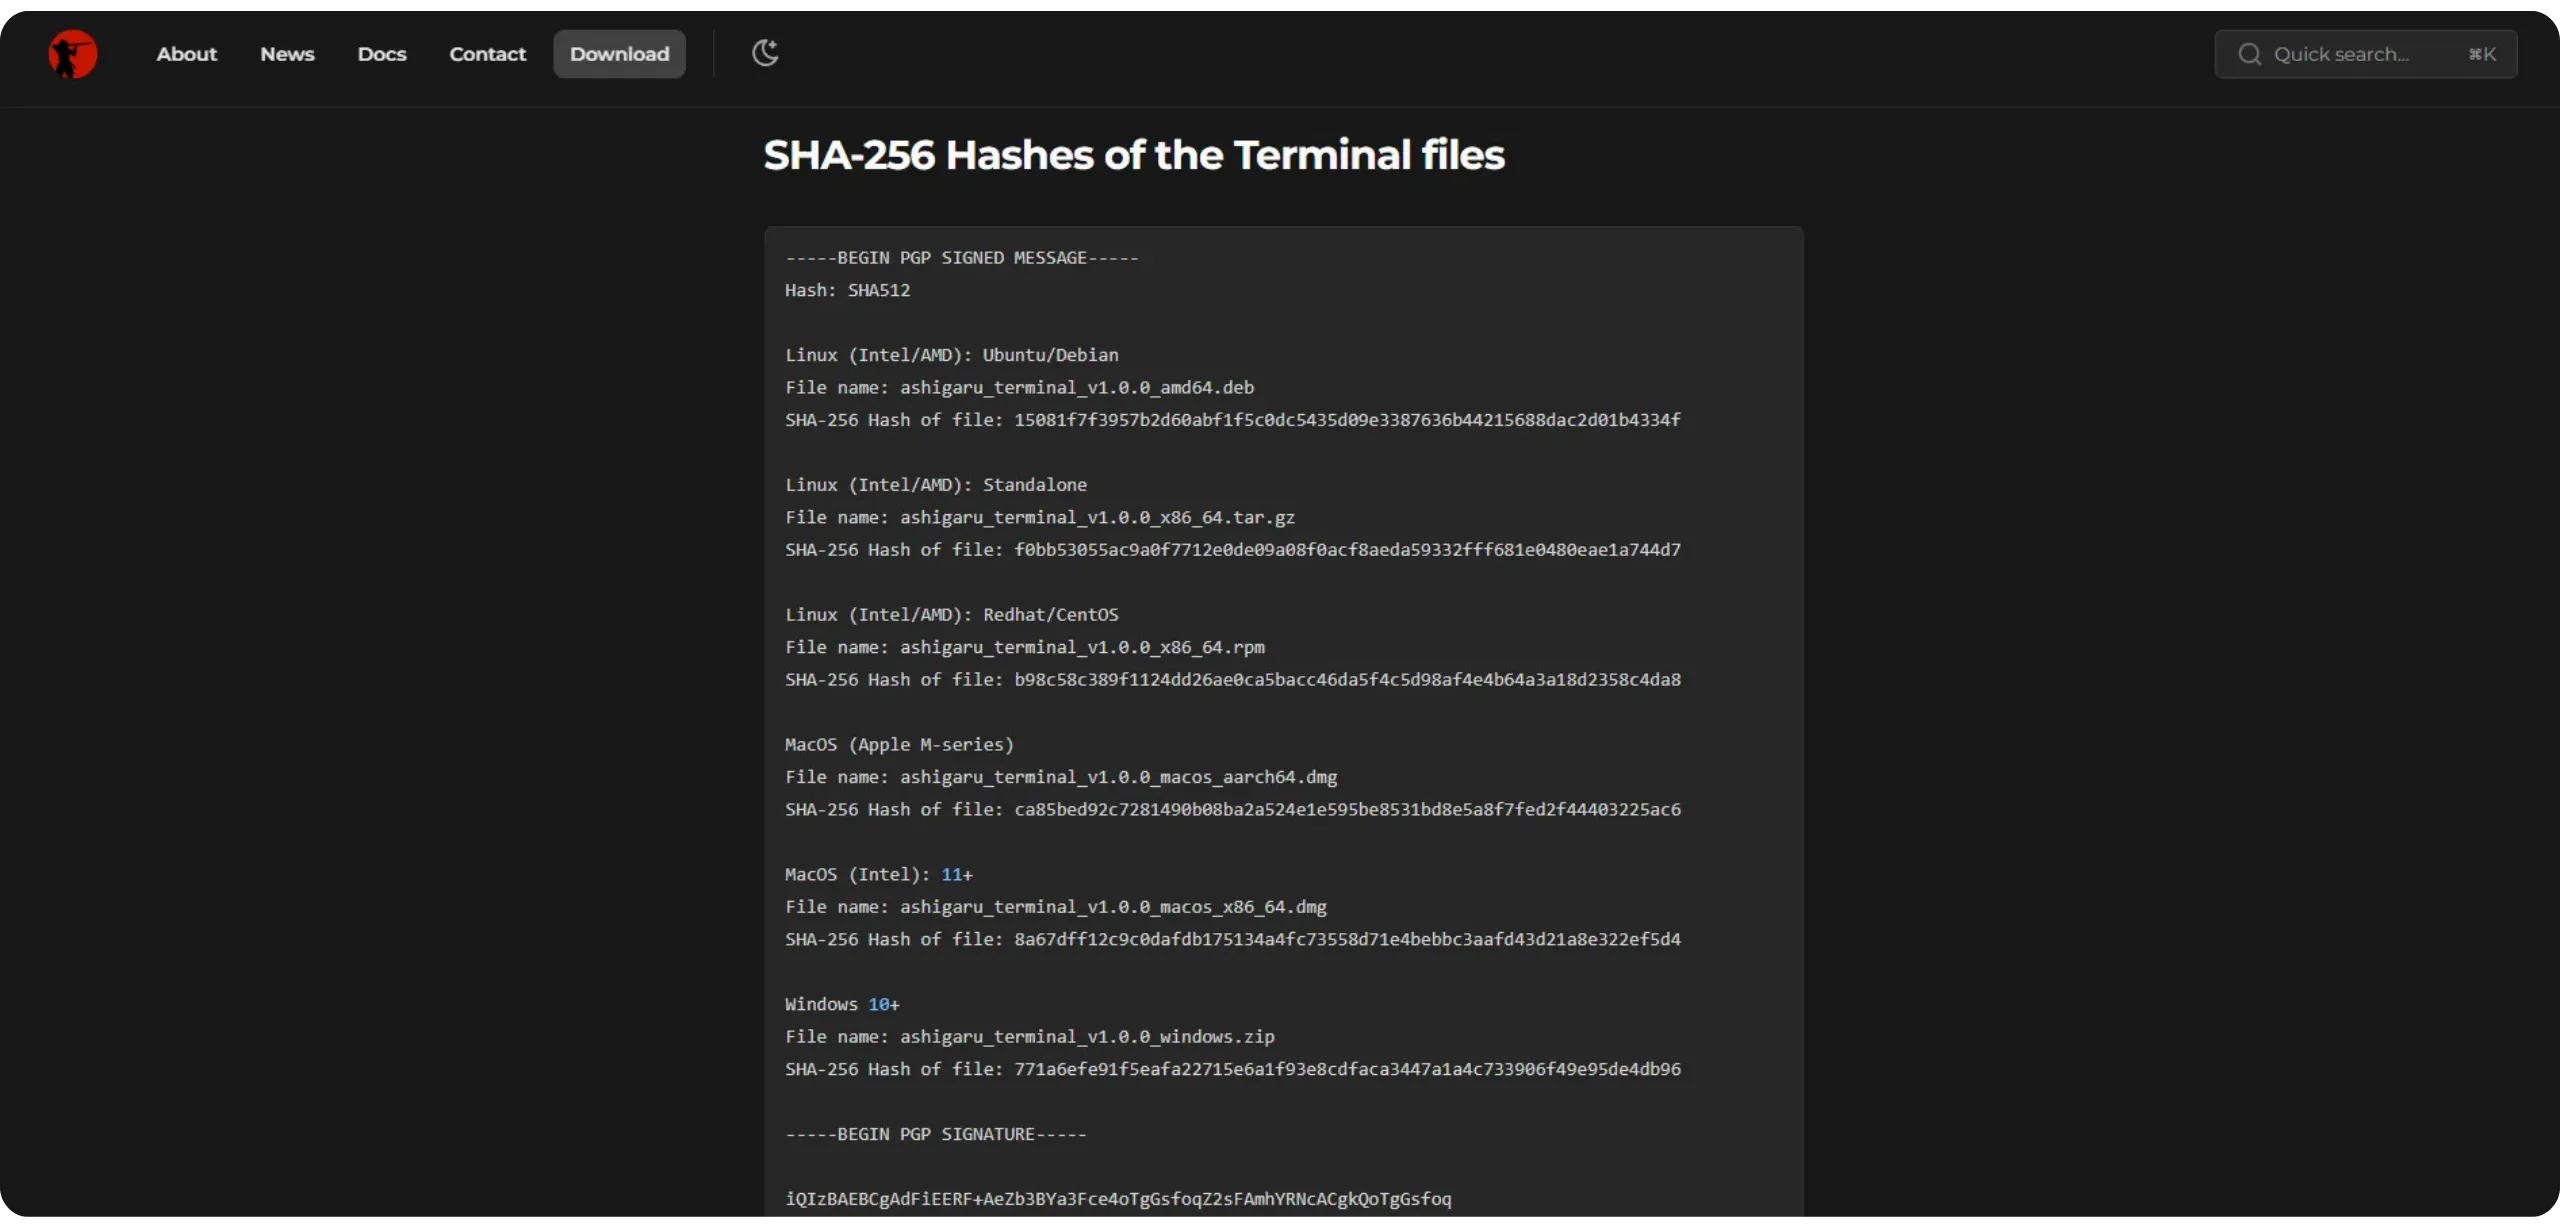
To diversify verification sources, you can also compare the message with what’s on the clearnet site ashigaru.rs under the/download section.
If the signature is valid, Keybase will confirm the file was signed by the Ashigaru developers.
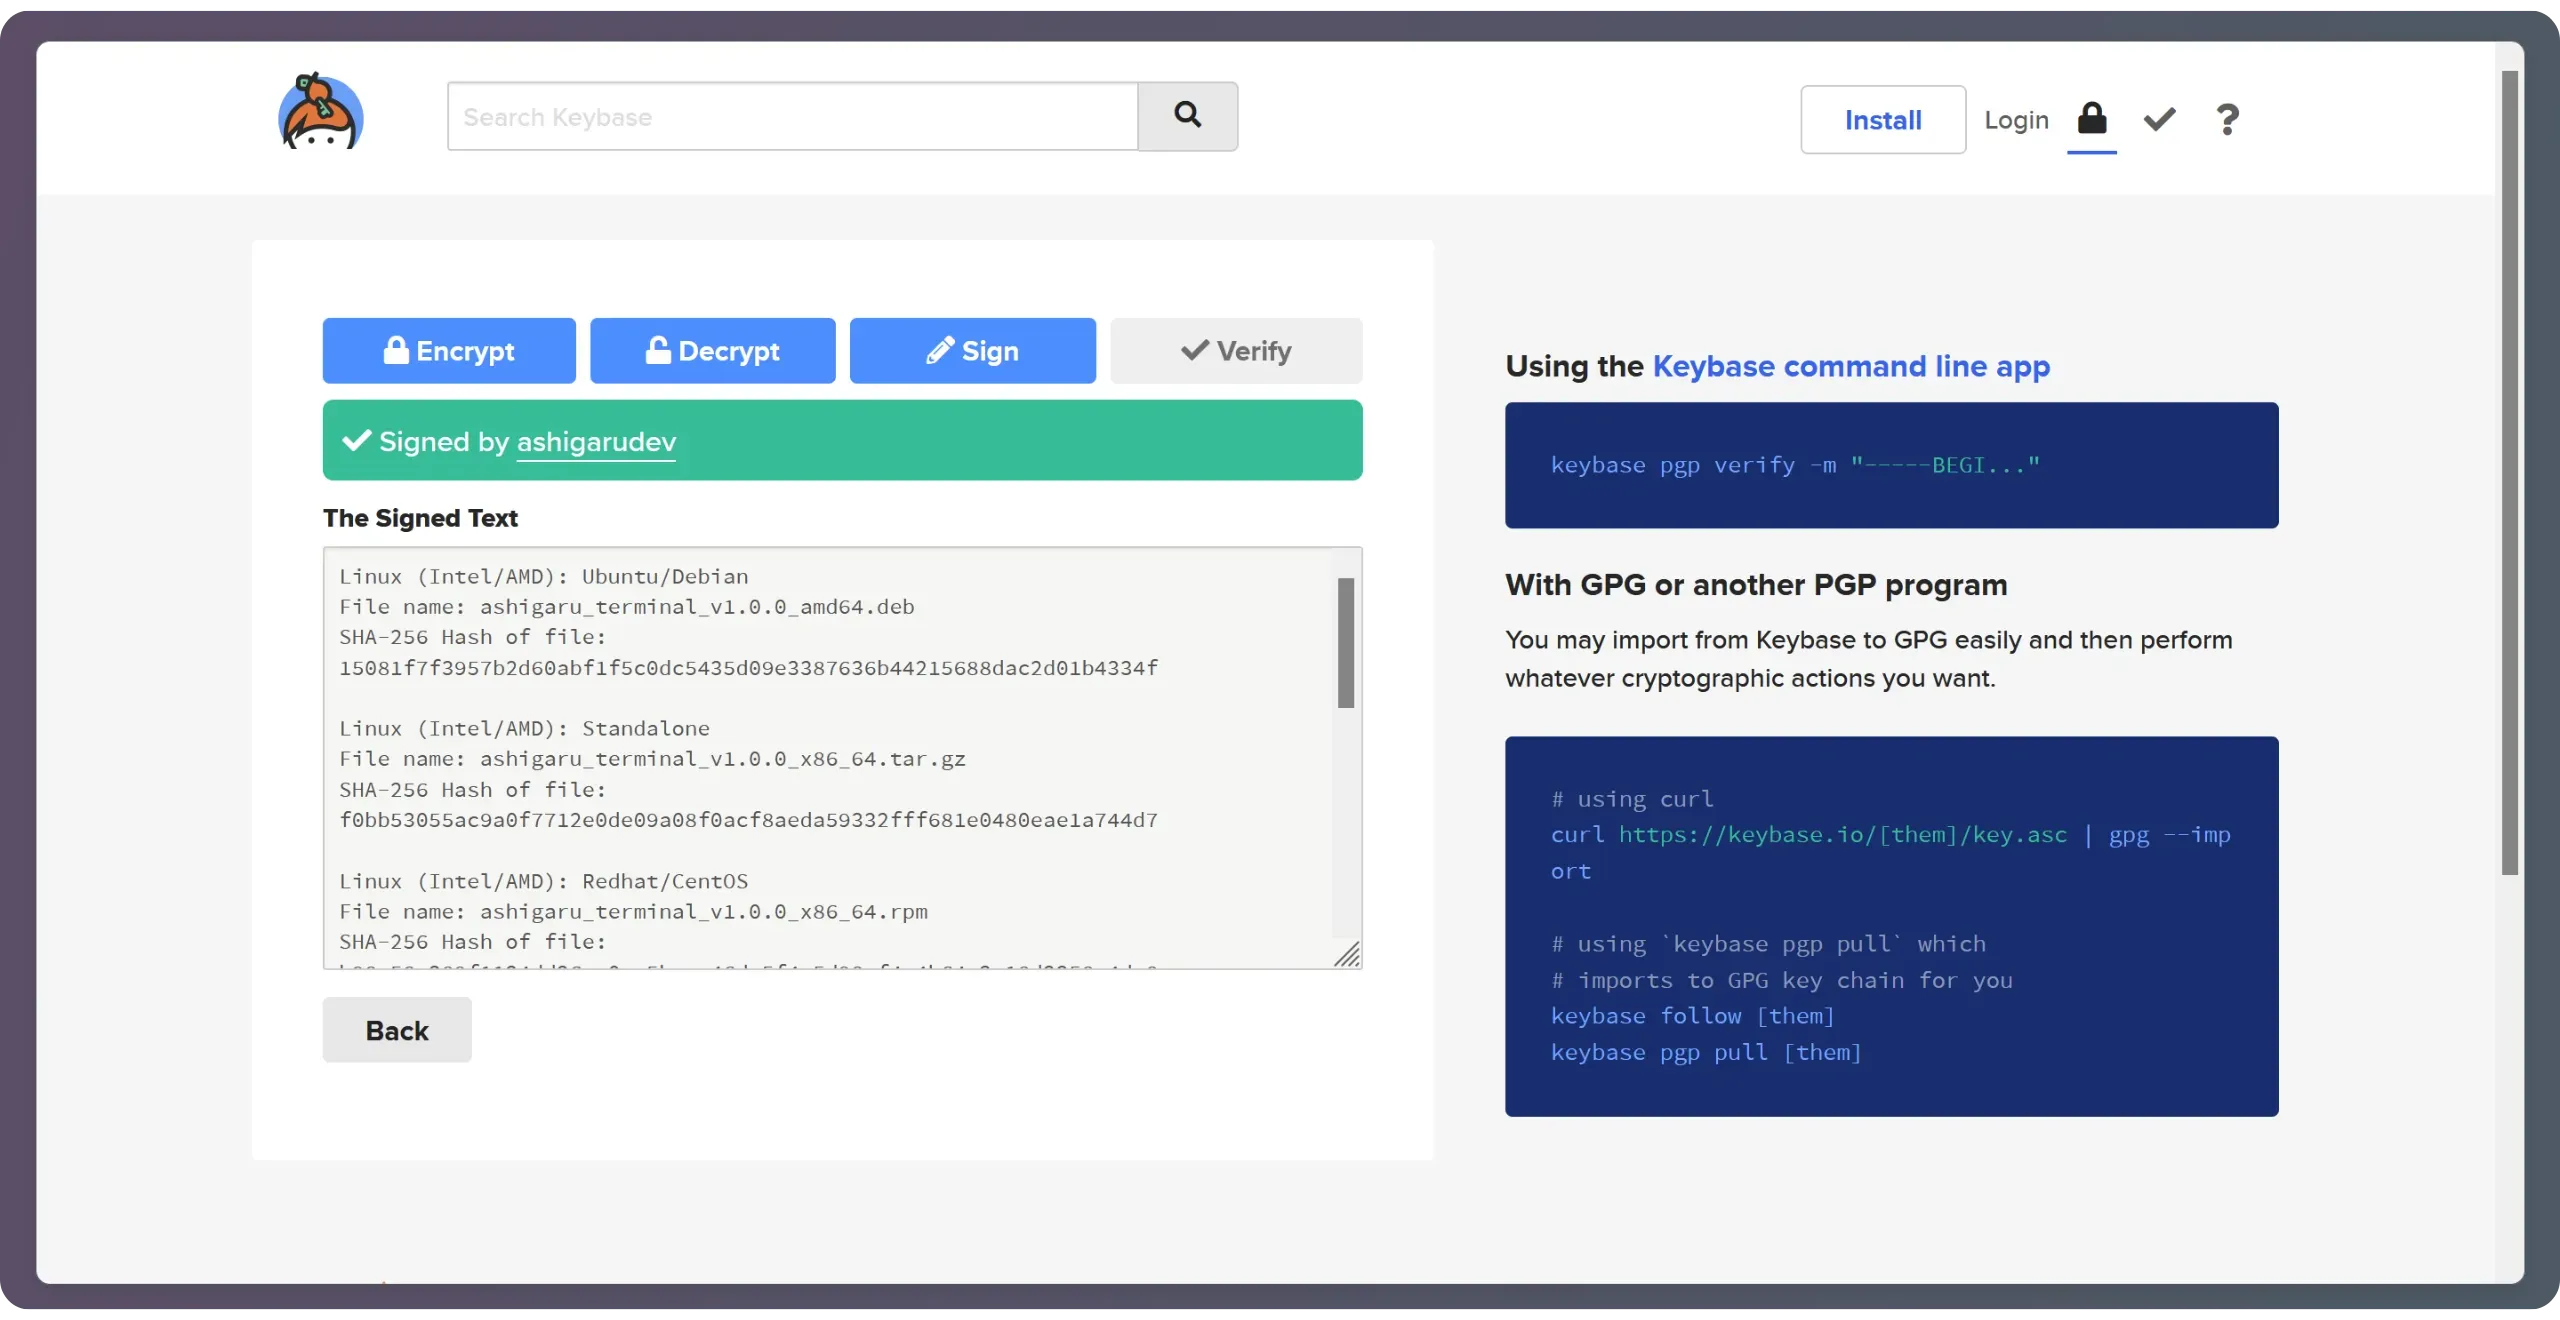
You can also click the “ashigarudev” profile shown by Keybase and ensure the key fingerprint matches exactly: A138 06B1 FA2A 676B.
If the Keybase verification fails, do not install the software. Start the process over or ask the community for help before proceeding.
Keybase gives you the authenticated hash for the app. Now verify the hash of the.deb,.zip, or.dmg you downloaded matches the Keybase-verified value. Use HASH FILE ONLINE.
- Click “BROWSE…” and select the
.deb,.zip, or.dmgyou downloaded - Choose SHA‑256 as the hashing function
- Click “CALCULATE HASH” to generate your file’s hash
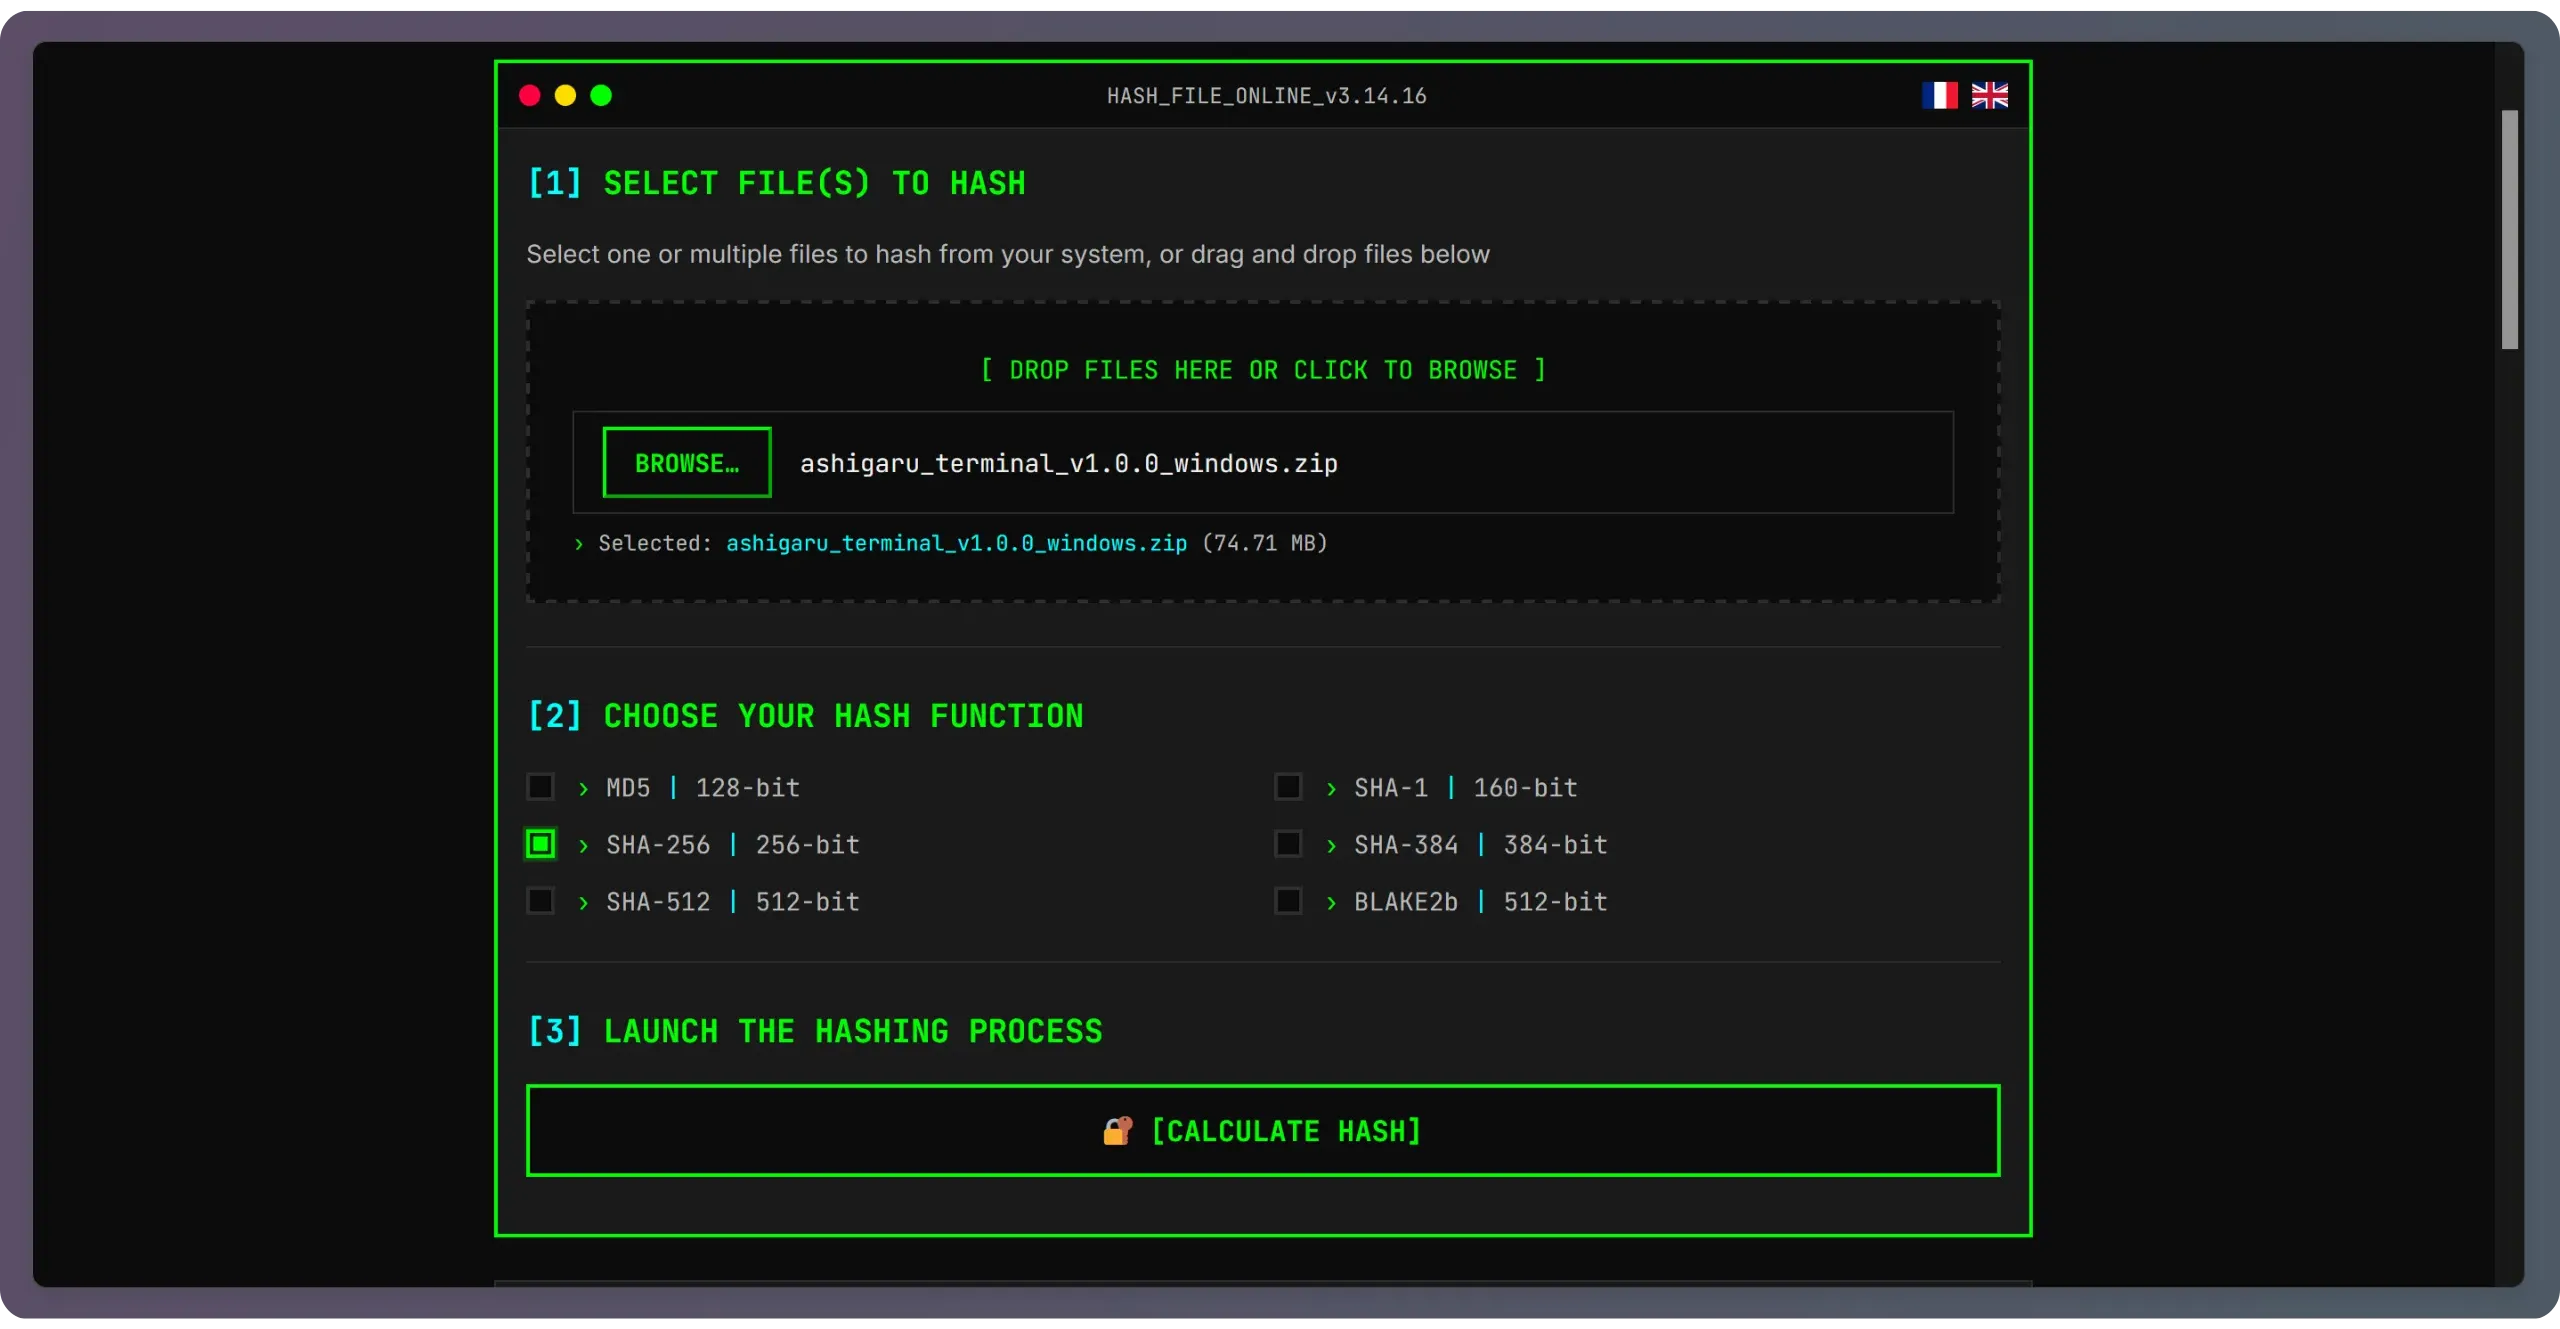
The site will display the software hash. Compare it to the one verified on Keybase. If both match perfectly, authenticity and integrity checks have succeeded. You can now install/run the software.

Never proceed if the signature or hash comparison fails — investigate the mismatch first.
1.3. Launch Ashigaru Terminal
- Debian / Ubuntu
To install:
1
2
cd ~/Downloads
sudo apt install ./ashigaru_terminal_v1.0.0_amd64.deb
Adjust the filename to match the version you downloaded.
Then verify the installation:
1
/opt/ashigaru-terminal/bin/Ashigaru-terminal --version
Prints the installed version to confirm the binary is available.
Launch the software:
1
/opt/ashigaru-terminal/bin/Ashigaru-terminal
Starts the TUI app in your terminal.
- Windows
Right‑click the.zip file you downloaded and verified, then select “Extract All…” to unpack it.
Once extraction is complete, double‑clickAshigaru-terminal.exe to launch the app.

On macOS, open the downloaded
.dmgand follow the standard app installation process. Gatekeeper may require you to allow running apps from this developer.
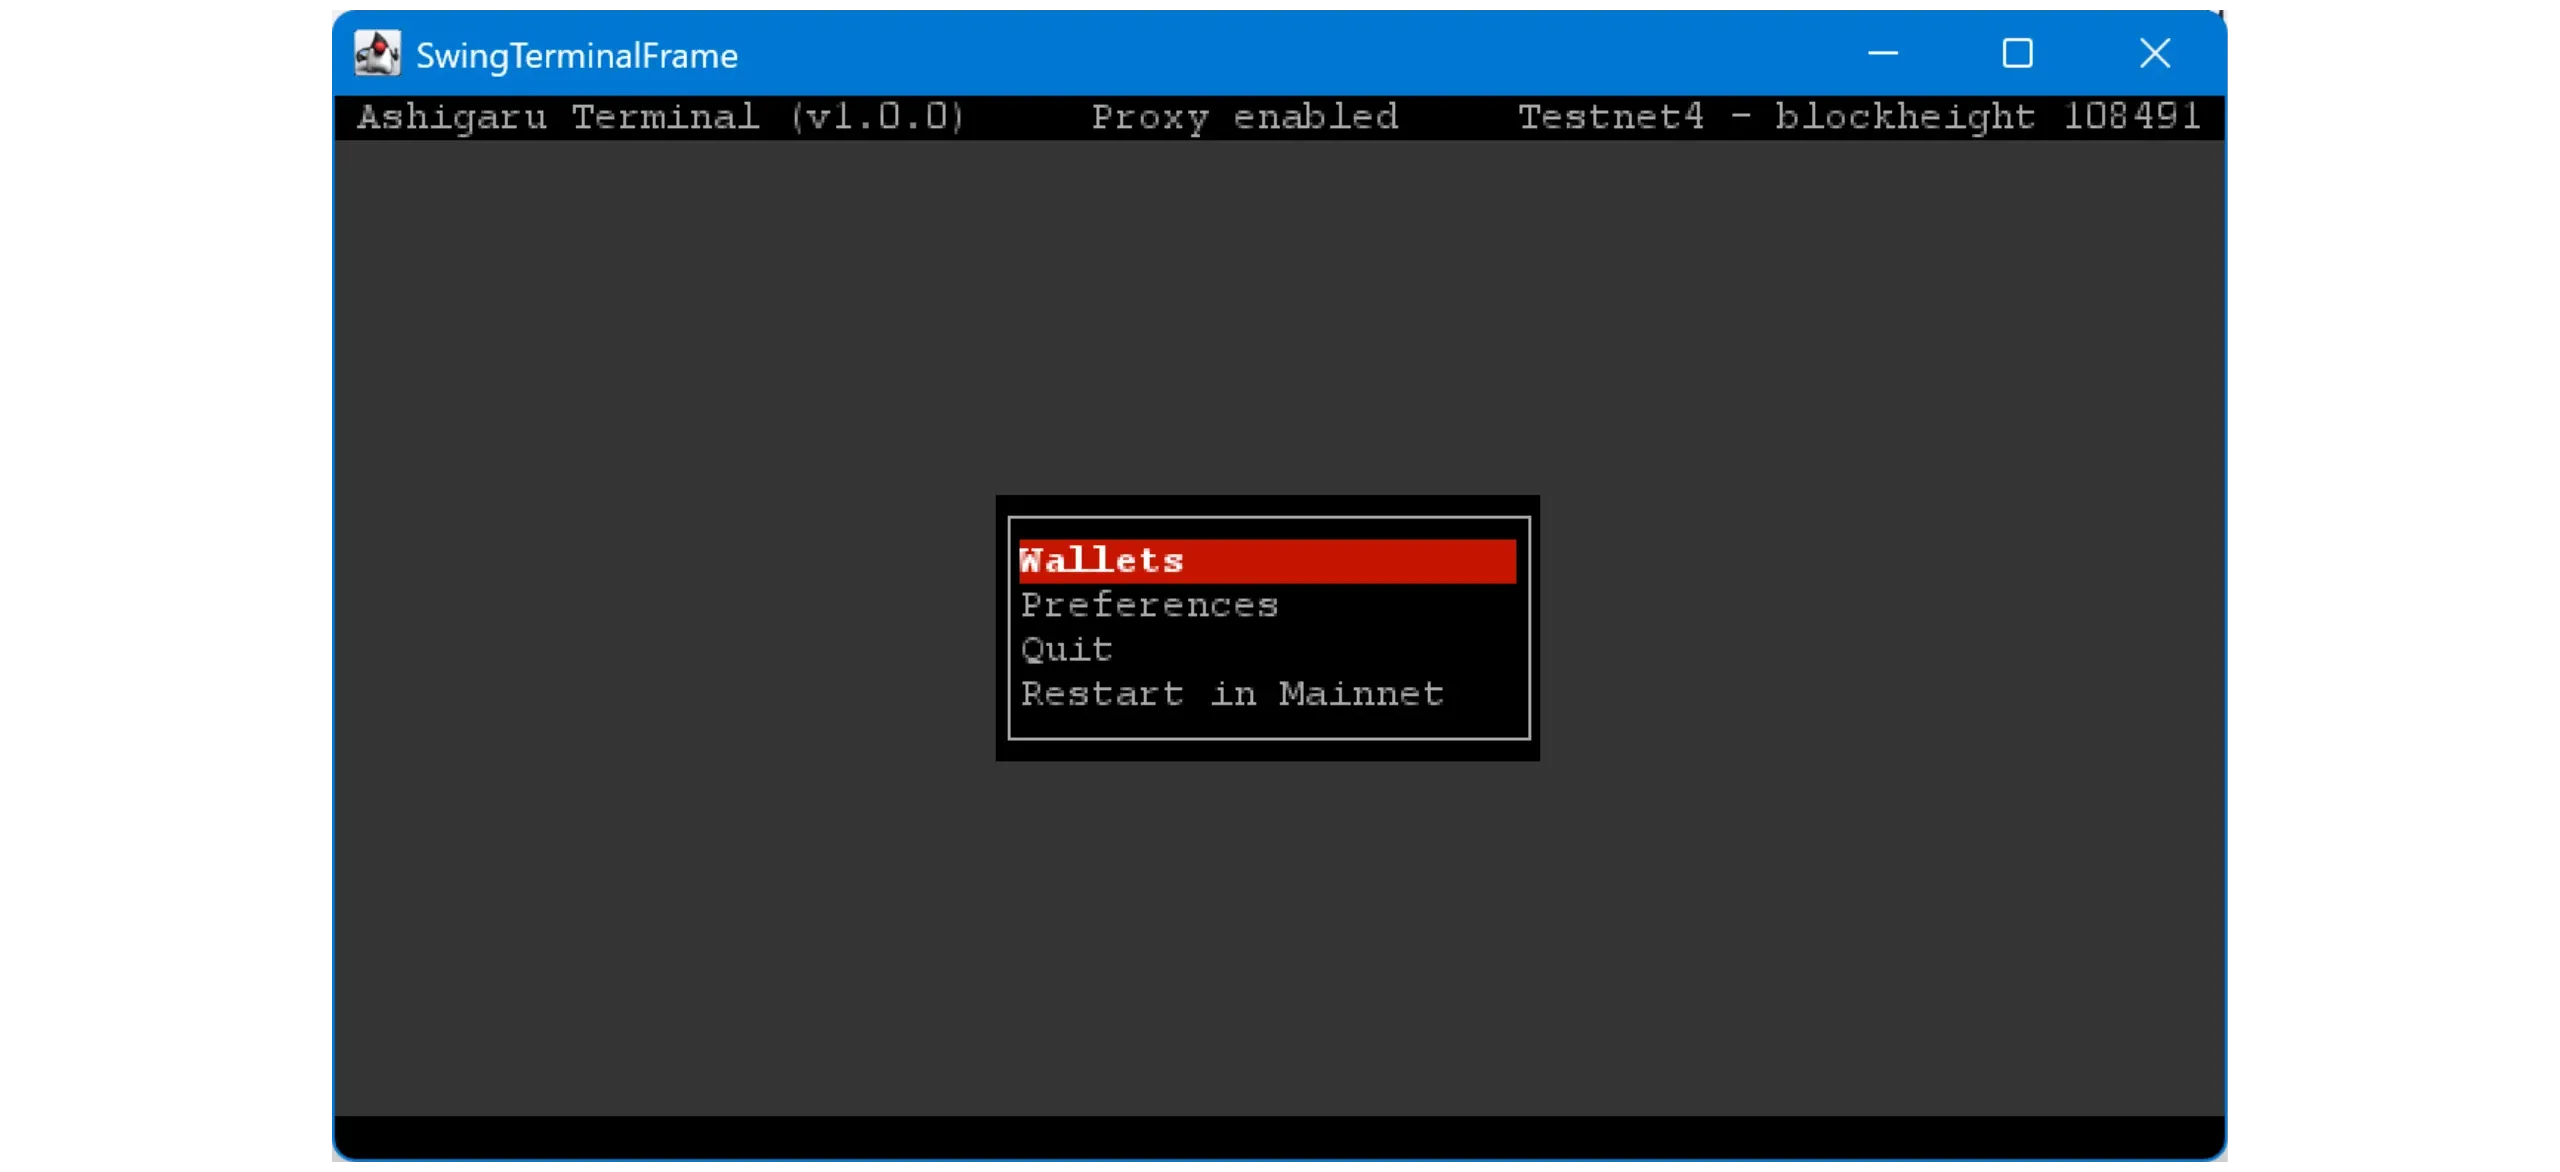
2. Get familiar with Ashigaru Terminal
Ashigaru Terminal uses a TUI (Text‑based User Interface), meaning a minimalist interface that runs directly in the terminal. You interact using menus and keyboard shortcuts without a traditional GUI.
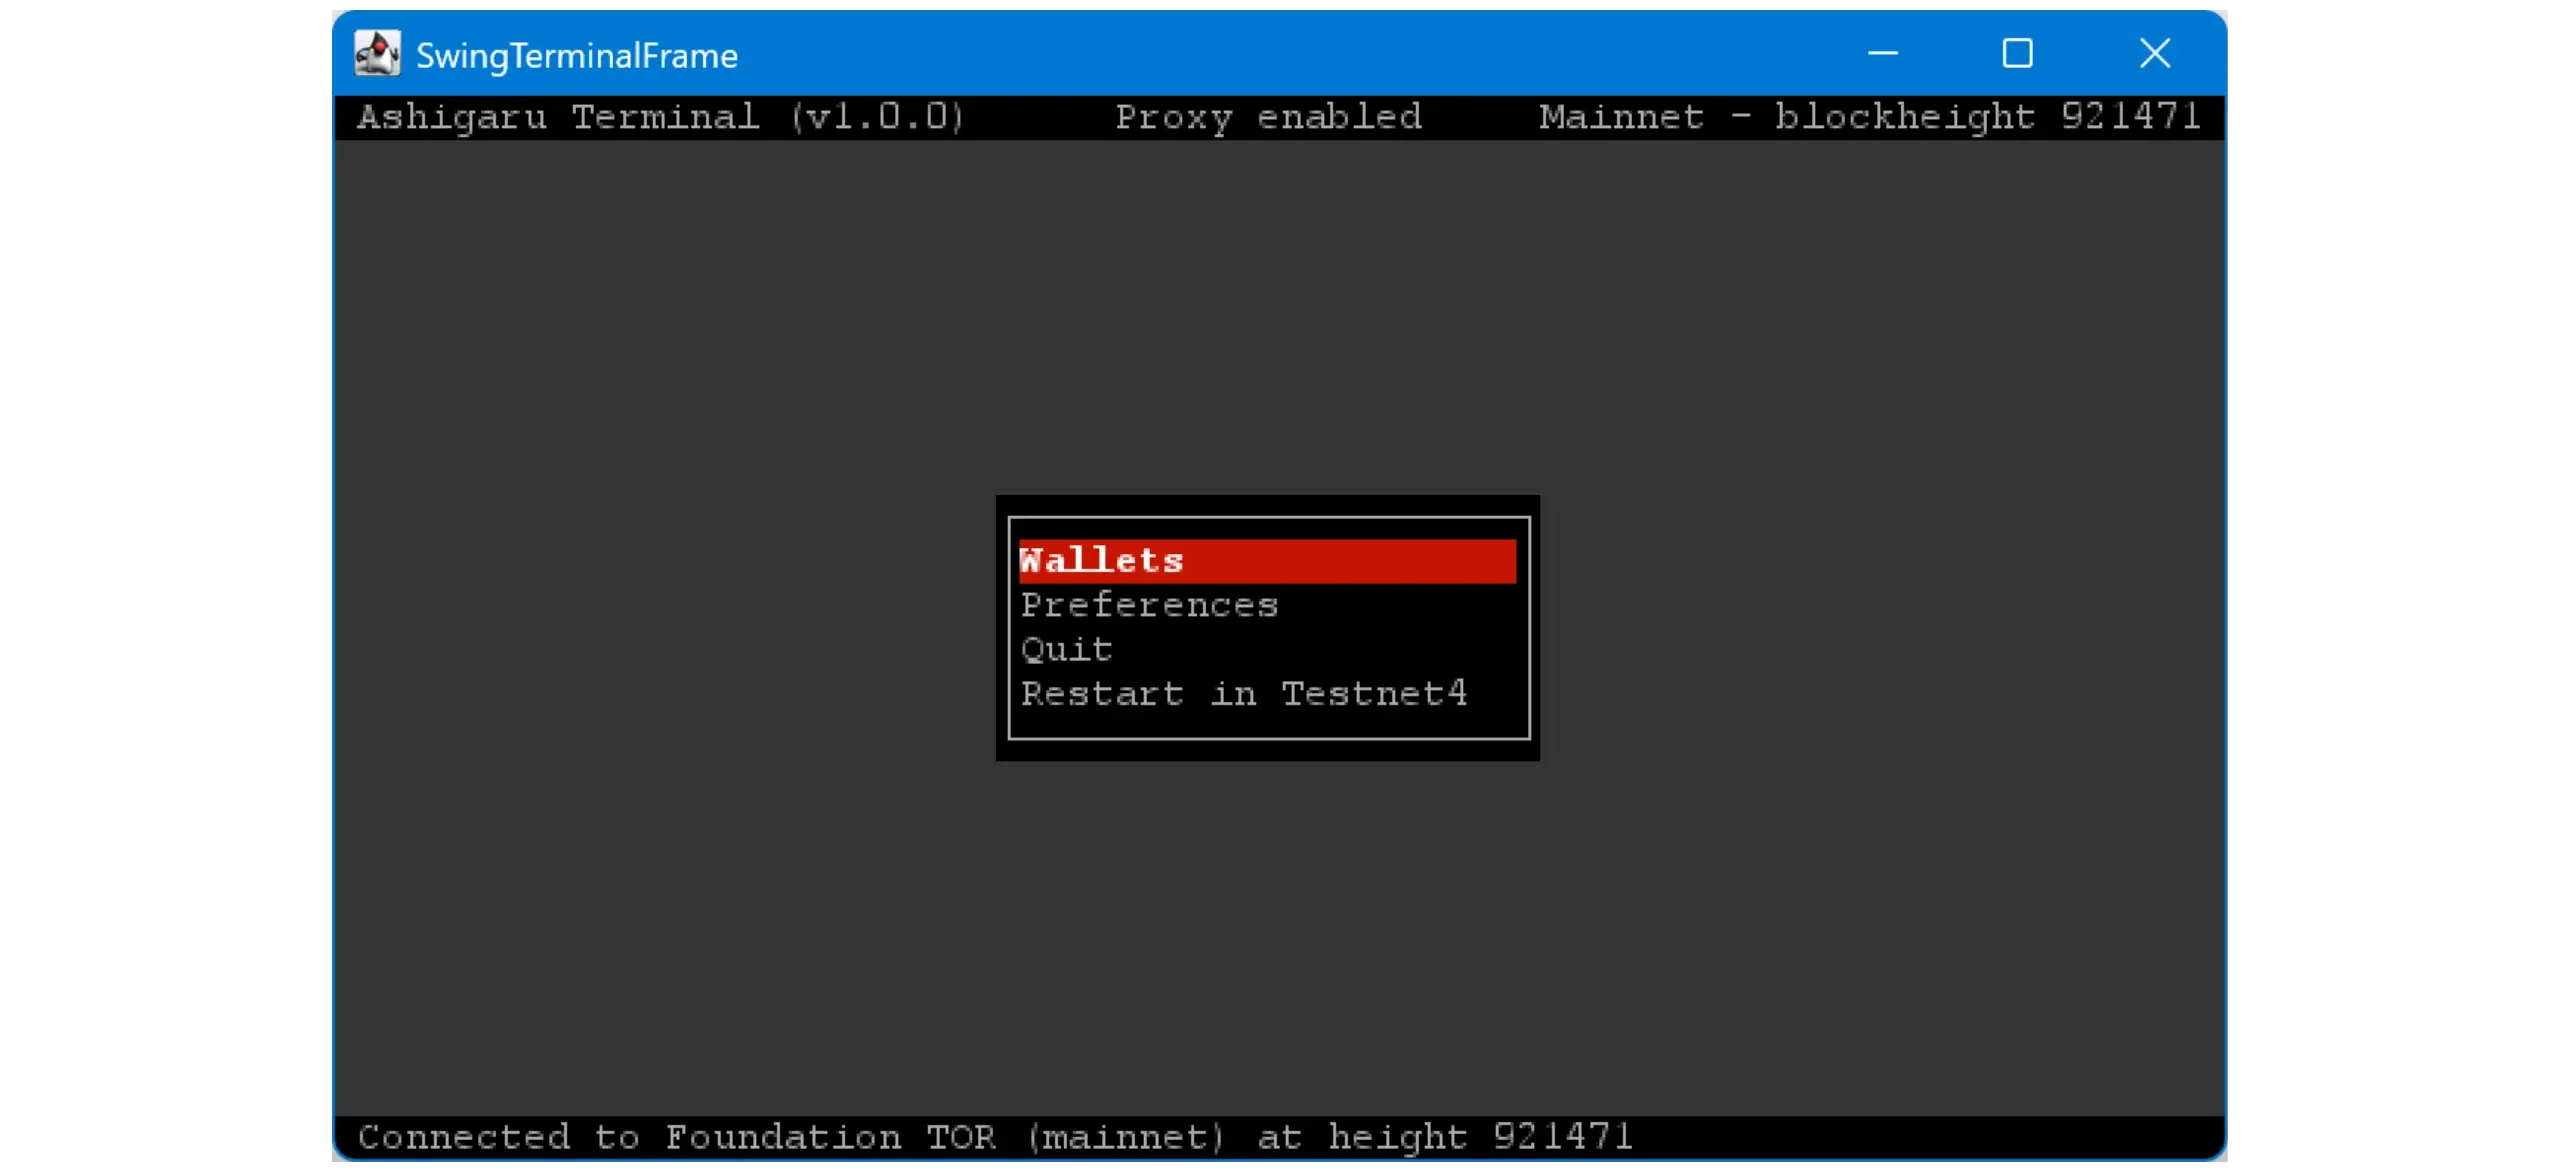
Navigation is straightforward: use your keyboard’s arrow keys to move through menus, and pressEnter to confirm or perform actions.
3. Connect your node to Ashigaru Terminal
By default, Ashigaru Terminal connects to a public Electrum server. This has obvious privacy and sovereignty drawbacks. Configure it to connect directly to your own Electrum server.
OpenPreferences > Server.
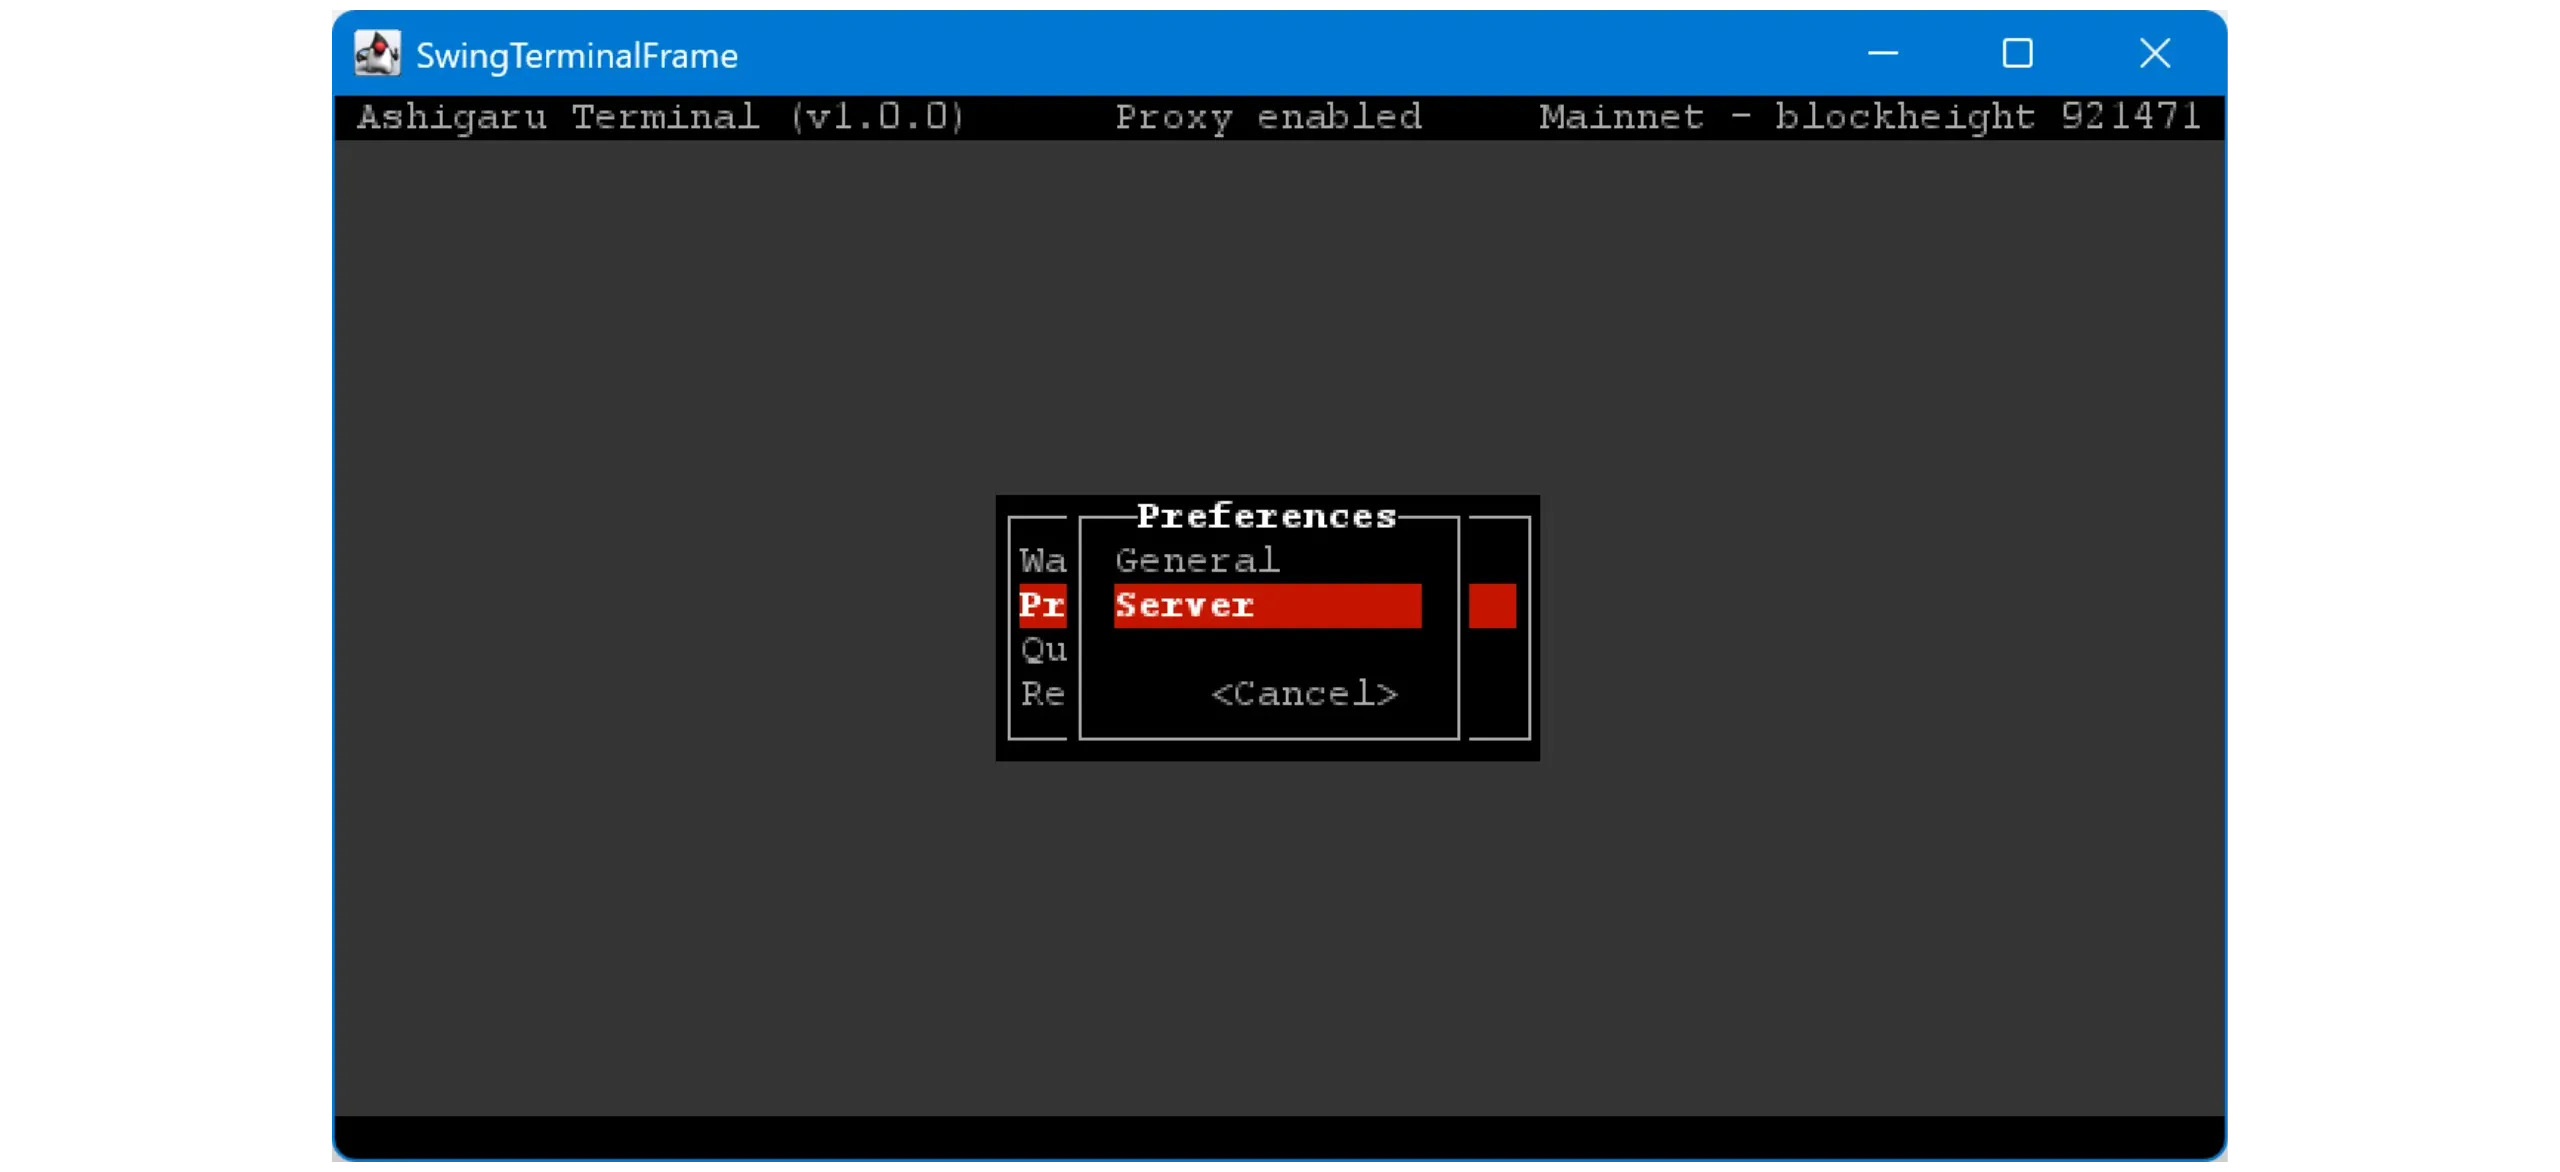
Click< Edit >.
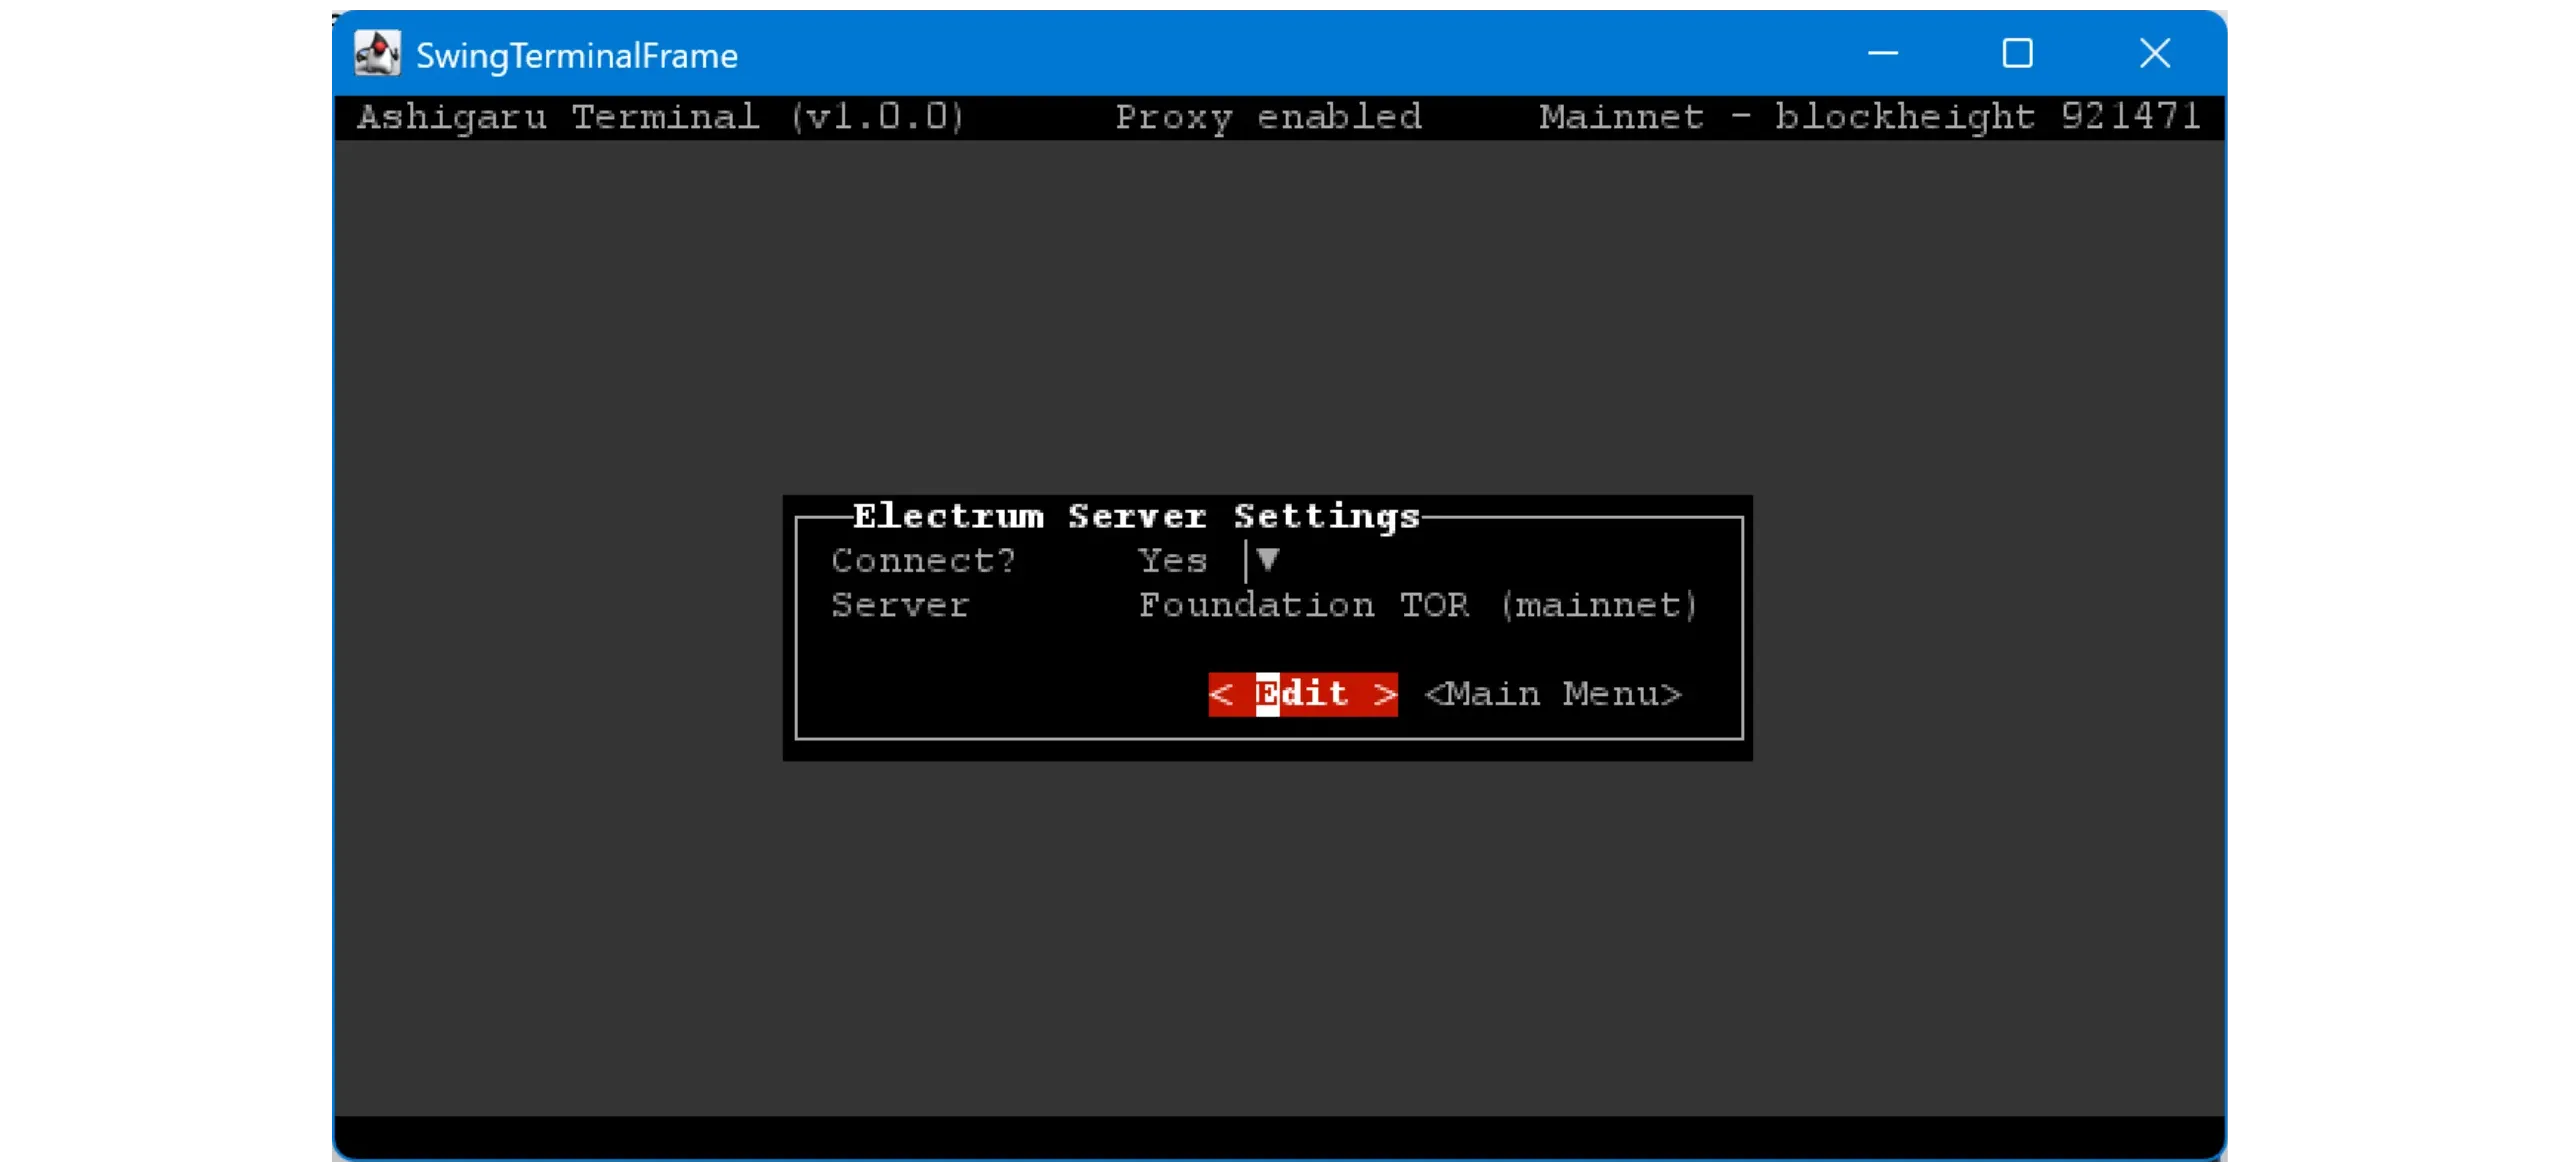
SelectPrivate Electrum Server, then click< Continue >.
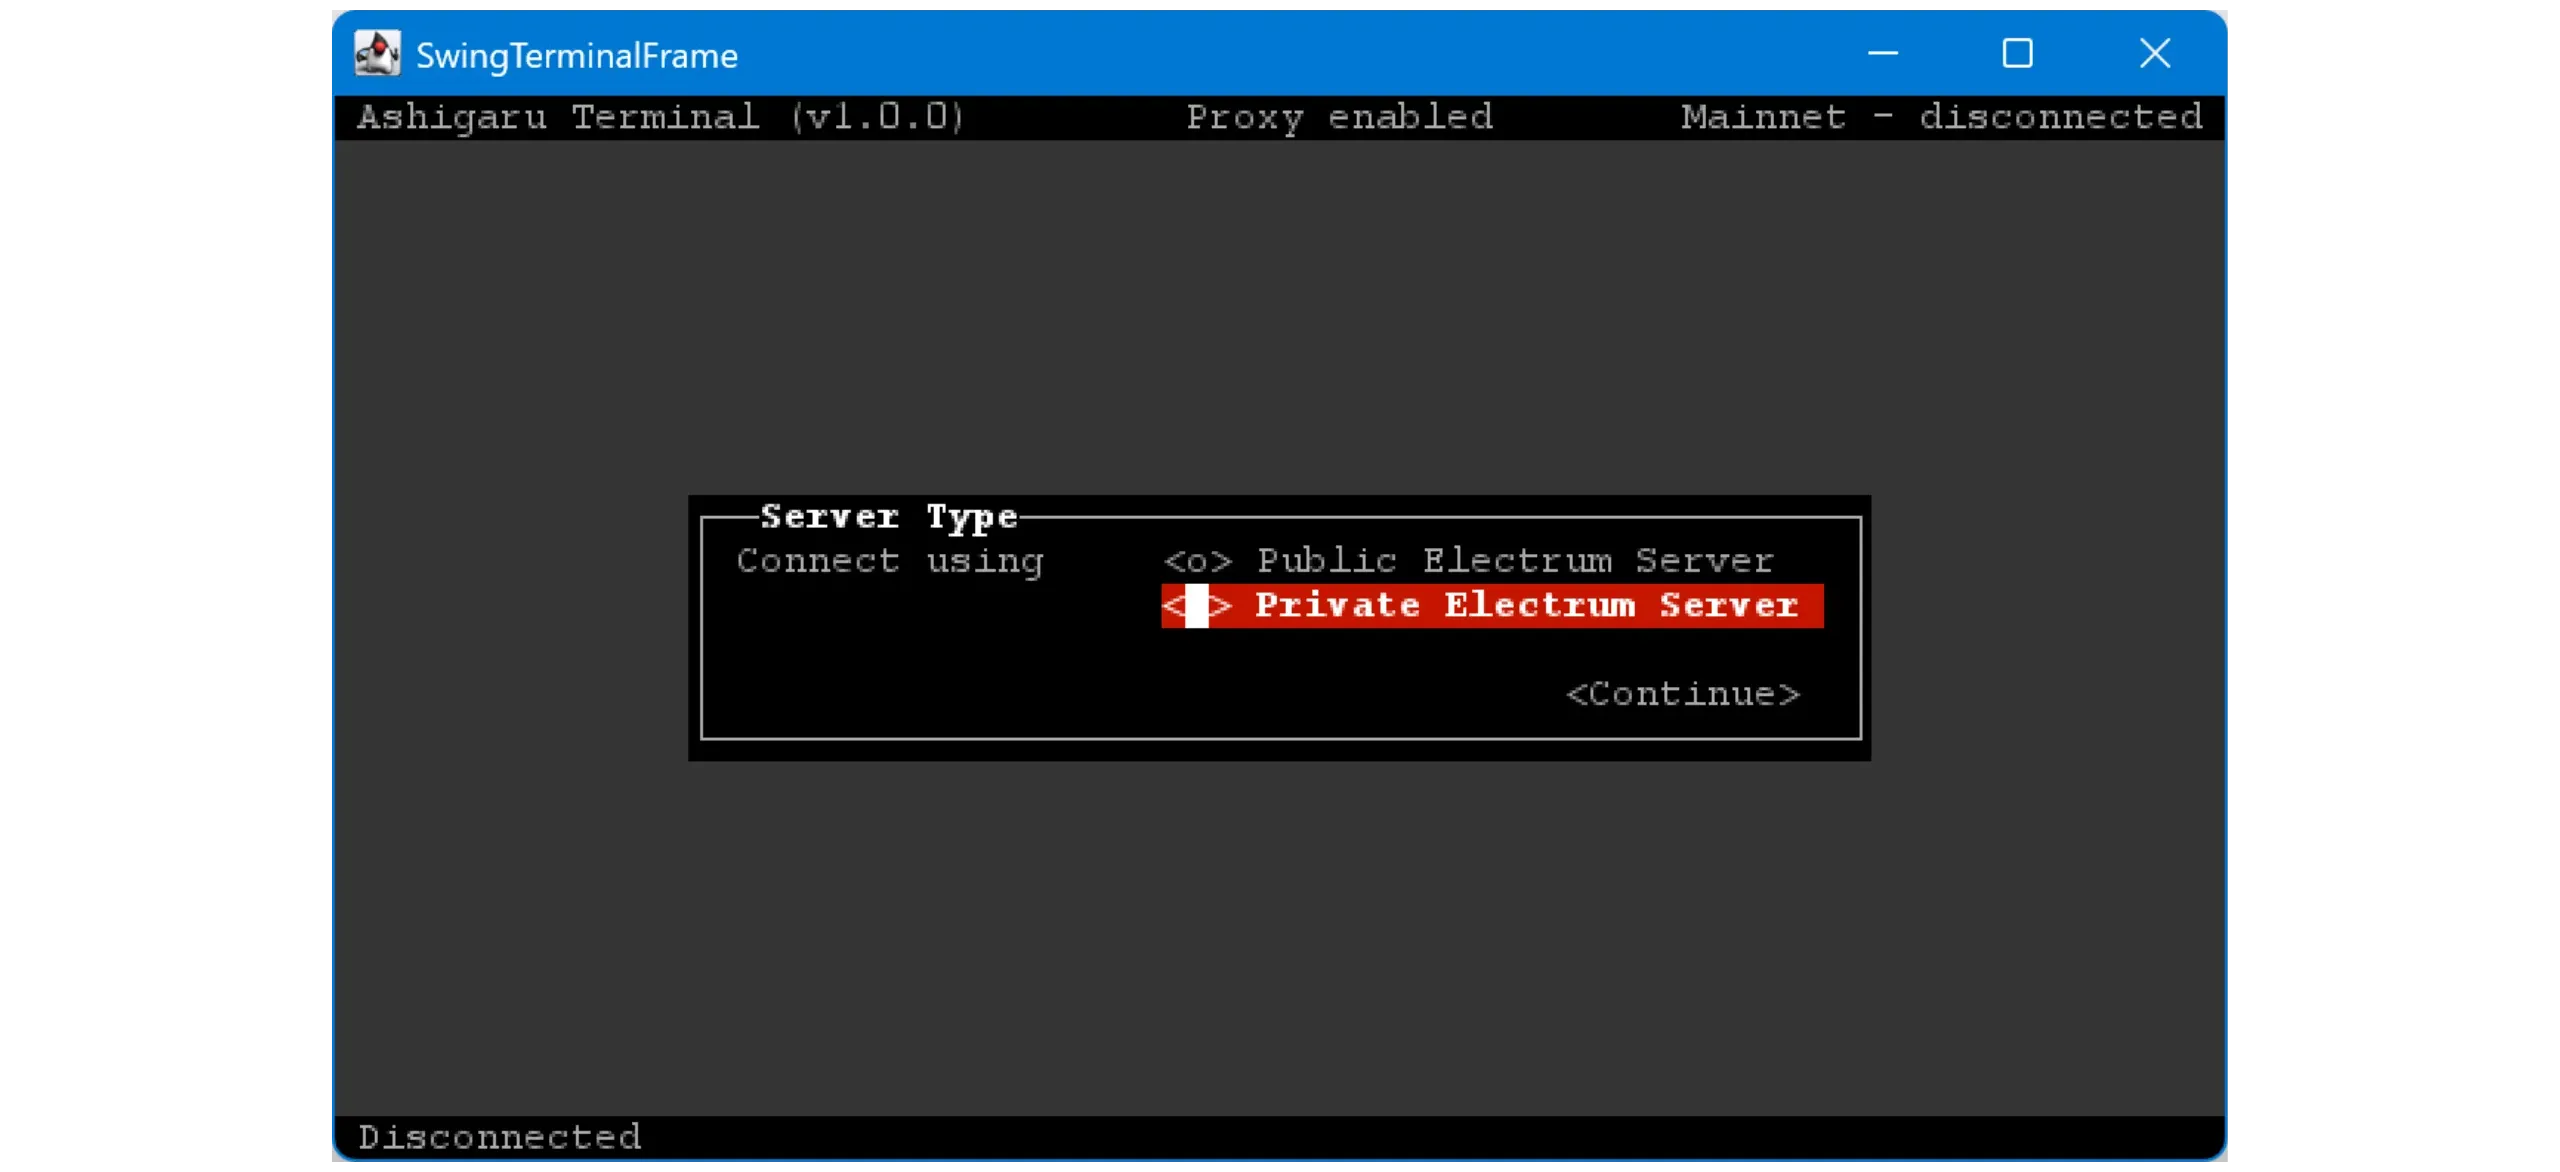
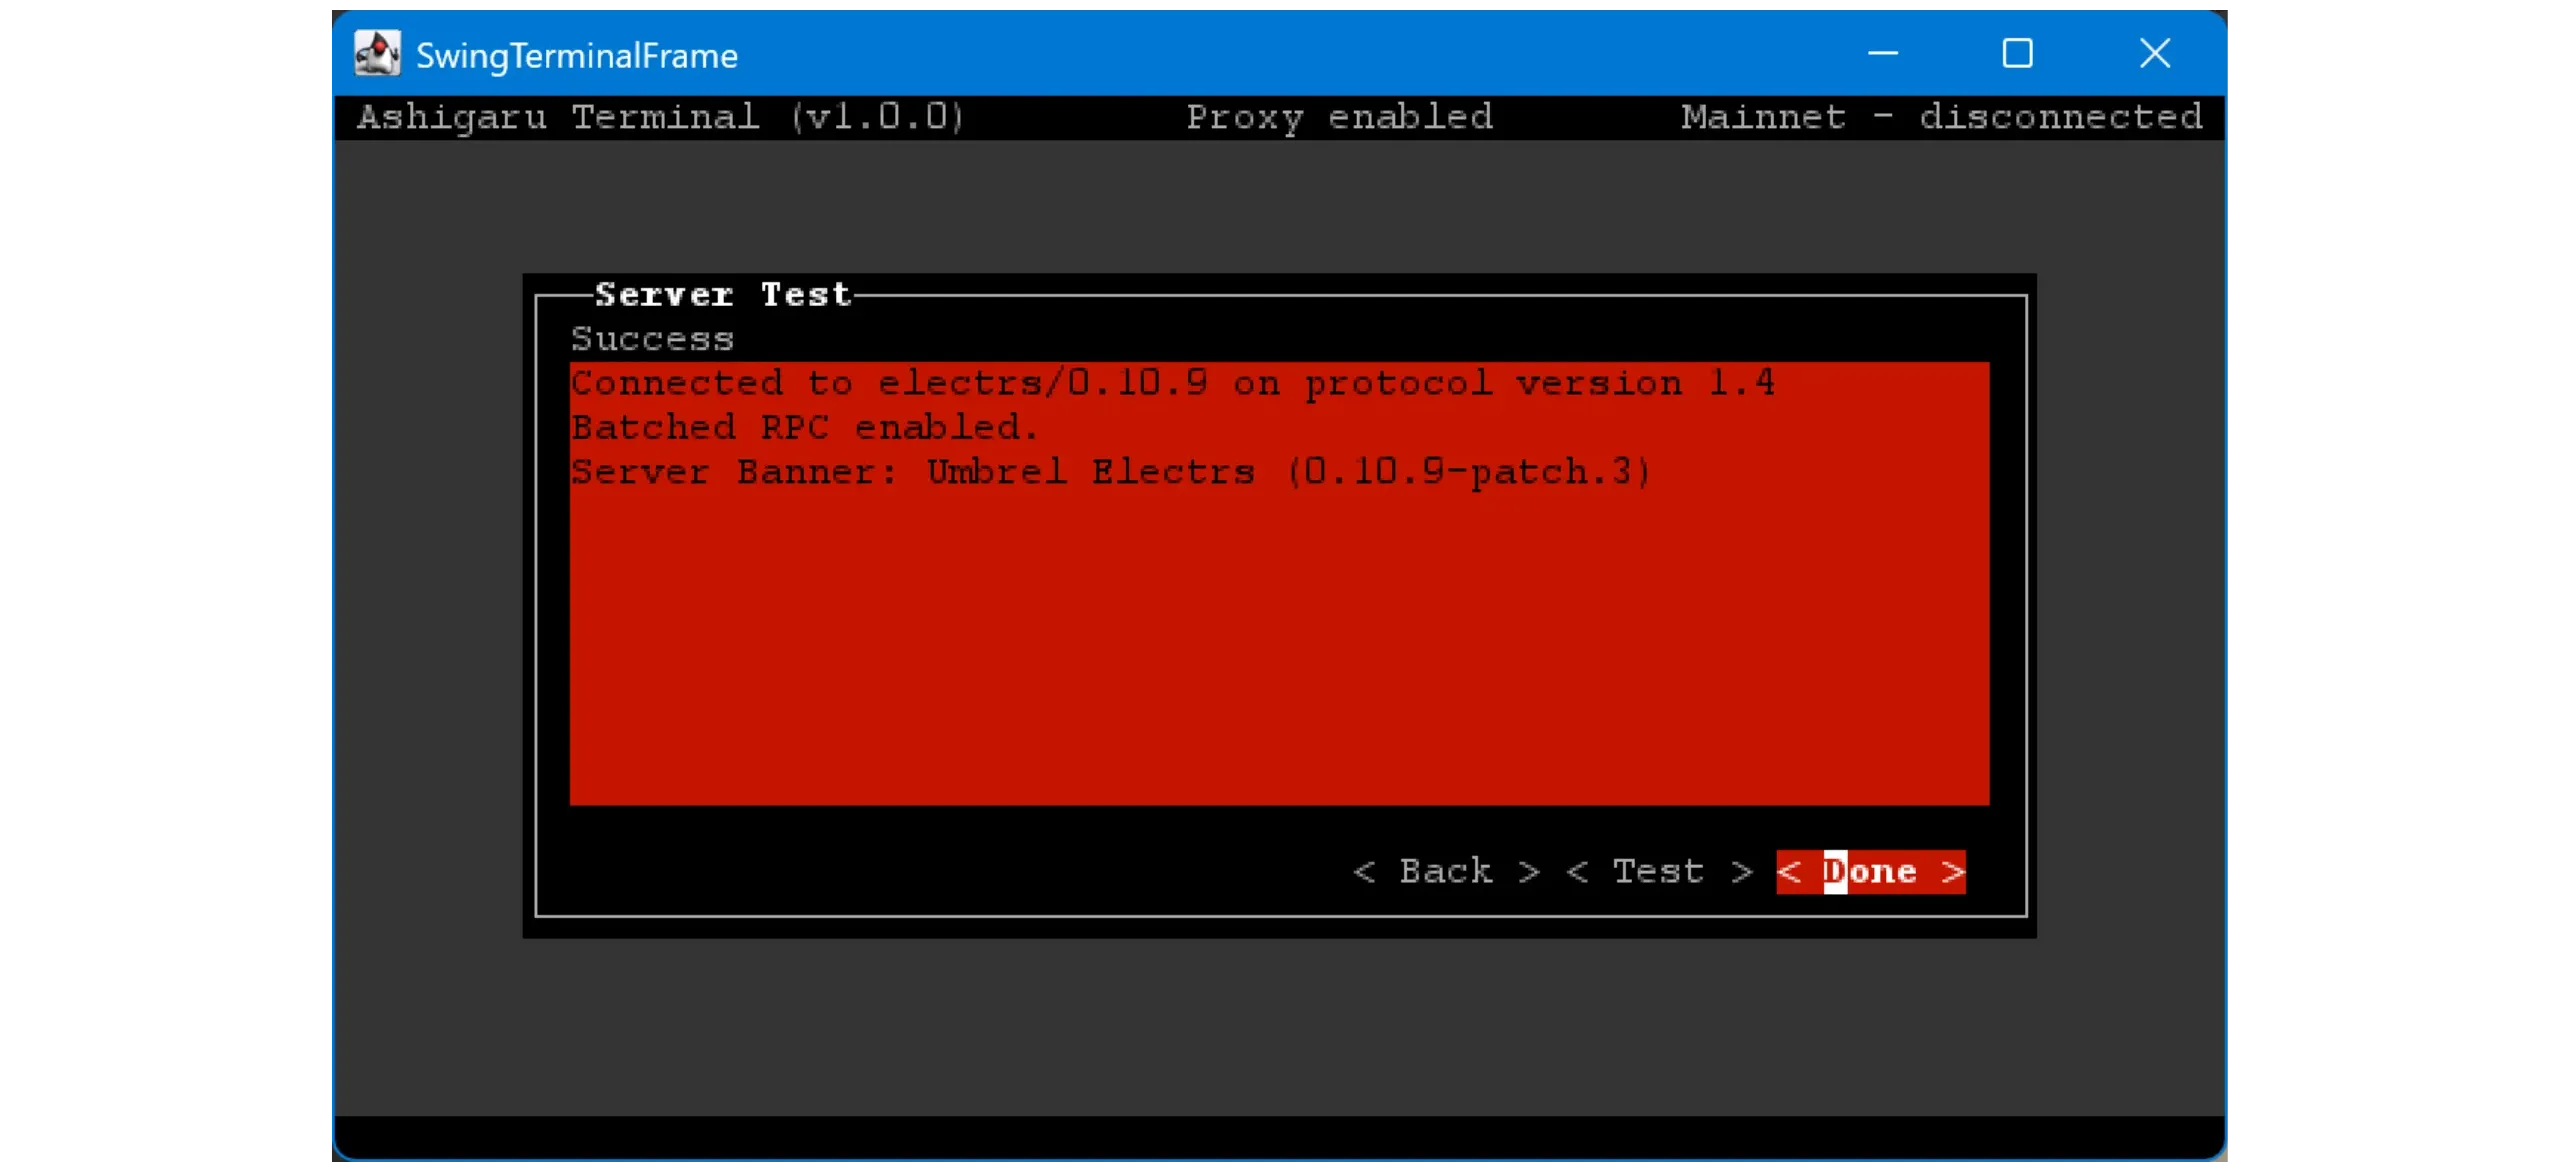
Enter your server’s URL and port. You can enter a Tor.onion address. Click< Test > to check the connection.
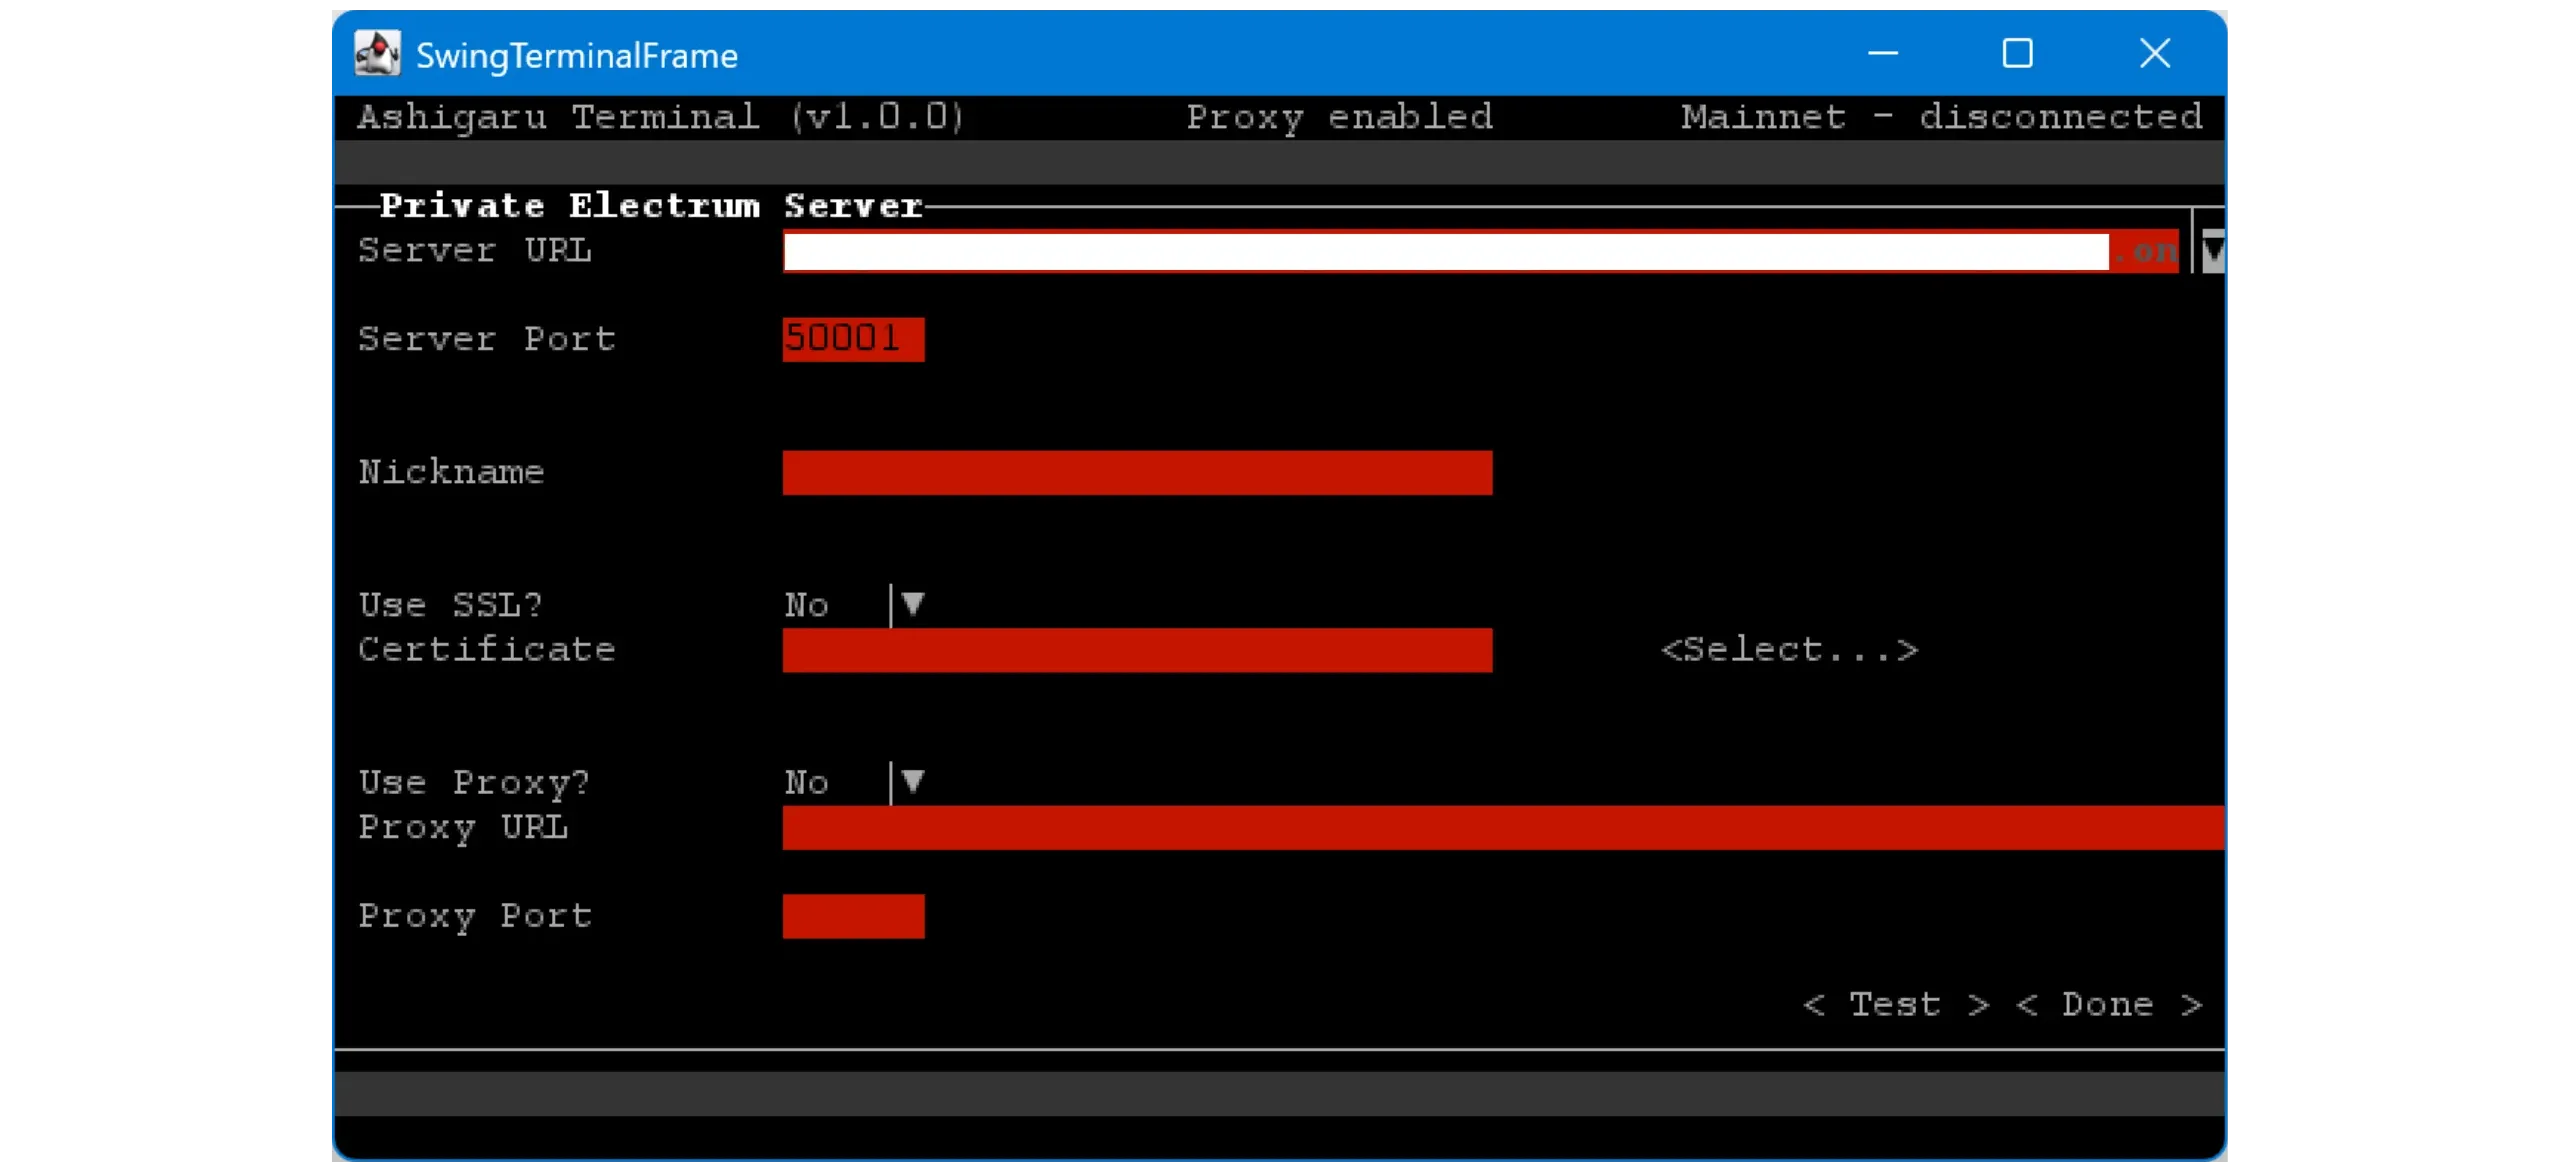
If the connection works, you’ll seeSuccess and your server’s details.
For best privacy, use your own Electrum server (onion if remote). Public servers can see and correlate wallet queries.
To learn more about Dojo and how to install it, I have written the following dedicated guides:
How to Run a Bitcoin Node (Advanced)
Note: For this tutorial, the author disconnects from their because they’re on testnet. Operation is the same on mainnet.
4. Create a wallet in Ashigaru Terminal
With the software configured, add a Bitcoin wallet.
You have two choices:
- Create a brand‑new wallet to use exclusively with Ashigaru Terminal. You’ll need this app running whenever you want to interact with the wallet.
- Import your existing Ashigaru (mobile) wallet into Ashigaru Terminal. This slightly reduces security (one wallet across two environments), but it lets Ashigaru Terminal run continuously to mix coins while you spend from the mobile app.
In this tutorial, we’ll use the second option. If you prefer creating a new wallet, the procedure is identical — the only difference is you’ll back up the new mnemonic and BIP39 passphrase during creation.
Note: Ashigaru Terminal does not allow you to spend your bitcoins directly. You can either synchronize the same wallet on Ashigaru Terminal and the Ashigaru app (which I will do in this tutorial), or on Sparrow Wallet.
If you don’t yet have a wallet in the Ashigaru app, follow this guide.
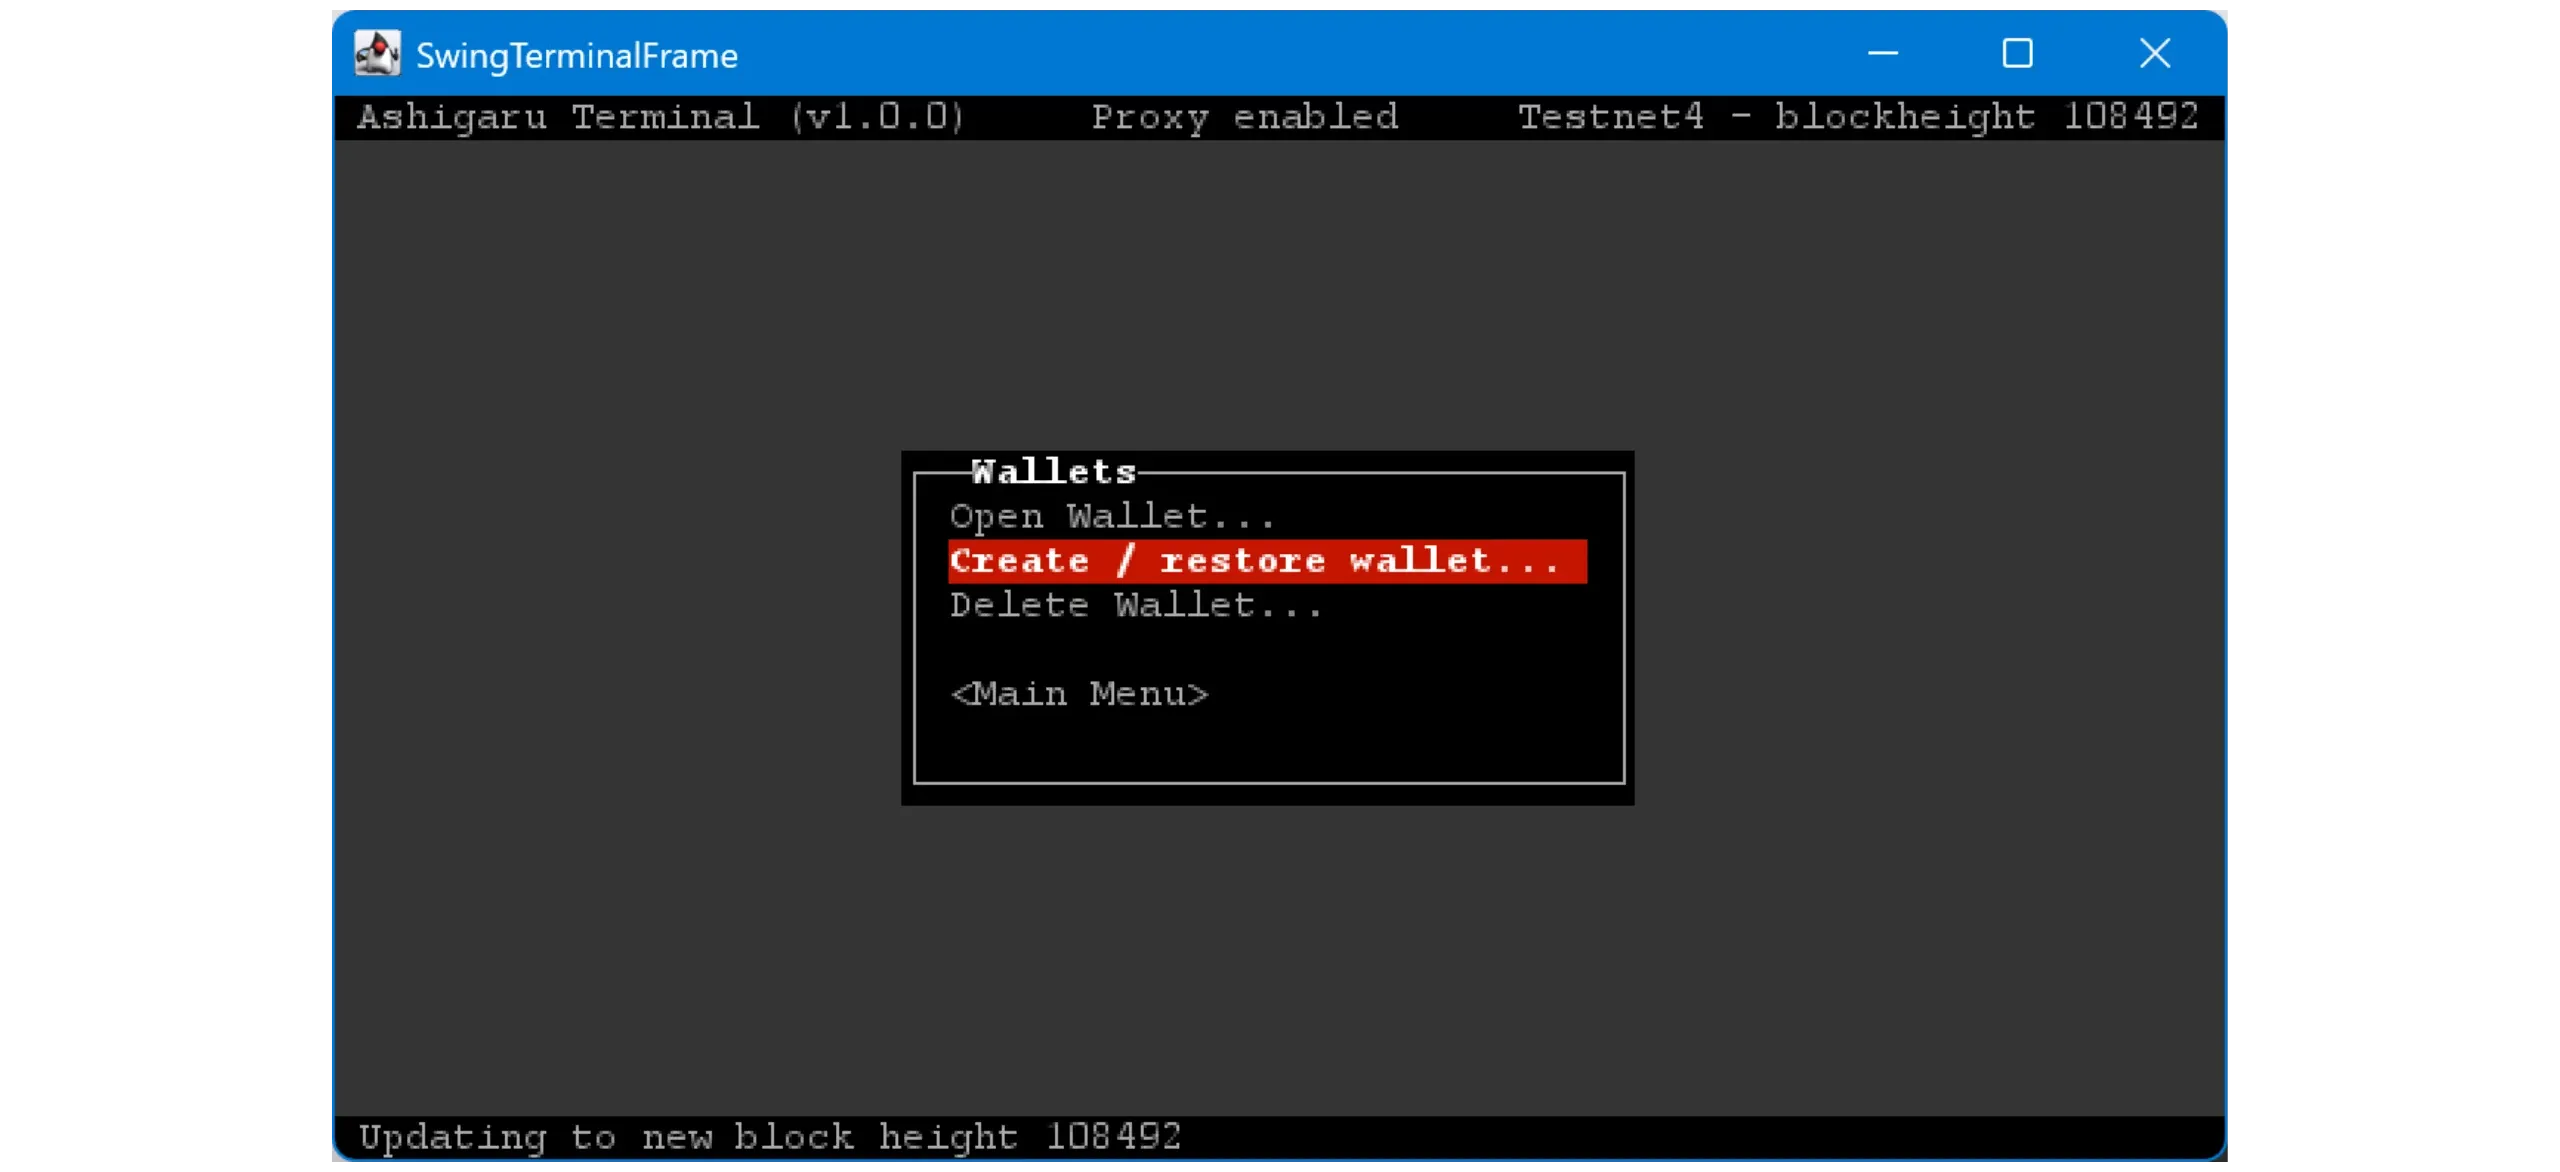
Go toWallets.
SelectCreate / restore wallet.... UseOpen Wallet... later to reopen a wallet already saved in Ashigaru Terminal.
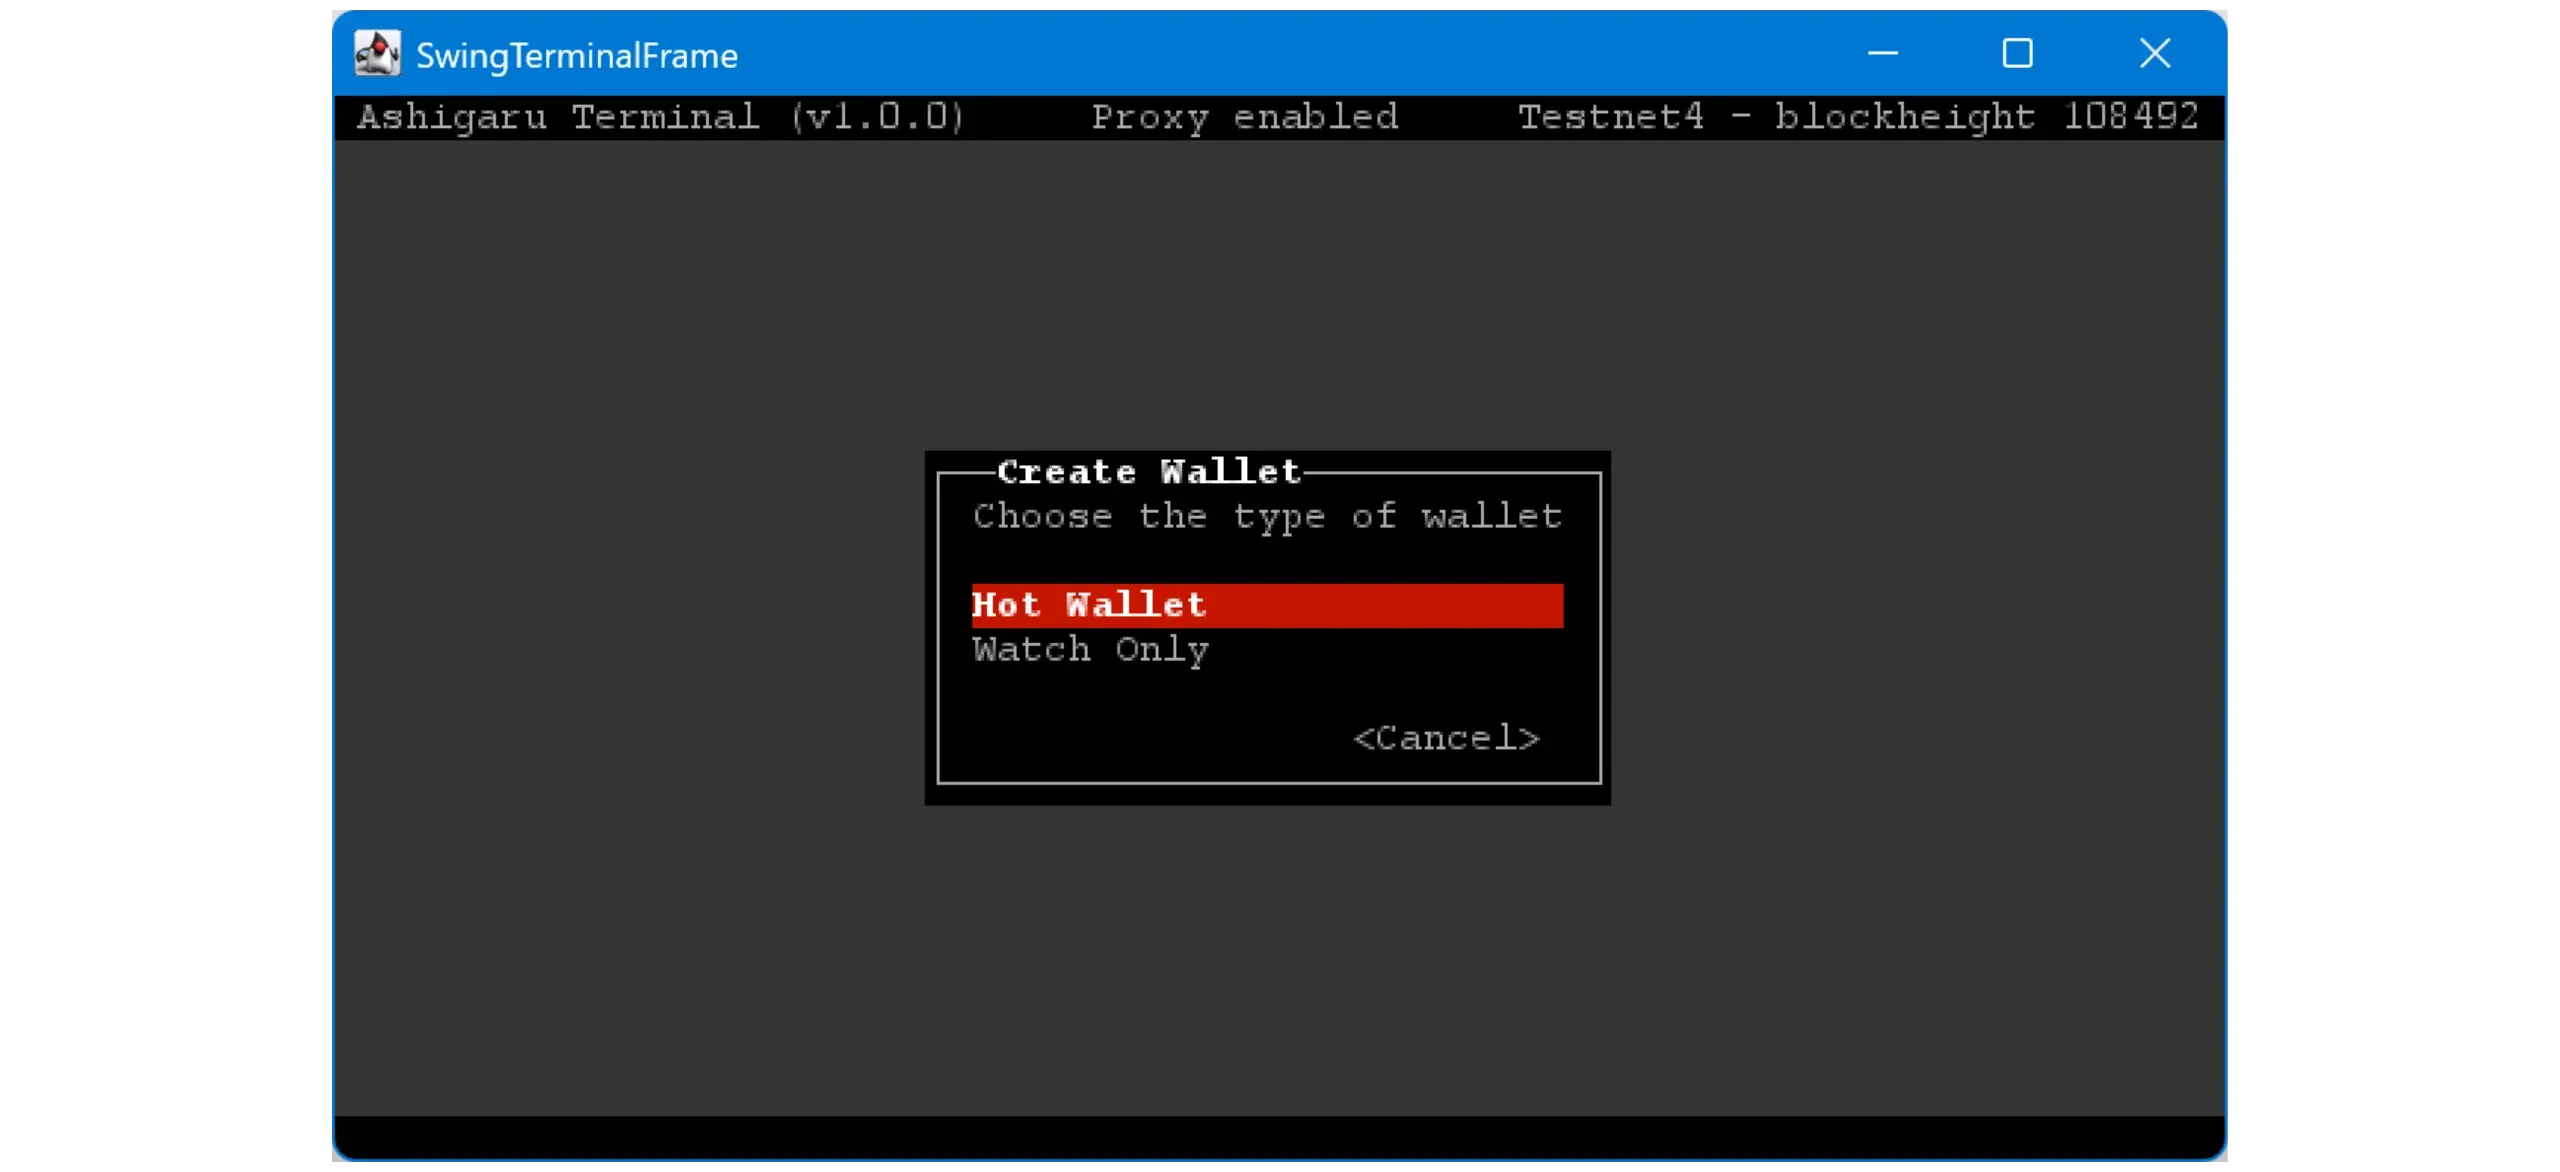
Give your wallet a name.

ChooseHot Wallet as the wallet type.
Note:Watch‑only lets you save a hardware wallet xpub for later use withMix to. A watch‑only wallet cannot participate in coinjoins. We’ll cover “Mix to” in a future tutorial.
Now the flow differs based on your choice:
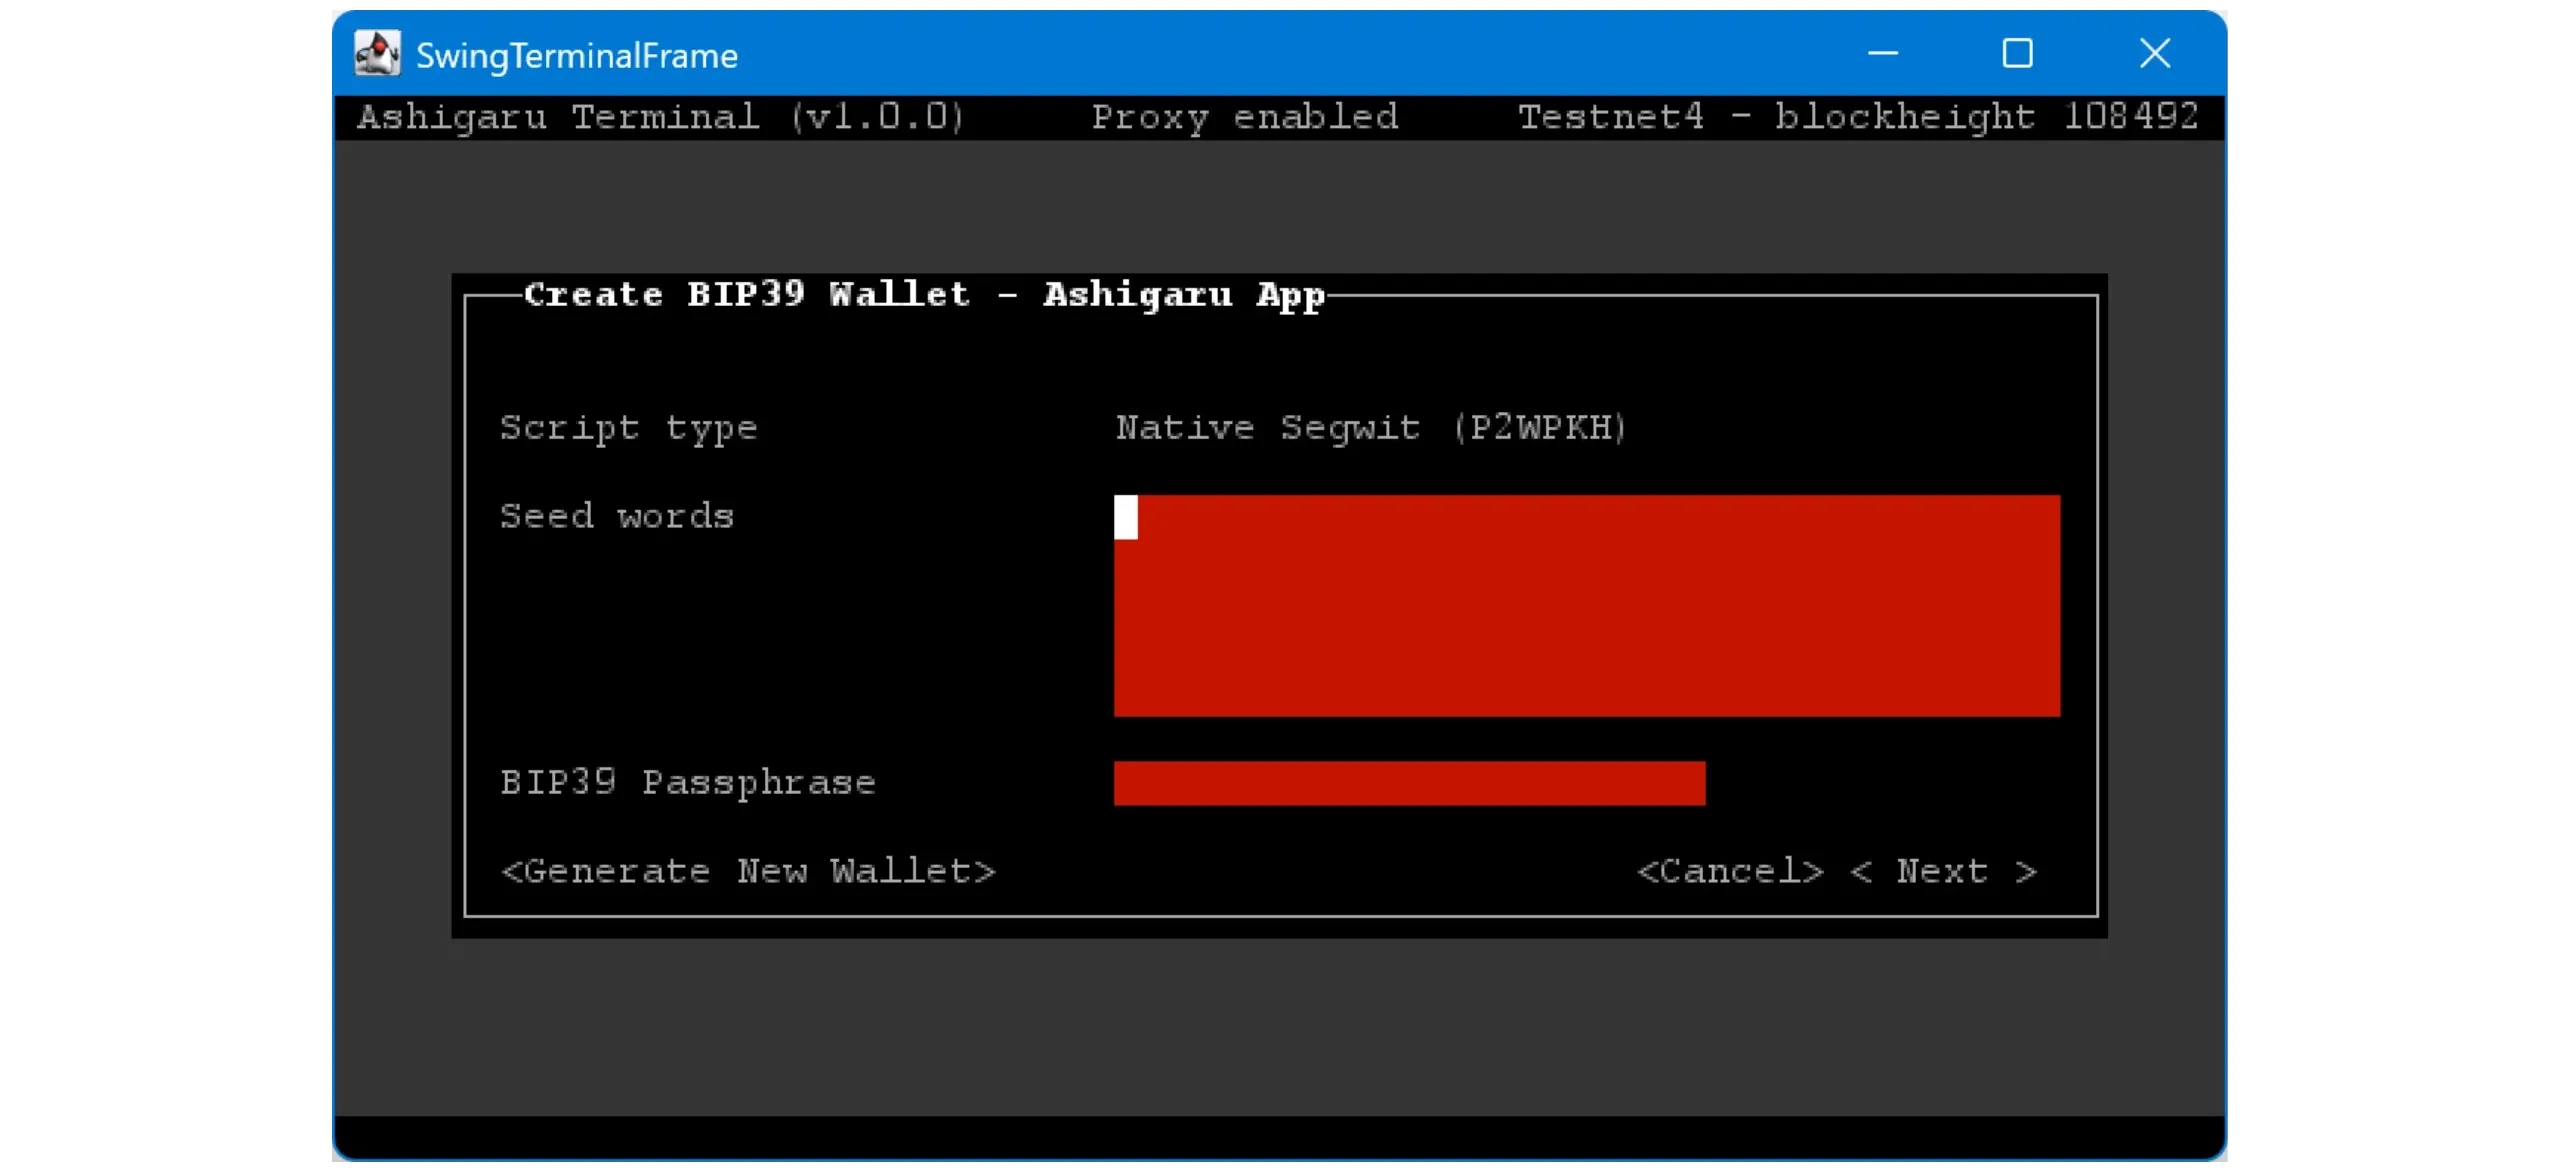
To create a new wallet from scratch, click
< Generate New Wallet >, set a BIP39 passphrase, and carefully back up the mnemonic and passphrase on physical media:To use the same wallet as your Ashigaru Mobile app, enter your 12‑word mnemonic and your BIP39 passphrase exactly: lowercase words, in order, separated by a single space, with no extra characters.
Click< Next > when done.
Note: If< Next > is disabled, your mnemonic is invalid. Double‑check for typos or incorrect words.
You’ll then set a password. This unlocks your wallet in Ashigaru Terminal and protects it from unauthorized physical access. It is not part of key derivation. In other words, even without this password, anyone with your mnemonic and passphrase can restore your wallet and access your funds.
Choose a long, random password. Store a copy safely — ideally on physical media or in a secure password manager.
Click< OK > when finished.
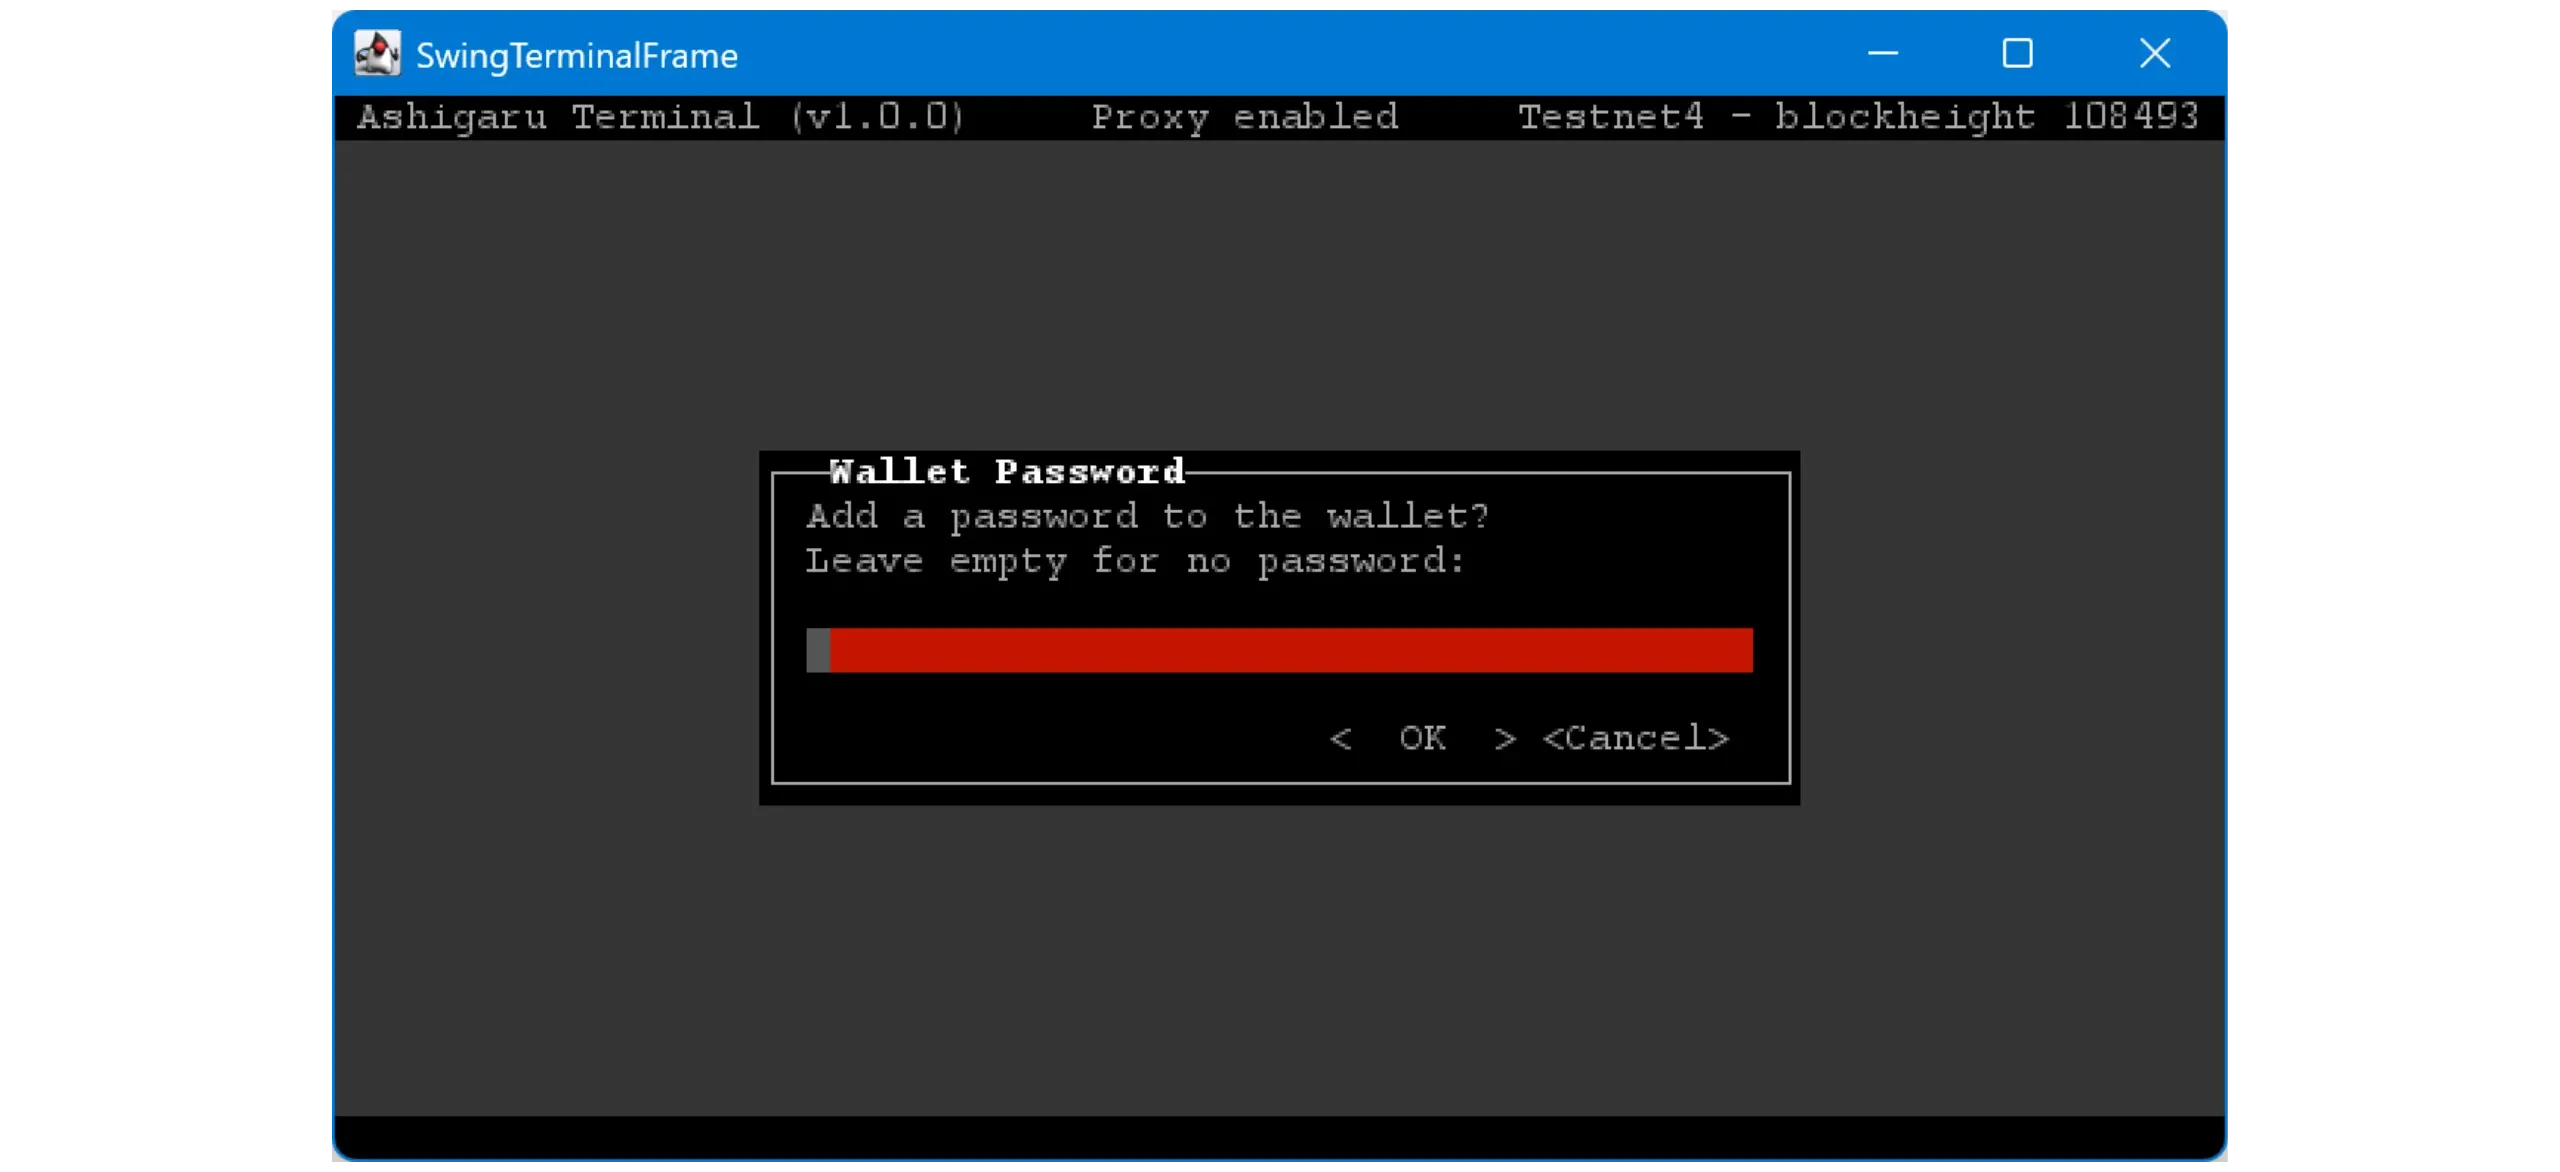
Mnemonic + passphrase = full access. Treat the Terminal password as a local lock; it does not replace seed security.
5. Use the wallet
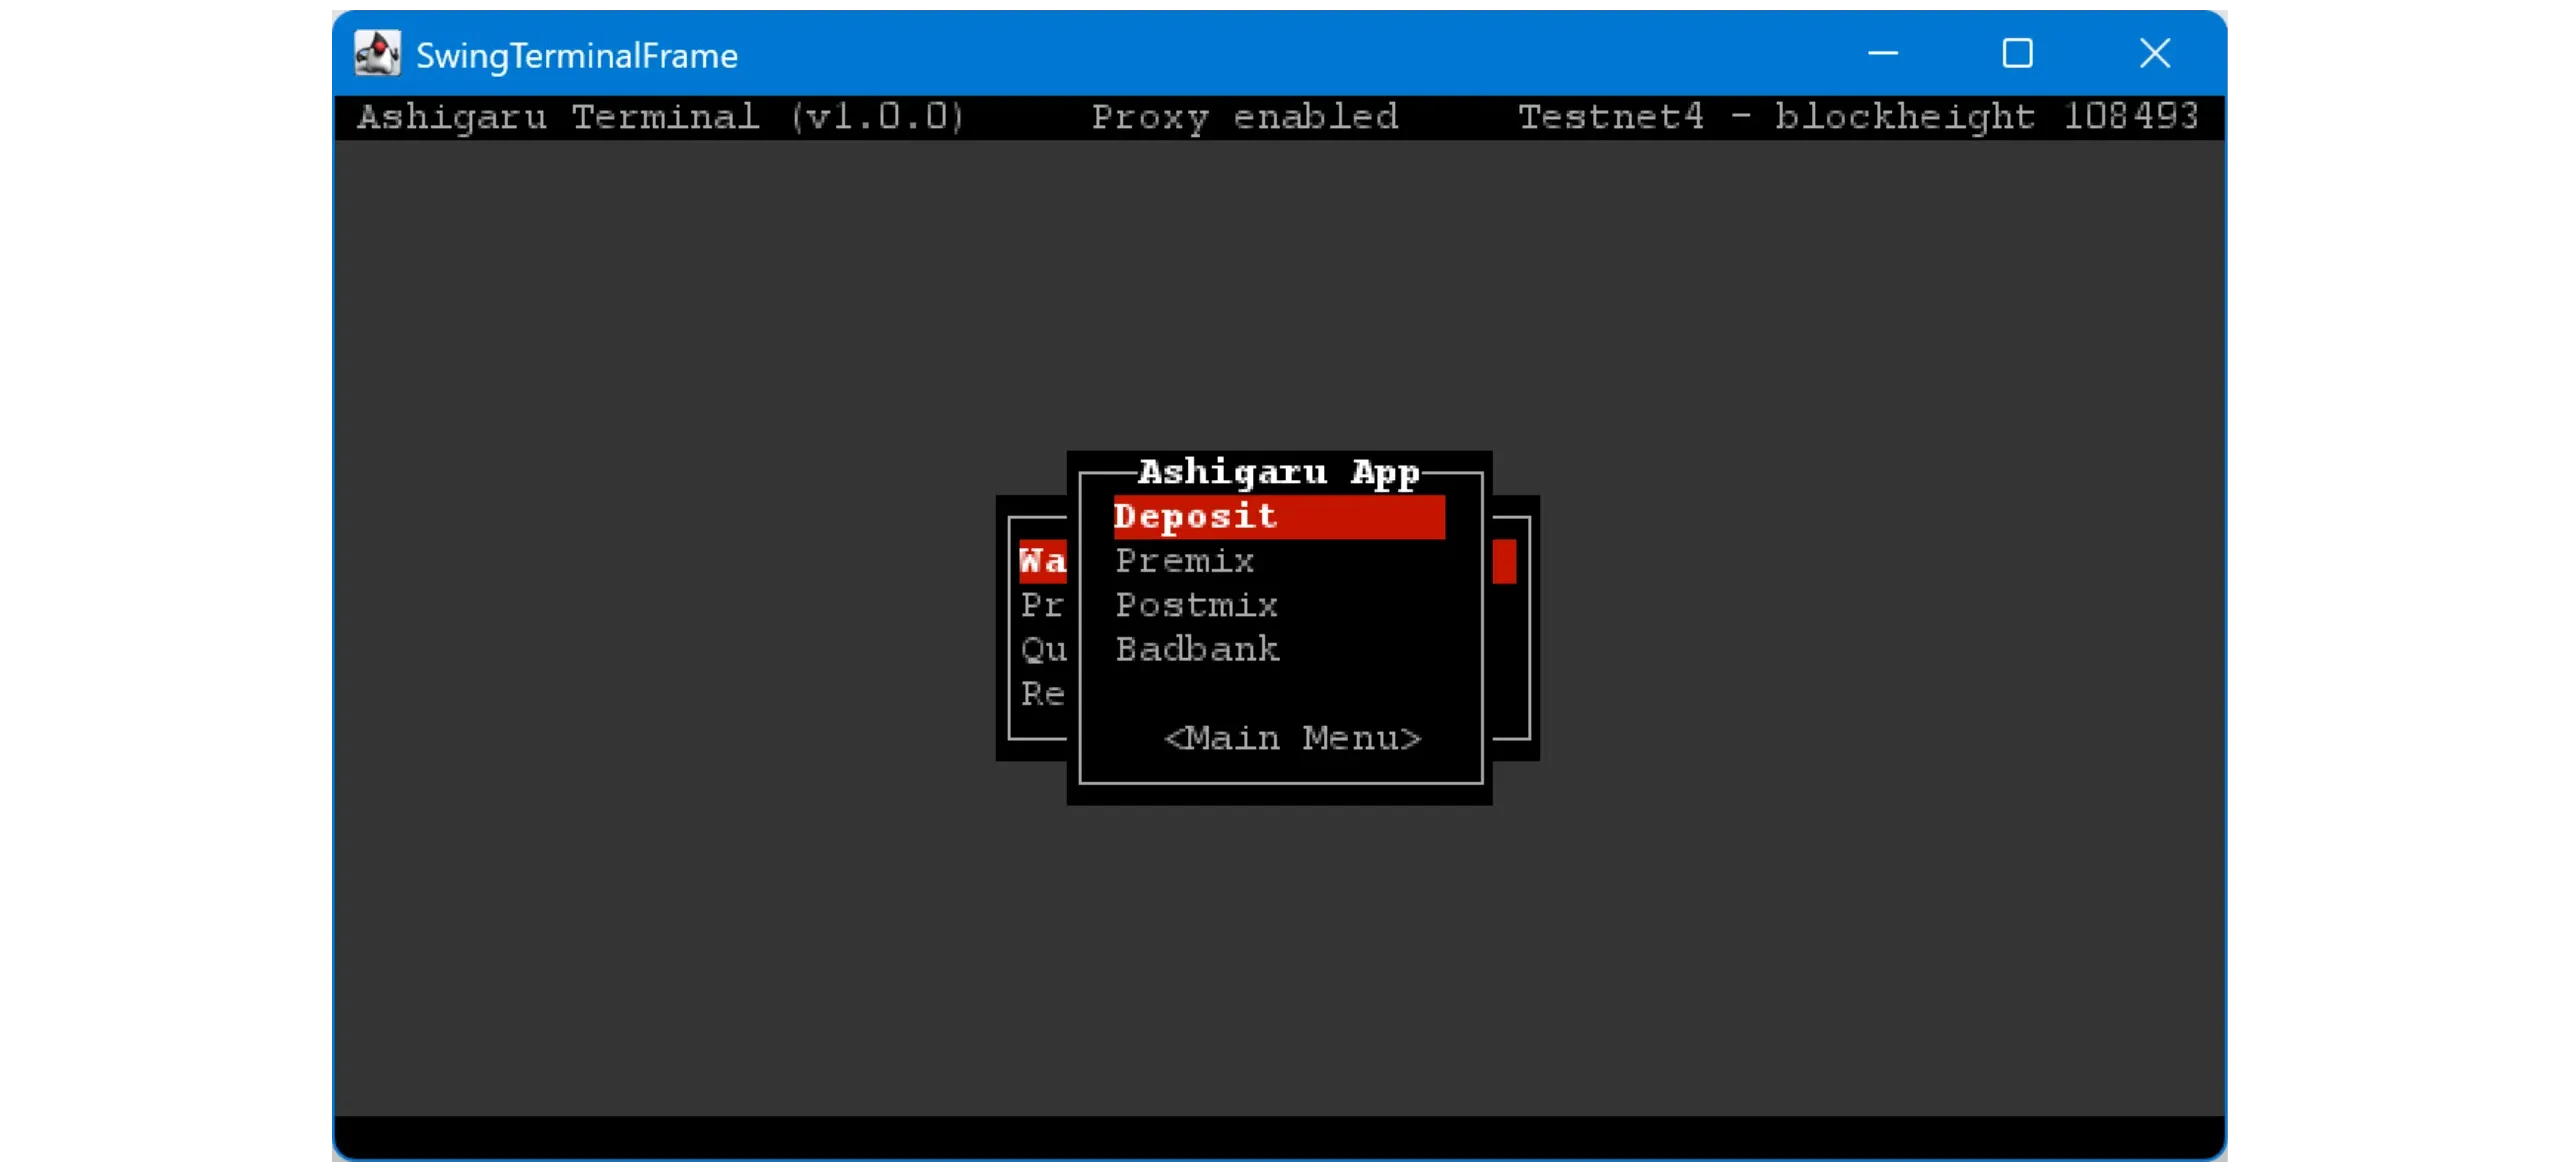
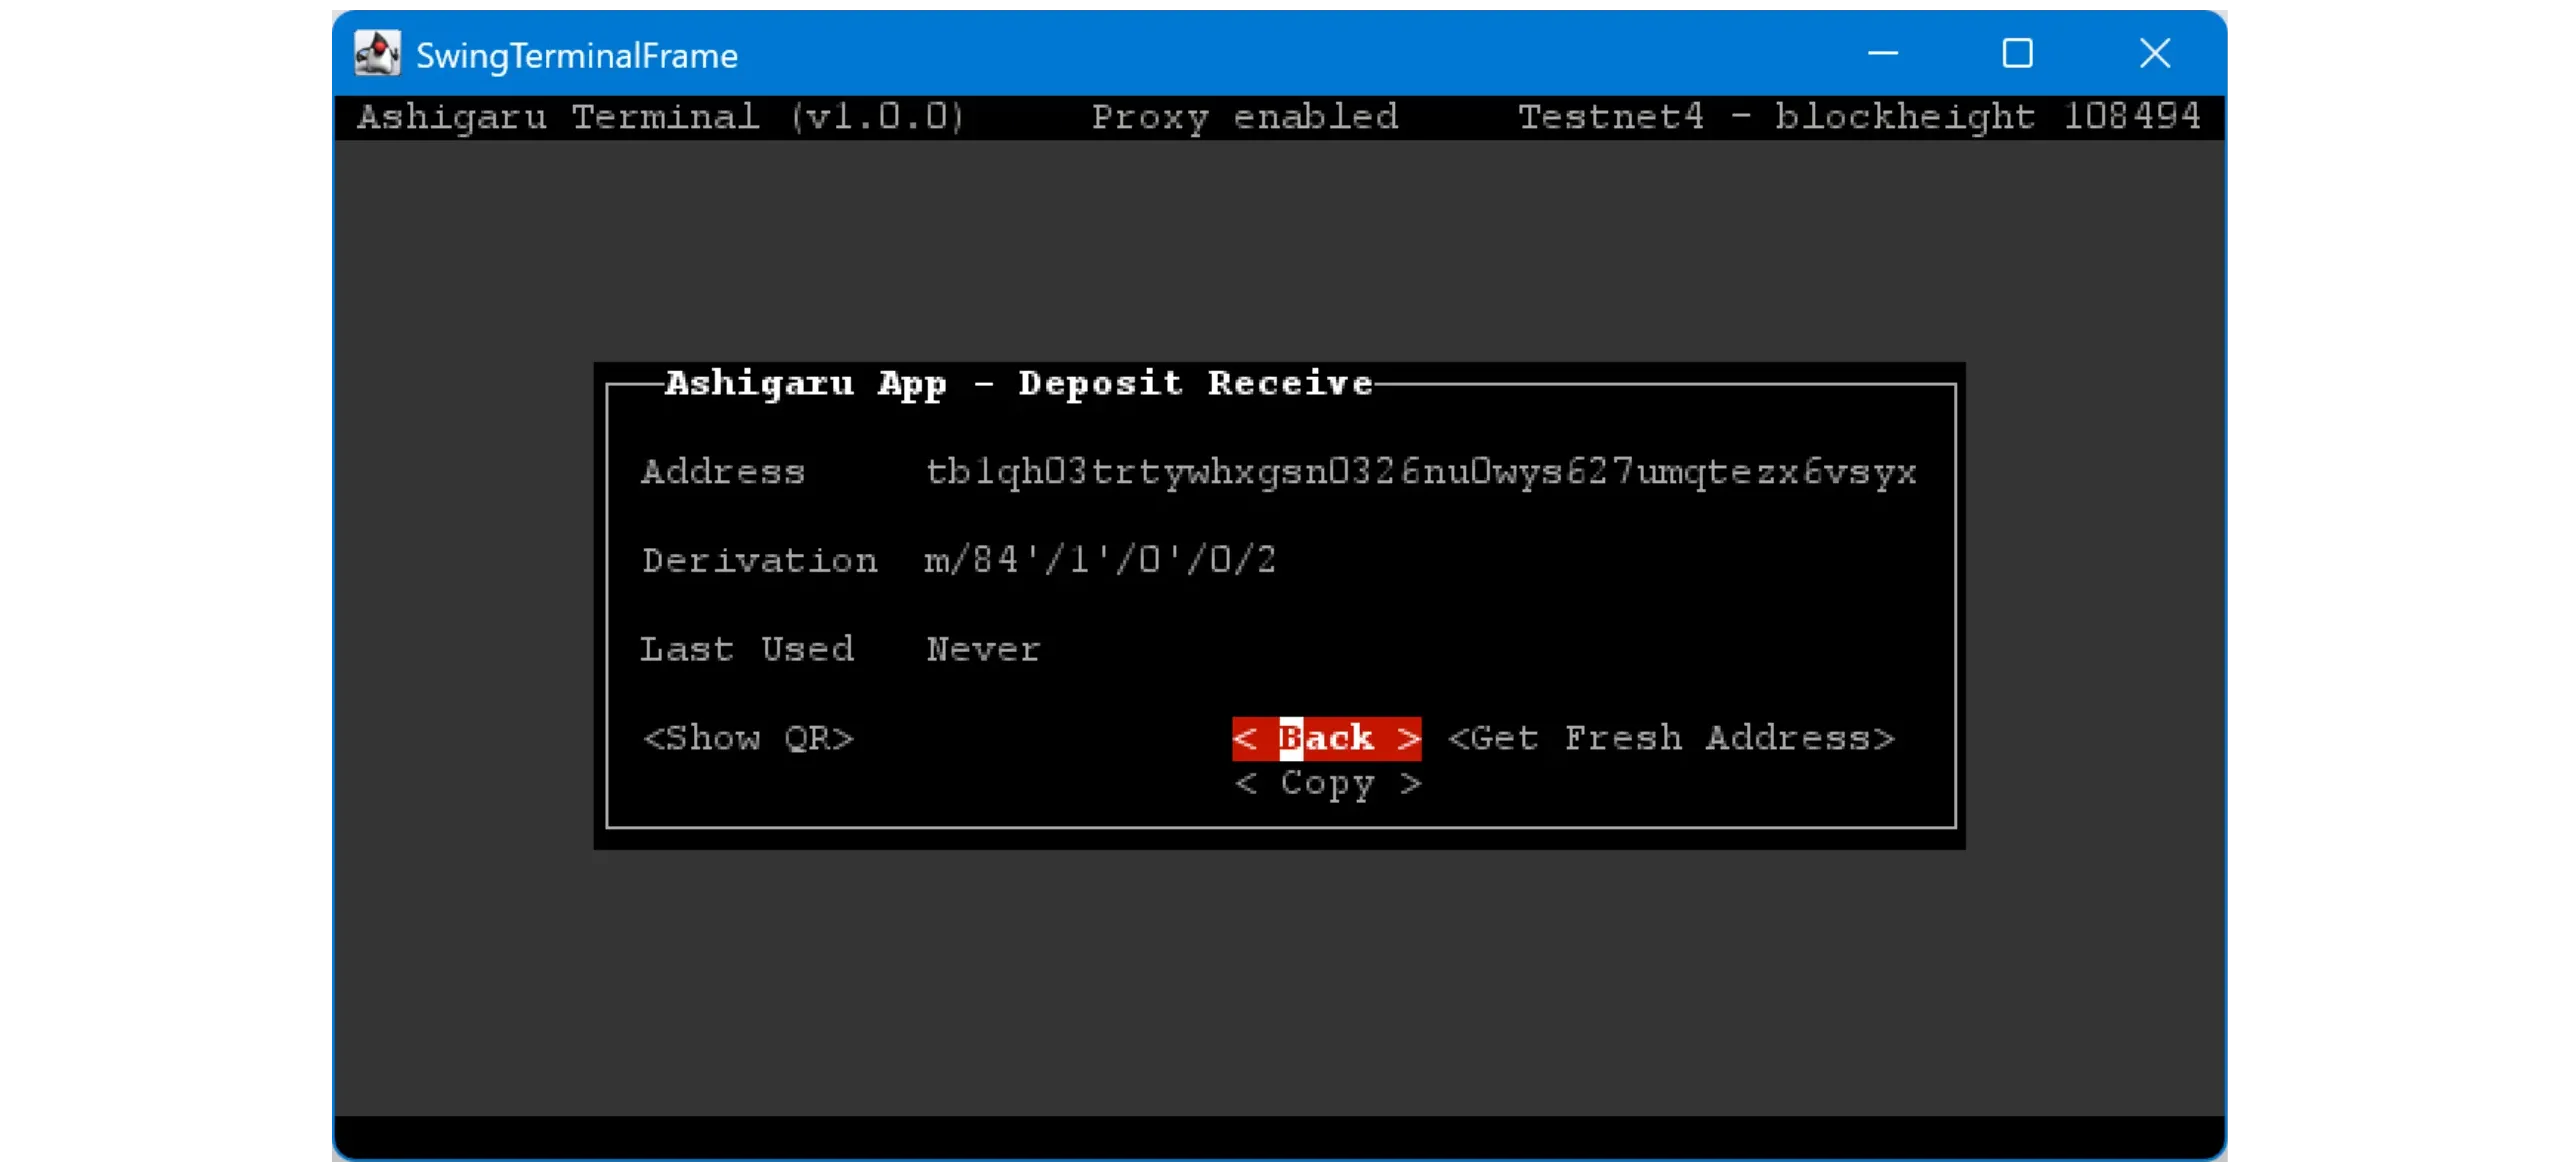
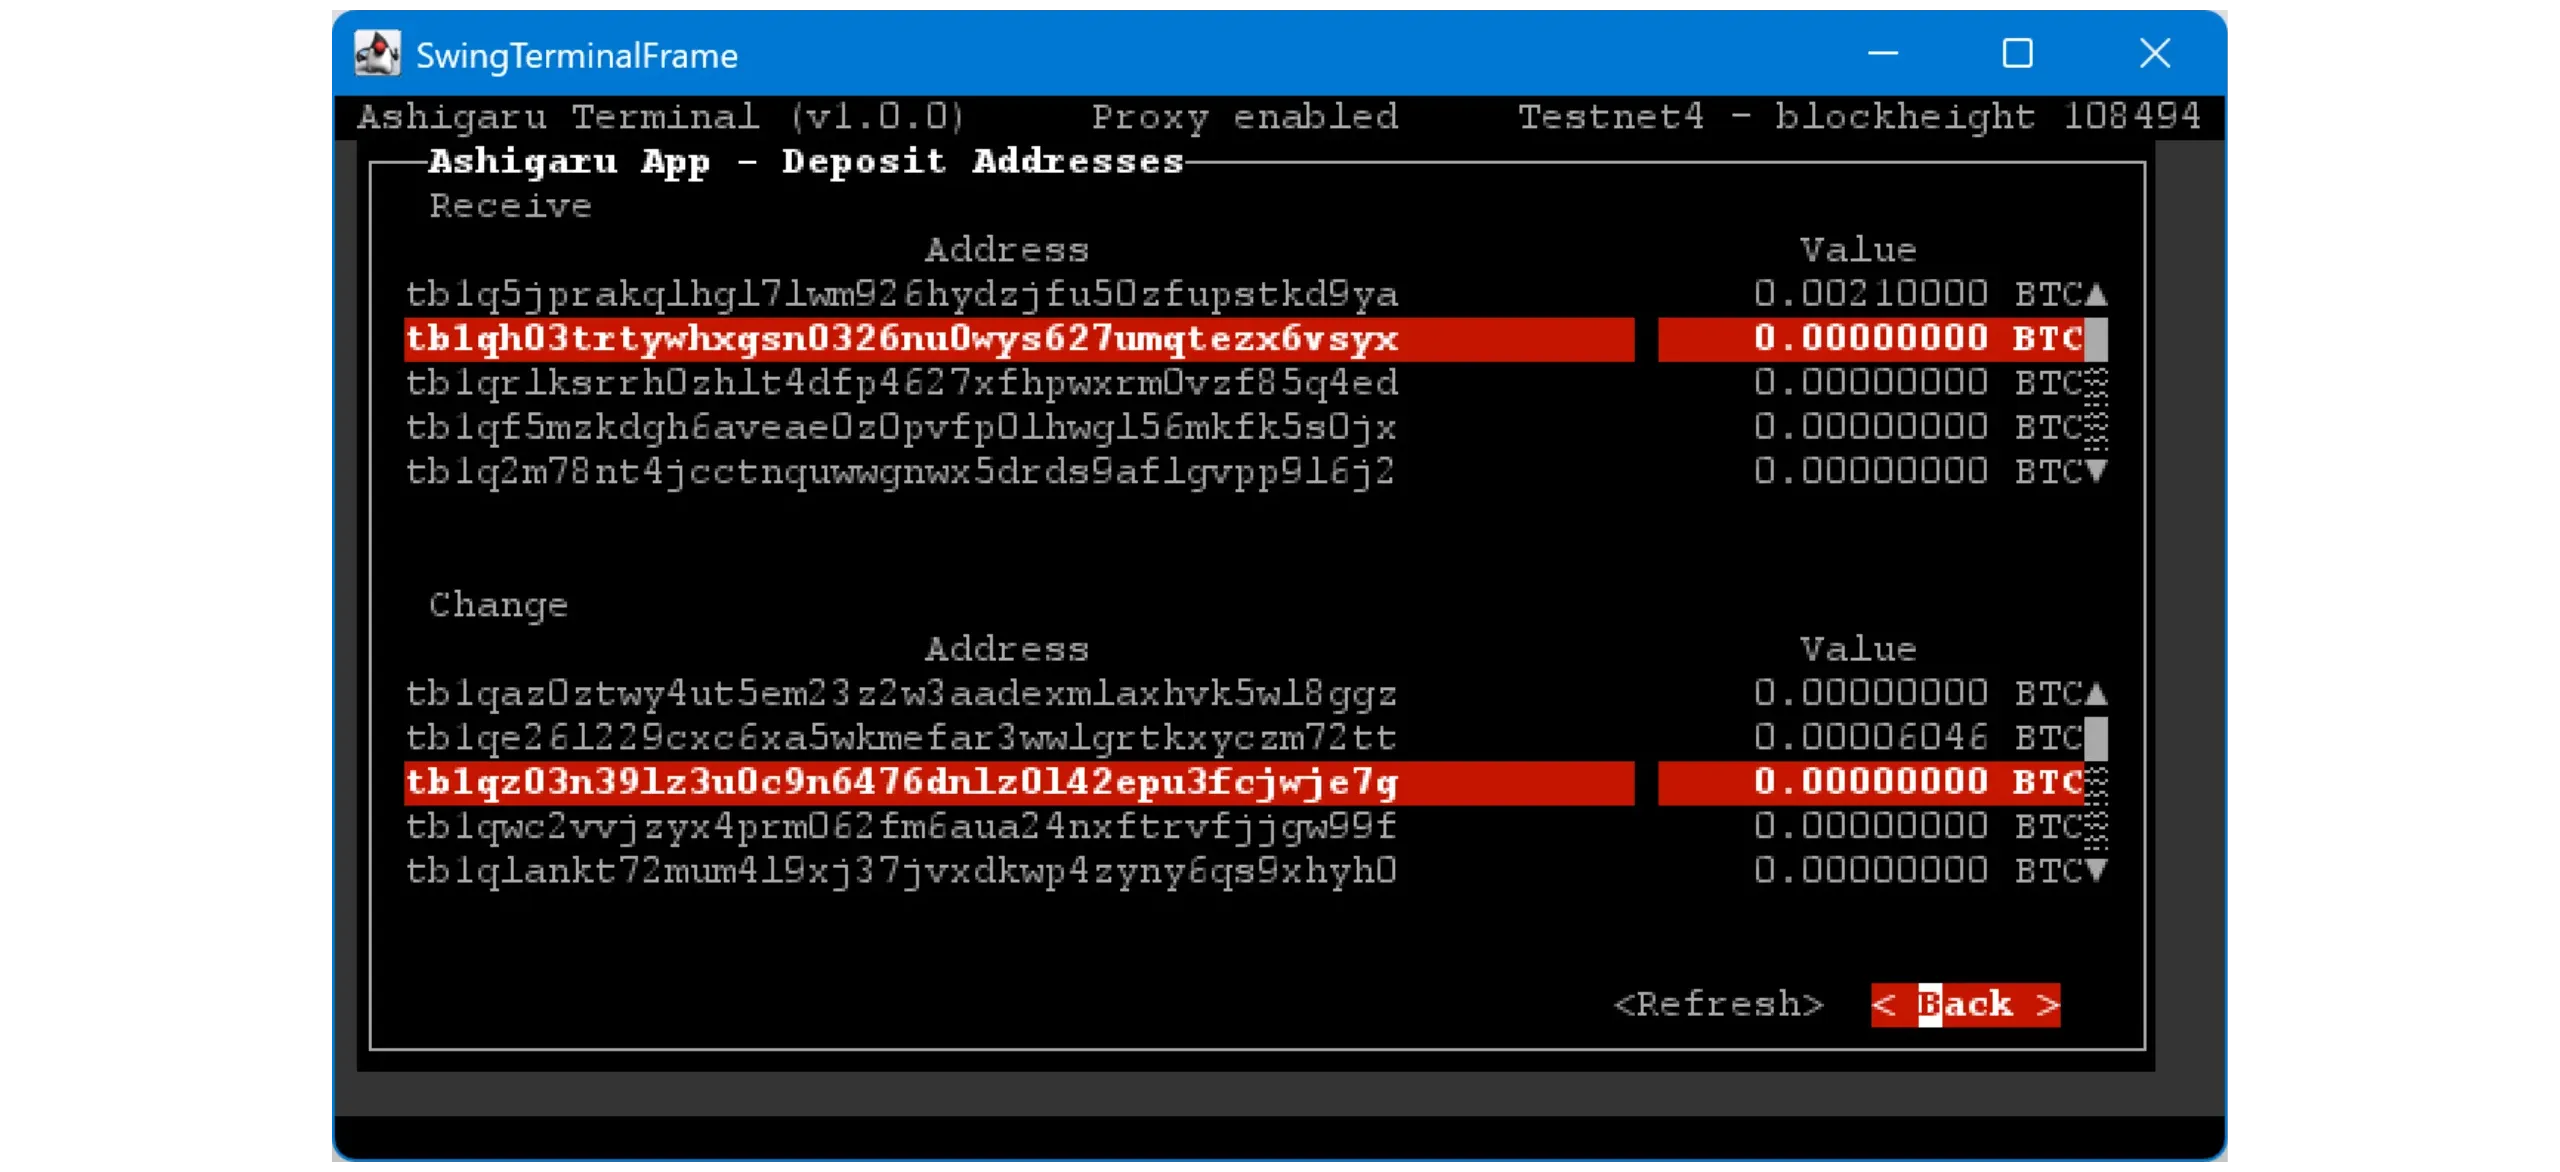
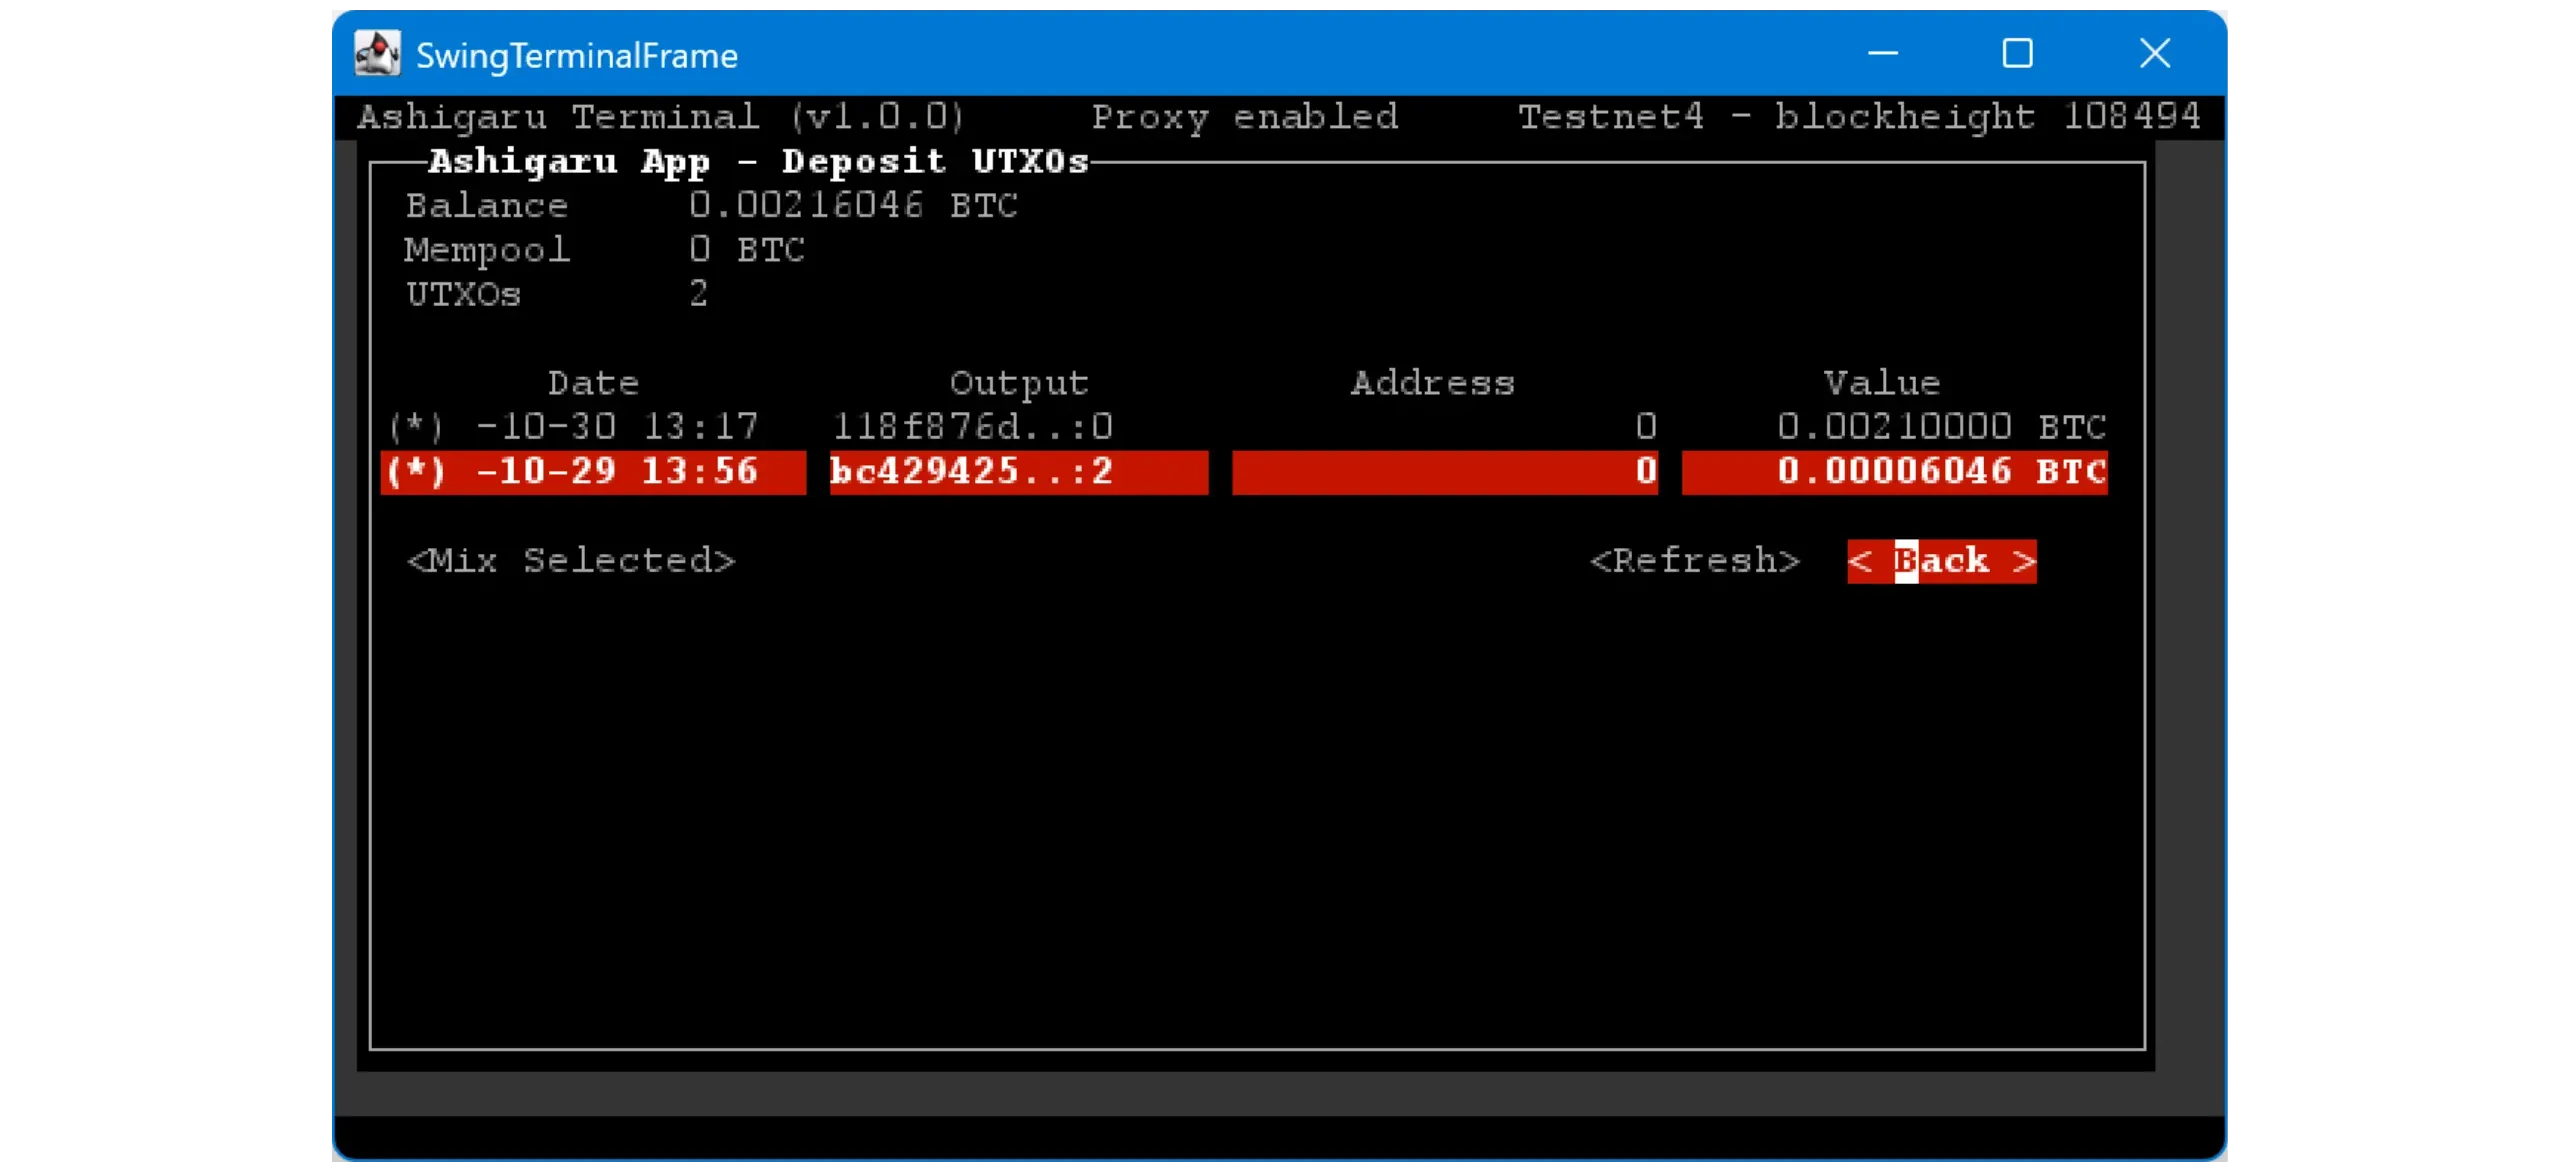
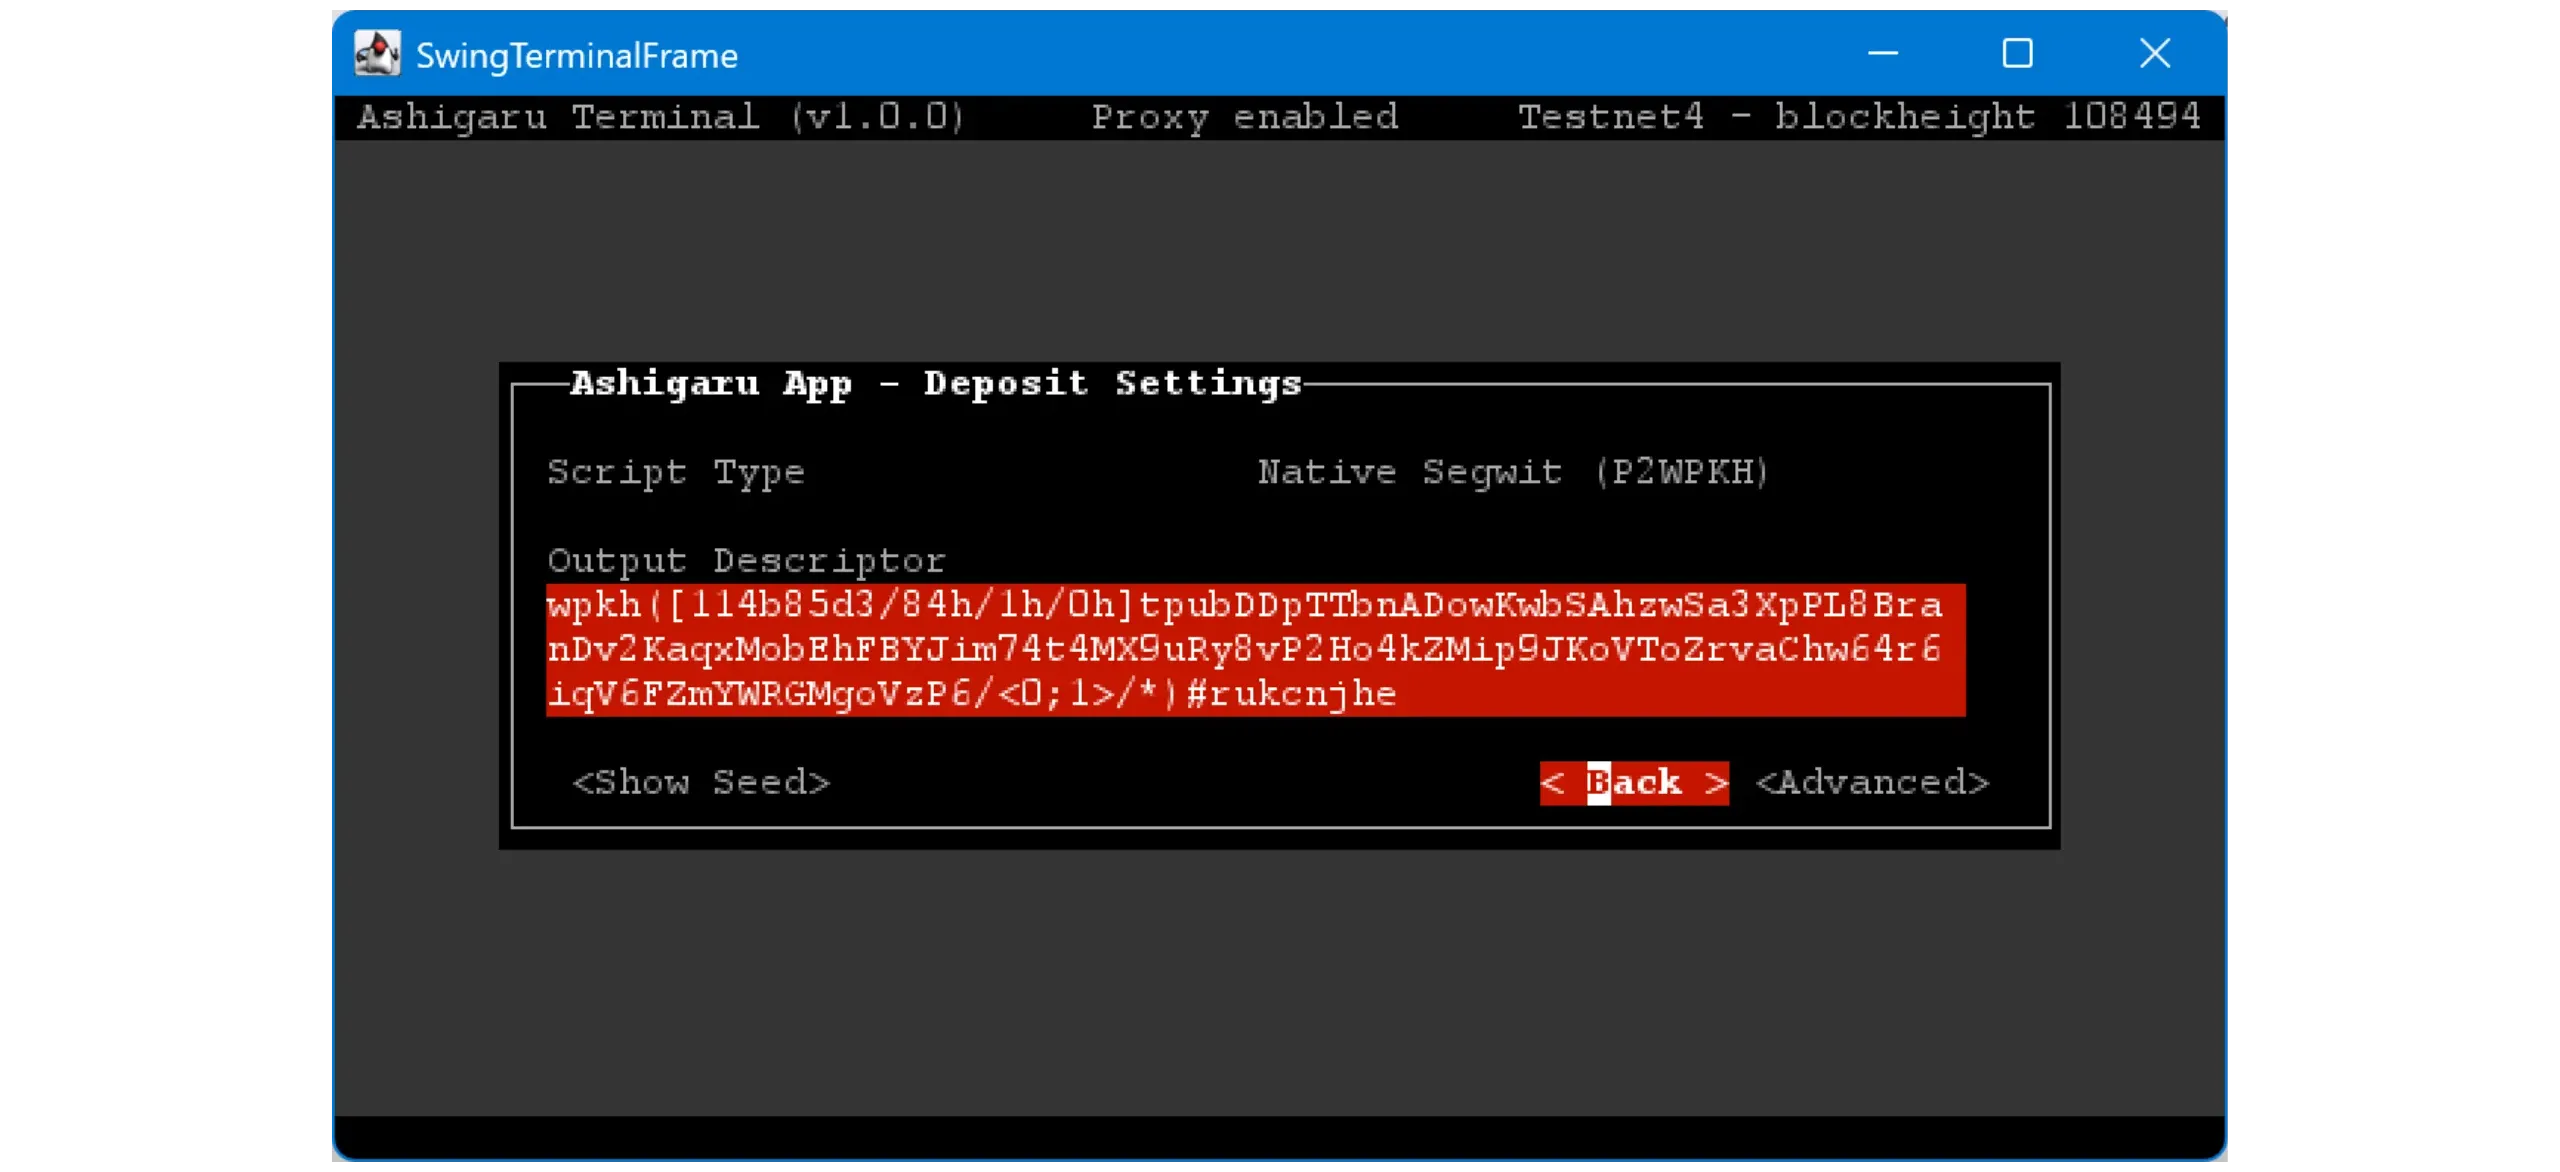
Choose which account to view. Since we haven’t started mixing yet, open theDeposit account.
Operation is similar to Sparrow (Ashigaru Terminal is a fork of Sparrow Server), so you’ll see familiar menus:
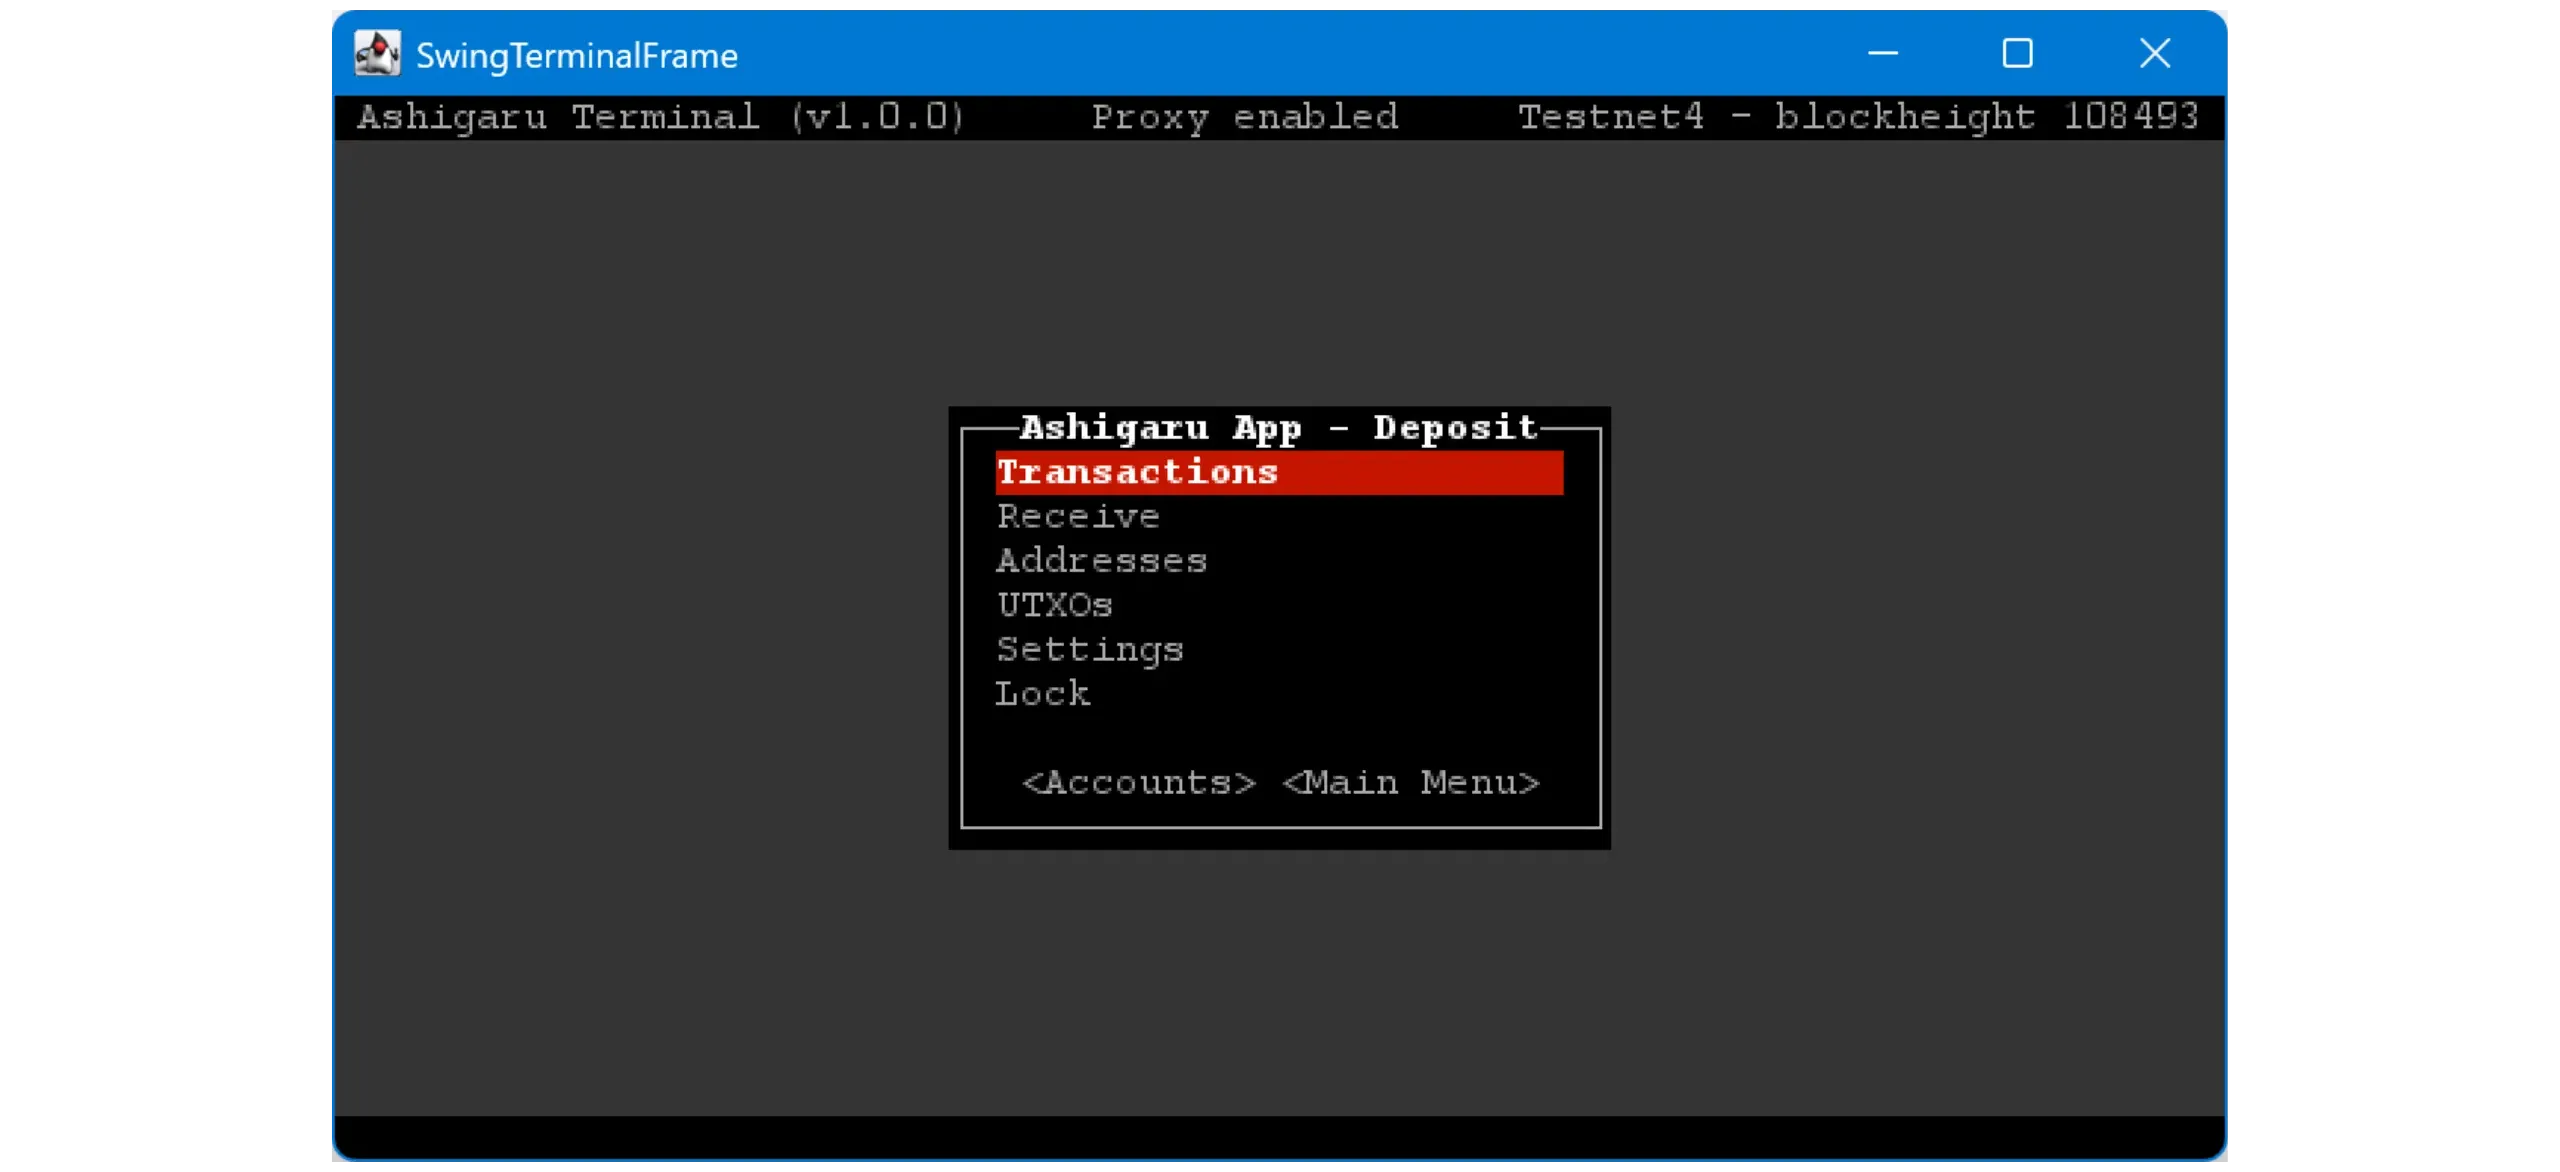
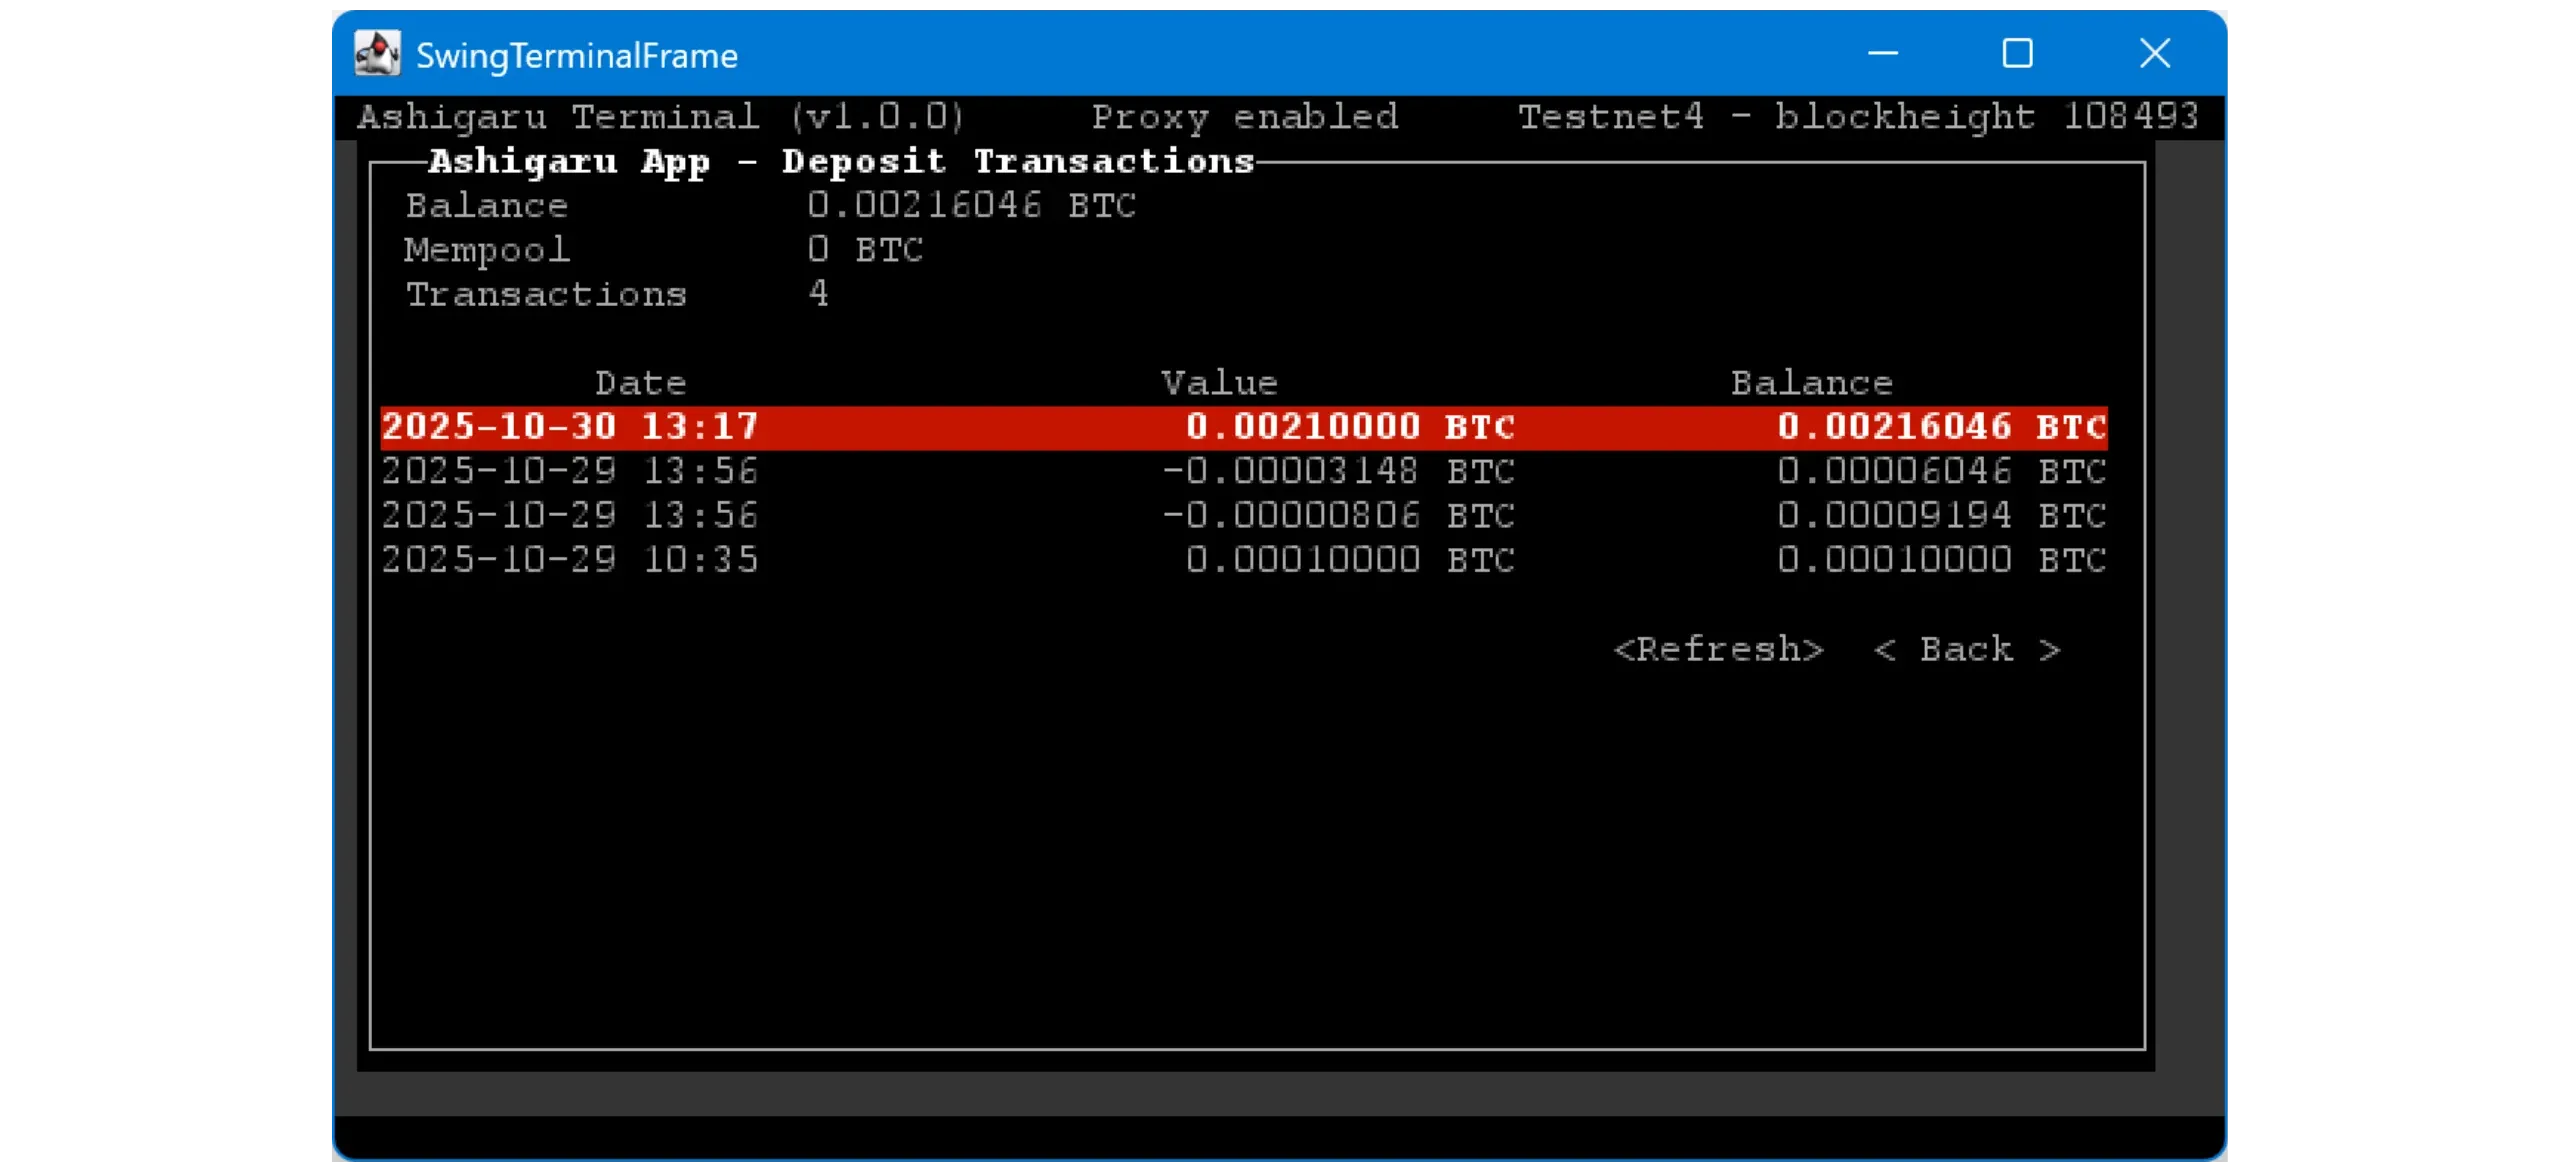
-Transactions: view transaction history for this account. In this example, some appear already because they were made with the Ashigaru Mobile app using the same wallet.
-Receive: generate a fresh receiving address to fund the deposit account.
-Addresses: list all addresses in this account (internal and external chains).
-UTXOs: list all available UTXOs.
-Settings: view the wallet descriptor, check the seed, adjust Gap Limit, or change the wallet birthday/start date.
You now know how to install and get started with Ashigaru Terminal. In the next tutorial, we’ll cover performing coinjoins and managing Postmix funds via the Ashigaru mobile app.